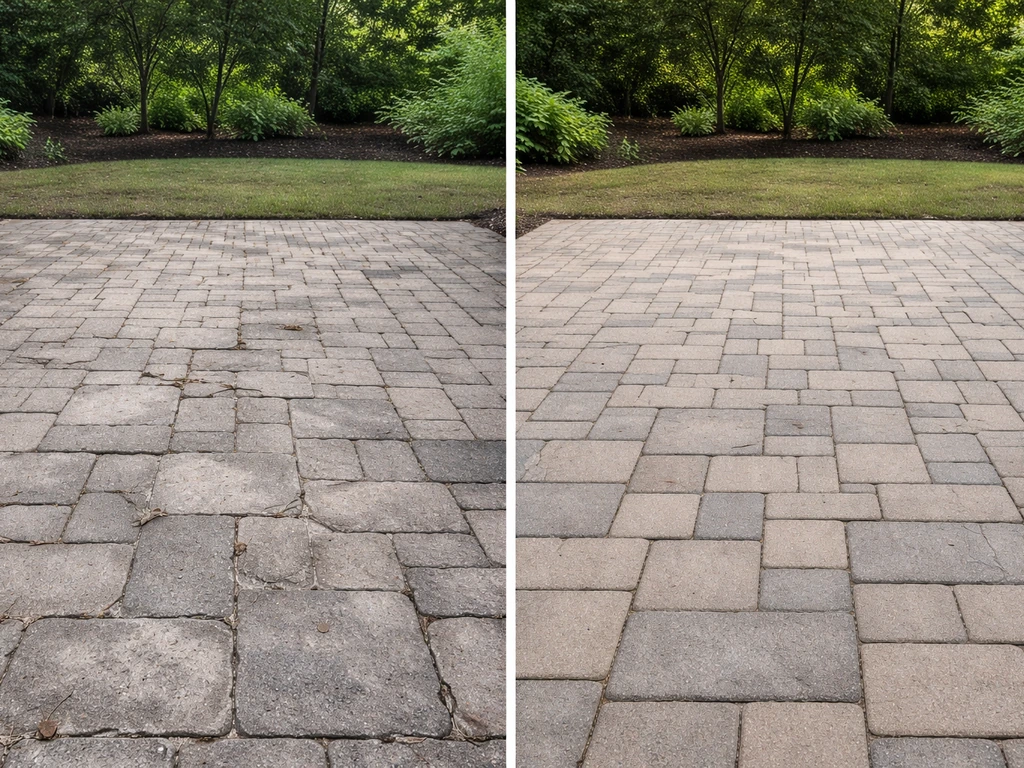
You can make a tired patio look dramatically better for $50 to a few hundred dollars, without tearing anything out and starting over. A weekend of cleaning, patching, and one well-chosen surface treatment, stain, grout refresh, fresh gravel, or interlocking tiles, handles about 80% of what makes a patio look neglected. The other 20% is furniture placement, a few plants, and some low-voltage lighting. This guide walks you through all of it, in the order that actually saves you money. For step-by-step tips and budget ideas, see our guide on how to spruce up a patio (aa5cabd9-eaba-4b35-8d58-37fed5a6a4af).
Cheap Ways to Make Your Patio Look Better: 12 DIY Fixes

Nolan Lennox
15 Jul 2026
Who this guide is for and how to use it
This is for homeowners who have an existing patio, concrete slab, loose pavers, old tile, or tired gravel, that looks rough but is structurally sound enough to save. Whether you are a first-time DIYer who has never touched a trowel or someone who has done a few projects and wants to go further, the sections here are ordered by effort and skill. Start at the top with quick wins that take a few hours. If you want to go deeper, the surface treatment sections each give you a full mini-project with tools, costs, and step-by-step instructions. The article intentionally stops short of full foundation rebuilds, that is a different conversation. What it does cover is everything you can do to the surface, the layout, and the finishing details without digging anything up.
Quick wins you can do this weekend
Before spending a dollar on materials, do one thing: pressure wash the whole surface. You will be amazed what disappears. Moss, efflorescence (those white chalky mineral deposits), years of grime, and faded color all look far worse than the actual concrete or tile underneath. A thorough wash with a pressure washer and a degreaser will sometimes make a patio look like it was just installed. Let it dry for 24 to 48 hours and you will see what you actually need to fix versus what was just dirty.
After that, here are the highest-impact things you can do in a single day, roughly ranked by visual payoff per dollar spent:
- Pressure wash and degrease the full surface (2–4 hours, cost: $0 if you own or borrow a washer, or around $40–$60 to rent)
- Sweep in fresh polymeric joint sand on pavers — stained, weedy joints are one of the biggest reasons patios look neglected (1–2 hours, $25–$50 for a 50-lb bag covers roughly 50–75 sq ft of joints)
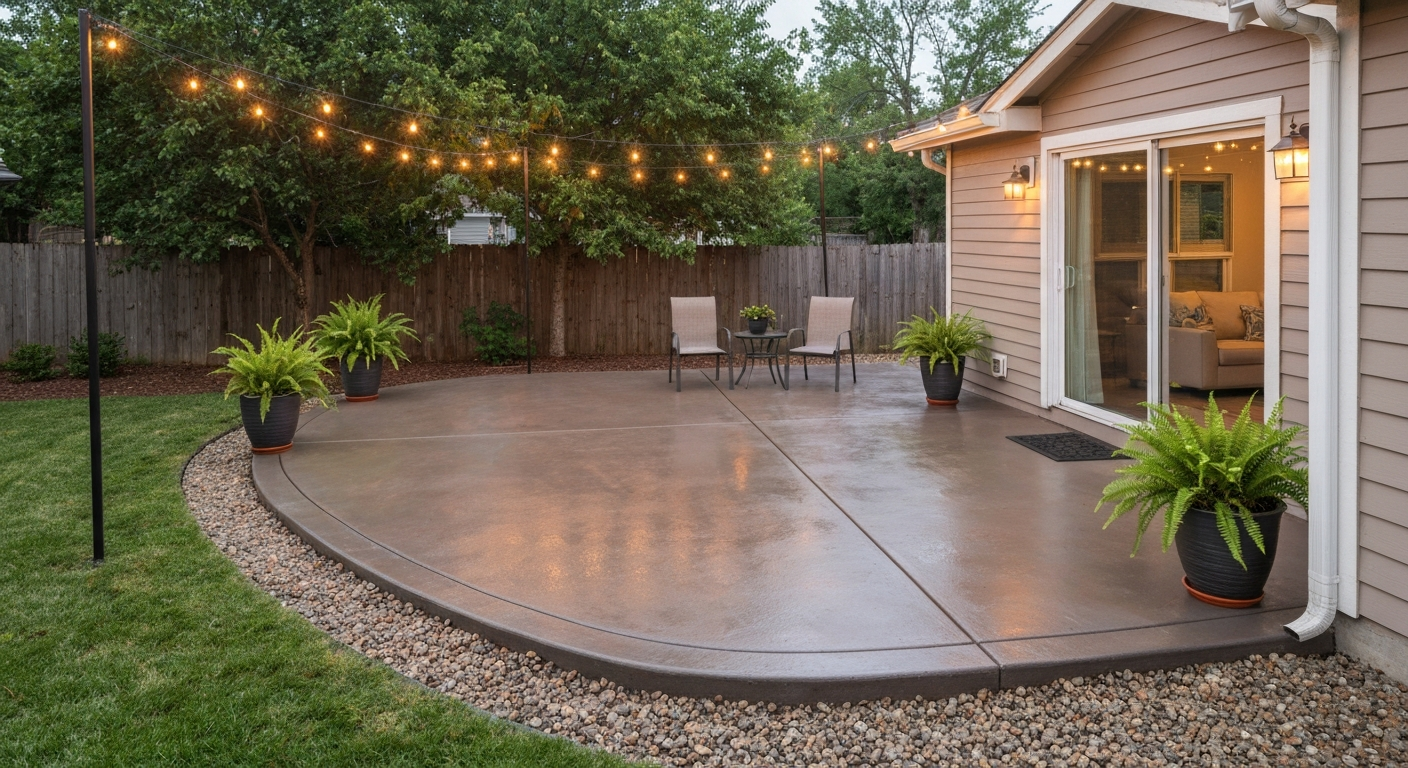
- Apply a concrete stain or sealer for an instant color refresh on bare slabs (1 day including dry time, materials $30–$80 for a typical 200 sq ft patio)
- Pull weeds, edge the perimeter, and add a border of bagged gravel or mulch to define the space from the yard ($20–$40 in materials)
- Rearrange existing furniture to create a defined seating zone rather than scattering pieces — no cost
- Hang string lights or add solar stake lights for evening ambiance ($15–$40)
- Add two or three potted plants at the corners or entry points ($15–$40 for basic nursery starts)
Each of these can be done alone or combined in a single weekend. They are also the right things to do before committing to any bigger surface treatment, because you need a clean, well-understood surface before you stain, tile, or resurface anything.
Check these things before spending any money
I have made the mistake of buying stain and supplies before fully inspecting the surface, only to find a drainage problem that would have wrecked the finish in one rainy season. Do this inspection first, it takes 20 minutes and can save you from wasting money on cosmetic fixes that will fail.
Drainage
Pour a bucket of water in the center of the patio and watch where it goes. Water should flow away from the house, minimum slope is roughly 1/8 inch per foot toward the yard or a drain. If it puddles in the center or, worse, runs toward the foundation, a cosmetic fix will not help. Standing water is also the main reason for moss, spalling concrete, and heaved pavers. For minor drainage problems you can sometimes correct the grade with a thin resurfacer or by re-bedding a few pavers. For serious ponding near the foundation, fix the drainage before anything else.
Structural soundness
Tap the concrete with a hammer or your knuckle across the whole surface. A hollow sound means the concrete has delaminated from the subbase below, that section will not hold a new coating or overlay reliably, and you need to assess whether it needs removal or can be stabilized. Cracks wider than about 1/4 inch, or cracks that show vertical displacement (one side higher than the other), suggest a subbase or drainage issue beneath. Hairline cracks and shallow surface spalling are fine to patch and coat. Pavers that rock or click when you walk on them need to be reset before any joint sand or sealer goes down.
Efflorescence and biological growth
White mineral deposits (efflorescence) and green or black moss or algae must be removed before applying any coating, stain, or overlay. They prevent bonding. Pressure washing handles most biological growth. Stubborn efflorescence needs a dedicated efflorescence cleaner or, for serious cases, diluted muriatic acid following the product's safety data sheet exactly, including eye protection, gloves, ventilation, and thorough rinsing. Do not skip the rinse; acid residue will interfere with any coating you apply next.
When to call a pro
Most surface-level patio work is genuinely DIY-friendly. Call a pro (or at minimum get an opinion) if you find: large sections of hollow, delaminated concrete covering more than 20–25% of the surface; cracks with vertical displacement; active water intrusion near the foundation; or any signs of significant subbase failure like multiple heaved sections. For everything else described in this article, you are in DIY territory.
Tools, materials, and realistic costs at a glance
The table below covers the main project types in this guide. Costs are 2026 mid-range estimates for a typical 200 sq ft patio and assume you are renting rather than buying larger tools.
| Project | Skill Level | Typical DIY Cost (200 sq ft) | Time Needed | Key Tools/Rentals |
|---|---|---|---|---|
| Pressure wash + clean | Beginner | $0–$60 (rental) | Half day | Pressure washer, degreaser |
| Concrete stain | Beginner | $30–$100 materials | 1 day (+ drying) | Pressure washer, pump sprayer or brush, acid-wash neutralizer, sealer |
| Concrete paint / resurfacer | Beginner–Intermediate | $50–$150 materials | 1–2 days | Pressure washer, squeegee/trowel, patch compound, roller |
| Crack and spall patching | Beginner | $15–$40 materials | 2–4 hours | Cold chisel, wire brush, trowel, QUIKRETE Vinyl Concrete Patcher or equivalent |
| Paver reset (small area) | Intermediate | $40–$120 materials + $60–$100 compactor rental | Half to full day | Pry bar, rubber mallet, plate compactor, bedding sand, polymeric sand |
| Full paver joint refresh | Beginner | $25–$60 materials | 2–4 hours | Pressure washer, polymeric sand, push broom, hose |
| Tile grout/caulk refresh | Beginner–Intermediate | $20–$60 materials | Half day per section | Grout saw or oscillating tool, float, sponge, exterior grout, flexible sealant |
| Interlocking deck/patio tiles | Beginner | $100–$500+ materials (varies by tile type) | Half to full day | Utility knife or saw, rubber mallet (optional), tape measure |
| Gravel or decomposed granite topdress | Beginner | $40–$120 materials | Half day | Wheelbarrow, rake, edging, tamper (optional) |
Paint and concrete stain: the fastest slab refresh
Staining or painting a concrete slab is probably the single highest-impact, lowest-cost thing you can do to a bare or dingy concrete patio. The two approaches look different and perform differently, so it is worth understanding the distinction before you buy anything.
Acid-based and water-based concrete stains penetrate the concrete surface and create a permanent, semi-transparent color that shows the texture and natural variation of the slab. Because the stain lives inside the concrete rather than on top of it, it does not peel. That said, it requires well-prepped concrete, ideally at least 4 to 6 weeks old, free of sealers, paint, oil, and any curing compounds. Opaque concrete paint (also called porch and floor paint) gives full, even coverage and hides imperfections better, but it sits on the surface and will eventually peel if the substrate was not properly prepped or if moisture is getting in from below.
My honest recommendation: if your concrete is in reasonable shape with only minor discoloration, go with a penetrating stain and finish with a clear sealer. If you have patched areas, old paint remnants, or significant variation you want to hide, use a high-quality concrete floor paint after thorough prep. Either way, prep is everything.
Step-by-step: staining a concrete patio
- Patch any cracks or spalls first: clean the area, undercut loose edges with a cold chisel, apply a vinyl concrete patcher slightly overfilled, and let it cure fully before proceeding (follow manufacturer cure times — often 24–72 hours for full strength)
- Pressure wash the entire surface with a degreaser; scrub oil spots with a dedicated concrete degreaser; rinse thoroughly and allow 24–48 hours to dry completely
- Remove efflorescence with an efflorescence cleaner or diluted muriatic acid per product safety instructions; rinse and let dry
- For acid stain: mix per instructions (typically diluted with water), apply with a pump garden sprayer in overlapping arcs working away from the house — avoid puddling; let react for the time stated on the label (often 2–4 hours minimum), then neutralize with a baking-soda-and-water solution, scrub with a stiff brush, rinse thoroughly, and allow to dry
- For water-based stain or paint: apply with a roller or brush in thin coats; work in manageable sections; second coat after the first is dry per label directions
- Seal the finished surface with an exterior-rated concrete sealer once fully dry and cured — this protects the color and makes cleaning easier; reapply sealer every 2–3 years
Materials cost: a gallon of water-based concrete stain covers roughly 200–300 sq ft and runs $25–$50. A quality exterior concrete sealer adds another $20–$40. Total for a 200 sq ft patio: roughly $50–$100 in materials. If you need to rent a pressure washer, add $40–$60. Time: plan a full day for cleaning and application, plus cure time before foot traffic.
Inexpensive pavers and resetting existing ones
Loose, rocking, uneven, or sunken pavers are one of the most common patio complaints, and also one of the most satisfying fixes because the repair is straightforward once you understand how dry-laid pavers are supposed to be installed. The pavers themselves did not fail; the bedding layer beneath them shifted, either from poor compaction at installation, water erosion, or freeze-thaw cycles.
Resetting sunken or uneven pavers
- Remove the affected pavers using a pry bar or flat screwdriver to lift the first one, then pull the rest by hand — stack them nearby in order if you want to preserve any pattern
- Excavate the bedding layer to expose the compacted stone subbase beneath; if the subbase itself has shifted or eroded, add compacted crushed stone (3/4-inch clean crushed stone) and compact it before proceeding
- Add 1 to 1.25 inches of coarse bedding sand (not fine play sand) and screed it level using a straight board pulled across temporary guide rails set to the correct grade
- Reset the pavers by hand, pressing them firmly into the sand bed; check for level and grade as you go using a level and a string line
- Compact the reset area with a plate compactor — rent one for $60–$100/day; use a rubber pad between the compactor plate and pavers to avoid scuffing
- Sweep polymeric jointing sand into all joints until full; compact again; repeat sweeping and compacting until joints are fully packed
- Mist with water per the polymeric sand manufacturer's instructions to activate the binding agents; keep foot traffic off for the recommended cure period (usually 24 hours)
Common mistakes that will send you back to square one: using fine sand for the bedding layer (it washes out), skipping the edge restraints (pavers migrate outward), and not compacting after the joint sand is swept in (the joints stay loose and weeds colonize them immediately). Manufacturer guidance from paver companies is consistent on all three points.
If you do not have pavers at all and want to add them cheaply, concrete patio pavers from a home center run as low as $0.50–$1.50 per paver for basic 12x12 or similar sizes, which makes them one of the most affordable ways to add a defined surface. For a 200 sq ft patio you are looking at $100–$300 in pavers plus bedding material, still well under most professional quotes.
Tile overlays and grout or caulk refreshes
If your patio has existing tile, cracked or missing grout is usually what makes it look awful, not the tile itself. Replacing grout in a section or around the perimeter takes a few hours and costs almost nothing, but it makes the whole surface look freshly installed. Tile overlays (laying new tile over an existing slab) go further and are still DIY-able, but they require a sound, stable substrate and add weight, so they are more of a weekend project.
Grout and caulk refresh: step-by-step
- Remove failed grout with a grout saw or an oscillating multi-tool with a grout removal blade — clear the joint fully, to at least a few millimeters below the tile edges; vacuum out all loose material
- Clean the joints with a stiff brush and let the area dry completely
- Mix exterior-rated grout per manufacturer instructions (unsanded for joints under 1/8 inch, sanded for wider joints); for wet or high-traffic areas, epoxy grout like LATICRETE SPECTRALOCK performs better against moisture and staining but has a short pot life and specific mixing/cleanup requirements — read the product data sheet before you open the bag
- Apply grout with a float held at a 45-degree angle, pressing it firmly into joints; work in small sections; wipe excess with a damp sponge before it firms up
- Where tile meets a wall, step riser, or other fixed element, do not use grout — use a flexible, exterior-grade silicone or urethane sealant instead; these movement joints accommodate the thermal expansion that causes rigid grout to crack repeatedly
- Allow full cure per product directions before exposing to rain or foot traffic
Materials cost for a grout refresh: a 25-lb bag of sanded exterior grout runs $20–$35 and covers a lot of joints; a tube of matching exterior caulk or sealant is $8–$15. For a full tile overlay on a slab, add thinset mortar and tile to the budget, basic 12x12 porcelain tile suitable for outdoor use starts around $1–$3 per sq ft at home centers, and thinset runs about $15–$25 per 50-lb bag. Total overlay project on 200 sq ft: $150–$400 depending on tile choice, plus tools if you do not own them.
Gravel, decomposed granite, and fast floating tile options
Not every patio improvement involves the existing surface at all. Sometimes the cheapest and most dramatic fix is to lay something new on top of what is already there, either loose material like gravel or decomposed granite over a bare or gravel area, or interlocking patio tiles over a concrete slab. For practical options on how to cover an existing patio, see our guide to covering an existing patio. Both approaches work well and both are genuinely beginner-friendly.
Gravel and decomposed granite topdressing
If your patio area is gravel or bare dirt and just looks tired, refreshing the surface material is the cheapest possible fix. A 2-inch topdress of fresh pea gravel, crushed granite, or decomposed granite (DG) transforms the look completely. DG compacts to a smooth, almost pavement-like finish that is popular for patios and garden paths; plain pea gravel stays loose but drains perfectly. Both options support good drainage, which is important around a house foundation.
- Define the patio perimeter with plastic or steel edging if not already done — this keeps gravel from migrating into the lawn
- Pull any weeds and lay weed barrier fabric if desired (it will not stop all weeds forever, but it slows them significantly)
- Spread 2 inches of fresh gravel or DG evenly with a rake; for DG, tamp it down with a hand tamper or plate compactor for a firmer finish
- Rinse with water (DG especially benefits from a light watering to start the compaction process)
Cost for a 200 sq ft patio: bagged pea gravel from a home center runs about $5–$8 per 0.5 cubic foot bag; bulk delivery of gravel or DG from a landscape supplier is much cheaper per cubic yard once you exceed roughly 1–2 cubic yards. Budget $40–$120 for materials depending on depth and whether you go bagged or bulk.
Interlocking deck and patio tiles over a concrete slab
Peel-and-stick or click-together patio tiles are one of the most renter-friendly, beginner-friendly options available. Plastic, composite (wood-look), or genuine hardwood interlocking tiles sit directly on the slab, no adhesive, no mortar, no structural framing required for a typical small patio. Manufacturers and retailers of interlocking composite tiles (see NewTechWood deck tiles (product overview), market/product summary) state these products install directly over concrete with no structural framing required for small patios, but require good surface drainage and occasional lifting to clean underneath NewTechWood deck tiles (product overview) — market/product summary. Composite tiles from brands in the NewTechWood category run $3–$6+ per sq ft; basic plastic grid tiles start around $1–$2 per sq ft. Real hardwood deck tiles cost more and need more maintenance.
The main requirement is a relatively flat, well-drained slab. Water needs to be able to drain through or around the tiles, which is why good surface drainage matters before you lay anything. Lift tiles occasionally to clean underneath, because debris and moisture can accumulate in the gap between tile and slab.
- Clean and dry the slab thoroughly before starting
- Dry-lay a few tiles to check alignment before committing to a direction — typically diagonal placement makes a space feel larger and hides any minor slab irregularities
- Click or press tiles together starting from one corner, working outward; no adhesive needed for floating installation
- Cut edge tiles with a jigsaw or circular saw (composite) or a tile saw (ceramic/porcelain versions)
- No sealing or finishing required for most composite tile products, but check manufacturer guidance for any recommended treatments
For a more permanent floating solution, pressure-treated sleepers (2x4 laid flat on the slab) topped with decking boards give a full wood-deck look without pouring new concrete. Use a moisture barrier between the slab and sleepers, and make sure there is airflow under the assembly to slow rot. This approach costs more ($300–$700+ for 200 sq ft depending on lumber prices) but looks like a real deck and adds genuine warmth to the space.
Finishing touches that make the biggest visual difference
Once the surface is sorted, the finishing layer is where a patio goes from looking fixed to looking designed. These are the elements that pull everything together, and most of them cost very little.
- Furniture arrangement: define a clear zone — seating facing inward toward a table or fire pit rather than scattered around the edges; a rug anchors the zone and adds color (look for outdoor-rated polypropylene rugs starting around $30–$60)
- String lights: $15–$40 for a 25–50 ft strand of outdoor Edison-style lights draped overhead between a wall hook and a shepherd's hook or fence post — adds warmth and makes the space usable at night
- Solar stake lights along the perimeter or in planters: no wiring, $15–$40 for a set
- Potted plants: two or three large containers with bold foliage (ornamental grasses, ferns, tropical-look plants) at corners or entry points define the space better than many small pots scattered around; reuse containers you own or check thrift stores
- Privacy screening: a simple lattice panel attached to a fence or freestanding frame, combined with a fast-growing vine, gives both privacy and greenery for $30–$80
- A defined edge between patio and lawn: fresh metal or plastic edging plus a clean-cut border is one of the most underrated improvements for making a patio look intentional rather than accidental
These finishing elements are also where the ideas from guides on how to make a patio pretty and how to spruce up a patio tend to overlap with the structural fixes in this article, the surface work sets the foundation, but the decor is what makes people say the patio looks good. For a practical, step-by-step checklist, see how to fix up your patio. Neither works as well without the other.
Comparing the main surface improvement options
If you are trying to decide which surface approach to tackle first, this comparison should help. Costs are for materials only on a 200 sq ft patio, at 2026 mid-range pricing.
| Approach | Best For | DIY Cost (200 sq ft) | Durability | Reversible? | Skill Level |
|---|---|---|---|---|---|
| Concrete stain | Bare or faded concrete slabs | $50–$100 | Very high (penetrating stain won't peel) | No (permanent color change) | Beginner |
| Concrete paint/resurfacer | Heavily worn or patched slabs | $50–$150 | Moderate (can peel if prep is poor) | No | Beginner–Intermediate |
| Paver joint refresh | Loose or weedy paver joints | $25–$60 | High with polymeric sand | N/A (maintenance, not overlay) | Beginner |
| Paver reset | Sunken or uneven pavers | $100–$200 incl. rental | High when done correctly | Yes | Intermediate |
| Grout/caulk refresh | Cracked grout on existing tile | $20–$60 | High with exterior grout | Partially (regrout again later) | Beginner–Intermediate |
| Interlocking tile overlay | Any sound, flat slab | $200–$600+ materials | Moderate–High (depends on tile type) | Yes (lift and remove) | Beginner |
| Gravel/DG topdress | Bare ground or thin gravel areas | $40–$120 | Moderate (replenish every few years) | Yes | Beginner |
| Sleeper deck overlay | Slab needing full wood-look | $300–$700+ | Moderate–High with proper ventilation | Yes | Intermediate |
For most homeowners on a tight budget, I would recommend starting with a pressure wash and joint sand refresh (if you have pavers) or a concrete stain (if you have a slab), then adding finishing touches. That combination alone, costing $75–$150 in most cases, closes most of the gap between a tired patio and a patio that looks cared for and intentional. Save the bigger surface projects like tile overlays or deck overlays for a second phase once you have a feel for what the space needs.
FAQ
What are the fastest, highest-visual ‘quick wins’ to make a patio look better on a tight budget?
Start with cleaning and small cosmetic changes: 1) Pressure wash + degrease to remove dirt, moss and efflorescence (1–2 hours prep, 24–48 hours dry). 2) Swap or add furniture cushions and an outdoor rug for instant color/texture (1–3 hours). 3) Add string lights and a couple of solar or low‑voltage fixtures for evening ambience (1–3 hours). 4) Place potted plants and vertical planters to soften hard surfaces (1–2 hours). 5) Apply a fresh stain or concrete paint for a quick surface refresh (1–2 days including prep/dry). Costs: $0–$200 for cleaning + textiles; $50–$300 for lights; $20–$200 for rugs/cushions; $30–$150 for paint or stain. Tools: pressure washer (rental ~$40/day) or stiff broom, basic hand tools.
How do I decide whether to paint, stain, or resurface concrete to refresh the patio surface?
Decision factors: condition, texture, and expected lifespan. If surface is sound with thin wear and you want color change: opaque concrete paint gives full coverage but may peel if prep is poor. If you want permanent finish that shows texture, choose transparent/semi‑transparent concrete stain (best on older, cured concrete). For pitted/uneven surfaces or lots of cosmetic damage, use a thin cement resurfacer (trowel/squeegee applied) to hide defects before staining/painting. Prep (pressure wash, remove efflorescence, repair cracks) is critical. Time/cost: paint/stain ~$30–$150 material, 1–2 days; resurfacer $50–$150 material + trowel, a day of work and curing per product guidance.
Step-by-step mini‑project: painting or staining an existing concrete patio
Steps: 1) Inspect for cracks, oil, efflorescence; remove loose coatings. 2) Pressure wash and degrease; let dry 24–48 hours. 3) Repair small cracks/spalls with a concrete patch product; allow cure per instructions. 4) Etch or mechanically abrade if product requires. 5) Apply primer/bonding agent if recommended. 6) Apply stain or paint per manufacturer instructions (roller/brush for paint; sprayer or applicator for stain). 7) Allow recommended cure before foot/furniture traffic. Tools/materials: pressure washer or stiff broom, concrete cleaner/degreaser, patching compound, etcher (if required), primer, concrete paint or stain, rollers/brushes/sprayer, safety gear. Time: prep 4–8 hours; application 1–4 hours; cure 24–72+ hours.
How do thin cement-based resurfacers work and when should I use one?
Resurfacers are cementitious mixes applied thinly (feather edge to ~1/2") to restore worn concrete texture and hide spalling/shallow cracks. Use when the slab is structurally sound but cosmetically degraded. Strict prep is required: clean, remove loose material, etch or abrade if directed, and use a bonding agent if product specifies. Working time is short (~20 minutes typical at 73°F for some formulations), so plan mixing/application and have tools ready. Expect to follow manufacturer cure times before staining or heavy use. Materials/tools: QUIKRETE-style resurfacer, mixing drill/paddle, squeegee/trowel, broom finish tools, safety gear. Cost: $40–$150 depending on area; time: several hours to a day (plus cure).
What are budget options for covering an existing patio without demolishing the slab?
Low‑cost cover options: 1) Interlocking peel‑and‑stick or snap‑together deck tiles (plastic/composite/wood-look) — fast install, $1–$6+/sq ft. 2) Floating deck-over with sleepers on pedestals and decking boards — a DIY frame with moisture barrier, moderate cost. 3) Gravel or pea stone overlays within small borders — inexpensive but changes level and drainage. 4) Thin-set outdoor tile overlays (requires sound base and proper substrate prep) — more skill and cost. Consider drainage and ventilation under floating solutions and choose products rated for exterior use. Time: tiles 1 day; floating deck 1–3 days; gravel a few hours; tile overlay 1–3 days plus cure.
How do I reset uneven or settled pavers myself? What tools and steps are needed?
Basic paver reset steps: 1) Remove the affected pavers. 2) Excavate to original bedding depth and remove disturbed sand/stone. 3) Rebuild or add/compact crushed stone subbase as needed (use plate compactor). 4) Re‑bed with 1"–1¼" coarse bedding sand; screed to grade. 5) Re‑set pavers, plate‑compact (use protective pad), and sweep polymeric or joint sand into joints; compact again. Tools/materials: pry bar, rubber mallet, coarse bedding sand, crushed stone, plate compactor (rental $60–$100/day), polymeric joint sand, edge restraint materials. Pitfalls: insufficient base compaction, wrong sand, no edge restraint — they cause recurring movement. Time/cost: a few hours to a day for small areas; material cost $20–$200 depending on scope; compactor rental typical.
Next Article
How to Fix Up Your Patio: DIY Repair and Upgrade Steps
DIY steps to diagnose patio issues and repair, replace pavers or concrete, improve drainage, and upgrade the look safely