Composite patio steps are one of the most satisfying upgrades you can make to an outdoor space. You get the clean look of real wood, near-zero maintenance, and decades of durability without the rot, splinters, or annual staining. Whether you're stepping down from a raised patio to the yard, bridging a deck-to-patio transition, or building wide, welcoming entry steps, composite boards paired with a solid substructure will outperform wood in almost every real-world condition. The process involves planning your rise and run, building a pressure-treated frame or cutting stringers, and fastening composite treads and risers with the right gap and overhang. It's a doable weekend project for a confident beginner and a fast one for anyone who's built a deck before.
Composite Patio Steps DIY Guide for Deck and Raised Patios

When you actually need composite patio steps
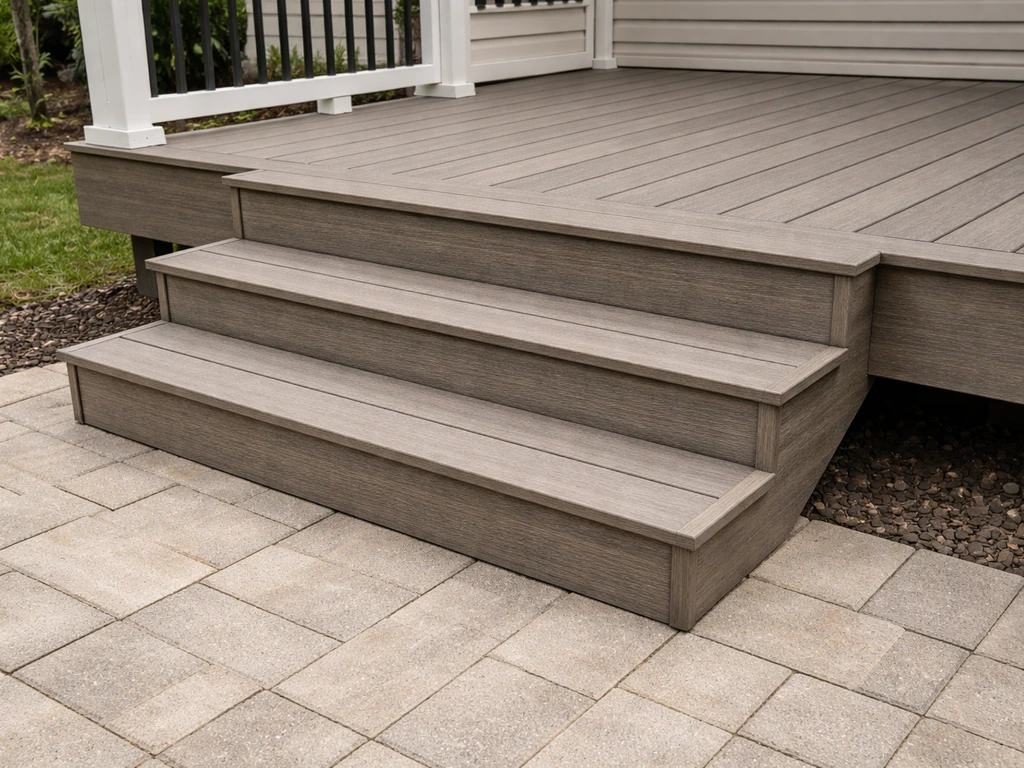
The situation that drives most people here is a grade change. You've got a raised patio slab or a deck platform that sits anywhere from 7 inches to several feet above the yard, and you need a safe, good-looking way to get from one to the other. Composite steps solve this in a way that plain concrete steps or wooden steps don't: they match your composite decking if you have it, they won't crack or heave the way concrete can in freeze-thaw climates, and they don't demand the yearly maintenance that wood steps do. If you are comparing options, wooden steps for patio installs can be simpler upfront but typically require more routine maintenance over time.
The patio vs. deck context matters a little here. On a deck, you're almost always working with stringer-based steps that hang off the deck's rim joist. On a patio, especially a concrete or paver patio, you're more likely building a freestanding step structure that sits on the ground or on a pad, sometimes tied to a retaining wall or step-down edge. Both situations use composite boards for the visible treads and risers, but the substructure approach differs. If you're comparing this to brick patio steps or wooden steps for a patio, composite wins on long-term maintenance. If you just need something fast and removable, temporary steps for a patio might be worth a look first.
Choosing a step style: raised, wide, and rounded
Before you measure a single board, decide what shape your steps will take. The three most common layouts for patios are raised steps, wide steps, and rounded steps, and each one changes your framing approach.
Raised patio steps
These are the most straightforward: a standard stair run descending from an elevated patio or deck platform down to grade. One to four steps covers most residential patio height changes. You'll cut or buy prefab stringers, attach them to your structure or a ledger, and run composite treads across. This is the style most deck-building guides cover, and the Trex and TimberTech installation instructions are written primarily with this in mind.
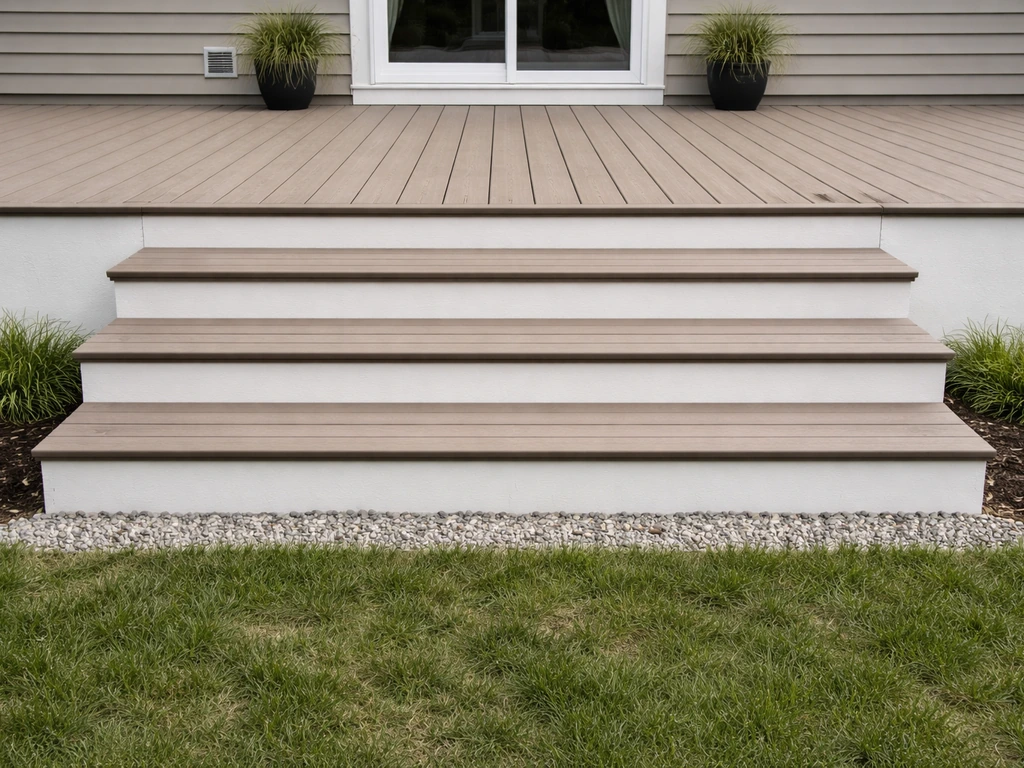
Wide patio steps
Wide steps, sometimes called platform steps, span the full width of a patio opening or doorway and can run 6 to 12 feet or more across. They feel grand and open, are easier to navigate with furniture or groceries, and work beautifully as informal seating. The framing here uses multiple stringers spaced per the manufacturer's recommendations (more on that in the framing section) to support the extra span. Nothing about the tread or riser dimensions changes, but you need more stringers, more fasteners, and more material.
Rounded and curved patio steps
Rounded steps are the most work but also the most striking. Each tread projects further than the one above, creating a cascading, arc-shaped look that softens the hard geometry of a rectangular patio. The framing uses angled or radiating stringer segments, and the composite boards are often cut with a slight bevel or laid in segments to approximate the curve. Some builders use a template cut from thin plywood to trace the arc. It takes more cuts and more patience, but composite boards are actually easier to cut into curves than wood, since you're not fighting grain direction the same way.
Planning measurements and layout
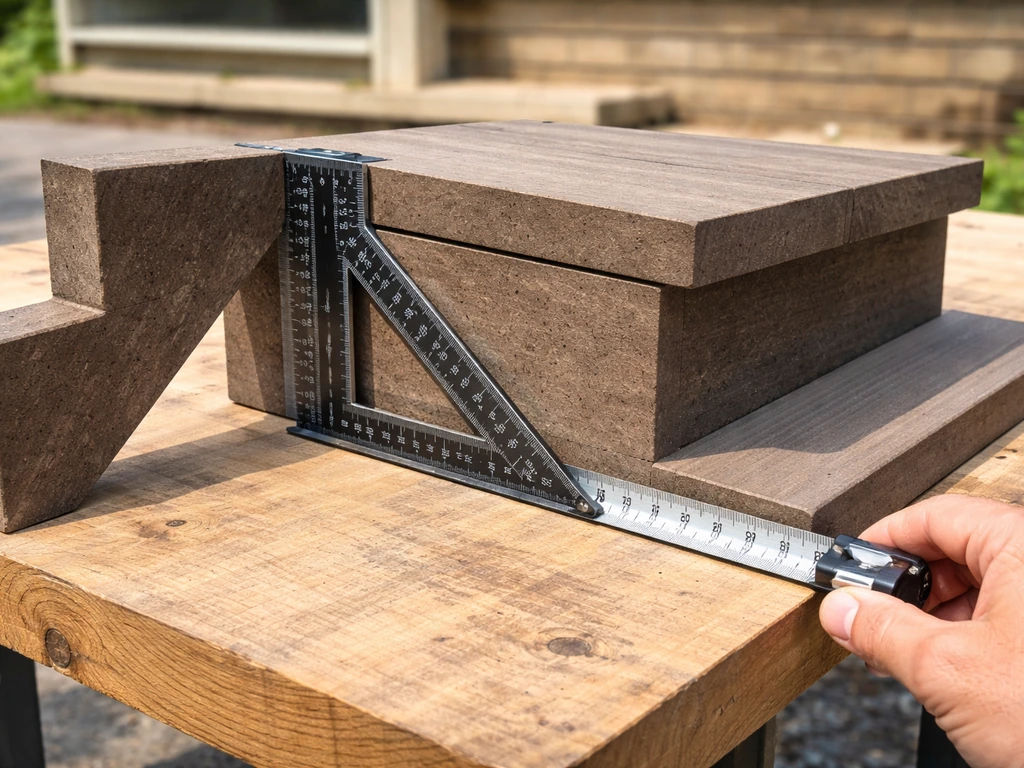
Get the dimensions right before you buy anything. This is the step most beginners rush past, and it's where most stair problems originate. The two numbers that govern everything are riser height (vertical) and tread depth (horizontal).
Rise and run rules
The IRC sets a maximum riser height of 7-3/4 inches and a minimum tread depth of 10 inches for residential stairs. The IBC is a little stricter on commercial work, capping risers at 7 inches, but for a home patio the IRC numbers are the standard you're building to. What matters more than hitting a specific number is consistency: the variation between your tallest and shortest riser in a single flight should be no more than 3/8 inch, and ideally no more than 1/8 inch. An inconsistent riser is a trip hazard, full stop. Divide your total rise (the vertical distance from finished patio surface to finished grade) by a trial riser height, round to the nearest whole number of steps, then divide again to get your exact, consistent riser height. For example, a 21-inch total rise divided by 3 gives you a 7-inch riser, which is clean and code-compliant.
Tread depth and nosing
For composite treads, plan on at least 10 to 11 inches of tread depth. MoistureShield's installation guide actually specifies a minimum of 11 inches, and that's a good target for patio steps where comfort matters as much as code compliance. Most builders achieve this by running two composite boards side by side across each tread. When it comes to nosing (the overhang at the front edge of the tread), keep it at or under 3/4 inch as Trex's installation guide recommends. More overhang than that creates a lip that catches toes. Leave a 1/4 to 3/8 inch gap between composite boards on the same tread for drainage, using composite spacers or a coin to keep spacing consistent.
Landing and total run
Your total horizontal run is the number of steps multiplied by the tread depth. For wide or rounded steps, factor in the full footprint at grade level. If you have three steps at 11 inches deep, you need 33 inches of horizontal space. Add a landing at the bottom if the steps lead to a path or transition to another surface: a landing of at least 36 inches in both directions is a comfortable minimum. For raised patios with multiple steps, a mid-flight landing can break up a long run and is required by code in some jurisdictions once a stair flight exceeds a certain height.
Materials and tools for a composite step build
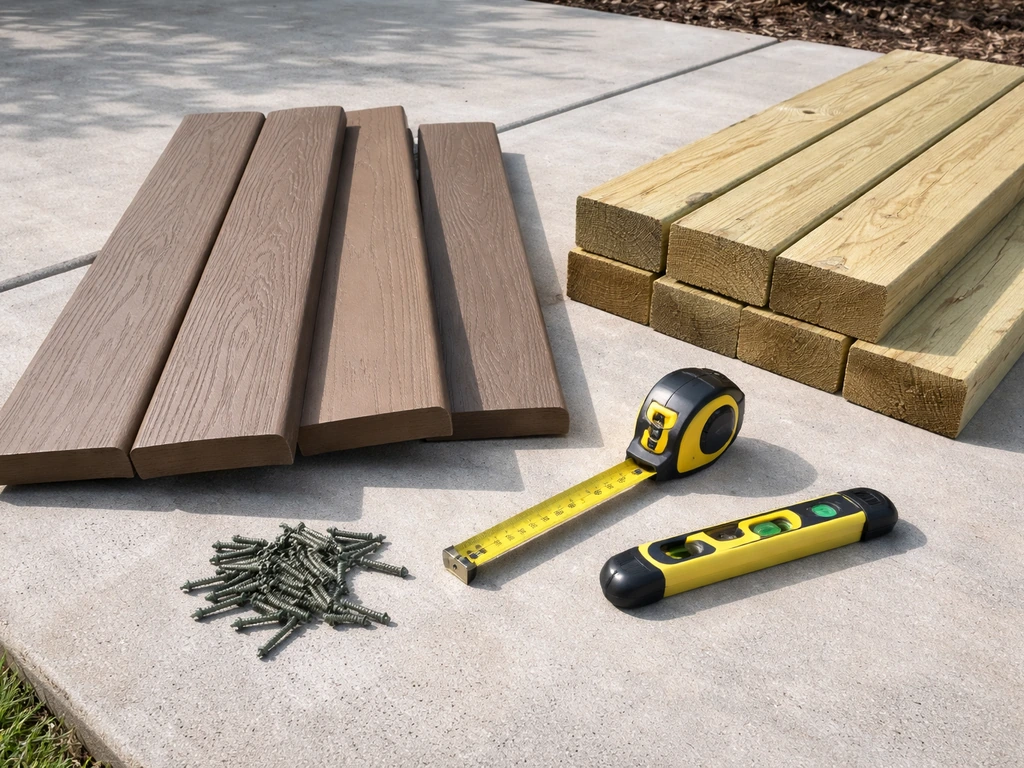
You don't need a lot of exotic tools for this. Here's what the typical composite patio step build calls for.
Composite products
For treads, use the same composite decking board you're using (or want to match) on the patio or deck field. Capped composite boards (PVC-capped wood composite, like Trex Transcend, TimberTech PRO, or MoistureShield Vantage) are the most durable choice because the cap protects the core from moisture on the exposed edges and underside. For risers and fascia boards, every major brand makes matching fascia trim. Fiberon's guidance is to fasten riser and fascia boards with 2.5-inch #8 or #10 stainless steel screws, flush to the surface. Don't use hidden fastener systems like Cortex plugs for risers or fascia since there isn't enough material thickness to seat them properly.
Substructure lumber and hardware
Use pressure-treated lumber for all framing in contact with or close to ground. 2x12 PT lumber is standard for stringers. For blocking and rim supports on freestanding patio step structures, 2x8 or 2x10 PT works well. All hardware (joist hangers, stringer connectors, screws, bolts) should be hot-dipped galvanized or stainless steel rated for use with pressure-treated lumber.
Tools
- Circular saw or miter saw (for composite board cuts) and a jigsaw for curved cuts
- Speed square and framing square for stringer layout
- Level (4-foot minimum) and tape measure
- Drill/driver with bits for composite screws
- Chalk line
- Stair gauges (those little brass clamps that attach to your framing square)
- Safety glasses and hearing protection
- Composite spacers or 1/4-inch drill bit shanks for consistent board gaps
Composite vs. other materials at a glance
| Material | Maintenance | Typical Lifespan | Slip Resistance | Best For |
|---|---|---|---|---|
| Composite (capped) | Very low (occasional wash) | 25+ years | Good (textured face); add tape if needed | Long-term patio/deck steps, matching decking |
| Pressure-treated wood | High (stain/seal annually) | 10–15 years treated | Moderate (splinters when old) | Budget builds, rustic look |
| Brick/concrete | Low–medium (sealing helps) | Decades (prone to cracking) | Moderate (seal reduces grip) | Traditional or Mediterranean patios |
| Trex/branded composite | Very low | 25+ years (limited warranty) | Good (textured) | Matching Trex deck systems |
Substructure and site prep for raised patio steps
The finished composite boards get all the attention, but the substructure is what makes steps last. A poorly prepped base means steps that shift, crack connections, and eventually become a safety issue. Don't skip this part.
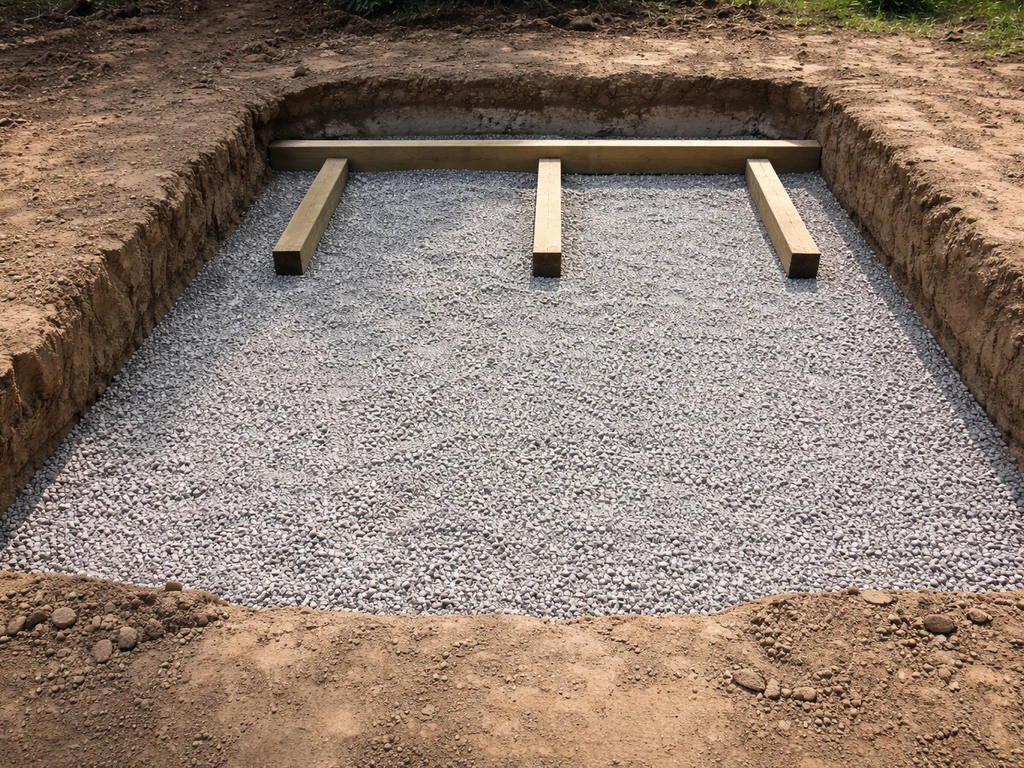
Ground prep
Where your stringers or step frame will land, excavate at least 4 to 6 inches and fill with compacted gravel for drainage. Concrete footings are better for anything taller than two steps or in areas with significant freeze-thaw cycles. The footings don't need to be elaborate: a 12-inch round tube footing at each stringer base set below frost depth is typically sufficient. The goal is to prevent frost heave from pushing your steps up and out of alignment.
Drainage and clearance
Composite boards need airflow and drainage below and around them. MoistureShield's installation guide specifies a 1/4-inch minimum clearance between the stair tread material and any permanent structure or post at the stringer support points. That gap is critical: it prevents moisture from wicking into the board end grain and allows water to escape rather than pool. Make sure your gravel base slopes away from the structure slightly, and don't pack soil or mulch up against the stringer faces after installation.
Attaching to an existing patio or structure
If your steps are attached to a concrete patio or wall, use tapcon-style concrete anchors or a ledger board bolted through the slab edge. For deck attachments, the stringers typically notch over or bolt to the rim joist with stringer connectors. Whatever attachment method you use, make sure the connection is solid before you put any weight on the finished steps.
Framing and installation: straight steps and curved steps
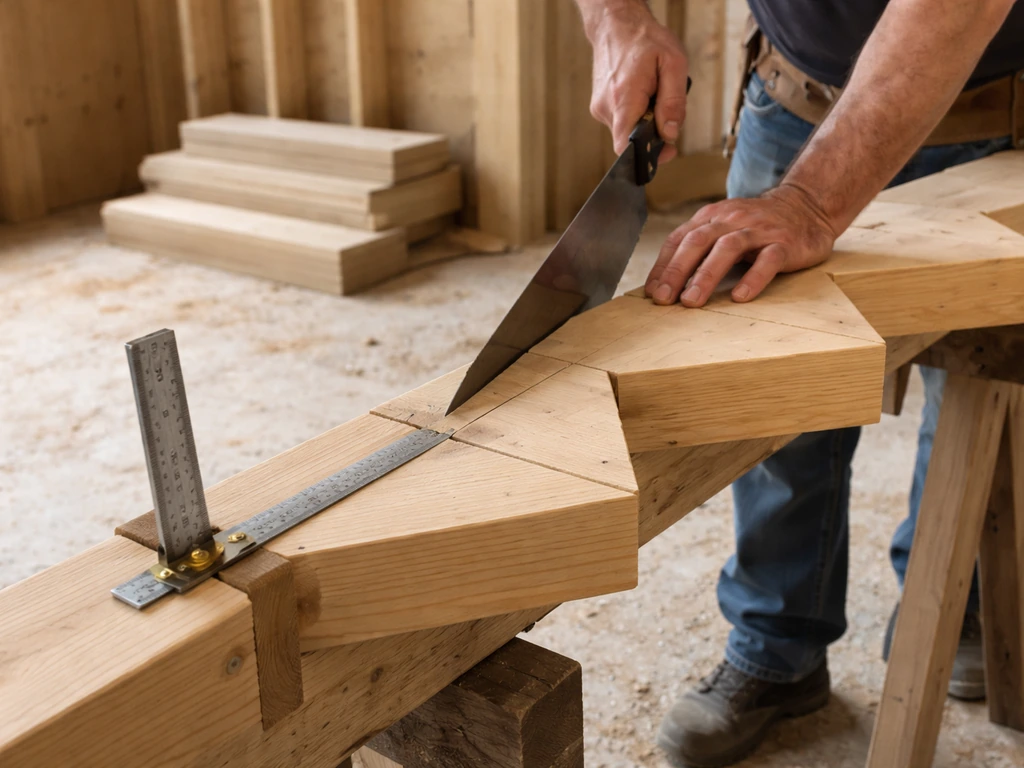
Cutting and setting stringers for straight steps
Mark your stringer cuts with a framing square and stair gauges set to your exact riser height and tread depth. The most important thing here is consistency: cut one stringer perfectly, then use it as a template for the rest. If your total rise is 21 inches and you're doing three steps, each step should come out to exactly 7 inches. Any variation more than 1/8 inch between steps is worth correcting by recutting. Trex's Academy guidance walks through the math of dividing total rise and recutting stringers to hit consistent dimensions, and it's worth doing that math twice before you touch the saw.
Stringer spacing is one of the most underrated decisions in step building. Both TimberTech and MoistureShield provide stringer spacing charts, and the numbers are tighter than most people expect. MoistureShield calls for a maximum of 9 inches on center for stringer spacing on stairs, which is far tighter than typical deck joist spacing. For wide steps especially, this means adding more stringers than you might initially plan. Under-spanning composite treads will flex underfoot, which feels unsafe and stresses the fastener connections.
Installing composite treads and risers
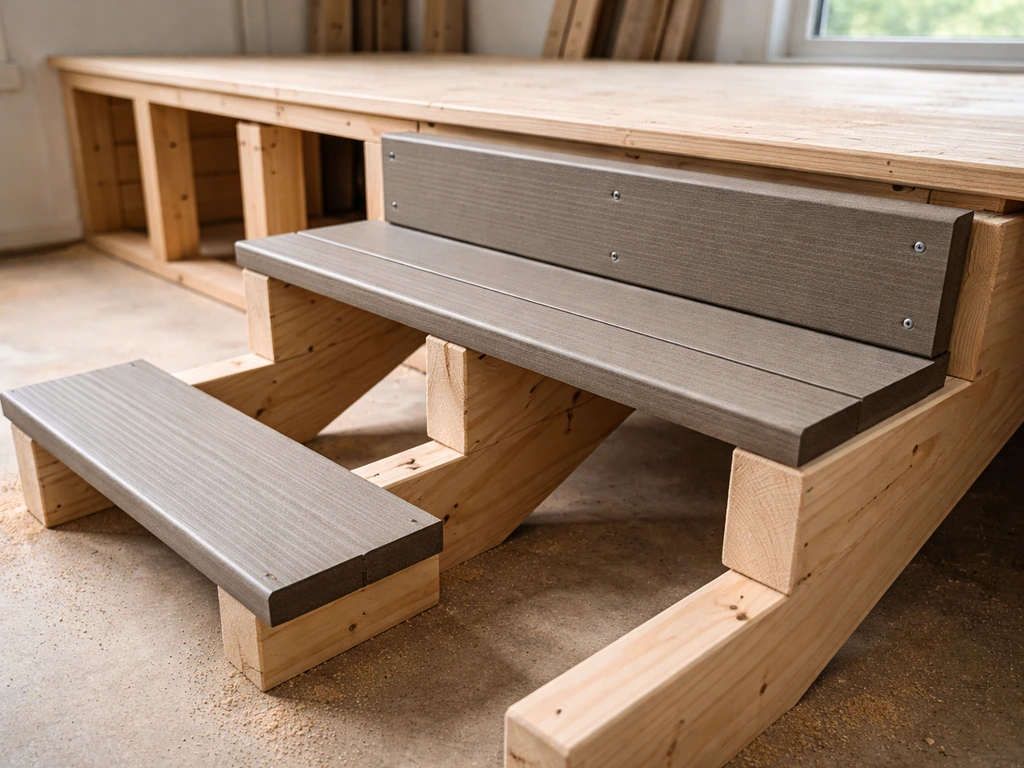
Start with the risers. Cut your composite fascia or riser boards to width (the vertical dimension of your riser) and fasten them to the stringer faces with 2.5-inch stainless screws, flush to the surface. Then lay your tread boards. For a 10 to 11-inch tread depth, you'll typically use two composite deck boards side by side. Position the front board first, leaving your 3/4-inch or less nosing overhang at the front. Use composite spacers to maintain a 1/4 to 3/8-inch gap between the two tread boards. Fasten through the face with composite screws at each stringer location. Trex's hidden fastener systems can be adapted for use on stair treads, but face screwing with color-matched screws is faster and entirely acceptable for steps.
Building rounded and curved steps
Curved steps require a little more planning but the same basic structural logic. For a rounded layout, each step projects outward in an arc. The common approach is to build a radiating stringer frame: cut your stringers so they fan out from a central pivot point, with shorter segments connecting them horizontally to define each step platform. Make a plywood template of your desired curve to guide cuts. The composite tread boards are then cut to approximate the arc, either in short segments that follow the curve or by kerf-cutting the underside of a board to allow it to bend slightly (this works for gentle curves on thinner boards). For tighter curves, shorter board segments laid end to end around the arc, with a small gap at the joints, is more practical. Always sand any cut edges and, if your composite is capped, apply the manufacturer's recommended edge sealant to exposed cut ends to maintain moisture protection.
Finishing details, drainage, and keeping steps safe
Non-slip surfaces
Most capped composite boards have a brushed or embossed texture that gives decent grip when dry. Wet steps are the real concern. The best products for this have a multi-directional grain texture rather than a simple brushed surface. If your chosen composite feels slick when wet (test by wetting a sample board and dragging your foot across it), add anti-slip strips to each tread. There are composite-compatible adhesive strips designed for this, and they're worth the $20 per flight. Avoid applying deck paint or sealers to composite boards, which can actually reduce traction rather than improve it.
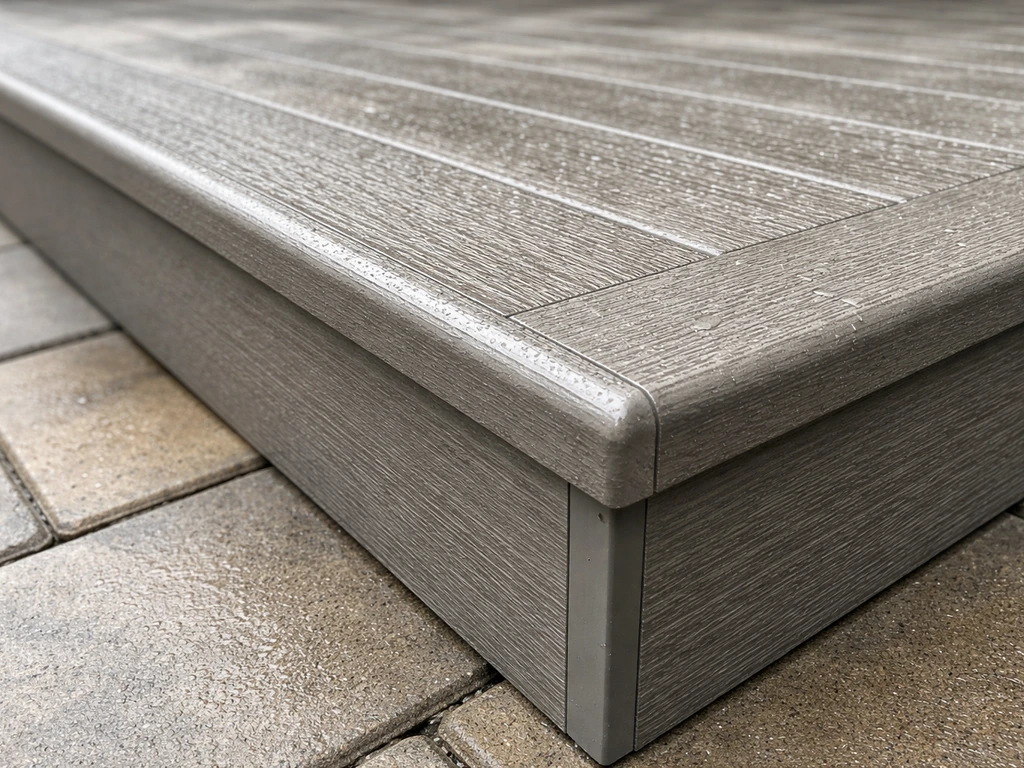
Edge trim and skirting
Wrap exposed stringer faces and the sides of your step structure with matching composite fascia. This hides the pressure-treated framing, gives a finished look, and protects the PT wood from direct weathering. Miter the corners where fascia boards meet, and fasten with stainless screws as described above. If you're building wide steps, the bottom front face can be a single long fascia board, which makes a clean, proportional finish.
Drainage maintenance
The board gaps you've left do the drainage work, but they can collect debris over time. Twice a year, run a putty knife or composite cleaning tool through the gaps to clear leaves and dirt. Wash the treads with a hose and a soft brush. Capped composite boards don't need sealing, staining, or any chemical treatment. That's the whole point.
Handrail requirements
Most U.S. jurisdictions require a graspable handrail on any stair with four or more risers. Even if you're building three steps, a railing adds real safety and is worth the extra day of work. Composite post sleeves over pressure-treated 4x4 posts are the cleanest solution: they match your steps and need zero maintenance. Set the posts in concrete or in metal post anchors bolted to your step structure, and make sure they're plumb before the concrete cures.
A quick check before you call it done
- Walk the steps and feel for any flex or bounce in the treads. If there's movement, add a stringer.
- Check that every riser is within 1/8 inch of the others. Use a level and tape measure at each step.
- Verify the nosing overhang is 3/4 inch or less at every tread.
- Confirm all board gaps are open and unobstructed so water can drain freely.
- Test traction on wet boards. Add anti-slip strips if needed.
- Check that all fasteners are flush or slightly recessed, not proud of the surface.
- If you have a handrail, give it a firm shake. It should feel solid with no wobble.
That's the full picture. Composite patio steps done right feel permanent: solid underfoot, good-looking next to almost any patio material, and genuinely maintenance-free for years. The upfront planning around consistent riser height and proper stringer spacing is where the quality lives. Get those two things right and the rest of the build falls into place quickly. If you're still deciding on your overall step layout or want to compare this approach against building Trex-specific deck stairs or DIY patio steps with other materials, the design decisions overlap more than you'd expect, and it's worth thinking through the full picture before you commit to a framing approach. If you are still deciding on your overall step layout, you can also use this as an adjacent comparison point to how to build a trex patio for guidance on materials, layout, and finishing details.
FAQ
Can I build composite patio steps directly against an existing concrete slab or retaining wall?
Yes, but only if the stair framing is engineered for that attachment and you leave a dedicated drainage and airflow gap behind it. For composite steps, plan a compacted gravel base under the stringer landing (and concrete footings for taller runs or freeze-thaw areas), then fasten to the slab with anchors or a bolted ledger so the connection cannot loosen when the ground shifts.
My stringers came out slightly different heights, how do I fix uneven risers before installing composite?
Do not plan on resurfacing the problem with “more screws” later. If risers vary more than about 1/8 inch across the flight, it usually means you measured rise incorrectly or your stringers were cut from inconsistent templates. The safest fix is to recut stringers (using one perfect cut as the template), then re-set riser boards so the stair is uniform.
Can I use any composite decking board as treads, or does it have to be the same product line as the patio?
Not always. Composite decking boards are often used for treads, but some brands have different minimum tread lengths, recommended fastener patterns, and specific gap guidance. If your composite is capped, it generally needs edge sealant only on field-cut ends. For safety and warranty, match the tread system components to the exact board line you buy.
What should I do if my composite steps are slippery when wet?
Do it, but use a purpose-made anti-slip solution. Common triggers are wet weather, algae on north-facing steps, and smooth embossing that turns slick. If you test your chosen board and it feels slippery when wet, apply composite-compatible adhesive anti-slip strips on each tread surface, then keep water from pooling by clearing gaps twice per year.
How much gap should I leave between two composite boards on each tread, and what mistakes cause drainage problems?
Use a stiff composite spacer strategy, then remove “helpers” immediately after fastening. If gaps between side-by-side tread boards are too small, debris and water can build up and promote end and underside moisture. Keep the gap in the 1/4 to 3/8 inch range and maintain it consistently across every tread using spacers made for decking (or your coin method, but with careful repeatability).
Can I use hidden fasteners for risers and fascia to get a cleaner look?
Avoid hidden-fastener plugs for risers and fascia, those areas typically lack enough thickness for proper seating. Face-screw with stainless screws rated for pressure-treated framing, and keep the heads flush. If you prefer hidden systems on treads only, adapt them only where the manufacturer explicitly allows it.
Is gravel-only support ever enough for composite patio steps, or do I always need footings?
Not if the ground is moving. Composite won’t crack like concrete, but the structure can shift if the base is undersized or not compacted and drained. For more than two steps, or in freeze-thaw zones, prioritize concrete footings set below frost depth at each stringer base, plus properly sloped gravel so water moves away from the support.
How do I choose stringer spacing, and what happens if I space them too far apart?
Most of the time, you should treat stringer spacing like a safety-critical spec, not a general guideline. If treads flex because the spacing is too wide, fasteners get stressed and the stair can feel unsafe. Check the product’s spacing chart (some composites require tighter spacing than deck joists), then add stringers if you’re building wide platform steps.
Do composite patio steps need a handrail if they only have a small number of risers?
Use a handrail whenever your stair is 4 or more risers, but also consider local conditions like kids, pets, or an unprotected side. Even if your run is “only” three steps, a railing can reduce falls and gives you something to hold when stepping onto slick surfaces. Composite post sleeves over treated posts are typically the cleanest, lowest-maintenance option.
Will sealing or painting composite steps improve durability or traction?
If you want maintenance-free traction, don’t coat composite with paint or sealers. Those products can reduce grip and make the surface slick. For traction control, rely on the board’s texture (choose multi-directional grain when possible) and add anti-slip strips if wet tests show it’s too smooth.
When do I need a landing for composite patio steps, and how big should it be?
Yes, and it’s usually the right move. A landing of at least about 36 inches in both directions provides room to transition to a path and helps reduce awkward foot placement. For multi-step runs, a mid-flight landing can also be required by code in some areas once the stair flight reaches certain heights.
What’s the safest way to frame rounded composite patio steps so they don’t wobble?
You can, but you need a plan for the arc so the structure supports every tread segment. The common approach is a radiating stringer frame from a central pivot point, then cut tread boards in segments or kerf-cut for gentle curves, and apply edge sealant to any exposed cut ends on capped composite.
Trex Steps to Patio: DIY Installation Guide and Checklist
Step-by-step DIY trex steps to patio guide with checklist, measurements, framing, fastening, and safety tips for proper