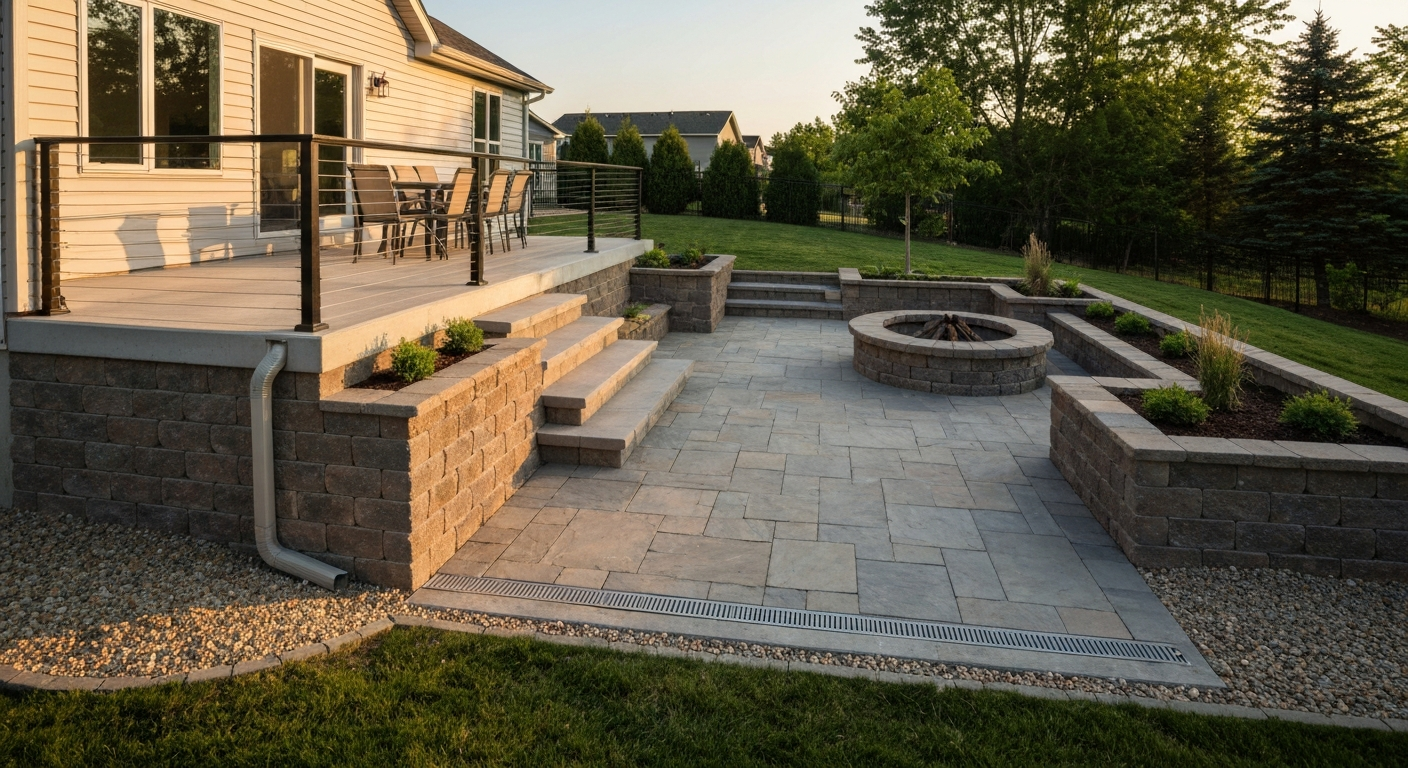
A multi-level patio is one of the most rewarding DIY projects you can tackle in a backyard, and yes, you can absolutely build one yourself. The basic process is: plan your levels and transitions, check permits, assess the site, handle drainage, build your bases and retaining walls, then lay your surface. Each of those steps has real detail behind it, and that detail is exactly what this guide covers, from reading your soil to cutting control joints in concrete. Whether you are working with a sloped lot that demands two or three distinct tiers, or just want to separate a dining zone from a lounge area with a single step down, the fundamentals are the same.
How to Build a Multi Level Patio: DIY Guide

Nolan Lennox
20 Jul 2026
What a multi-level patio actually is (and who this guide is for)
A multi-level patio is any outdoor hardscape that uses two or more distinct elevation planes connected by steps, ramps, or retaining walls. It might be a simple raised concrete pad stepping down to a lower flagstone lounge area, or a three-tier terraced structure cut into a steep hill with timber cribbing, segmental retaining walls, and a built-in staircase. The connecting elements are what separate it from a single flat slab, and they are also where most of the planning, code compliance, and structural thinking happen.
This guide is written for homeowners who want to do the work themselves. I have built multi-level patios on flat suburban lots and on slopes that made my transit look like it was lying. The guide is honest about where you can push through solo, where you genuinely need a licensed engineer, and where a weekend of careful work will save you thousands compared to a full contractor bid. If you are a confident beginner or a seasoned DIYer who has never built a retaining structure before, this is for you.
Should you DIY this? Scope, skill level, budget and timeline
The honest answer is: it depends on the scale. A two-level patio with a single 6-inch step change, a gravity block retaining wall under 3 feet, and pavers or a concrete slab on top is very manageable for someone comfortable using a plate compactor, laser level, and mixing mortar. That kind of project might run 2 to 4 weekends of actual work and cost anywhere from $15 to $35 per square foot in materials depending on surface choice, far less than the $40 to $80 per square foot a contractor would typically charge.
Where things escalate is with height. Once a retaining wall exceeds 3 to 4 feet, or once a walking surface is more than 30 inches above grade (which triggers a guard rail requirement under the 2024 IRC), the structural and code complexity goes up sharply. Walls over 4 feet almost always need geogrid reinforcement and, at many municipalities, a licensed engineer's stamp. If your slope requires multiple stacked tiers or a total wall height over 6 feet, budget for at least a soil and foundation consultation. That consultation typically costs $300 to $800 and can save you from an expensive failure or a failed inspection.
On timeline: a modest two-level patio of 400 square feet can realistically be completed in three to five weekends including base prep. Add a week of cure time for concrete work. A larger three-tier project with engineered retaining walls, a staircase, and a wood or composite upper deck platform can easily stretch to six to ten weekends. Build in buffer time and do not pour concrete in the week before heavy rain or a hard freeze.
Design and layout: defining your levels, zones, and sightlines
Start on paper, or use a free tool like SketchUp or even graph paper with a 1-inch-to-1-foot scale. The goal at this stage is to decide three things: where each level sits in relation to the house, how people move between them, and what each level is used for. Circulation matters more than most people expect. A staircase tucked in a corner saves space but can feel awkward if it is the only path between an upper dining level and a lower fire pit zone.
For zones, think about sun and shade patterns at the times you actually use the space. The upper level closest to the house almost always works best as the main dining or entertaining area since it has the most sightlines to the yard. Lower levels work well for lounging, fire pits, or planting beds. If you are near a pool, the lower level often wraps the pool edge, and getting that elevation consistent matters a lot both aesthetically and for drainage.
Sightlines are the difference between a patio that feels cohesive and one that feels like a series of disconnected slabs. Stand at your back door and imagine looking out. The upper level should frame a view to the lower one. Step transitions that are slightly offset rather than centered can create a more dynamic, less boxy feel without adding cost.
- Sketch every level to scale, including the house footprint and property lines
- Mark compass directions and note which areas get afternoon shade from the house or trees
- Identify the primary circulation path between levels and place stair runs there first
- Plan utility zones (grills, outlets, spigots) at the design stage, not after the base is poured
- Note any adjacent features like a pool, shed, or fence that affect grading and drainage
Permits, local codes and inspections: check before you break ground
Permit requirements for patios vary more than almost any other residential project. A simple ground-level concrete slab in one jurisdiction needs no permit at all, while the same slab three miles away in a different county might require a site plan and a footing inspection. The general rule is: if your patio is at grade and fully detached from the house, you may be fine without a permit. Once any part of it is attached to the structure, elevated more than about 18 to 30 inches above grade, or includes retaining walls over a certain height (often 4 feet), you almost certainly need one.
Seattle's SDCI, for example, notes that elevated outdoor platforms over roughly 18 inches can trigger permit requirements. Forsyth County, Georgia's residential deck and porch permit packet explicitly requires a site plan, footing and pier details, framing plans, and inspection scheduling for footing, framing, and final stages. Bothell, Washington publishes a similar checklist. Your local AHJ (Authority Having Jurisdiction) is the only source you should rely on. Call or email them with the description of your project and ask directly what is required. Keep that response in writing.
The 2024 IRC is the basis for most local residential building codes. For this project, the sections you need to know are: R403.1.4 and R403.3 for frost protection on footings (footings must extend below the local frost line or use frost-protected shallow foundation details), R311.7 and related stair provisions for minimum stair widths, riser heights, nosing dimensions, and the handrail requirement for four or more risers, and the guard requirement that triggers at 30 inches above grade. Write these down and cross-reference with your local amendments before drawing your construction documents.
Site assessment and survey: measuring, soil, utilities and grades
Before anything else, call 811 (the national dig-safe number in the US) at least three business days before any excavation. Utility marking is free and mandatory. Do not skip it. I have heard of homeowners nicking a gas line during a simple footing dig and it is an experience nobody needs.
Once utilities are marked, get accurate grade measurements across the entire project footprint. A laser level or a builder's transit is the right tool here. Measure existing grades at a 5-foot grid across the area and record the elevations on your layout drawing. This tells you exactly how much soil needs to move, where your retaining walls need to be, and how tall they will be. A difference of even 4 inches from what you estimated on paper can change whether you need permits and engineering review.
For soil, the USDA NRCS Web Soil Survey is a free, authoritative online tool. Enter your address, draw a boundary around your project area, and it will return the mapped soil unit with engineering interpretation data including bearing capacity, drainage class, and frost susceptibility. Print and save that report. It is not a substitute for a geotechnical engineer on complex sites, but it gives you a solid starting point and is exactly the kind of documentation a permit office sometimes asks to see.
Check soil drainage by digging a hole about 12 inches deep and filling it with water. If it drains in under an hour, your drainage is good. If it is still sitting there two hours later, you have slow-draining soil and your base thickness and drainage layer design need to reflect that. ICPI guidance specifies a minimum 4-inch compacted aggregate base over well-drained soils for pedestrian patios, with thicker bases required on poor-draining or expansive soils.
Drainage and water management: this is the most important thing to get right
Water is the single most common reason patios fail. It gets under the base, freezes, and heaves pavers. It saturates the soil behind a retaining wall and pushes it over. It ponds at the base of a step and erodes the joint material. Getting drainage right is not glamorous work, but it is the work that determines whether your patio looks the same in ten years as it does the day you finish.
IRC R401.3 requires surface grade to slope away from the foundation, and the commonly cited standard is 6 inches of drop in the first 10 feet. For patio surfaces themselves, a minimum slope of 1/4 inch per foot (about 2%) is the standard recommendation to shed water without feeling like you are walking on a ramp. If your patio is at the base of a slope or near a downspout, that water load needs to go somewhere controlled, not just sheet across your slab.
For roof runoff, extend downspouts well away from the patio footprint or redirect them to a dry well or French drain before they reach your base. For surface flow across the patio, plan the grades on your layout so water flows toward a defined low edge where it can exit the hardscape zone, ideally into a planted area or a channel drain. For sub-surface drainage behind retaining walls, compacted drainage aggregate directly behind the wall face combined with a perforated pipe at the footing is the standard approach. Without it, hydrostatic pressure will eventually move even a well-built wall.
If your lot has significant impervious surface area, consider permeable pavers or a gravel-filled joint system for at least part of the patio. EPA green infrastructure guidance supports permeable pavement as an effective LID (Low Impact Development) practice that reduces runoff volume and can simplify your site drainage design. Permeable pavers cost roughly the same as standard interlocking concrete pavers at the surface level; the main cost difference is in the open-graded base aggregate beneath them.
How to plan level changes: risers, runs, sightlines and comfortable transitions
The most common mistake I see on DIY multi-level patios is inconsistent riser heights. One step at 5 inches, the next at 7.5 inches. It sounds minor but your body expects consistency and an irregular stair catches you off guard every single time. The IRC is clear: riser height shall not vary more than 3/8 inch within any flight of stairs. In practice, aim for zero variation.
For comfortable outdoor steps, the classic formula is 2 x riser height + tread depth = 26 to 27 inches. A 6-inch riser with a 15-inch tread (2x6+15=27) feels natural and relaxed. Avoid going below a 6-inch riser outdoors as very shallow risers are actually tricky to see and easy to trip on. The IRC maximum riser height for stairs is 8-3/4 inches, but for a patio setting, 6 to 7 inches is a much more pleasant range. Tread depth (the horizontal run) should be at least 11 inches per IRC, but 12 to 16 inches is genuinely more comfortable in an outdoor context.
For the total elevation change, divide it evenly. If you have a 24-inch total drop from an upper level to a lower one, you can do four 6-inch risers. If the math does not work out cleanly with your desired riser height, adjust your finished grade slightly at either level rather than forcing awkward fractional risers. This is where setting your finished elevation benchmarks in advance, before any concrete or base work, pays off. A laser level is the fastest and most accurate way to establish and check those benchmarks across a multi-point layout. If you want a deeper look at setting elevation control points, the process for setting patio levels with a laser is worth understanding before you stake the project. For step-by-step instructions on how to set levels for a patio, see the guide referenced by this internal id f8c3bb77-7ccb-4bea-813b-07c8ee083be1.
The IRC also requires a handrail on any stairway with four or more risers, and a guard (minimum 36 inches high for residential where the walking surface is 30 inches or less above grade, 42 inches where it is higher) wherever the patio edge drops more than 30 inches. Plan these into your layout now. A well-designed steel cable guard or a simple powder-coated aluminum rail adds very little material cost relative to the whole project and looks intentional when designed from the start rather than bolted on as an afterthought.
| Riser Height | Tread Depth | Total Step Formula (2R+T) | Feel |
|---|---|---|---|
| 5.5 in | 16 in | 27 in | Very relaxed, best for wide landscaping steps |
| 6 in | 15 in | 27 in | Comfortable standard for outdoor patios |
| 7 in | 13 in | 27 in | Slightly more compact, still comfortable |
| 7.75 in (max IRC) | 11 in (min IRC) | 26.5 in | Code minimum, feels steep outdoors |
Retaining solutions: gravity walls, reinforced walls, cribbing and when to call an engineer
The retaining solution you choose is largely determined by how much height you need to hold back and what the soil conditions are. Here is a plain breakdown of the main options and where each one fits.
Gravity walls (up to about 3 feet)
A gravity wall relies entirely on its own weight to resist the soil pressure behind it. Dry-stacked segmental retaining wall (SRW) blocks, dry-laid fieldstone, and compacted gravel-filled gabion baskets all work on this principle. For walls under 3 feet holding back typical residential fill, a gravity wall built from standard SRW blocks (the interlocking kind you find at any big box store) is a perfectly solid DIY project. The NCMA Design Manual for Segmental Retaining Walls is the industry reference here. Follow the manufacturer's batter (setback per course), use compacted gravel as backfill directly behind the wall, and include a perforated drain pipe at the footing level.
Geogrid-reinforced walls (3 to 6 feet)
Once you exceed about 3 feet of retained height, most SRW block systems require geogrid reinforcement layers embedded into the backfill. Geogrid is a polymer mesh (tensile properties tested per ASTM D6637) that creates a mechanically stabilized earth zone behind the wall face. Installation follows a pattern of layers at specific vertical intervals, with each layer extending horizontally into the backfill a distance that depends on wall height and soil type. Geogrid manufacturers like Tensar publish installation guides with exact spacing and overlap requirements, and their guidance explicitly recommends consulting a licensed engineer for walls over approximately 3 feet in height or where there are sloped fills, surcharge loads, or poor soil conditions. The material cost of geogrid runs roughly $0.40 to $1.00 per square foot depending on the grade, making it an affordable addition to the wall system.
Timber cribbing
Timber crib walls use interlocking horizontal headers and stretchers to create a box-like gravity structure filled with compacted granular material. They are well-suited to moderate slopes and can look very natural in a wooded backyard setting. Pressure-treated timber rated for ground contact (UC4B or higher for soil contact) is required. The practical limit for a DIY timber crib wall is about 4 to 5 feet; beyond that, the engineering complexity and the material weight make it a specialist project. Timber walls also have a shorter service life than concrete block or stone, typically 20 to 30 years before the wood degrades depending on species and treatment.
When to hire a structural or geotechnical engineer
Get an engineer involved when: any wall exceeds 4 feet of retained height, the soil behind the wall is saturated or expansive, there is a structure (house, garage, fence) within the failure zone of the wall (roughly the height of the wall measured horizontally from the base), you are on a slope that exceeds about 2:1 (horizontal to vertical), or your permit office requires a stamped drawing. An engineer's design does not mean you cannot do the construction yourself. Many homeowners successfully build engineer-designed walls from stamped drawings. The engineering fee typically runs $500 to $2,000 for a residential retaining wall and is money well spent against the cost of a wall failure.
| Wall Type | Max DIY Height | Relative Cost | Lifespan | Engineer Needed? |
|---|---|---|---|---|
| Segmental block (gravity) | Up to 3 ft | $ (block + gravel) | 50+ years | No (under 3 ft, simple site) |
| Segmental block + geogrid | 3–6 ft | $$ (block + geogrid + gravel) | 50+ years | Recommended above 3–4 ft |
| Dry-stacked stone | Up to 2.5 ft | $$ (varies by stone cost) | 50+ years | No for low walls |
| Timber cribbing | Up to 4–5 ft | $ to $$ (PT lumber + hardware) | 20–30 years | Recommended above 4 ft |
| Poured concrete wall | Any height | $$$ (form, rebar, concrete) | 50+ years | Yes for most DIY heights |
Step-by-step construction: the actual build sequence
Once your design is finalized, permits are in hand, and utility markings are on the ground, the construction sequence for a multi-level patio follows a consistent order. Working from the bottom of the site up and from the perimeter in is the principle that prevents you from compacting base material you then have to excavate.
- Establish layout with batter boards and string lines: set your control strings at finished surface elevation for each level, and check diagonal measurements to confirm square
- Excavate to subgrade: remove topsoil and organic material completely, then cut to your required subbase depth (at minimum 4 inches below your finished surface for a paver patio over well-drained soil, deeper for poor drainage or concrete slabs)
- Compact subgrade to 95% Standard Proctor: rent a plate compactor for areas up to about 500 square feet or a jumping jack compactor for trench areas; make multiple overlapping passes
- Install sub-surface drainage if required: perforated pipe in gravel at the retaining wall footing level and any catch basins for surface collection
- Build retaining walls from the bottom tier up: set each wall before backfilling to its full height, backfill and compact in 6-inch lifts with clean angular gravel directly behind the wall face
- Install aggregate base in lifts: place and compact in 3 to 4-inch lifts using a plate compactor; verify elevation at multiple grid points with your laser level before proceeding
- Install edge restraints for paver systems before screeding the setting bed
- Screed a 1-inch bedding layer of concrete sand (for pavers) or set forms and pour a concrete slab per your design
- Lay pavers or finish concrete surface: for pavers, set in a running bond or herringbone pattern and compact after installation; for concrete, finish surface, cut control joints at 8 to 12 foot spacing (1/4 slab depth per ACI guidance), and cure for at least 7 days
- Build stair structures: construct from the lowest riser up, ensuring each riser is consistent and each tread is level side to side and has a slight forward pitch (1/4 inch per foot) for drainage
- Install railings and guards per local code requirements
- Apply joint sand, sealers, or surface treatments as appropriate for your chosen material
Foundation and base layers: what goes under everything
The base is invisible once the project is done and it is the thing that determines whether the project stays flat for 20 years or heaves in its third winter. ICPI Tech Spec guidance specifies a minimum 4-inch compacted aggregate base for pedestrian paver patios over well-drained soils. FHWA guidance notes a common compaction target of 95% of Standard Proctor (AASHTO T‑99 / ASTM D698) for subgrade and aggregate base beneath pavements FHWA — Guidance on compaction (common specification of 95% Standard Proctor for subgrade/base). Bump that to 6 inches for marginal soils or any area that gets occasional vehicle traffic. For concrete slabs, ACI 360R recommends a prepared subbase, typically 4 inches of compacted granular material under a standard 4-inch residential slab.
Use clean angular crushed stone (often called 'crusher run' or 'road base') rather than rounded pea gravel for the base. Angular aggregate compacts to a stable interlocked matrix; rounded gravel never fully locks and can shift under load. In freeze-thaw climates, frost depth is critical. The IRC requires permanent supports to extend below the local frost line (IRC R403.1.4) or use frost-protected shallow foundation details. For patios that are not structurally attached to the house and are built on well-drained non-frost-susceptible base material, heave is much less of a concern, but check your local frost depth and soil type before making that call.
Surface material options: pavers, concrete, wood and composite
The surface material affects aesthetics, maintenance, cost, and how forgiving the system is of minor movement. Here is a practical comparison based on hands-on results.
| Surface Material | Installed Cost (DIY) | Durability | Maintenance | Best For |
|---|---|---|---|---|
| Interlocking concrete pavers | $8–$18/sq ft materials | Excellent (50+ years) | Low (re-sand joints every few years) | Any level, great for DIY |
| Poured concrete slab | $4–$8/sq ft materials | Very good (30–50 years) | Low (seal every 3–5 years) | Lower levels, clean modern look |
| Natural flagstone (mortared) | $15–$30/sq ft materials | Very good | Moderate (grout maintenance) | Upper entertaining levels |
| Composite decking (upper levels) | $12–$22/sq ft materials | Good (25–30 years) | Low (annual clean) | Elevated platforms with framing |
| Pressure-treated wood decking | $6–$12/sq ft materials | Moderate (15–25 years) | Moderate (annual seal/stain) | Budget elevated platforms |
| Gravel / decomposed granite | $1–$4/sq ft materials | Fair (needs topping up) | Low-moderate (edging required) | Lower accent zones, casual areas |
For most multi-level DIY patios, interlocking concrete pavers are my first recommendation for ground-level surfaces. They are forgiving, the individual units can be relaid if a section heaves or settles, and the DIY installation process is well-documented. For elevated platforms (anything framed above grade), composite decking gives you the best maintenance-to-longevity ratio, but follow the manufacturer's ledger attachment and flashing instructions exactly. Trex and similar manufacturers publish detailed ledger installation guides that reference IRC Table R507.2 for prescriptive fastener patterns. Improper flashing at ledger connections is one of the most common causes of structural rot in elevated platforms.
Tools you need (and a note on laser levels)
You can rent most of the heavy equipment for a one-time project and buy the precision tools since you will use them on every future outdoor project. Here is the honest tool list for a mid-sized multi-level patio build.
- Rotary or line laser level (buy or rent): essential for setting consistent elevations across multiple levels and checking base slopes
- Builder's rod and tripod (if using rotary laser): for reading elevations at grid points
- Batter boards and string lines: for layout and maintaining level reference during excavation
- Plate compactor (rent): for compacting base layers
- Hand tamper: for tight areas near walls and edges
- Sod cutter or mini excavator (rent for larger areas): for stripping topsoil
- Wheelbarrow and shovels
- Rubber mallet and paver splitter or angle grinder with diamond blade
- Screed pipes and straightedge for bedding sand
- Circular saw with masonry blade or wet tile saw for precision cuts
- Level (4-foot torpedo and 4-foot standard)
- Tape measure and chalk line
- Safety equipment: ear protection, safety glasses, knee pads, and heavy work gloves
A rotary laser level changes the quality and speed of a multi-level project dramatically. You set the laser on a tripod, level it, and it projects a 360-degree reference plane at a known height. Every grade stake, every base check, every stair riser can be measured back to that single reference. For setting consistent patio elevations and checking that your drainage slopes are actually where you planned them, a laser level is worth every penny of the rental fee. If you want to go deeper on the setup and use of a laser level for patio work, that topic deserves its own read-through before you start staking the project.
Common mistakes that cause real problems
- Skipping the call to 811: non-negotiable, always mark utilities before digging
- Insufficient base depth: 2 inches of gravel is not a base, it is a gesture; follow the 4-inch minimum and increase for poor soils
- No drainage behind retaining walls: hydrostatic pressure will move even a correctly built wall if there is no drainage outlet
- Inconsistent riser heights: measure and cut every riser to the same dimension, not 'close enough'
- Grading toward the house: all surface drainage must slope away from the foundation at a minimum 2% slope
- Starting concrete work too late in the day: concrete needs time to set before temperatures drop; check the forecast
- Not checking soil drainage before committing to a base spec: slow-draining soil needs a thicker base and possibly a perimeter drain
- Forgetting to account for material thickness in finished elevation: your subbase + base + bedding + paver/slab all add up; calculate backward from finished surface to excavation depth before you dig
Cost breakdown: what to budget
Costs vary significantly by region, material choice, and site complexity, but this range gives you a realistic planning framework for a two-level DIY patio in the 300 to 600 square foot range.
| Item | Typical DIY Cost Range | Notes |
|---|---|---|
| Excavation and disposal | $200–$800 | Higher if renting equipment or hiring labor for haul-off |
| Aggregate base material | $200–$600 | Depends on depth and square footage |
| Retaining wall blocks + geogrid | $400–$2,000+ | Geogrid adds $100–$400; engineer fee $500–$2,000 if required |
| Paver surface (materials only) | $1,200–$4,800 | Based on 300 sq ft at $4–$16/sq ft |
| Concrete (materials, forms, rebar) | $600–$2,000 | Includes mixer rental or ready-mix delivery |
| Stair materials | $200–$800 | Block steps or cut stone treads |
| Drainage components | $150–$500 | Perforated pipe, catch basin, gravel |
| Permits and inspections | $50–$500 | Varies widely by jurisdiction |
| Tool rental (plate compactor, laser) | $150–$400 | Per weekend |
| Total estimate (mid-range project) | $3,000–$8,000 | Materials and rentals; excludes labor if hiring any help |
Maintenance, sealing and keeping it all looking good
A well-built multi-level patio needs very little maintenance in its first few years. For paver systems, the main task is re-sanding joints every two to three years as the polymeric sand gradually erodes with rainfall and foot traffic. Use a quality polymeric jointing sand and compact it in properly the first time. For concrete surfaces, clean and apply a penetrating sealer every three to five years to reduce water absorption and staining. Control joints (saw cut to about 1/4 of the slab depth per ACI practice, at roughly 8 to 12-foot spacing for a 4-inch slab) are there to control where cracking occurs. See ConcreteNetwork, Control joints and joint spacing guidance (references ACI recommendations) for common industry practice on saw‑cut depth and spacing, which cites ACI guidance recommending saw cuts about one‑quarter the slab depth and typical spacing of 8–12 ft for a 4‑inch unreinforced slab (confirm with ACI 360R and local engineer) ConcreteNetwork — Control joints and joint spacing guidance (references ACI recommendations). If cracks form at the joints, that is the system working as intended. If they form between joints, check that the base has not settled or that a drainage issue is not causing erosion under the slab.
For retaining walls, check annually that drainage outlets are not blocked and that the wall face is not showing any signs of bowing or shifting. Early intervention on a block that is tilting outward is a half-hour repair. A wall that has been allowed to move 2 inches before anyone noticed is a full rebuild.
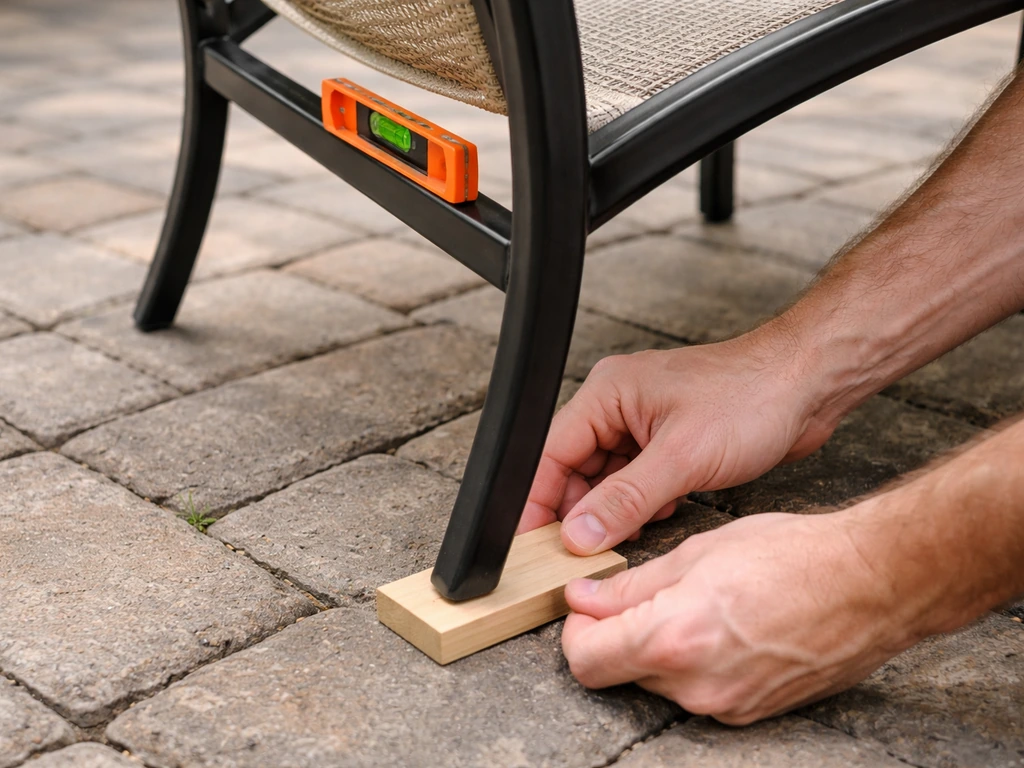
One thing that is easy to overlook after the build is furniture leveling. A slightly uneven lower patio surface can make dining tables wobble even when the patio itself is structurally perfect. Getting furniture set up properly on a multi-level space is its own small task, and if you end up with a persistent leveling issue, that is worth addressing separately once the surface settles through its first full season. See our guide on how to level patio furniture for simple techniques to stabilize tables and chairs on uneven surfaces.
The final word on building this yourself
A multi-level patio is not a beginner's first project, but it is absolutely within reach for a homeowner who is willing to plan carefully, check permits, and respect the sequencing. The parts that most DIYers underestimate are drainage, consistent level setting across the full project area, and retaining wall engineering above 3 feet. Get those three things right and the rest of the project falls into place with patience and physical effort. The result, a custom outdoor living space on two or three distinct levels that you built from the ground up, is one of the most satisfying things you can do to a backyard.
FAQ
What codes and standards should I check before starting a multi‑level patio project?
Check your local building department (AHJ) for permit triggers and submittal requirements first. Key national standards to reference: International Residential Code (IRC) for foundations, stairs, guards and handrails; ACI 360R for slabs‑on‑ground; ICPI/CMHA tech specs for interlocking pavers; NCMA design manual for segmental retaining walls; ASTM D6637 for geogrid tensile properties; and USDA NRCS Web Soil Survey or a local geotechnical report for soil/frost data. Follow manufacturer installation guides for products (pavers, geogrid, ledgers). Engage a licensed engineer when required by code or for walls > ~3–4 ft, complex soils, or attached structures.
When do I need a permit or an engineer for a patio or multi‑level platform?
Permit/engineer needs vary by jurisdiction. Common triggers for permits include elevated platforms above local height thresholds (examples: ~18–30 in), attached structures, significant structural work, or retaining walls exceeding local height limits. Engage an engineer for retaining walls typically over 3–4 ft, sloped fills, poor soils, or when stability/drainage concerns exist. Always confirm with the local building department early—many municipalities publish permit checklists listing required drawings and inspections.
How should I plan grades, drainage and frost protection for a multi‑level patio?
Plan positive drainage away from buildings (IRC recommends 6 in drop within first 10 ft where applicable) and use a minimum surface slope of about 1/4 in/ft (≈2%) for pedestrian slabs to sheet water off. Identify frost depth from local code and provide footings/piers that extend below the frost line or use frost‑protected shallow foundation details per IRC. Include subdrainage behind retaining walls and drainage layers under paving areas; consider permeable pavement or LID practices to reduce runoff.
What are typical base and compaction requirements for paver patios and concrete slabs?
For interlocking pavers on well‑drained soils, ICPI recommends a minimum 4 in compacted aggregate base for pedestrian patios, 6 in for light vehicular use, and thicker (8–12 in) for heavy loads or poor subgrade. For slabs‑on‑ground, follow ACI 360R guidance on thickness, jointing and reinforcement. Aim for at least 95% Standard Proctor (ASTM/AASHTO) relative compaction for subgrade and aggregate base unless project specs require otherwise.
How do I handle level changes between patio tiers—retaining walls, steps and transitions?
Use engineered segmental retaining walls (SRWs) or properly designed cast‑in‑place walls for significant level changes; follow NCMA SRW guidance for geogrid design and drainage. For short drops, gravity block walls with a proper base and drainage may suffice. Provide code‑compliant stair runs where vertical rise between usable walking surfaces requires steps; IRC sets riser limits and requires a handrail for four or more risers and guards where walking surfaces are more than 30 in above grade. Design smooth transitions with landings and consistent tread/riser geometry.
What tools and equipment are essential, and how do I use a laser level for a patio?
Essential tools: plate compactor, shovel, tamp, wheelbarrow, grading rake, laser level or transit, string lines, sod cutter/rototiller, saw (masonry/concrete/paver cutter), concrete tools (if pouring), and PPE. To use a rotary laser level: set it on a tripod, establish a benchmark (BM) at finished elevations, use a grade rod/receiver to transfer elevations around the site, and set slope by adjusting the laser or rotating head per required fall (e.g., 1/4 in/ft). Verify readings against string lines and a hand level for accuracy.
Next Article
How to Level Patio Furniture: Stop Wobble Fast DIY Guide
Fix wobbly patio furniture fast: diagnose uneven surfaces, then level chairs and tables with shims and re-bedding steps.