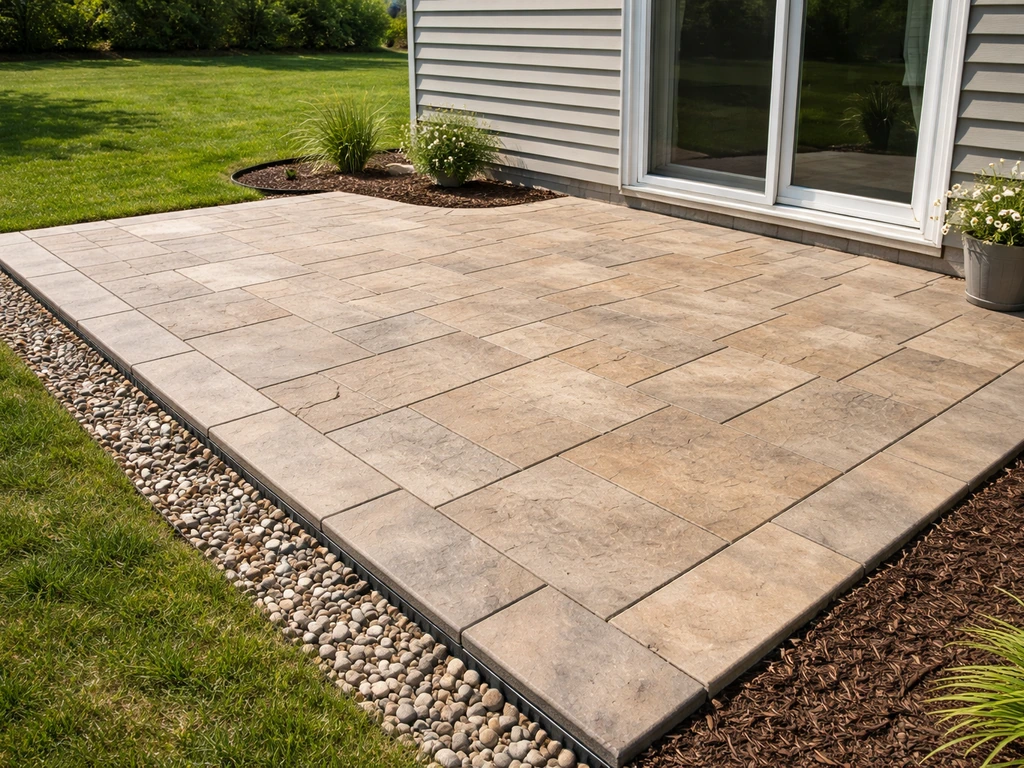
You can absolutely build a patio attached to your house yourself, but it takes more planning than a freestanding slab because you have to manage the connection to the structure, handle drainage away from the foundation, and respect local code. Done right, an attached patio lasts decades without cracking, leaking, or pulling away from the house. Done carelessly, it funnels water into your foundation and heaves with every freeze-thaw cycle. This guide walks you through every real decision, from permits and layout to the finished surface, so you can build it once and build it right.
How to Build a Patio Attached to the House: DIY Guide

Nolan Lennox
7 Jul 2026
Permits, Code, and What Your HOA or Lender Might Say
Most municipalities require a building permit for an attached patio, especially if it involves a concrete slab, footings, or any structural connection to the house. The threshold varies by jurisdiction, but a common trigger is anything over 200 square feet or any structure that attaches to the dwelling. Call or visit your local building department (the Authority Having Jurisdiction, or AHJ) before you buy a single bag of concrete. Ask specifically about permits, required inspections, and setback requirements, because setbacks from property lines and easements affect how large and where your patio can go.
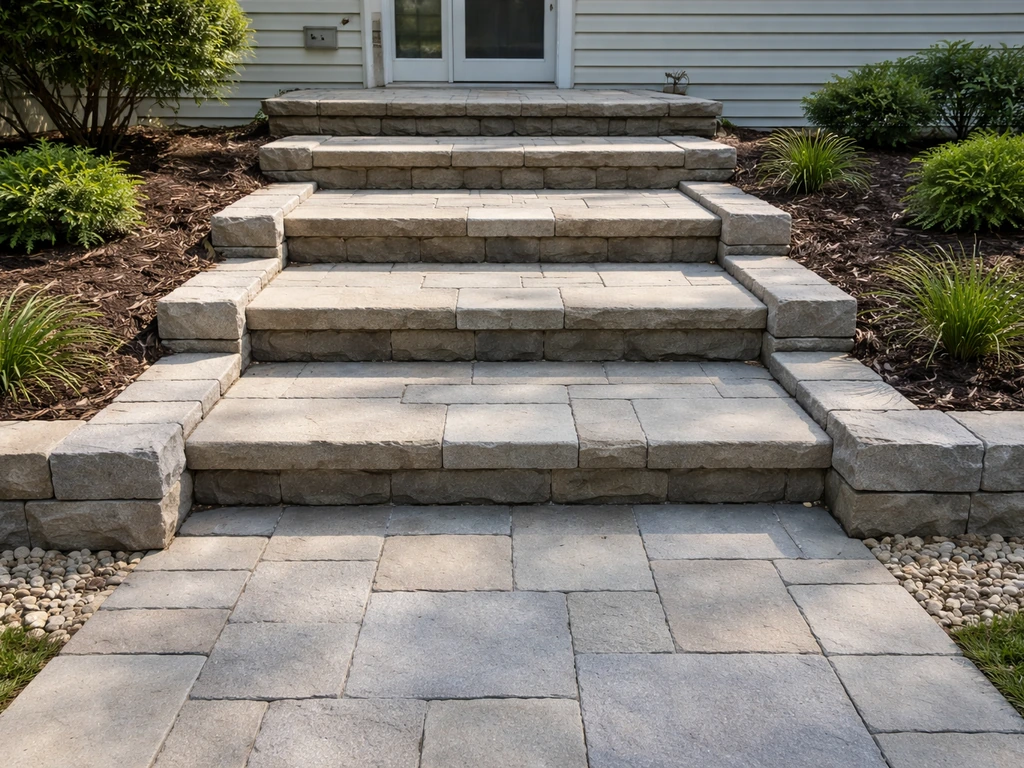
If your patio will have steps down to the yard (and most attached patios do), the IRC sets common baselines: maximum riser height of 7-3/4 inches, minimum tread depth of 10 inches, and handrails gripped between 34 and 38 inches above the tread nosing. Once your patio is laid out and the step dimensions are correct, follow a clear how to build patio stairs plan to finish the landing and treads safely.
Guardrails on elevated platforms need to be at least 36 inches high. Your inspector will check these, so knowing the numbers ahead of time saves you a failed inspection and a tear-out. If you plan to add stairs or steps to the patio later, those are their own planning consideration worth researching separately.
Beyond municipal code, check your HOA rules (some prohibit certain materials or colors) and your homeowner's insurance policy. An unpermitted attached structure can complicate a claim or a home sale. Permits feel annoying, but they also give you an inspector who catches problems before you bury them under a slab.
Site Planning: Layout, Size, Orientation, and Slope
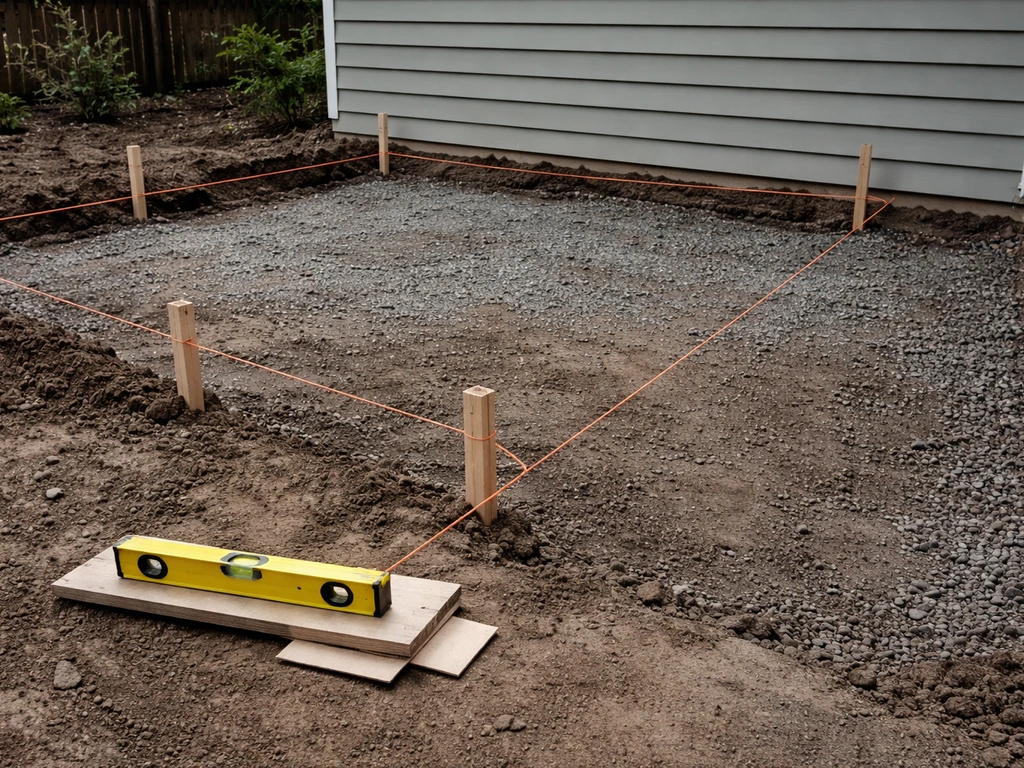
Before you break ground, spend real time thinking about how you will actually use this space. A 10x12-foot patio fits a small bistro table and two chairs, barely. A 16x20 gives you a full dining setup and a couple of loungers. Measure your furniture first, lay it out in the yard with stakes and string, and stand in it. Most people build too small and regret it. A good rule of thumb: if the space feels comfortable with your furniture in it, add 2 feet on each side for clearance and that is your minimum.
Orientation matters enormously. A south or west-facing patio gets hammered by afternoon sun in summer, which can make it unusable without shade. East-facing is pleasant for morning coffee but shady by afternoon. Walk your yard at different times of day and note where the shade falls from the house, trees, and any planned patio cover. If you plan to add a patio cover or pergola later, your slab dimensions need to account for post footings.
Slope is non-negotiable on an attached patio. You need a minimum 1/8-inch drop per foot of run away from the house, and 1/4 inch per foot is even better. On a 12-foot-deep patio, that means the outer edge sits 1.5 to 3 inches lower than the house side. This keeps rainwater moving away from your foundation instead of pooling against it. When you plan building steps from house to patio, keep the same drainage goal so water does not flow toward the foundation rainwater moving away from your foundation. Mark your slope with a transit or a long level and a tape measure before you dig, and recheck it at every stage of the build.
Designing the House Connection: Attachment Details and Movement Gaps
This is the part most DIYers get wrong, and it is the part that causes the most long-term damage. Your house foundation and your patio slab or base behave differently. The house sits on deep footings and barely moves. Your patio sits on a shallower base and will settle, shift, and expand and contract with temperature changes. If you pour concrete tight against your house with no gap, that movement cracks the slab and eventually cracks your foundation wall or forces water behind your siding.
The solution is an isolation joint, sometimes called an expansion joint or movement joint, running the full length of where your patio meets the house. This is not optional. For a concrete patio, this means placing a compressible expansion joint filler (a preformed fiber or foam strip, typically 1/2 inch wide) against the house before you pour.
After the concrete cures, you remove the filler to the correct depth, insert a backer rod, and seal over it with a flexible polyurethane or silicone sealant. For example, ACPA’s TB010-2018 bulletin describes typical isolation joint construction by removing the preformed expansion joint filler to the sealant depth, then using a backer rod above and sealing the joint in place [preformed expansion joint filler removed to sealant depth plus a backer rod above for a formed-in-place seal](https://www. acpa. org/wp-content/uploads/2019/02/ACPA-Jointing-Sealing-Tech-Bulletin-TB010-2018.
pdf). The standard joint design ratio is 2:1 width to depth, so a 1/2-inch-wide joint should have your sealant about 1/4 inch deep, with the backer rod sized slightly wider than the joint width to hold it snugly in place.
For paver patios, the same principle applies: leave a 1/2-inch gap between the last paver row and the house wall, fill it with a compressible foam backer rod, and seal with a flexible sealant rated for exterior masonry. Never fill this gap with mortar, polymeric sand, or any rigid material. Rigid fills crack and then hold water directly against your foundation.
Water management at the house connection also requires flashing. If your patio surface elevation comes within a few inches of the bottom of your siding or sheathing, you need step flashing or a continuous flashing membrane installed behind the siding before the patio goes in, so any water that migrates behind the surface drains out and away rather than into your wall assembly. This is a real waterproofing detail, not decoration. If your siding is already in place and you cannot install flashing properly without a major tear-out, keep your patio surface at least 8 inches below the top of the foundation wall and well below the sill plate.
Choosing Your Patio Material: What Actually Works for Your Budget
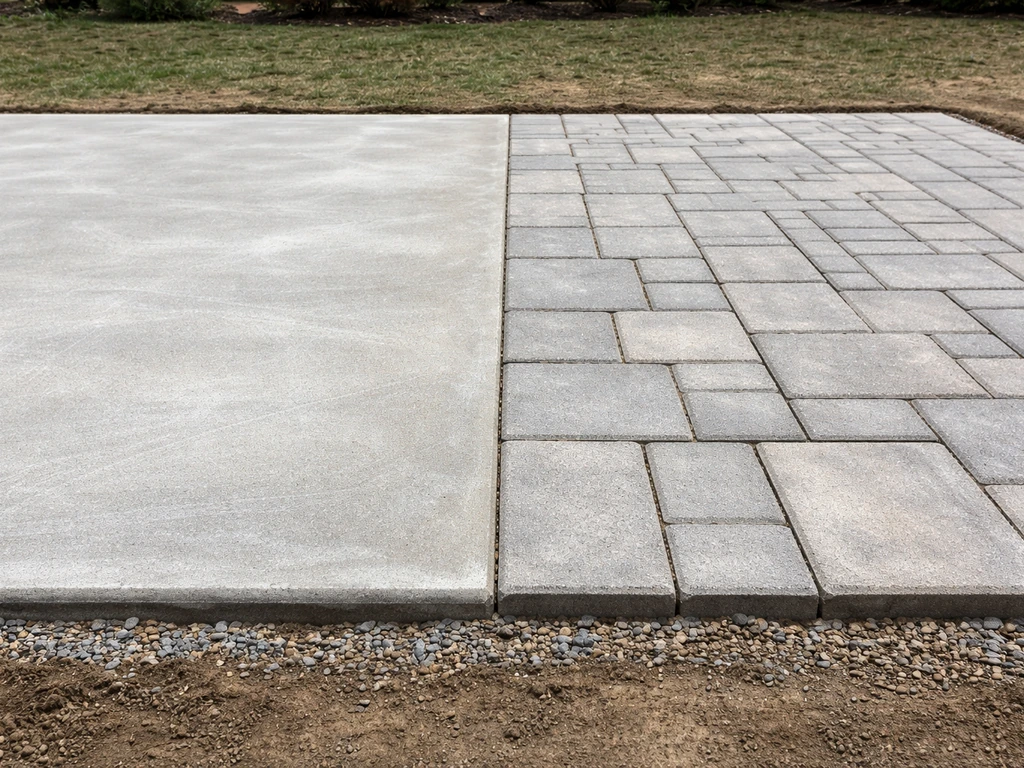
There is no single best material. Every option has real trade-offs in cost, skill required, durability, and looks. Here is an honest breakdown of what each one actually involves for an attached patio specifically.
| Material | Typical DIY Cost (per sq ft) | Skill Level | Longevity | Best For |
|---|---|---|---|---|
| Concrete slab | $4–$8 | Moderate to hard | 30–50+ years | Low maintenance, permanent patios |
| Concrete pavers | $8–$15 | Moderate | 25–40 years | DIY-friendly, repairable surfaces |
| Brick | $10–$18 | Moderate | 30–50+ years | Classic look, good drainage |
| Gravel/crushed stone | $2–$5 | Easy | Indefinite with maintenance | Low budget, fast install |
| Natural stone (flagstone) | $12–$25 | Moderate to hard | 40+ years | High-end aesthetics |
| Wood/composite decking | $15–$30 | Moderate | 15–30 years | Elevated or uneven terrain |
Concrete Slab
Poured concrete is the most permanent and lowest-maintenance option long term, but it is the hardest to DIY well. You need to nail your forms, your reinforcement layout, your pour timing, and your jointing all in the same day. ACI 302. 1R guidance recommends control joint spacing at roughly 24 to 30 times the slab thickness, so for a 4-inch slab, joints every 8 to 10 feet in both directions, with a maximum of about 15 feet regardless of thickness.
Miss your control joints or cut them too late and you get random cracks across the surface instead of controlled cracks at the joints. For an attached patio, concrete is the best choice if you want something you literally never have to think about again after it cures.
Concrete Pavers and Brick
Pavers are the most forgiving DIY option because you can lift and relay individual pieces if something goes wrong, and the drainage through the joints is built in. The system is straightforward: compacted aggregate base, about 1 inch of bedding sand screeded level, then pavers set and compacted in. Fill joints with polymeric sand, which stabilizes the joints and resists washout. Polymeric sand only works properly if the base is well-drained, the joint width matches the product specs (typically 1/8 to 3/8 inch depending on the paver system), and you follow the wetting and curing steps exactly. Cut corners on base prep or joint filling and the surface will shift and develop weeds within two seasons.
Gravel
Crushed gravel is the fastest and cheapest way to get a functional outdoor surface. It drains perfectly, is easy to install, and requires almost no skill. The downsides: it migrates over time, requires solid edge restraint, and is not pleasant to walk on barefoot or to set furniture on without pavers or stepping stones added. For an attached patio, gravel works well as a budget option or as a temporary surface while you plan something more permanent.
Wood and Composite Decking
A wood or composite deck attached to the house is technically a deck, not a patio, and requires its own structural framing, ledger attachment with proper flashing, and often a separate permit. That said, if your ground slopes away from the house significantly, a low-level attached deck platform is sometimes the more practical solution than trying to build a patio on a severe grade. The attachment to the house ledger is critical and must be flashed and waterproofed properly to prevent rot. If you are going down this path, the attachment and waterproofing details are more involved than a slab or paver patio.
Foundation and Base Prep: Getting This Right Means Everything
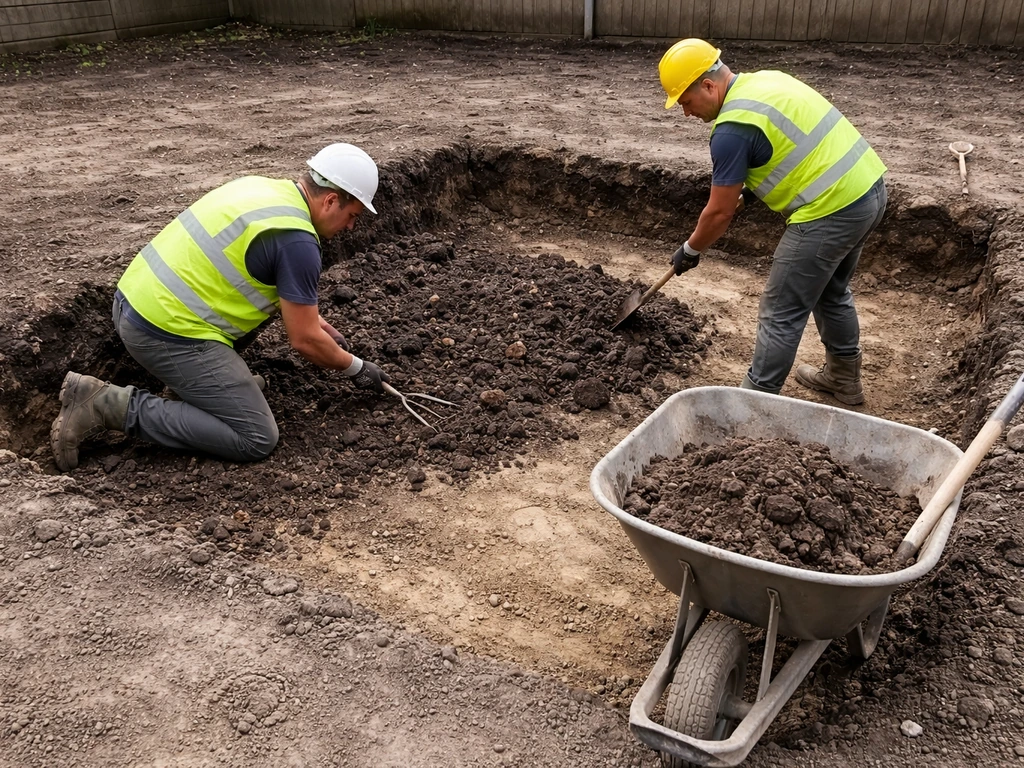
Base preparation is where most DIY patio failures originate. A beautiful surface on a bad base is just a slow-motion disaster. The base does three things: it distributes load evenly, it provides drainage, and it resists frost heave.
Excavation and Subgrade
Excavate all vegetation, topsoil, and organic material from your patio footprint. Organic soil compresses and decomposes, causing settlement. For a paver patio, excavate 8 to 10 inches below your finished surface elevation to accommodate base, sand, and paver thickness. For a concrete slab, excavate 8 to 12 inches below finished grade to allow for 4 to 6 inches of compacted base plus your 4-inch slab. Once you hit undisturbed native soil or subgrade, compact it with a plate compactor before adding any base material.
Aggregate Base Layers
Use compactable crushed aggregate (typically 3/4-inch minus or road base gravel), not rounded river rock, which does not compact well. Place the base in 3 to 4-inch lifts, compacting each lift thoroughly with a plate compactor before adding the next. A single deep pour of uncompacted gravel is one of the most common base mistakes. If your soil has a lot of fine particles or clay, lay a geotextile filter fabric on the subgrade before adding base gravel. This separates the layers and prevents fines from migrating up into your base over time, which causes settling and surface irregularity.
Frost Depth Considerations
In cold climates, frost heave is the enemy of any outdoor slab or paver surface. Water in the soil expands when it freezes, and if that expansion happens under your patio, it will lift and crack everything above it. The IRC requires exterior footings to extend below the local frost line, which varies dramatically by region (a few inches in the deep South, 48 inches or more in northern Minnesota).
InterNACHI’s footing inspection guidance explains that, in cold climates, exterior footings and foundation systems must extend below the local frost line, using IRC-related approaches such as checking Table R301. 2 and local depth determinations [The IRC requires exterior footings to extend below the local frost line](https://www. nachi. org/foundation-footings.
htm). Check your local frost depth through your building department or the IRC Table R301. 2. For slabs-on-grade that cannot go below frost depth, the best protection is thorough drainage in the base (so water does not accumulate there to freeze) combined with a deep, well-compacted aggregate base that allows frost to move through without building pressure.
Drainage
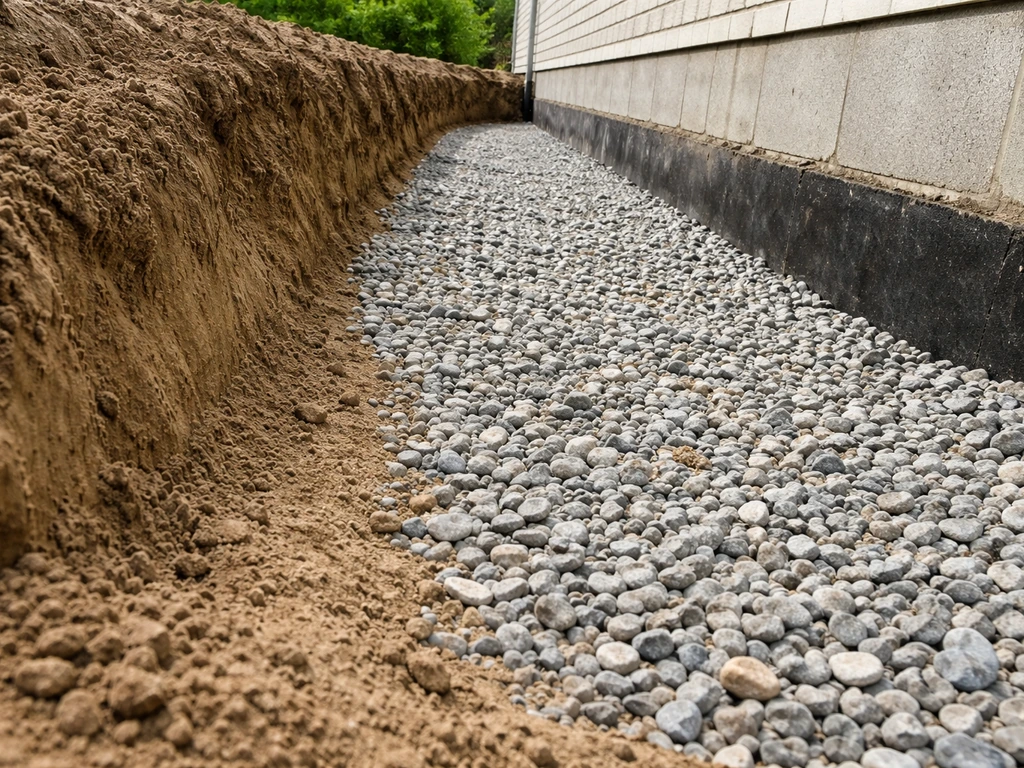
Drainage runs through every layer of this build. Your excavated subgrade needs to slope away from the house at 1/4 inch per foot minimum. Your aggregate base needs to carry water to the edges. Your finished surface needs that 1/8 to 1/4-inch-per-foot slope toward the yard.
Once your attached patio has the right slope away from the house, you can build patio steps that keep drainage moving in the same direction finished surface needs that 1/8 to 1/4-inch-per-foot slope toward the yard. . If your yard has a bowl or low spot at the outer edge of the patio, consider a perforated pipe drain at the edge tied to a dry well or drain outlet.
Standing water at the base of your patio is the root cause of most heave, cracking, and joint failure.
Step-by-Step Construction Workflow
Here is the full sequence for building a concrete paver patio attached to the house. Adapt the materials steps if you are pouring concrete instead, but the sequence and preparation work are the same.
- Mark your layout with stakes and string lines. Check for square using the 3-4-5 triangle method. Verify your setbacks and confirm permit requirements are met.
- Call 811 (or your local dig-safe number) to have underground utilities marked before any excavation.
- Excavate the full footprint to your required depth (typically 8 to 10 inches below finished paver surface, or deeper for concrete slab plus base). Remove all organic material.
- Compact the subgrade with a plate compactor. Establish your slope away from the house (1/4 inch per foot minimum) at the subgrade level.
- Lay geotextile filter fabric on the subgrade if your soil is clay-heavy or silty.
- Add compacted aggregate base in 3 to 4-inch lifts, compacting each lift before adding the next. Total compacted base depth: 6 inches for pedestrian paver patios, 4 inches for concrete slab (slab adds its own thickness on top).
- Install edge restraints on the three outer sides (a rigid plastic or aluminum paver restraint spiked into the base). Do not install edge restraint against the house; that side uses your isolation joint instead.
- For concrete slab: set your forms to final grade and slope, place rebar or wire mesh, place your preformed isolation joint filler against the house wall, pour and screed the concrete, cut control joints within 24 hours (or tool them wet), and cure for at least 7 days before foot traffic.
- For paver patio: screed a 1-inch bedding sand layer over the compacted base. Do not compact the bedding sand layer, just screed it flat and level at your target slope. Set pavers in your chosen pattern, working from the house outward. Use a rubber mallet and a level to keep surfaces even.
- Once all pavers are set, compact the full surface with a plate compactor (use a pad protector on the plate to avoid cracking pavers). This seats the pavers into the bedding sand.
- Spread polymeric sand over the surface and work it into all joints with a push broom. Remove excess from paver surfaces completely, then activate per the product instructions (typically a light mist application to set the binders). Follow the manufacturer's weather and temperature requirements exactly.
- Install your isolation joint seal against the house: clean the gap, insert backer rod sized slightly wider than the joint (for a 1/2-inch joint, use a 5/8-inch backer rod), and apply a flexible exterior-grade polyurethane or silicone sealant over the backer rod to a depth of approximately half the joint width (the 2:1 width-to-depth ratio). Tool the sealant smooth and allow it to cure fully before exposing it to foot traffic.
Finishing Touches: Edging, Joints, Sealing, and Keeping It Looking Good
Edging and Edge Restraints
Good edge restraint keeps your patio from spreading over time. For pavers, rigid plastic or aluminum edge restraint spiked into the compacted base every 12 inches is the standard. For concrete, your forms define the edge but you can add a soldier course of pavers or a steel edging strip at the perimeter for a cleaner finished look. Brick soldier courses set in mortar make a handsome edge for paver patios and add extra resistance to the perimeter drifting outward.
Control Joints and Sealant on Concrete
If you poured a concrete slab, your control joints need to be sealed to keep water and debris out of the crack plane. Use the same backer-rod-plus-flexible-sealant approach described for the isolation joint. Clean the joints thoroughly, vacuum out any debris, set your backer rod to achieve a 2:1 width-to-depth sealant profile, and apply a self-leveling polyurethane sealant for horizontal concrete joints. Re-inspect and re-seal control joints every 5 to 7 years, or whenever you see the sealant cracking, peeling, or pulling away from the joint walls.
Sealing Concrete and Pavers
Sealing is optional but extends the life and appearance of most surfaces. For concrete, a penetrating silane-siloxane sealer reduces water absorption and freeze-thaw damage. Apply it to clean, dry concrete at least 28 days after the pour. For pavers, a joint-stabilizing sealer locks in the joint sand and protects the paver surface from staining. Reapply sealer every 3 to 5 years depending on traffic and exposure. Avoid film-forming sealers on outdoor horizontal surfaces in freeze-thaw climates as they can trap moisture and peel.
Waterproofing at the House Connection
The isolation joint sealant is your primary waterproofing line at the house connection, and it needs annual inspection. Every spring, look for any gaps, cracks, or separation in the sealant bead. If you catch it early, cleaning out the failed section and re-applying sealant is a quick fix. If you wait until water is getting behind the patio surface and against your foundation, the repair gets much more expensive.
If you have stucco or EIFS siding that comes close to the patio surface, this detail is especially critical because water infiltration behind those systems is very difficult and costly to remediate. Because stucco systems are hard to repair after water intrusion, plan the patio cover posts and flashing so rain and runoff are kept out of the stucco wall assembly stucco or EIFS siding.
Ongoing Maintenance Checklist
- Inspect the isolation joint sealant every spring and re-seal any cracked or separated sections immediately.
- Check that the patio surface still slopes away from the house. Settlement can flatten your slope over years.
- For paver patios, re-sweep and re-activate polymeric sand in any joints that have washed out or show weed growth.
- Clean concrete or paver surfaces annually with a pressure washer to prevent organic buildup that retains moisture.
- Re-apply penetrating sealer to concrete every 3 to 5 years, or joint-stabilizing sealer to pavers on the same schedule.
- Watch for any signs of differential settlement: edges rising or dipping, gaps opening up at the house wall, or surface cracking near the house connection.
- Keep gutters and downspouts clear and directed away from the patio edge so roof runoff does not saturate the base.
An attached patio built on a solid, well-drained base with a proper isolation joint at the house is genuinely one of those projects that rewards the extra upfront care for decades. Get the connection and the drainage right, and everything else is surface-level maintenance. The most important next step is a 20-minute conversation with your local building department before you dig, so you know exactly what your permit requires and can plan your build around a passed inspection rather than a failed one.
FAQ
Do I need a gap between an attached patio and the house for both concrete and pavers, or is it only for concrete?
You need an isolation gap in both cases, but the details differ. For concrete, use a compressible expansion joint filler against the house, then seal after curing with backer rod plus a flexible exterior sealant. For pavers, leave the same concept (a compressible 1/2-inch gap at the house wall) and seal it with a masonry-rated flexible sealant. The key is keeping the connection non-rigid so slab or base movement does not transfer into the wall.
What’s the easiest way to confirm my patio won’t end up too high against my siding or foundation?
Before you finalize layout, measure from the finished patio surface you want to the bottom edge of siding, any sheathing, and the top of the foundation wall. If you cannot install flashing properly, keep the finished surface well below the foundation top (your article notes an at-least 8-inch difference as a practical safeguard). Doing this early prevents having to re-surface or re-excavate later.
How do I choose between control joints and isolation joints, and what mistake causes the most cracking?
Isolation joints handle movement between the patio and the house, they run along the house edge. Control joints manage cracking within the concrete slab itself and must be planned and placed on a schedule so cracks happen where you want. The common mistake is pouring tight to the house without an isolation joint, or missing the planned control joint spacing so cracks become random and harder to maintain.
Can I skip the isolation joint if I’m using pavers instead of concrete?
No. Even though pavers are more forgiving, you still need a compressible gap at the house. Without that gap, the paver system becomes effectively rigid against the structure, and you risk water intrusion through the interface and movement-related separation. Your article also notes never fill the gap with mortar or other rigid materials, because rigid fills can crack and hold water against the foundation.
How often should I inspect and maintain the sealant at the house connection?
Do a quick check at least once per year, ideally in spring after freeze-thaw. Look specifically for separation, gaps, or peeling of the flexible sealant bead, then clean and re-apply only the failed section when you catch problems early. Waiting until water is visible or you smell dampness around the wall makes repairs much more expensive.
What’s the proper way to build the slope if my yard already has a low spot near the house?
Match the patio’s finished slope away from the house, then address the low spot at the outer edge. If water tends to collect at the perimeter, add an edge drainage approach (such as a perforated pipe draining to a dry well or outlet). Without a pathway for water to leave the system, slope alone may not prevent standing water under joints and in the base.
How deep should I excavate when I want a concrete slab attached to the house?
Plan for extra depth beyond the slab thickness. Your article gives a practical guideline of excavating roughly 8 to 12 inches below finished grade to allow for about 4 to 6 inches of compacted base plus a 4-inch slab. The exact excavation depth should be adjusted based on your chosen slab thickness and base depth, then confirmed with a transit or level before you add aggregate.
What base material mistake leads to settlement or weeds on paver patios?
Using the wrong aggregate or skipping proper compaction. Round river rock does not compact well, and leaving organic material in the excavation causes future settlement. For pavers, also ensure your bedding and jointing match the system requirements (including correct joint width for polymeric sand), because incorrect base prep and joint sand habits lead to shifting and weed growth within a few seasons.
How do I prevent frost heave if I can’t place footings below the frost line?
If you cannot go below frost depth, the strategy becomes about keeping water from accumulating and using a deep, well-compacted aggregate base that can accommodate frost movement without building upward pressure. Your article emphasizes drainage and proper base design as the best protection in slab-on-grade scenarios. In freeze climates, this is usually more important than cosmetic surface choices.
Is a patio cover or pergola post footing treated differently than the patio slab itself?
Yes. If you plan posts on the patio, you need to account for their footings and how water will be managed around them. Your article notes that future cover plans affect slab dimensioning. Even if the patio itself is non-structural in your area, posts and roof connections can trigger separate permit or inspection requirements, so confirm this with the building department before pouring.
If I pour concrete now, how do I avoid random surface cracking later?
Use planned control joints, and install them on time. Your article explains typical spacing guidance for slabs based on slab thickness and notes that late or missed jointing leads to random cracks. Also ensure the joint sealing system is maintained so water and debris do not clog the crack plane.
Do I need to reseal concrete control joints, and does resealing trap moisture?
Resealing control joints helps keep water and debris out of the joint plane, but it must be done with the right sealant type for horizontal exterior concrete joints. Your article recommends backer rod plus flexible sealant profiles and re-inspecting and re-sealing every 5 to 7 years. When done correctly, flexible sealants accommodate movement rather than creating a rigid moisture trap.
What’s the biggest red flag that I should call my inspector or building department again before starting?
If you are planning any structural attachment, a large slab area, or changes in elevation that could affect flashing and setbacks. Your article stresses that permit thresholds vary and that setbacks and easements can limit patio size and placement. A quick call before you dig can prevent building an attached patio that later fails inspection or must be relocated.
Next Article
Building Steps From House to Patio: DIY Step-by-Step Guide
DIY how-to for building steps from house to patio, with layout, base prep, materials, construction sequence, and fixes f