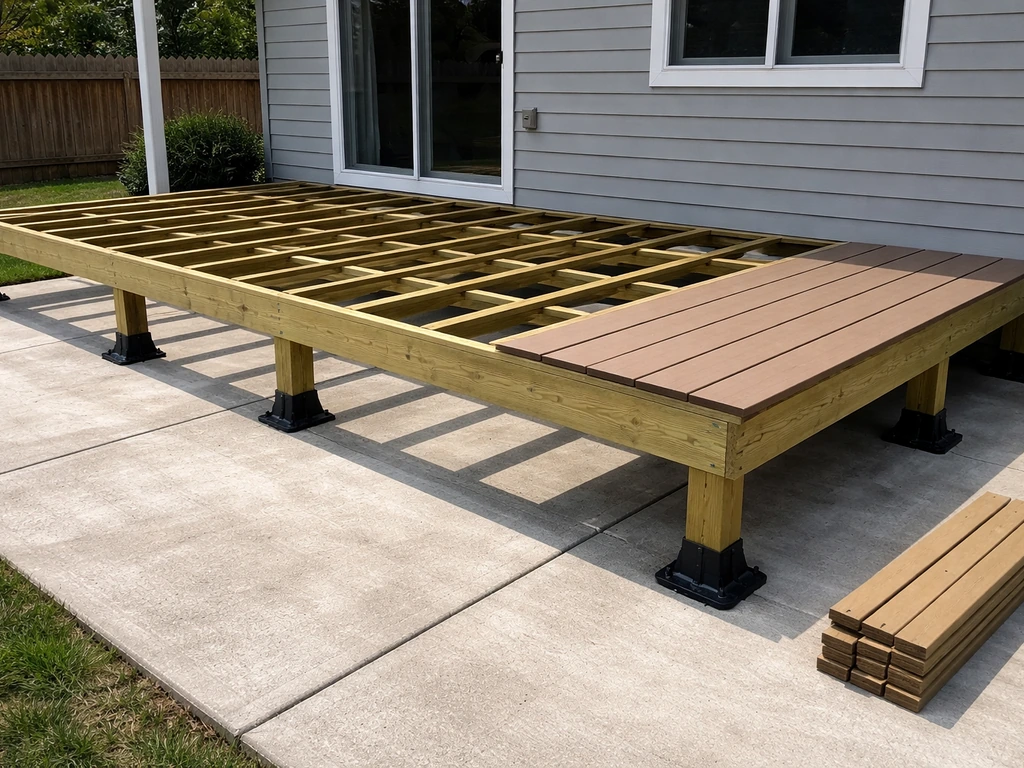
You can absolutely build decking on top of an existing patio, and in most cases it's faster and cheaper than tearing out what's already there. The basic approach is to either lay pressure-treated sleepers directly on a concrete slab or pavers and nail your decking to those, or to use adjustable screw-jack pedestals that level everything out without drilling a single hole. For gravel bases or situations where you need real height, a framed floating deck set over the patio is the way to go. Whichever method you use, the keys are: confirm your existing surface can handle the load, plan for drainage so water doesn't get trapped underneath, and check whether your project needs a permit before you buy a single board.
How to Build Decking on Top of a Patio: DIY Guide - Permits, Materials & Plan

Nolan Lennox
12 Jul 2026
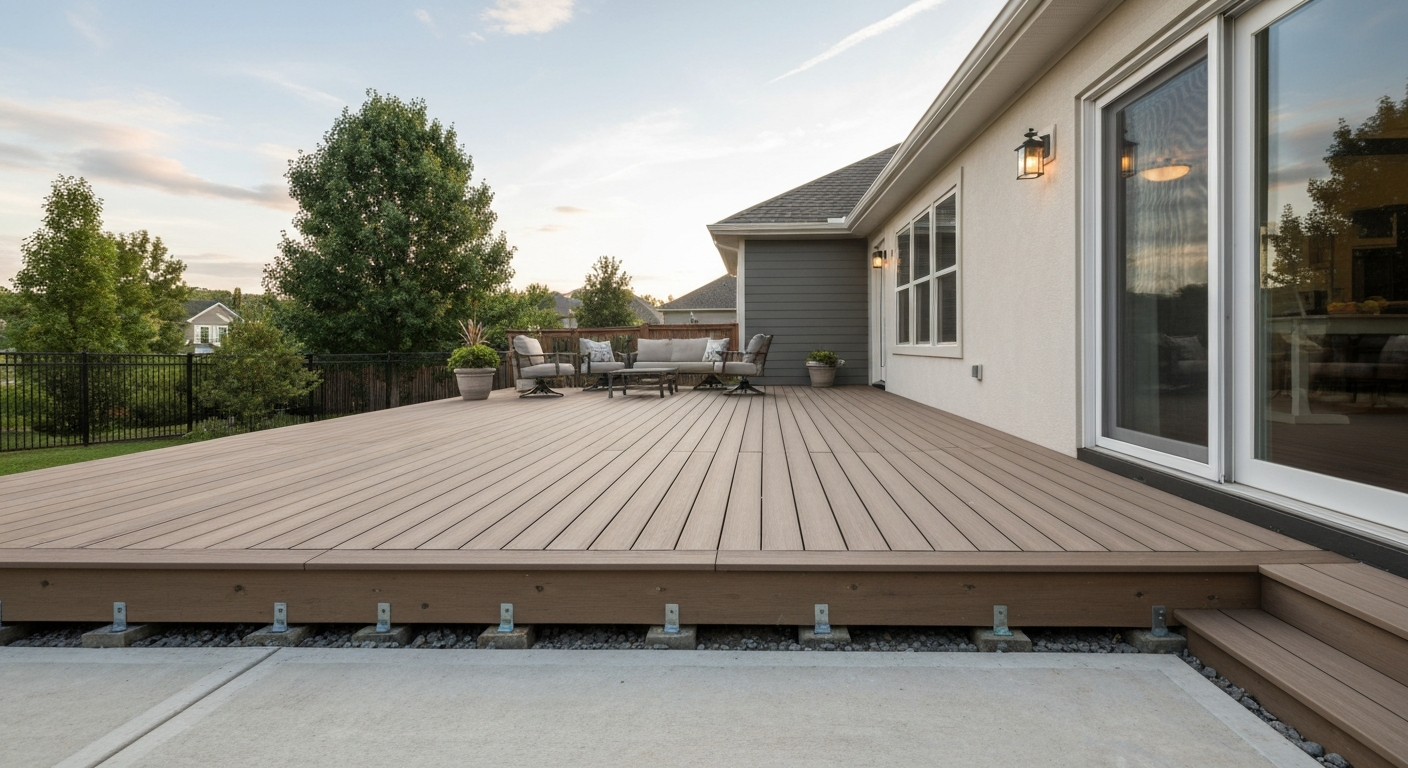
Who this guide is for and what you'll learn
This guide is written for homeowners who want to upgrade an existing outdoor surface without necessarily demolishing what's already there. Maybe you've got a cracked concrete slab that's structurally sound but ugly. Maybe you have a paver patio that's uneven. Maybe you're starting from gravel and want a real deck surface. Whatever the starting point, I'll walk you through the decision process, the permitting reality, how to assess your existing patio, the structural methods available, and full step-by-step build sequences for both a sleeper system and an adjustable pedestal system. For a single, focused walkthrough, see the section on how to deck over a patio for step-by-step instructions and layout tips. I'll also cover materials, fasteners, drainage, rough costs, and the maintenance issues that tend to bite people a few years after the build.
Deck over the patio or tear it out first?
This is genuinely the first question to settle, because the wrong choice costs you real money. The good news is the decision usually isn't complicated once you look at a few things honestly.
Decking over an existing patio makes sense when the slab or paver base is structurally intact, reasonably level (within about an inch or two across the span), and not heaving or actively cracking. You save the cost of demo and disposal, you keep a solid, ready-made base, and for a sleeper or pedestal system you can often finish the whole job in a weekend or two. The patio acts as your foundation, which is a legitimate structural advantage.
Removal makes more sense when the patio has serious structural problems: large settlement cracks (wider than 1/4 inch), significant frost heave, active drainage problems that are redirecting water toward your house, or when the combined height of the new deck surface would create a step-up that violates code or creates a tripping hazard at a door threshold. You should also consider removal if the existing surface raises the final deck height so much that you'd need guards and railings when you'd otherwise go without, since that adds meaningful cost and a permit trigger.
| Factor | Deck Over It | Remove First |
|---|---|---|
| Slab condition | Sound, minor cracks only | Heaving, structural cracks, active settlement |
| Level tolerance | Within 1–2 inches across span | More than 2 inches of variation |
| Drainage at house | Water drains away from structure | Water pools against foundation |
| Final deck height | Stays within 30 inches (often no guard needed) | Demo gives you a lower, cleaner start |
| Budget | Lower — no demo/haul-away cost | Higher upfront, cleaner long-term result |
| Timeline | Faster, often 1–3 weekends | Longer — add 1–2 days for demo |
| Starting surface | Concrete, solid pavers | Gravel, badly damaged slab |
One nuance worth noting: if you're dealing with a gravel base, a true sleeper or pedestal system isn't really an option, gravel shifts. In that situation you're either compacting and pouring a thin concrete pad first, or building a properly framed floating deck on concrete footings or ground-contact posts set above the gravel. That's a different project, closer to how you'd build a patio deck off the ground, but it's entirely doable for a confident DIYer.
Permits, inspections, and code triggers: your homeowner checklist
I know nobody wants to hear about permits, but skipping this step is how projects get stopped mid-build or create problems when you go to sell your house. Here's the honest version: permit requirements vary by municipality, but there are predictable triggers that apply in most jurisdictions following the International Residential Code (IRC). Run through this checklist before you buy materials.
- Height above grade: Most jurisdictions require a permit once any part of your deck surface is 30 inches or more above grade. Below 30 inches is often exempt, but confirm locally.
- Attachment to the house: Any ledger-attached deck almost always requires a permit regardless of height — the ledger connection is a structural and moisture-management concern that inspectors take seriously.
- Guard/railing requirement: Once deck height exceeds 30 inches above grade, IRC R312 requires a guard system capable of resisting a 200-pound concentrated horizontal load at the top rail. If your project triggers guards, it almost certainly triggers a permit.
- Electrical or lighting: Adding outlets, hardwired lighting, or a hot tub triggers electrical permits separately.
- HOA and deed restrictions: These operate independently of building codes. Check before you build.
- Impervious surface limits: Some municipalities restrict how much of your lot can be covered by impervious surfaces. A new concrete-topped deck counts.
- Structural loads: The IRC prescriptive deck tables assume a 40 psf live load plus 10 psf dead load (Table R301.5, R507 series). If your planned deck exceeds prescriptive spans or loads, you may need engineered drawings.
- Call your local building department: Describe what you're doing specifically — 'building a low sleeper deck over an existing concrete patio.' They'll tell you in five minutes whether you need a permit. Do this before anything else.
The practical reality for most sleeper or pedestal projects on low, freestanding decks is that you'll fall under the permit exemption threshold. But don't assume. A five-minute phone call protects you.
Assessing your existing patio before you build
Spend an hour on this assessment before committing to any method. What you find here will determine whether you can go straight to building or whether prep work is needed first.
Concrete slabs
Walk the entire slab and look for cracks. Hairline cracks (less than 1/8 inch wide, no vertical displacement) are almost always cosmetic and fine to build over. Cracks wider than 1/4 inch, or any crack where one side of the slab sits higher than the other, indicate movement, either from settling, frost heave, or a failed sub-base. Mark these with chalk and check whether the displacement is uniform (the whole section shifted, which may be stable) or random (ongoing movement, which is a problem). Also probe the edges of the slab where it meets soil, if the concrete is undermined or hollow-sounding when you tap it, that section may not support sleeper loads reliably. Use a long straightedge or a 6-foot level to measure how much the surface varies. If the high-to-low difference across any 10-foot run exceeds about 1.5 to 2 inches, note where it is, you'll need to shim your sleepers to compensate.
Paver patios
Pavers present a different challenge. Individual pavers can rock, tip, or sit at slightly different heights, creating an uneven base that's harder to shim consistently. Press down on each paver across the field, if multiple pavers rock, consider re-bedding the worst ones with polymeric sand or pulling up sunken sections and adding base material before building over them. If the paver base is well-compacted and mostly stable, a sleeper system works fine, you'll just shim each sleeper independently. One advantage pavers have over a solid slab is natural drainage between joints, which is great for moisture management under your deck.
Gravel bases
Gravel is not a suitable direct substrate for sleepers or pedestals. It shifts, compacts unevenly, and won't give you the stable bearing surface you need. Your options are: compact the gravel, add a layer of compactable base material, and pour a concrete pad (even a 3-inch skim slab works); install ground-contact-rated posts or footings through the gravel to undisturbed soil and frame a proper elevated deck above it; or rethink the scope. If your gravel patio is the starting point, this project is effectively building a new ground-level deck, not just overlaying an existing surface.
Drainage direction check
This is the single most important thing most DIYers skip. Run a hose on the patio for five minutes and watch where the water goes. You want it flowing away from the house at roughly 1/8 to 1/4 inch per foot of run (that's the minimum recommended slope for reliable drainage). If water pools at the house foundation or against a door threshold, you have a pre-existing drainage problem. Building a deck over it will make that problem invisible and worse. Address it before decking over anything.
Load, drainage and ventilation: what you need to account for
These three factors are the engineering backbone of a decking-over-patio project. Get them right and the build lasts decades. Miss them and you'll be pulling boards in five years wondering what went wrong.
Load
The IRC prescriptive standard for residential decks is 40 psf live load (people, furniture, snow) plus 10 psf dead load (the deck structure itself). A typical 6-inch concrete slab rated for residential use handles well over 100 psf, so for sleeper systems and pedestal systems on a sound slab, the existing patio is not your limiting factor. The limiting factor is usually your decking boards and the spans between sleepers or joists. Follow the IRC R507.6 joist span tables for your lumber species, size, and spacing. For composite decking, follow the manufacturer's maximum joist spacing requirements, many composites require 16-inch on-center joist spacing, and some allow 12-inch only in high-snow or heavy-use situations.
Drainage
When you lay decking over a solid surface, you create a dark, damp, enclosed space where water can sit. That's a rot and mold problem waiting to happen. The solution is threefold: maintain the existing slab's slope so water can still run off (don't level a sloped slab flat with your sleepers), leave consistent gaps between decking boards (typically 3/16 inch for composite, similar for wood), and build in a cross-slope or drainage path for water that does get in. For sleeper systems, run sleepers perpendicular to the slab's drainage slope so water can pass under them and drain off the low end. For pedestal systems, the gap under the deck boards is already your drainage path, but the slab still needs to slope a minimum of 1/8 inch per foot to move water reliably.
Ventilation
A trapped, unventilated space under your deck will cause even pressure-treated lumber to deteriorate faster. The perimeter of your deck should have open gaps or ventilated skirting so air can circulate. Some composite manufacturers explicitly require a minimum 1.5-inch clearance between the bottom face of composite decking and the substrate for this reason. Don't box in the perimeter with solid fascia that blocks airflow unless you've built in ventilation openings.
Structural options side by side
There are four realistic methods for building decking over a patio. Each has a different cost profile, skill level, and application. Here's how they compare.
| Method | Best for | Typical height added | DIY skill level | Rough cost (materials) | Permit likelihood |
|---|---|---|---|---|---|
| Sleeper system | Sound concrete or paver patio, low height desired | 2–4 inches | Beginner–Intermediate | $3–$6/sq ft | Low (if under 30 in.) |
| Adjustable pedestals | Flat or near-flat slabs, rooftop terraces, over membranes | 2–18+ inches (varies by pedestal) | Intermediate | $6–$14/sq ft | Low to moderate |
| Raised framed floating deck | Gravel bases, sloped sites, more height needed | 6–30+ inches | Intermediate–Advanced | $10–$20/sq ft | Moderate to high |
| Ledger-attached framed deck | Permanently attached to house, elevated above patio | Variable | Advanced | $12–$25/sq ft | High — almost always |
For most DIYers building over a concrete or paver patio, the sleeper system is the starting point: it's the least expensive, the most forgiving, and requires the least specialized knowledge. Decks.com, How to install decking over a concrete slab (sleeper & floating deck methods) provides practical installation notes recommending pressure‑treated sleepers on plastic shims or adhesive pads, options to fasten sleepers to the slab or leave them floating, and mentions some composite manufacturers require roughly 1½" clearance to the substrate when using sleeper systems Decks.com — How to install decking over a concrete slab (sleeper & floating deck methods). Adjustable pedestals are worth the extra cost if you have a rooftop, a membrane you can't penetrate, or a slab that's close to level but not perfect and you want a truly flat deck surface. The raised framed and ledger-attached options are separate projects in their own right, they involve footings, joist hangers, beams, and real structural calculations.
Sleeper system on concrete or pavers: step-by-step
This is the most popular DIY method for a reason. You're essentially building a low substructure directly on your existing patio and nailing decking to it. Here's how to do it right.
What you'll need
- Pressure-treated 2x4 lumber (ground-contact rated, UC4A or UC4B for sleepers in contact with concrete) — quantity based on your layout at 16-inch on-center spacing
- Composite, PVC, or pressure-treated 5/4x6 decking boards
- Plastic shims or composite shim material (not wood — wood shims will rot)
- Concrete screws (Tapcon or equivalent, 3/16-inch diameter, 2.25–3.25 inches long) for anchoring sleepers to slab
- Hammer drill and appropriate masonry bit
- Structural screws or stainless deck screws for decking boards — hot-dip galvanized minimum, stainless steel Type 304/316 preferred with ACQ or CA treated lumber
- Speed square, chalk line, tape measure, circular saw, miter saw
- 4-foot level and 10-foot straightedge
- Construction adhesive rated for masonry contact (optional, for floating installation on pavers)
- Joist tape or self-adhering membrane for tops of sleepers (protects both sleeper and composite decking underside)
Step 1: Lay out your sleeper direction
Sleepers run perpendicular to your decking boards. Decide which direction you want the decking to run, typically parallel to the longest house wall for visual width, or at a 45-degree angle if you want a diagonal pattern. Snap chalk lines on the slab at 16-inch intervals across the full patio. If your composite manufacturer requires 12-inch spacing for cantilevered ends or high-traffic use, adjust accordingly. Also snap border lines at each edge, you'll need sleepers at both perimeter ends and wherever a decking board end will land.
Step 2: Check for level and plan shimming
Lay a long straightedge or level diagonally across the slab in multiple directions and measure the gaps. Note the high and low spots. Your goal is to get the tops of all sleepers to within about 1/8 inch of a common plane. On a slab that slopes for drainage, you don't need to level everything dead flat, you just need the top face of the sleepers to be consistent. Use plastic shims under sleepers at low spots. A 1/4-inch or 1/2-inch shim at low points lets you achieve a consistent top plane. Don't use wood shims, they'll absorb moisture and compress over time.
Step 3: Install the sleepers
Set each sleeper on its chalk line, shim as needed, then drill through the sleeper and into the concrete with your hammer drill. Use concrete screws (Tapcon style) at 24-inch intervals along each sleeper, pre-drill with the correct masonry bit diameter per the fastener manufacturer's instructions, then drive the screws to snug. Don't overtighten or you'll crack the concrete surface. At paver patios, you have a choice: either drill through the paver into the base (which works fine on a stable base) or use a construction adhesive rated for masonry to leave the system floating. Floating works well on very flat patios; fastened is more secure and better for areas with strong lateral loads.
Step 4: Tape the sleeper tops
Before you lay any decking, apply a strip of joist tape (self-adhering butyl or similar) to the top face of every sleeper. This protects both the treated lumber and the underside of your composite or PVC decking from trapped moisture at the contact point. It's a small cost that meaningfully extends the life of both materials. Some composite manufacturers now actually require this in their installation guides.
Step 5: Install the decking boards
Start from the house wall and work outward. For composite or PVC decking, set your first board with its grooved edge facing the house (or use the appropriate starter clip per your brand's instructions) and leave a 1/4-inch gap between the board end and any wall or fascia. Use hidden fastener clips or face screws per manufacturer guidance. If face-screwing composite, use a countersink bit and the screws specified by the manufacturer, cross-threading or the wrong fastener can cause surface cracking. Maintain consistent gaps between board edges: typically 3/16 inch for most composite products when installed at temperatures between 40 and 70 degrees Fahrenheit. At higher installation temperatures, boards are already expanded so you can reduce the gap slightly; at lower temperatures, increase it per the manufacturer's temperature chart. The end gaps at sleepers (where a board end lands) are typically 3/16 to 1/4 inch, check your brand's published chart for long boards or hot climates. For pressure-treated wood decking, use 16d hot-dip galvanized nails or structural screws, leave 1/8-inch gaps, and expect some initial shrinkage as the wood dries.
Step 6: Install border and fascia
Once all decking is down, trim the outer edge with a chalk line and circular saw for a clean, straight edge. Install a fascia board (typically a decking board ripped to width or a dedicated fascia product) on the outer face of the perimeter sleepers. Leave ventilation gaps, don't seal the perimeter completely. If you're at a door threshold, verify the final deck height leaves no more than a 1.5-inch rise from the deck surface to the threshold, which is the typical code maximum for accessible door transitions.
Rough cost and time estimate (sleeper system)
| Item | Typical range (200 sq ft deck) |
|---|---|
| Pressure-treated 2x4 sleepers | $80–$150 |
| Composite decking (mid-range) | $600–$900 |
| Concrete screws, shims, tape | $40–$80 |
| Fasteners/hidden clips | $60–$120 |
| Fascia boards | $40–$80 |
| Total materials (200 sq ft) | $820–$1,330 |
| DIY labor time | 1–2 weekends (2–3 people) |
Adjustable pedestal system: step-by-step and layout tips
Pedestal systems use screw-jack plastic or composite pedestals that sit directly on the slab and support decking joists or direct-lay deck boards above them. The big advantages are that you don't drill into the slab, the system is fully reversible, and the adjustable height range (typically from about 1 inch up to 18 or more inches depending on the pedestal series) lets you create a perfectly level deck over a sloped or uneven slab. Products like the Buzon PB and DPH series are the commercial standard, but several other brands now offer pedestal systems for residential DIY use.
When pedestals make sense vs. sleepers
Use pedestals when: you cannot or don't want to drill into the substrate (rooftop terraces, membraned surfaces, rental properties), when you need a truly level deck over a noticeably sloped slab, when the slab is in excellent condition and you want a clean no-penetration installation, or when you might want to lift the boards in the future for access to drains or utilities below. The cost is higher per square foot than sleepers, but the installation can actually be faster once you get a feel for the adjustable-height mechanism.
Substrate requirements for pedestals
Pedestals concentrate load onto a small contact point, typically a 3 to 6-inch base plate. On a structurally sound concrete slab this is not a problem. However, if you're installing over a waterproofing membrane (on a rooftop deck or over a below-grade structure), you need to verify that any insulation or cover board under the pedestal has adequate compressive strength. Insulation rated for under-pedestal use (typically 40–60 psi compressive strength or higher) should be specified, standard EPS insulation is often not stiff enough. Consult the waterproofing membrane manufacturer before building this kind of assembly.
Step 1: Plan your pedestal grid
Pedestal spacing depends on whether you're supporting composite/wood joists (which then carry decking boards) or whether your decking boards are stiff enough to span directly between pedestals (direct-lay). For direct-lay composite decking, most manufacturers allow maximum 12 to 16-inch pedestal spacing depending on the product's thickness and stiffness, check your decking manufacturer's specs. For a joist-supported system, pedestals support 2x6 or 2x4 joists at the same spacing you'd use for a sleeper system (16-inch o.c. for most composites), and the pedestals under those joists can be at 4 to 6-foot intervals along each joist depending on load. Sketch your grid on paper first. Mark where every pedestal will land, including perimeter edge pedestals no more than 6 inches in from each board end.
Step 2: Establish a reference height and set your first pedestals
Find the highest point on your slab, this sets your minimum finished deck height. Use a laser level or a water level to mark that height reference around the perimeter of the deck area. At the high point, your pedestal will be at minimum height. At lower areas, you'll dial the pedestal up to match. Start at the highest corner, set a pedestal to minimum height, and lock it. Set a second pedestal at the opposite corner at the height needed to level with the first, using your laser level reference. Work your way across the slab setting pedestals on your grid, adjusting each one and checking level across neighbors with a straightedge. The threaded-stem mechanism on adjustable pedestals makes this much easier than shimming sleepers, small turns of the stem give you 1/8-inch adjustments.
Step 3: Set joists or direct-lay decking
For a joist-supported system, set your joists across the pedestal heads, check level in both directions, and confirm pedestal heights once more before any fastening. Most residential pedestal systems clip or seat the joist into the pedestal head, follow the specific pedestal manufacturer's guidance for how the joist is retained. For direct-lay systems, the decking boards go directly onto the pedestal heads with alignment tabs or spacers built into the pedestal keeping consistent gaps. Direct-lay is faster but requires a stiffer, thicker decking product, don't try to direct-lay standard 1-inch composite boards at 16-inch pedestal spacing.
Step 4: Install decking and maintain drainage gaps
Install decking the same way as the sleeper method for expansion gaps and fastening. The advantage of a pedestal system is that the gap between the deck surface and the slab (even if only 2–3 inches) is completely open for drainage and airflow. Maintain a minimum slope of 1/8 inch per foot on the underlying slab, the slab still needs to drain even if the deck surface above is level. On a rooftop or membrane situation, confirm all drains remain accessible and not blocked by pedestal bases.
Layout tips for gravel base transitions
On a gravel base, pedestals are not appropriate without a stable bearing surface underneath them. If you're determined to use a pedestal approach over gravel, you need at minimum a compacted crusher-run base and concrete pavers or a poured slab under each pedestal location. This adds significant work and cost; at that point a framed floating deck on proper footings is usually a better use of your time.
Rough cost estimate (pedestal system, 200 sq ft)
| Item | Typical range |
|---|---|
| Adjustable pedestals (approx. 50–80 needed) | $200–$500 |
| Composite decking (mid-range) | $600–$900 |
| Joists if used (2x6 PT) | $80–$150 |
| Fasteners and clips | $60–$120 |
| Total materials (200 sq ft) | $940–$1,670 |
| DIY labor time | 1–2 weekends |
Materials and fasteners: what to buy and what to skip
Choosing the right decking material isn't just about looks, it affects how you build, how much maintenance you sign up for, and how long the deck actually lasts. Here's the honest comparison from someone who has worked with all three types.
| Material | Cost (rough) | Maintenance | Lifespan | Best use case |
|---|---|---|---|---|
| Pressure-treated pine | $ (lowest) | Stain/seal every 1–3 years | 15–25 years with care | Budget builds, sleeper systems |
| Composite (Trex, TimberTech, Fiberon) | $$–$$$ | Occasional cleaning only | 25–30+ years | Low-maintenance priority, sleepers or pedestals |
| PVC decking | $$$ | Minimal — wipe clean | 25–30+ years | Wet climates, around pools |
| Hardwood (Ipe, Tigerwood) | $$$–$$$$ | Annual oiling or leave to gray | 40+ years | Premium look, high durability |
For fasteners, the rule is simple: if your lumber is pressure-treated with modern copper-based preservatives (ACQ, CA, MCA, which is nearly all ground-contact PT lumber sold today), your fasteners must be hot-dip galvanized to the appropriate ASTM standard or stainless steel. Type 304 stainless is acceptable in most climates; Type 316 is the right choice for coastal or high-humidity environments. Do not use bright, electroplated, or zinc-dipped screws with ACQ-treated wood, the copper in the preservative will corrode them within a few years. When mixing metals on the same deck (say, a stainless fastener going into a galvanized connector), be aware of galvanic incompatibility and try to keep the same metal families together.
Waterproofing and flashing where it matters
For a ground-level sleeper or pedestal deck over a concrete patio, traditional waterproofing membranes aren't necessary, your slab is already waterproof enough, and open drainage gaps handle what gets through the boards. However, flashing becomes critical at two specific points: where the deck meets the house, and at any ledger-to-masonry connection.
If your deck abuts the house wall without a ledger (the common situation for a freestanding sleeper deck), install flashing at the gap between the decking boards and the siding. This means a z-flashing over the top of the decking edge or a self-adhering membrane flashing that directs water away from the house wall and the gap between deck and foundation. Water infiltration at this joint is the most common cause of rot and moisture damage in decking-over-patio projects, even when the deck is technically 'freestanding.'
For any ledger attached to a masonry or concrete foundation wall, the flashing requirement is non-negotiable. Flash the top and both sides of the ledger with a continuous drainage path to the outside. Common professional practice is: set the ledger on standoffs to create a small gap, run self-adhering flashing from the sheathing down behind the ledger and out to a drip edge, and seal all penetrations. For ledger anchoring into concrete or CMU, use wedge anchors, epoxy/chemical adhesive anchors, or through-bolts appropriate for the substrate, select anchor type and spacing per the manufacturer's ICC-ES evaluated load data and follow their installation instructions exactly, including hole depth and diameter. Building America Solution Center (PNNL), porch/deck attachment and common failure modes (ledger corrosion/decay and flashing importance) notes that for ledger attachments to masonry or concrete you should verify substrate condition and thickness, select ICC‑ES‑approved adhesive or mechanical anchors, space anchors per the ledger/engineer or IRC tables, and flash the ledger top and sides to provide a continuous drainage path and prevent trapped moisture at the house connection Building America Solution Center (PNNL) — porch/deck attachment and common failure modes (ledger corrosion/decay and flashing importance).
Stairs, railings, and transitions
For low sleeper decks (under 8 inches of total rise), a single step down to grade is usually handled with a pre-made step unit or a simple built-up frame with decking on top. If your deck surface is more than 30 inches above grade at any point, IRC Section R312 requires a guard system capable of resisting a 200-pound concentrated load at the top rail, this is a hard code requirement and not optional. Design guards so the top rail is at least 36 inches above the deck surface (42 inches for commercial applications). Balusters must be spaced so a 4-inch sphere cannot pass through.
At door thresholds, the most common problem is a height mismatch. Building over a patio adds 2 to 4 inches of height to the surface, and if the existing patio was already close to the door threshold, you might end up with zero step-down or an upward step into the house. Both are code and safety issues. Measure the existing threshold-to-patio distance before finalizing your sleeper or pedestal height, and make sure your finished deck surface is at or below the door threshold, with a maximum step of 1.5 inches being the general accessible design target.
Tools checklist
- Circular saw with carbide-tipped blade (for decking and sleepers)
- Miter saw (highly recommended for clean end cuts)
- Hammer drill with SDS+ chuck and appropriate masonry bits
- Cordless drill/driver and impact driver
- Chalk line and marking chalk
- Tape measure (25-foot minimum)
- 4-foot level and long straightedge (8–10 feet)
- Laser level (useful; not strictly required for simple sleeper jobs)
- Speed square
- Pry bar and hammer
- Safety glasses, hearing protection, work gloves
- Knee pads (you will be glad you have them)
Maintenance and what to watch over the years
Composite and PVC decks over concrete need the least attention, annual cleaning with a deck cleaner to remove algae and tannin stains is usually all that's required. The bigger maintenance concern for any decking-over-patio project is what's happening underneath. Every two to three years, shine a light under the perimeter of the deck and look for: debris buildup blocking drainage gaps (leaves, dirt, mulch), evidence of standing water on the slab surface, any soft spots or discoloration on the sleepers or joists suggesting moisture retention, and any movement in the fastener connections to the slab. Clear debris annually from the drainage gap and reseal any perimeter flashing that has lifted or cracked.
For pressure-treated wood decks, plan to apply a water-repellent stain or sealer within 6 months of installation (once the PT lumber has fully dried, it arrives wet from the treatment process) and every 1 to 3 years depending on climate and sun exposure. Inspect for checking (splitting along the grain) and replace any badly checked boards before they become a splinter hazard.
Troubleshooting common problems
- Deck boards cupping or buckling: Almost always caused by either insufficient expansion gaps at installation, or excessive moisture differential between top and bottom face. Check that the underside is ventilating and that gaps at ends are correct per the manufacturer's temperature chart.
- Squeaking when walking: Usually a sleeper or pedestal that has shifted slightly, or a fastener that's worked loose. Pull back the nearest board, check the sleeper connection to the slab, re-drive any loose concrete screws, and re-secure.
- Standing water on slab under deck: Check that drainage gaps at the perimeter are clear and that the slab slope is intact. If the slab has settled to a flat or reverse slope, you may need to add a small drainage channel or route water with a perimeter drain.
- Composite boards showing white haze or surface staining: Typically efflorescence from moisture under the boards wicking through concrete. Improve sub-deck ventilation and drainage. Some composite manufacturers have specific cleaners for this.
- Concrete screws pulling out or stripping: Means either the hole was drilled too deep/wide, the concrete is spalling, or you over-torqued the screw. Use a larger-diameter screw or switch to an adhesive anchor at that location.
- Soft spots in pressure-treated sleepers: If you find soft, punky wood in a sleeper, it means moisture has been trapped. Remove and replace the affected sleeper, address the drainage cause, and apply preservative end-cut treatment to all new cuts.
Thinking about the reverse: replacing a deck with a patio, or converting between the two
This article is focused on adding decking over an existing patio, but the question sometimes runs the other direction: what if you have a deck now and want a patio instead, or want to replace a worn deck with a fresh patio surface? Those are genuinely different projects. Replacing a deck with a patio involves removing the deck structure down to grade, then building a patio base (compacted gravel, sand bed, or concrete) and laying your patio surface over it. Turning a deck into a patio typically means the deck framing stays in place and you're either overlaying patio materials on the existing structure or filling in beneath it. For practical steps and comparisons, see the guide on how to turn a deck into a patio. These are related but distinct workflows that deserve their own treatment, and they're worth exploring if your project is evolving in that direction.
FAQ
When should I build decking over an existing patio vs removing the patio and building a conventional framed deck?
Choose decking-over-patio when the existing substrate (concrete, pavers, or compacted gravel) is structurally sound, level or can be reasonably shimmed, and you want a lower-cost, faster option that preserves elevation. Remove the patio and build a framed deck when: the patio slopes or drains poorly and cannot be corrected; the slab is cracked or unstable; you need an elevated floor height to match doors or code-required clearances; you need extensive under-deck storage or utilities; or local code/inspector requires a new footings system. Inspect slab thickness, cracks, and drainage; if in doubt, consult local building department or a structural pro.
What permitting and inspection steps should I follow before starting?
Contact your local building department to confirm permit requirements—most deck work (attached decks, structural changes, or increased floor area) requires a permit. Provide plan drawings showing loads, ledger/attachment details, joist spans, guard/stair details, and footing/anchorage methods. Schedule inspections for footings/piers (if new), ledger or anchor installation, framing (if building an elevated framed deck), and final. Use IRC R507 and local amendments for span, ledger fasteners, and guard load requirements (40 psf live load prescriptive basis). Keep product technical data (anchors, pedestals, composite instructions) on site for inspector review.
How do load and code requirements affect my design?
Design to handle a 40 psf live load + typical dead load assumptions (IRC prescriptive basis) for residential decks; use IRC R507 joist/beam span tables or manufacturer span tables to size members and spacing. Guards must resist a 200 lb concentrated load at the top per code. If you deviate from prescriptive tables (long spans, heavier loads, unique conditions), get engineered calculations. When attaching to a house, follow ledger fastener schedules in IRC R507.2 or use approved structural screws/anchors with manufacturer tables that map to those requirements.
What are the main structural methods to build decking over a patio?
Common methods: 1) Sleeper system — pressure-treated sleepers (e.g., 2x4 on edge) attached or held by adhesive/concrete screws to a slab; good for concrete/pavers. 2) Floating deck on pedestals — adjustable pedestals supporting joists or sleepers over a membrane/slab; allows drainage and height adjustment. 3) Raised attached framed deck — build a traditional framed deck elevated on posts with independent footings or attached ledger to masonry/concrete using approved anchors. Choose based on existing surface, desired height, drainage needs, and code/permit requirements.
How do I attach a ledger to concrete or masonry if I want an attached deck?
Use through-bolts, mechanical expansion anchors (e.g., wedge anchors), or adhesive/epoxy anchors (threaded rod set in adhesive) sized and spaced per anchor manufacturer approvals and local code. Verify concrete thickness and condition before selecting anchors. Drill holes to the specified depth, clean per manufacturer steps, and install anchors to their torque/spec. Always flash the ledger top and edges with corrosion-resistant flashing to create a continuous drainage path and prevent trapped moisture at the house connection.
What are adjustable pedestals and when should I use them?
Adjustable pedestals (screw-jack pedestals) support an elevated wearing surface over slabs or membrane assemblies and allow height adjustment and drainage gaps beneath decking/pavers. Use them when you need a drained surface over waterproofing, want to preserve the existing slab, or desire a level walking surface independent of minor slab irregularities. Ensure the slab or protection board beneath has adequate compressive strength for pedestal loads per manufacturer guidance.
Next Article
Can You Build a Deck Over an Existing Patio? DIY Guide
Learn if you can build a deck over a patio and how to assess structure, moisture, clearance, framing, and costs.