You can absolutely compost on a patio. The simplest setup is a sealed tumbler or a lidded bin in a shaded corner, fed with a 50/50 mix of kitchen scraps (greens) and dry browns like cardboard or wood shavings, kept as moist as a wrung-out sponge, and turned every few days. Do it right and there are no bad smells, no pests, and you get finished compost in as little as 4 to 8 weeks. If you are specifically trying to remove grass for a patio, the goal is to kill the lawn and remove roots or sod before you build up the base how to remove grass for a patio.
How to Compost on a Patio: Step-by-Step DIY Guide

Nolan Lennox
25 Jun 2026
Best patio composting setup options

The biggest decision is which container to use. On a patio you are working with limited space, close neighbors, and usually a hard surface underneath you, so an open pile is off the table. Here are the four setups that actually work in this situation.
Countertop pail (collection only)
A small 1 to 2 gallon countertop pail with a tight lid is not a composter by itself. It is a collection bucket you use inside to gather scraps, then empty into your main outdoor bin daily or every other day. Keep the lid on at all times. That lid is the single most important thing for keeping fruit flies out of your kitchen, and it also keeps odors from building up between trips outside.
Sealed tumbler
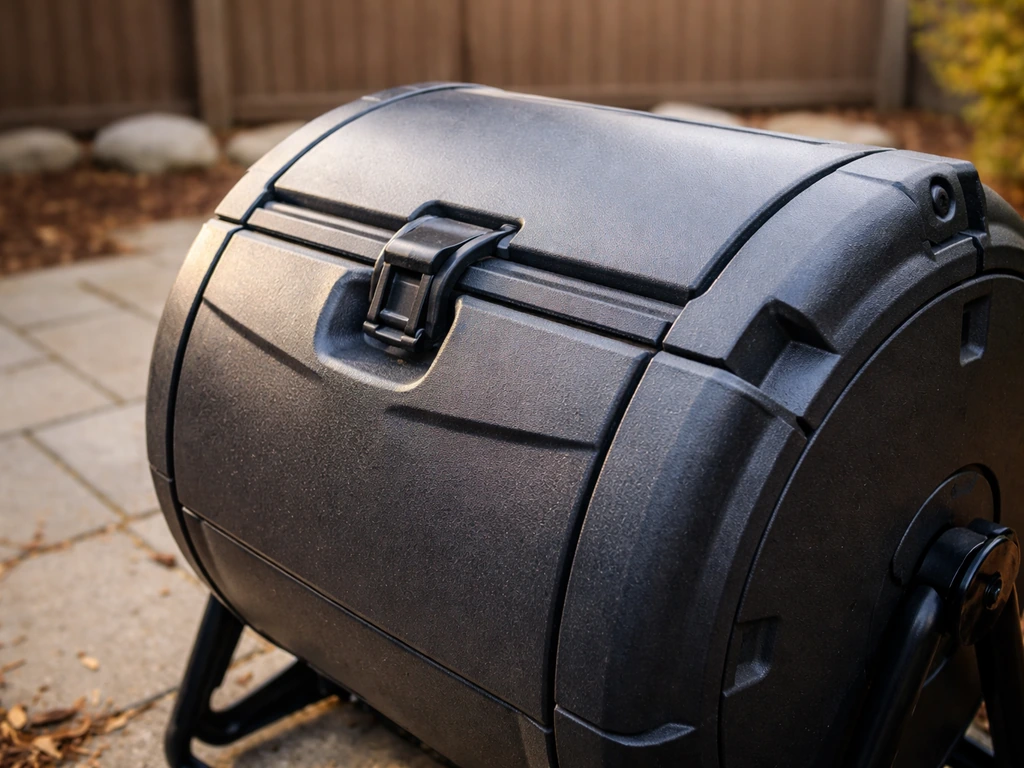
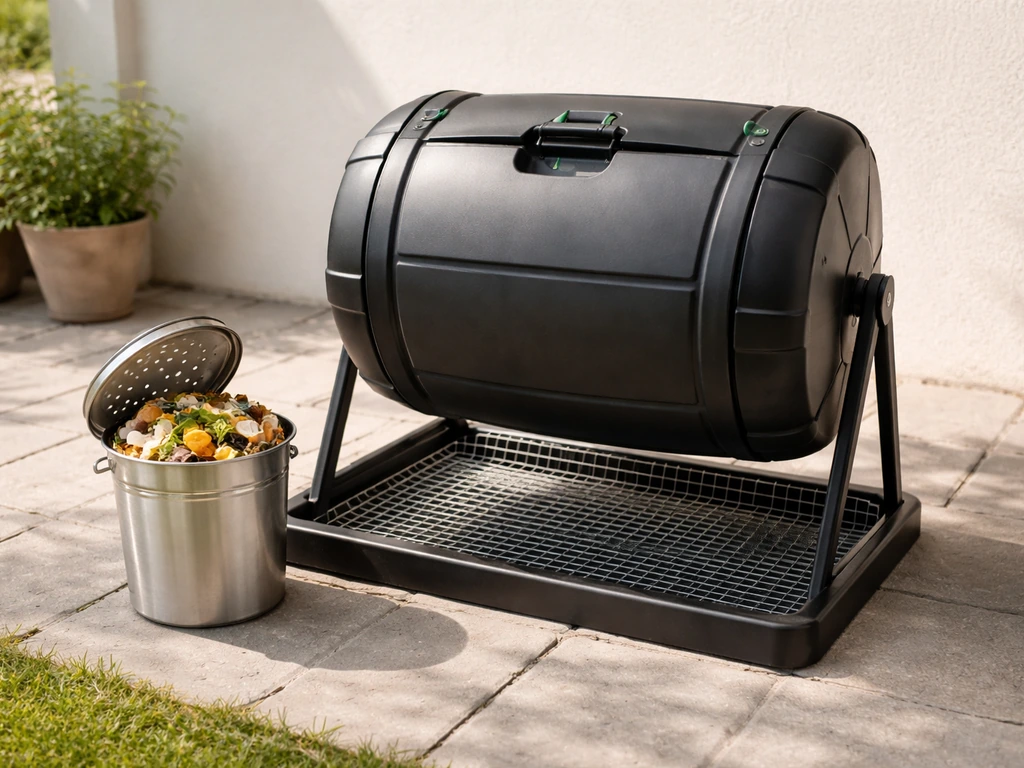
A tumbler is the go-to for patio composting, and for good reason. The sealed drum keeps pests out, controls odor, and sits cleanly on a hard surface without leaking into your patio material. For a household of 1 to 4 people, look for something in the 35 to 50 gallon range. Units in the 15 to 25 gallon range work if you are mostly composting kitchen scraps and occasional plant trimmings, but they fill up fast. The main drawback is cost and capacity, since tumblers are generally smaller than open bins, but for a patio that tradeoff is usually worth it.
Lidded bin or animal-resistant bin
A sturdy lidded compost bin with a reinforced lid and bottom baffles works well if you want more capacity without the tumbler price tag. Look for bins specifically rated as animal-resistant or animal-proof, since a standard plastic bin with a loose lid will get investigated by raccoons and squirrels. These bins can usually sit directly on a patio surface, though adding a layer of hardware cloth underneath gives an extra barrier against rodents burrowing in from below.
Bokashi system
Bokashi is a fermentation method rather than true composting. You layer food waste with bokashi bran (a wheat bran inoculated with beneficial microbes) in a sealed bucket, let it ferment for about 10 to 14 days, then bury or transfer the pre-composted material. The big advantage is that it accepts meat, dairy, and cooked food that a regular bin cannot.
The catch is that it produces a liquid leachate you need to drain every 2 to 3 days, and if the seal is not tight the smell can get overpowering. For a patio-only setup, bokashi works best as a complement to a tumbler rather than a standalone system. For more on making a mulch patio, start by choosing the right base and laying mulch evenly for consistent coverage patio-only setup.
| Setup | Best for | Capacity | Pest control | Approximate cost |
|---|---|---|---|---|
| Countertop pail | Indoor scrap collection only | 1–2 gallons | Good with tight lid | $10–$30 |
| Tumbler (35–50 gal) | Most patio composters, 1–4 people | 35–50 gallons | Excellent | $80–$200 |
| Lidded animal-resistant bin | Higher volume, lower budget | 50–100+ gallons | Very good | $40–$100 |
| Bokashi bucket | Meat/dairy inclusion, small batches | 5 gallons per bucket | Excellent (sealed) | $30–$60 |
For most patio DIYers, a countertop pail indoors paired with a 35 to 50 gallon tumbler outside is the sweet spot. It is tidy, pest-resistant, and produces finished compost reliably without much fuss.
Where to place it on your patio and what gear you need
Placement matters more than most people expect. You want a spot that is easy to reach from the kitchen door so that emptying the countertop pail does not feel like a chore. At the same time, keep the bin away from seating areas and out of direct afternoon sun. A shaded corner works best because heat is fine for composting but excessive sun dries out the pile too fast and can warp plastic bins over time. If you are in an HOA community, a corner tucked against a fence or wall usually keeps things discreet.
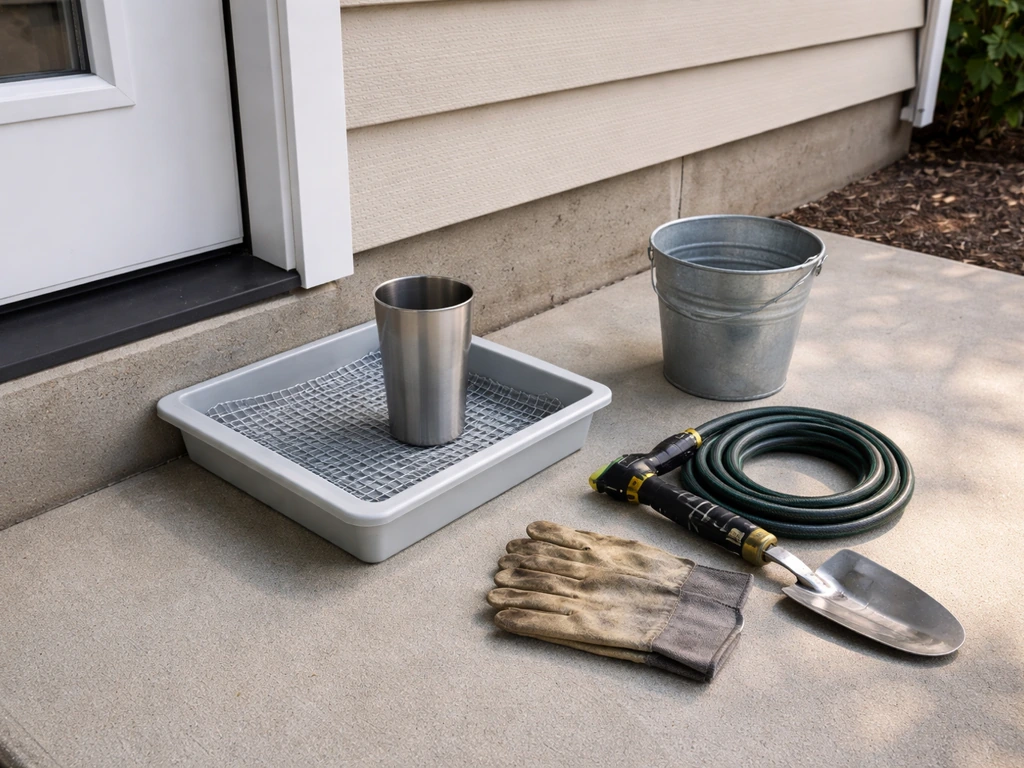
On a concrete or paver patio, lay a piece of hardware cloth or a plastic drip tray under the bin to catch any leachate and block rodents from chewing up from below. This also protects your patio surface from staining, which matters especially if you have invested in nice pavers. If you are thinking about how your patio edges meet the surrounding yard, that is the same drainage awareness that comes up when you are working on things like separating patio from grass or turning grass into a patio area. When you are separating patio from grass, make sure water still drains away from the compost bin and does not funnel toward the yard.
Here is the gear list that actually gets used:
- A lidded countertop pail (1–2 gallons) for scrap collection indoors
- A tumbler or lidded animal-resistant bin (35–50 gallons for most households)
- A hand trowel or small garden fork for turning and scooping
- A spray bottle or small watering can for moisture adjustment
- A hardware cloth mat or drip tray for under the bin
- A bag of dry browns to keep on hand (wood shavings, shredded cardboard, or dry leaves)
- Optional: a half-inch mesh sifter screen for finished compost
What to compost (greens vs browns) and what to avoid
Composting basically works by balancing carbon-rich materials (browns) with nitrogen-rich materials (greens), then keeping the pile moist and aerated so microbes can break everything down. Think of greens as the fuel that fires up biological activity and browns as the structure that keeps air moving through. Without enough browns, greens pile up, go anaerobic, and start to smell. Without enough greens, the pile just sits there doing nothing.
Aim for roughly 50% greens and 50% browns by volume as a starting target. You can adjust from there based on how your pile behaves, but that ratio gets you in the right zone quickly.
Good greens to add
- Vegetable and fruit scraps (peels, cores, rinds)
- Coffee grounds and paper filters
- Tea bags (check they are not plastic-sealed)
- Fresh grass clippings (in thin layers only)
- Plant trimmings and spent annuals from patio pots
- Eggshells (not technically green but always welcome for calcium and structure)
Good browns to add
- Shredded cardboard and paper (no glossy coating)
- Dry fallen leaves
- Wood shavings or untreated sawdust
- Paper bags, paper towels, and newspaper (shredded)
- Dried plant stems from patio container plants
What to keep out
- Meat, fish, and bones
- Dairy products and eggs (other than shells)
- Oily or greasy foods and cooked food with heavy seasoning
- Pet waste
- Diseased plants
- Anything with synthetic coatings, inks, or plastic
Meat, dairy, and oily foods are the main odor and pest triggers in a patio bin. Leave them out and you eliminate most of the problems people run into before they even start. If you want to compost those items, a bokashi bucket is the right tool for that job.
One thing worth mentioning on particle size: smaller pieces break down faster because microbes have more surface area to work with, but shredding things too finely can reduce airflow and slow things down. Chop or tear scraps into pieces roughly 1 to 2 inches across and you will hit a good middle ground.
Step-by-step: start your patio compost bin or tumbler
- Position your bin or tumbler in a shaded patio corner, set on a hardware cloth mat or drip tray. If you have a tumbler, lock the legs into a stable position on a flat surface.
- Add a 3 to 4 inch base layer of dry browns (shredded cardboard or dry leaves) to the bottom of the bin. This creates airflow and absorbs early moisture.
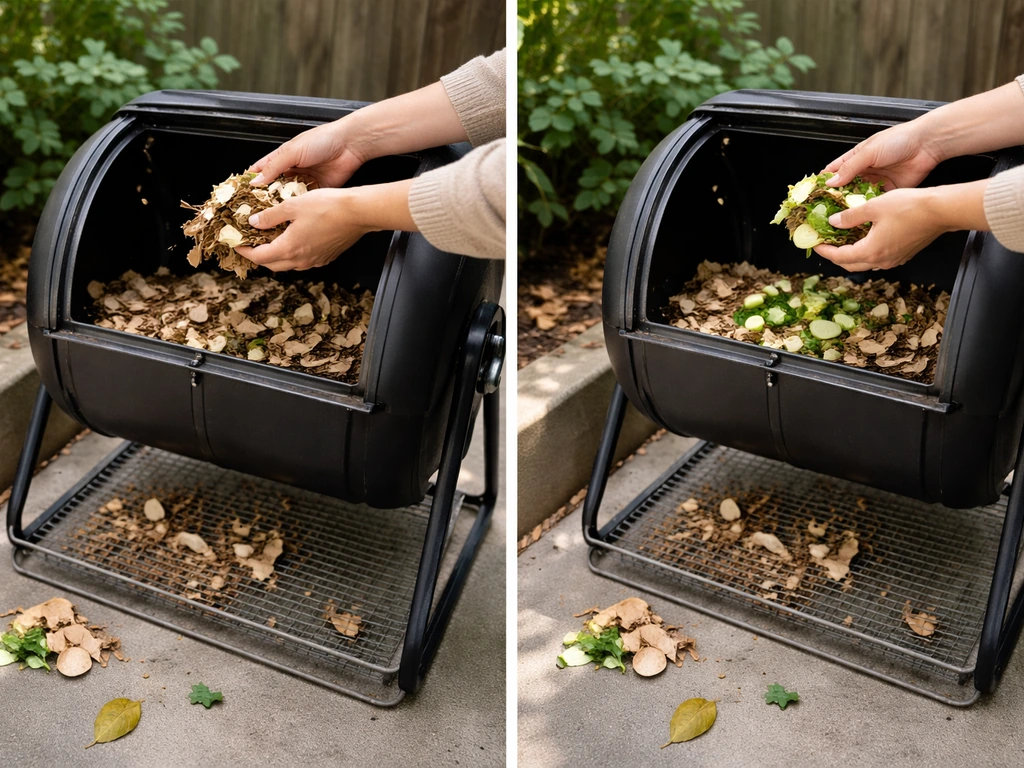
- Add your first batch of greens on top. A good starting load is one full countertop pail of kitchen scraps spread over the browns.
- Lightly mist the pile with water if the scraps seem dry. Fresh fruit and vegetable scraps usually bring enough moisture on their own.
- Cover greens with another layer of browns at roughly equal volume. This is your standard "sandwich" pattern: browns, greens, browns.
- Close the lid. For a tumbler, give it 5 to 10 rotations right away to mix and introduce air.
- Add scraps from your countertop pail every 1 to 2 days, always adding a matching layer of browns on top. If you run out of natural browns, torn-up cardboard from packaging works perfectly.
- After the first week, check moisture and temperature. A pile that is working should feel warm inside and smell earthy, not sour or sulfurous.
Under warm patio conditions, an active tumbler can produce finished compost in 4 to 8 weeks. A lidded bin takes a bit longer, closer to 8 to 12 weeks, because you are not turning it as aggressively. Once you have composting down, you can use the finished material to help turn grass into a clean, durable patio-ready base patio compost bin or tumbler. Both timelines assume you are keeping the brown-to-green ratio balanced and managing moisture.
Ongoing care: moisture, aeration, and turning
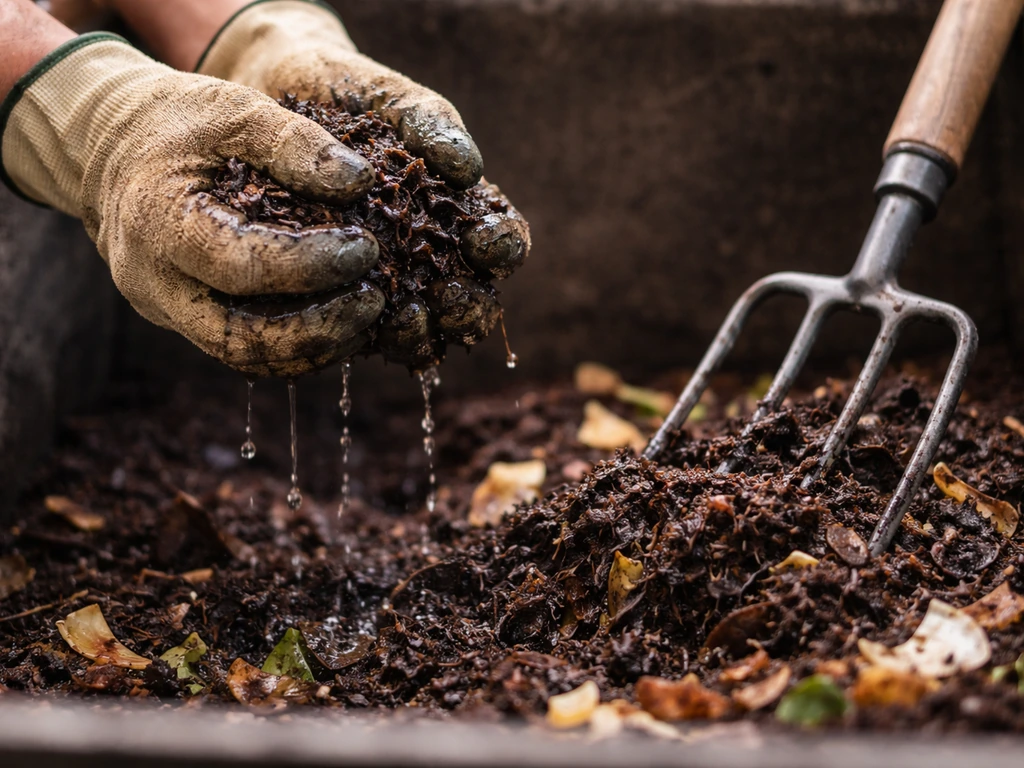
The wrung-out sponge is the universal benchmark for compost moisture: pick up a handful of compost and squeeze. If water streams out, it is too wet. If it crumbles and falls apart, it is too dry. You want it to hold its shape and feel damp but release barely a drop. That is the sweet spot where decomposition happens fastest.
Aeration is the other key variable. Oxygen-hungry microbes are doing all the breakdown work, and they suffocate in a dense, waterlogged pile. Turning the pile introduces fresh oxygen, re-engages those microbes, and helps control odor at the same time. For a tumbler, spin it 5 to 10 times every 2 to 3 days. For a lidded bin, use a garden fork to turn and mix the contents about once a week, pulling material from the outside toward the center.
In hot summer conditions on a patio, check moisture more often. Black bins especially absorb heat and can dry out faster than you expect. A quick spritz from a watering can every few days is usually enough to keep things right. In cooler weather, composting slows down significantly below about 55 degrees Fahrenheit but does not stop entirely. Keep adding material and it will pick back up when temperatures rise.
Troubleshooting odors, pests, and slow compost
Rotten egg or sulfur smell
This is the classic sign of an anaerobic pile: not enough air getting through, usually because it is too wet or packed too tightly. Fix it by turning the pile immediately, then adding a generous layer of coarse browns like wood shavings or torn cardboard to open up air pockets. Avoid adding more greens until the smell clears.
Ammonia smell
Ammonia means too much nitrogen, too many greens without enough carbon to balance them. Add browns and mix them through the pile thoroughly. This usually clears up within a day or two.
Fruit flies and gnats
Fruit flies almost always trace back to the indoor countertop pail, not the outdoor bin. Keep the lid on that pail at all times, clean spills immediately, and empty it every day rather than every few days. Outside in the bin, burying fresh scraps under a layer of browns every time you add material is the most effective prevention. If flies are already present, add wood shavings on top of any exposed greens and they will die out within a week.
Rodents or larger pests
If something is getting into your bin, the first check is always the lid. A reinforced animal-resistant lid that latches properly is worth the investment on a patio where raccoons and squirrels are likely nearby. Make sure you are not adding meat, dairy, or cooked food, which are the main attractants. A hardware cloth layer underneath the bin blocks burrowing from below on ground-level patios.
Pile is too wet
Add dry browns, turn the pile to introduce air, and if you can, leave the lid cracked slightly on a non-rainy day to let some moisture escape. In a tumbler, just keep turning it more frequently with added browns mixed in.
Pile is too dry and not breaking down
Mist the pile lightly, turn it, and add some greens if you have mostly been adding dry material. A dry pile is essentially dormant. Moisture activates the microbes again and you should see heat build back up within a couple of days.
Slow decomposition overall
The most common causes are low temperature, pieces that are too large, imbalanced ratios, or insufficient turning. Chop materials smaller, confirm your green-to-brown ratio is close to 50/50, increase turning frequency, and check moisture. All four of those variables working together is what drives fast breakdown. If you are in cooler months, be patient and keep feeding the pile.
Using finished compost on patio plants and storing the rest
How to tell when it is ready
blank" rel="noopener noreferrer">Finished compost is dark brown, crumbly, and loose. It smells earthy, like fresh soil after rain, not like rotting food. You should not be able to identify any of the original materials you put in. To turn that compost effort into lawn growth, you can learn the right steps for how to grow grass on patio using good soil prep, proper seed choice, and consistent watering. If you still see recognizable scraps or the pile smells sour, it needs more time. Give it another week or two, turn it once, and check again.
Sifting and applying compost to patio containers
For patio container plants, run finished compost through a half-inch mesh sifter to remove any large pieces that did not fully break down. Those chunks can go right back into your active bin. Use the sifted compost as a top dressing on potted plants, mixing the top inch or so of potting mix with a layer of compost, or blend it into potting mix at roughly 20 to 30 percent compost by volume when repotting. It is a genuinely noticeable improvement for herbs, flowers, and vegetables in containers.
Storing leftover finished compost
If you have more finished compost than you can use immediately, store it in a sealed bucket or bag in a shaded spot on the patio. Keep it slightly moist but not wet. Compost stored too soggy can go moldy, and compost that completely dries out loses some of its biological activity. Check it every week or two and give it a stir. Stored correctly, finished compost stays useful for several months.
Patio housekeeping notes
Wipe down the outside of your bin periodically, especially after adding scraps, to remove residue that can attract insects. If your tumbler or bin has a drainage hole or drip tray, empty and rinse it regularly. Leachate from a compost bin can stain concrete and pavers if left to sit, so dealing with it promptly protects your patio surface.
Using that finished compost well is what ties your patio cleanup and improvement together, which is also part of the process of turning a driveway into a patio how to turn a driveway into a patio. At the end of each composting season or when you clean out a finished batch, give the inside of the bin a rinse with a garden hose and let it dry before the next cycle.
FAQ
My patio compost seems stuck, how can I speed it up when it’s not heating or breaking down?
If your patio bin isn’t producing finished compost within the expected window, the fastest fix is to check moisture and airflow together. Reassess the wrung-out sponge test, then turn more aggressively (for a tumbler, several more spins every 1 to 2 days), and add coarse browns (torn cardboard or wood shavings) to prevent a packed, anaerobic mass.
What should I do if I accidentally put too many scraps in at once on my patio?
A small amount of “wrong” material usually won’t ruin a patio system, but repeated additions do. For the most stubborn clogs, remove or sift out any undigested chunks, then return everything else to the active bin with added browns and more frequent turning, so airflow is restored before adding new greens.
How do I stop a bad smell in my patio compost without starting over?
Start by reducing the source of smell: make sure meat, dairy, and cooked/oily foods are excluded from tumblers and lidded bins. If the odor is already sour or rotten, stop adding greens, turn immediately, and cover exposed scraps with a thick layer of browns (wood shavings or dry shredded cardboard).
Can I compost mostly leaves or paper on a patio, and will it still work?
Yes, you can compost paper-only yard waste like leaves, but keep it balanced with kitchen scraps. Dry leaves work best when chopped or mulched so they break down reliably, and they usually need more nitrogen input to avoid stalling, especially in cooler patio conditions.
Do I need a tray under my compost bin on a concrete patio, or is it optional?
For patio setups on concrete or pavers, always plan for leachate control even if your bin has a drip tray. Use hardware cloth or a plastic drip tray under the bin and empty and rinse it regularly, because pooled leachate can stain patio surfaces and create an ongoing odor source if it overflows.
Is it okay to use patio compost directly in paver joints or along patio edges?
Don’t mix compost into paver cracks or permeable joints. Use compost as a top dressing in containers or on soil areas, and keep the bin placed on a stable, non-rooting surface (like intact pavers). This prevents nutrients and moisture from concentrating in unwanted places.
I see fruit flies near the outdoor bin, how do I find the real source?
Fruit flies typically originate from the indoor countertop pail, even if you see them outdoors. Keep the indoor bucket lidded at all times, line it if needed for easy wipe-downs, empty it daily, and bury every outdoor addition under browns to prevent exposed scraps from attracting insects.
Raccoons or squirrels keep investigating my patio compost, what’s the best next step?
If you have pests that are getting in, upgrade the barrier first. Confirm the lid fully latches, add or reinforce an animal-resistant bottom, and do not rely on “loosely covered” food waste. Also stop feeding meat and dairy, since those attract the most persistent scavengers.
Can I use my patio compost for houseplants, or is it too strong?
You can, but choose the right fraction. Run finished compost through a half-inch sifter, then mix sifted compost into potting mix at a modest rate (about 20 to 30 percent by volume) to avoid heavy, waterlogged soil that can harm container plants.
How can I tell the difference between “almost done” compost and truly finished compost?
If your compost looks dark and crumbly but still smells unpleasant or you can identify scraps, it is not ready yet. Give it more time, turn once after adding a fresh layer of browns, then check again after another 1 to 2 weeks before using it as a top dressing.
Will patio composting still work in winter, and what changes should I make?
If you want to compost in winter on a patio, the goal is slower fermentation, not instant results. Keep adding material and browns, but reduce turning frequency, and expect a longer timeline when temperatures stay below about 55°F. When it warms up again, increase turning and moisture checks to restart activity.
Next Article
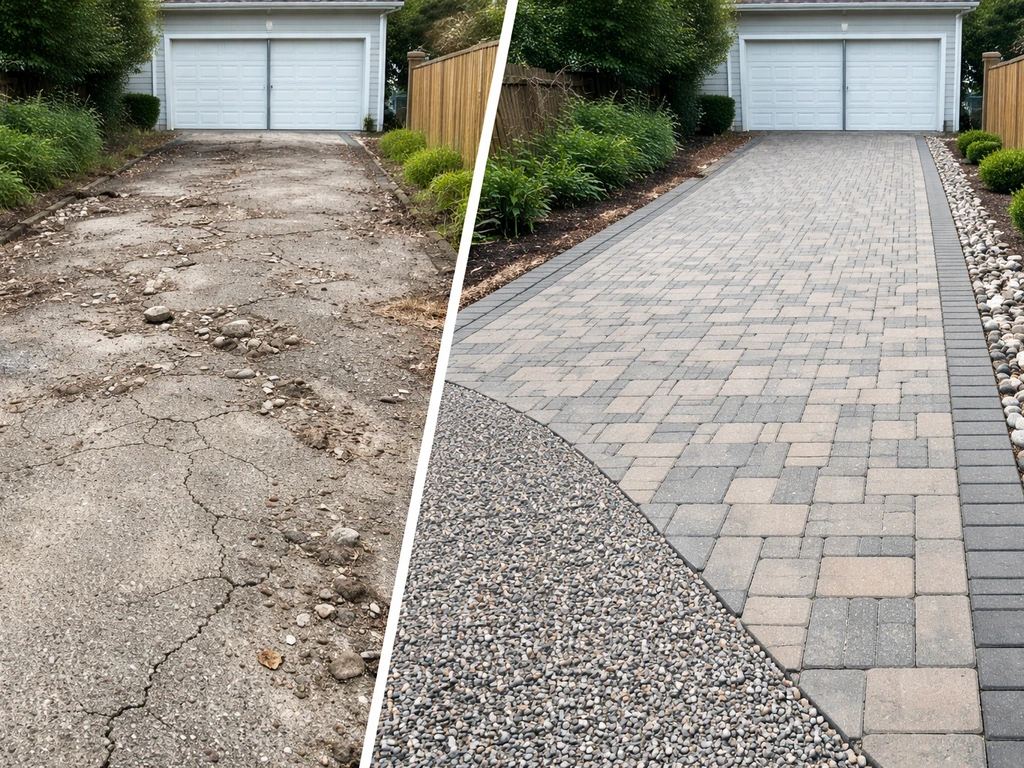
How to Turn a Driveway Into a Patio: DIY Steps
DIY guide to convert a driveway into a patio: drainage, base, leveling, surface options, costs, and common mistakes.