You can grow real grass on a concrete patio, but not by just throwing down seed and hoping for the best. Grass roots need soil, oxygen, and moisture management that bare concrete simply cannot provide. The practical solution is to build a growing medium on top of the slab using contained raised areas, planter trays, or turf tile systems with at least 4 to 6 inches of quality soil mix.
How to Grow Grass on a Patio: Step-by-Step DIY Guide

Nolan Lennox
21 Jun 2026
Do that right, and you can have a lush green surface. Skip it, and you'll have dead patches and a frustrated afternoon. This guide walks you through every step, from prepping the slab to mowing your finished lawn. If you are specifically working on how to turn a driveway into a patio, you can apply the same slab prep and contained soil setup to get grass (or turf) to perform reliably This guide walks you through every step.
Reality check: what's actually possible on a concrete patio
Let's be upfront about something: grass does not root into concrete. That smooth, sealed slab offers zero anchorage for turfgrass roots, no nutrient exchange, and almost no oxygen movement. Turfgrass root health depends on soil temperature, moisture, and oxygen availability, and a sealed concrete surface blocks all three from working together properly. So if you've seen photos of green grass flowing across a patio and thought you could just roll out sod directly on the concrete, that image is almost certainly built on a raised system or a well-contained soil layer.
That said, growing grass on top of a concrete patio is genuinely achievable for a DIYer with the right approach. If you’re still aiming for a true patio lawn, focus on the specific steps in how to turn grass into patio rather than trying to grow turf directly from bare concrete.
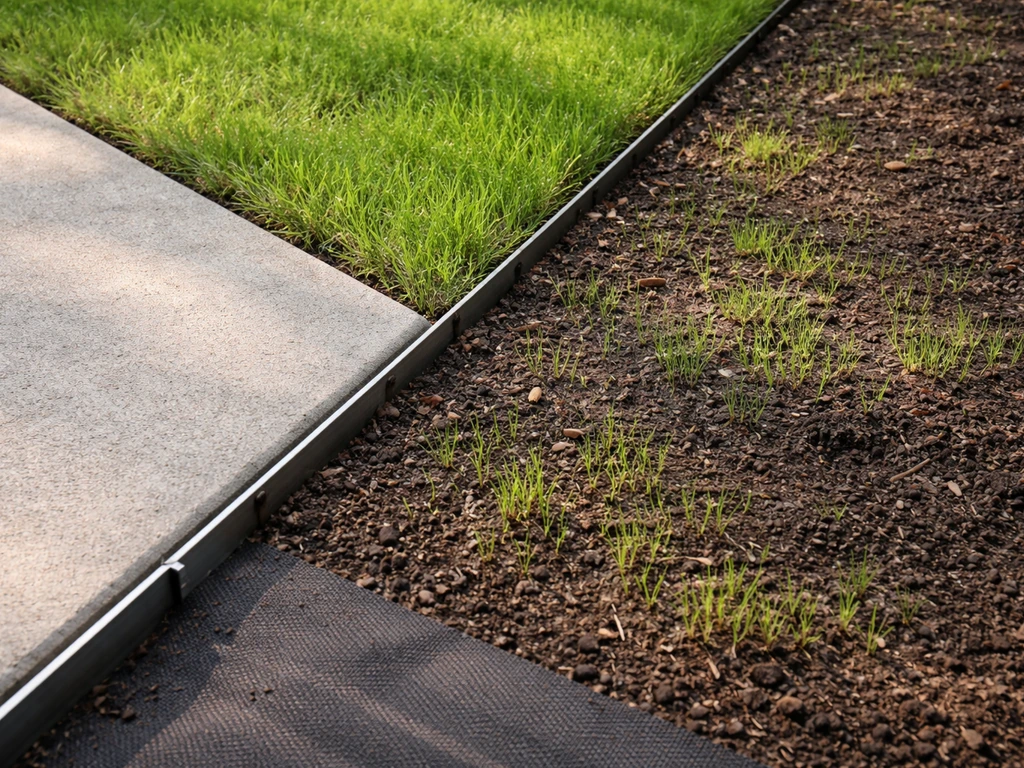
Your two main paths are: building a contained growing area over the slab (using edging, a weed barrier, and a deep enough soil mix) or installing a modular turf tile system that handles the drainage and root zone for you. There's also artificial turf if your space has serious shade, high foot traffic, or drainage limitations that make real grass impractical. Each option has a different cost, effort level, and long-term result.
The section on choosing your grass system below will help you figure out which one fits your situation.
One more thing worth knowing before you start: if your goal is actually to convert your entire patio back to a lawn, or to blend a grass area with an existing paved space, that's a related but different project. If what you actually want is to separate patio from grass, plan a clear edge and contained transition so the lawn area and paved area stay distinct without encroachment. This guide focuses on growing grass on top of the existing slab, not removing the slab or turning a grass area into a patio.
Prep the concrete slab first (don't skip this)
Concrete prep matters more than most people expect. Even if you're laying soil on top, a dirty, cracked, or oil-stained slab will cause problems with drainage, mold, and settling. Give yourself an hour or two here and you'll save yourself weeks of troubleshooting later.
Cleaning and degreasing
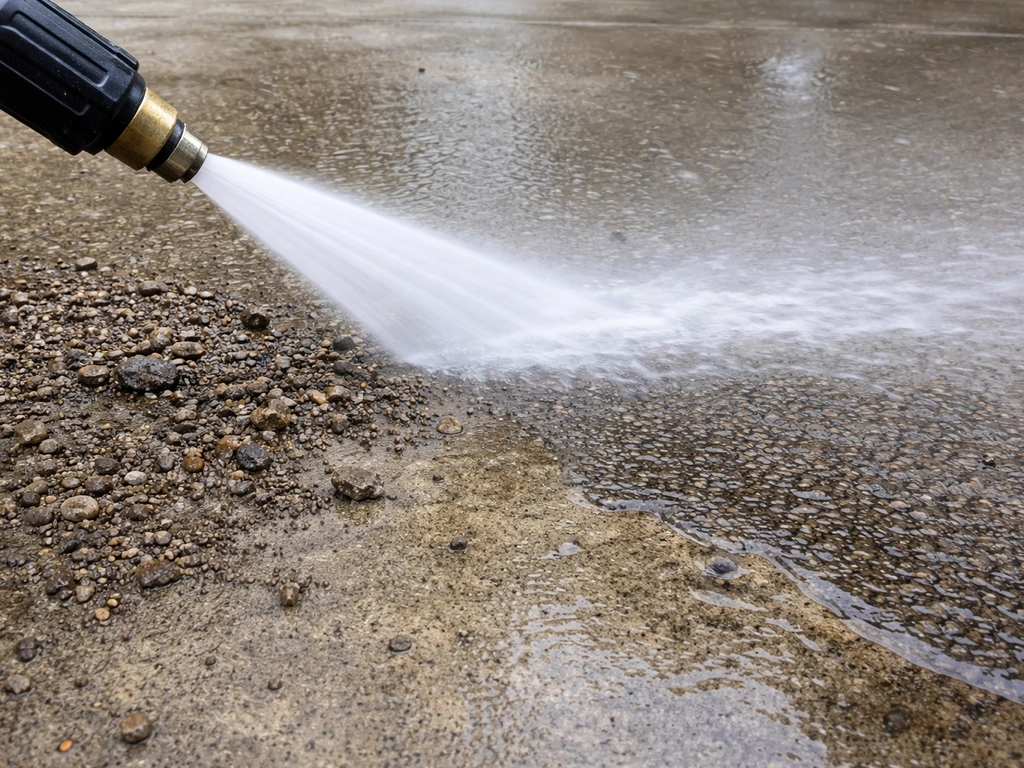
Start with a stiff broom to clear loose debris, then hit the surface with a pressure washer set to at least 2,000 PSI. After you finish cleaning, remove grass and weed growth from any existing areas before you build your patio-friendly growing setup pressure washer.
If there are oil stains from vehicles or a grill, treat those spots with a concrete degreaser (you can find it at any hardware store for around $10 to $15) and scrub with a stiff brush before rinsing. Mold or algae patches should be treated with a diluted bleach solution (one part bleach to four parts water), left for 10 minutes, then thoroughly rinsed.
The goal is a clean, neutral surface with no residue that could interfere with drainage or encourage fungal growth under your soil layer.
Roughening the surface
If you plan to use any adhesive-backed edging strips or install a bonded turf system, roughening the slab improves grip. A concrete grinder or even a rented floor buffer with a diamond pad can scuff the surface enough to create mechanical adhesion. For most DIY soil-over-slab setups, though, mechanical edging stakes or a perimeter border frame hold everything in place without needing adhesion to the slab itself, so full grinding is optional.
Fixing cracks and managing drainage
Cracks wider than about 1/4 inch should be filled with a flexible polyurethane caulk or concrete crack filler before you do anything else. Left open, they become channels where roots try to go (and fail) and where water pools. More importantly, take a close look at how water drains off your slab during rain. If it puddles in the middle or drains toward your house foundation, you've got a drainage problem that will kill grass roots faster than anything else.
Compacted or waterlogged conditions deplete soil oxygen, which directly slows root growth and can cause wilting even when plants have plenty of water. If your slab doesn't drain to the edges naturally, plan to drill a few 1/2-inch weep holes near low spots before laying down soil, or route overflow with a simple gravel channel to a lawn area.
Choosing the right grass system for your patio
Before you buy anything, decide what system actually makes sense for your patio. This decision hinges on four things: how much sunlight the space gets, how much foot traffic it handles, how well it drains, and how much ongoing maintenance you're willing to do.
| System | Best for | Soil depth needed | Maintenance level | Approximate cost (per sq ft) |
|---|---|---|---|---|
| Live grass over contained soil | Sunny patios, low-to-medium traffic, good drainage | 4 to 6 inches minimum | High (mowing, watering, fertilizing) | $2 to $5 (sod) or under $1 (seed) |
| Modular turf tiles | Any light level, moderate traffic, moderate drainage | Built into tile system | Low (occasional rinsing) | $3 to $8 |
| Artificial turf | Shade, high traffic, poor drainage | 2 to 4 inch infill base recommended | Very low | $5 to $20 |
Live grass is the most satisfying option if you can support it, but it demands real sun (at least 4 to 6 hours of direct light daily for most cool-season grasses, more for warm-season types), consistent watering, and a contained soil depth of at least 4 inches. Go shallower than that and you'll constantly fight drought stress and compaction.
Modular turf tiles are a middle ground: they look natural, handle moderate traffic, and snap together like puzzle pieces over the slab without needing soil prep. Artificial turf is the most durable and lowest maintenance, and honestly a smart choice if your patio is under a covered roof or heavy shade where real grass would struggle to survive. If you're still undecided, think about what you want the space to feel like in two years, not just opening weekend.
Materials and setup: soil depth, edging, and weed barrier
If you're going with real grass, assembling the right material stack is everything. Getting this wrong is the most common reason a patio grass project fails within the first season.
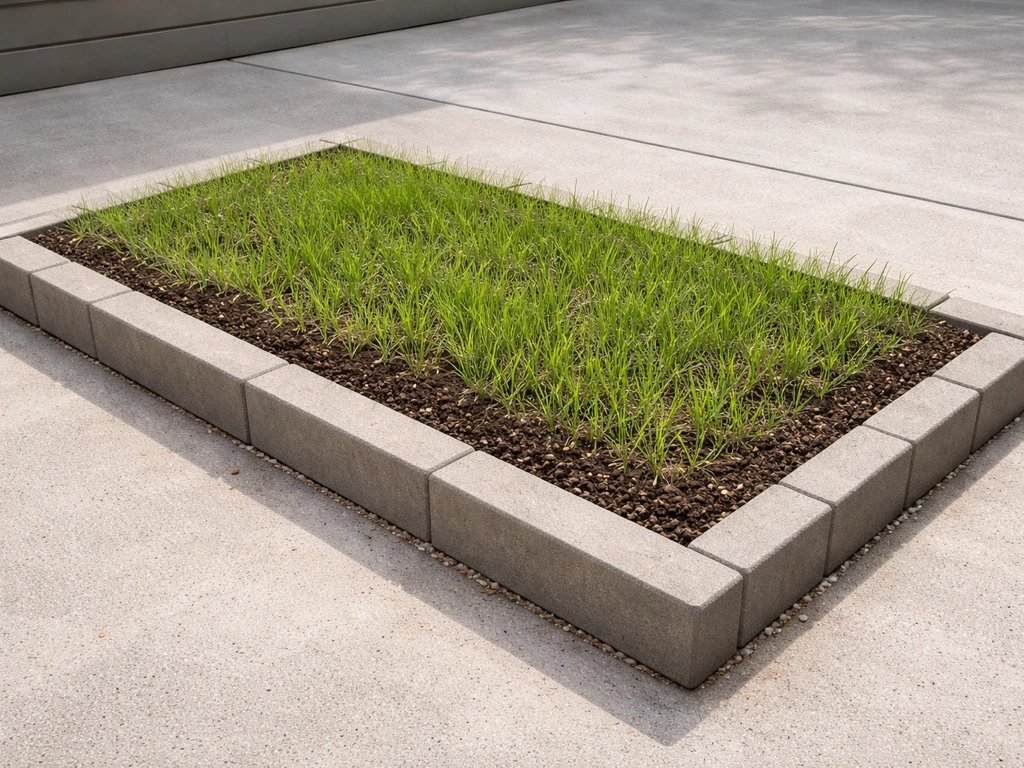
Edging and containment
You need a solid perimeter to hold your soil in place and give the whole setup a clean look. Aluminum or steel landscape edging works well for smaller areas and can be secured to the concrete using masonry anchor pins or construction adhesive. For larger sections, build a simple wood frame from 2x6 or 2x8 pressure-treated lumber and fasten the corners with angle brackets. The frame height determines your soil depth, so size it accordingly. A 2x6 gives you about 5.5 inches of soil depth, which is just enough for a healthy root zone.
Weed barrier
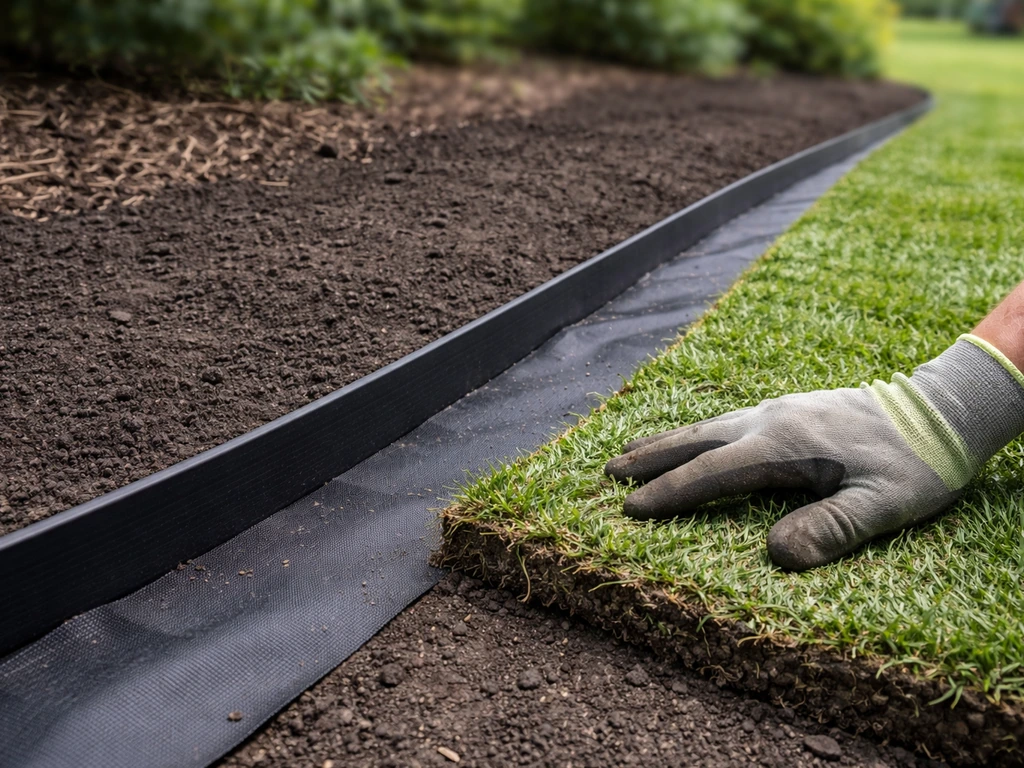
Lay a woven geotextile weed barrier directly on the cleaned concrete before you add soil. This does two things: it prevents any rogue weeds from pushing up through cracks, and it keeps your soil from washing down into those cracks over time. Do not use solid plastic sheeting here. Plastic blocks drainage and oxygen exchange, and it will create the exact waterlogged, anaerobic conditions that destroy grass roots. Use a permeable woven fabric rated for landscaping, cut to fit your contained area, and overlap seams by at least 6 inches.
Soil mix and depth
Minimum soil depth for turfgrass over a hard surface is 4 inches; 6 inches is better, and anything less than 4 inches will cause the root zone to heat up, dry out, and compact too quickly. Use a lightweight, free-draining mix rather than dense garden soil. A good starting blend is one part topsoil, one part coarse sand or perlite, and one part compost.
This keeps the weight manageable (critical on older or thinner slabs), ensures drainage, and gives the grass the organic matter it needs. Pre-bagged lawn soil mixes from a garden center work fine, but avoid anything labeled as potting mix, which is too light and acidic for turf. For a 10x10-foot area at 5 inches deep, you'll need roughly 42 cubic feet (about 1. 5 cubic yards) of mix.
Step-by-step installation: from layout to first sprout
Here's the actual installation sequence. Follow these steps in order and you'll have a solid foundation whether you're seeding or sodding.
- Clean and prep the slab (degrease, pressure wash, fill cracks, confirm drainage direction) as described above.
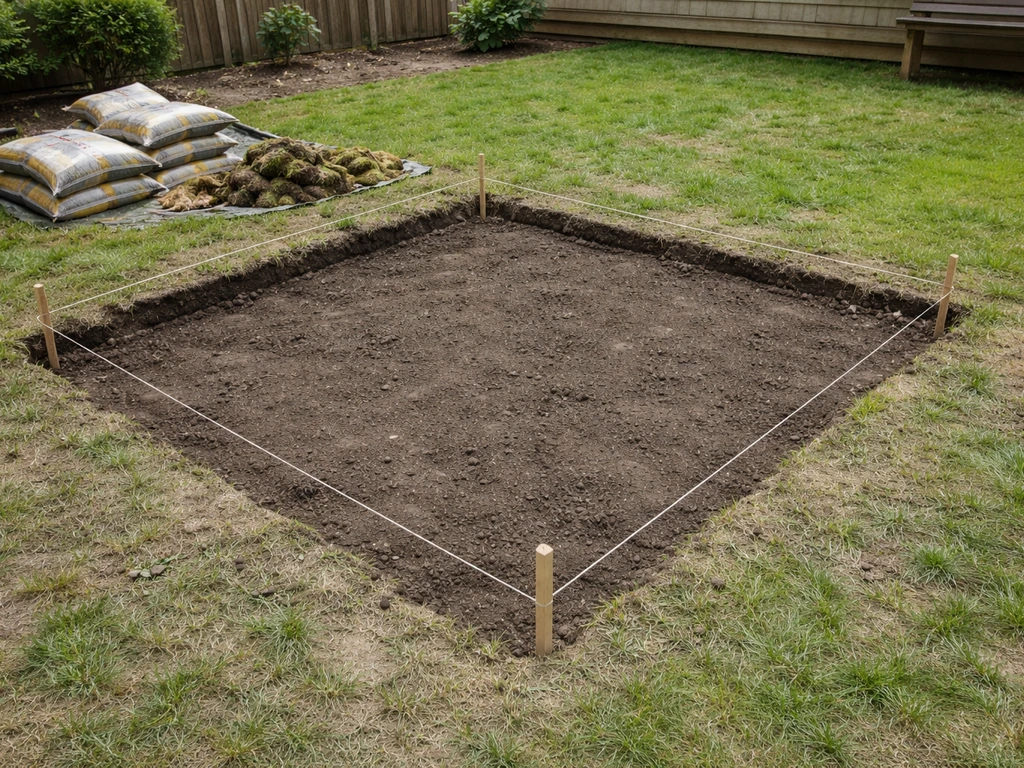
- Mark out your grass area with chalk or marking paint. If you're dividing a larger patio into zones, this is also when you plan your pathways and borders.
- Install your edging or wood frame perimeter. Secure it firmly so it won't shift when you add soil weight or water pressure.
- Lay the woven geotextile weed barrier across the entire base, pressing it into corners and overlapping seams by at least 6 inches. Trim excess flush with the edging.
- Pour and level your soil mix. Add it in 2-inch lifts if possible, tamping lightly between layers to eliminate air pockets without compacting excessively. A thin compacted layer as small as 1/4 to 1/2 inch can significantly impede water infiltration and gas exchange, so keep tamping light.
- For seeding: Rake the surface level, broadcast seed at the recommended rate for your grass species (check the bag label), then rake lightly to cover seed to no more than 1/8 to 1/4 inch deep. Deeper burial reduces germination rates significantly. Firm the surface with a lawn roller if available.
- For sodding: Lay sod strips in a staggered brick pattern, pressing edges together firmly with no gaps. Use a sod knife to trim edges flush with your border. Roll the whole area to ensure good sod-to-soil contact.
- Water immediately after installation. For seed, keep the top 1 inch of soil consistently moist until germination (typically 7 to 21 days depending on species and temperature). For sod, water deeply on day one, then daily for the first two weeks.
- Keep foot traffic off seeded areas until the grass reaches mowing height (about 3 inches for most species). Sod can handle light traffic after two to three weeks once roots have knit in.
Watering, light, and keeping it healthy long-term
Grass on a patio behaves a bit differently than grass in a regular lawn because the shallow, contained soil dries out faster and heats up more in summer. You'll need to water more frequently than you think, especially in the first growing season. Once established, deep watering two to three times per week (enough to wet the full soil depth) is better than light daily watering, which encourages shallow roots. If you're on a concrete patio in a hot climate, check soil moisture daily during peak summer. A soil moisture meter (under $15 at any garden center) takes the guesswork out of this.
Mowing and traffic
Mow at the right height for your grass species, and don't go lower than that. Cool-season grasses like tall fescue and perennial ryegrass generally do best kept at 3 to 4 inches on a patio setup where soil depth is limited. Cutting shorter stresses already-challenged roots. For a small patio area, a battery-powered push mower or a basic rotary mower handles the job fine. Rotate foot traffic patterns if you can, and consider adding a stepping stone path through the grass if people tend to cut across the same spot repeatedly. Concentrated traffic compresses the shallow soil quickly, reducing oxygen and stunting growth.
Fertilizing
Fertilize lightly but regularly. In a contained system, nutrients leach out faster than in a standard lawn. Use a balanced slow-release granular fertilizer (like a 10-10-10 or turf-specific blend) in spring when growth begins, again in early fall for cool-season grasses, and mid-summer for warm-season types. Avoid heavy nitrogen applications in summer heat, which can burn the already-stressed root zone. A soil test from your local extension office (often $15 to $25) will tell you exactly what your mix needs after the first season.
Troubleshooting the most common problems
Even a well-installed patio grass setup will throw you a curve ball or two. Here's what to look for and how to fix it.
Poor drainage and waterlogging
If water is sitting on the surface or the soil feels permanently soggy, your drainage path is blocked or your soil mix is too dense. Check that your weep holes (if you drilled any) aren't clogged with debris. If you didn't build in drainage exits, you may need to drill new ones or create an overflow channel along one edge of the frame. Long-term waterlogging depletes soil oxygen, which reduces water and nutrient uptake and causes grass to wilt even when it looks well-watered. To fix a waterlogged mix, core aerate with a hand aerator tool and top-dress with coarse sand.
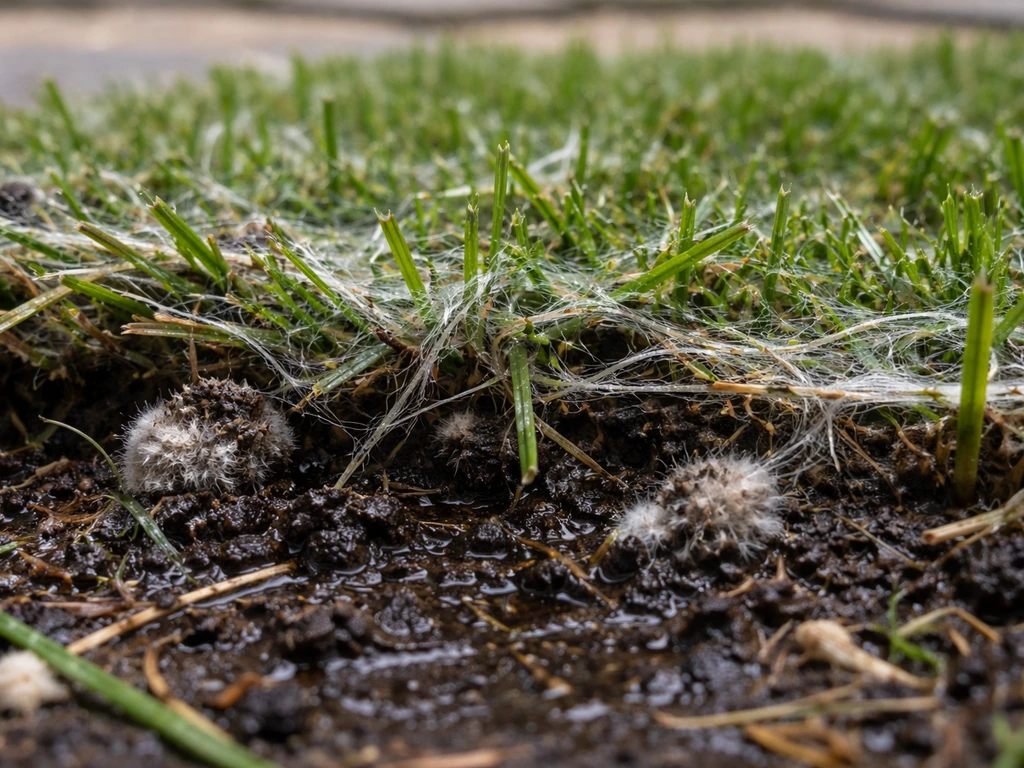
Mold and fungal growth
Mold on the soil surface or white fungal threads running through the grass are a sign of too much moisture combined with poor airflow. This is especially common on covered patios or in shaded areas. Reduce watering frequency, improve drainage, and apply a lawn-safe fungicide if the problem spreads to the grass blades. Raking the surface to improve air circulation helps too. If mold keeps coming back, seriously reconsider whether real grass makes sense in that spot versus a modular turf system with better drainage by design.
Weeds
Weeds in your patio grass usually mean one of two things: the weed barrier was installed with gaps, or weed seeds blew in from the top (which no barrier can stop). Hand-pulling is the safest approach in a small contained area to avoid herbicide drift onto nearby plants. For persistent grassy weeds in a cool-season lawn, a selective post-emergent herbicide labeled for use with your grass type can help. Pre-emergent herbicides applied in early spring will reduce new weed seed germination without harming established turf.
Patchy growth and uneven germination
Bare patches after seeding are almost always caused by uneven seed coverage, seed buried too deep, or a section of soil that dried out during the critical germination window. Overseed those spots immediately, keep them consistently moist, and consider covering with a thin layer of straw mulch to retain moisture. If you are building a mulch patio to control weeds and hold moisture, you can apply similar layering ideas to your patio grass setup.
Seed buried deeper than 1/4 inch has a noticeably lower emergence rate, so if patches keep failing to fill in, check your seeding depth. For sod, patches that turn brown and don't root usually mean the sod dried out before rooting or wasn't pressed firmly enough to the soil.
Mississippi State University Extension lists seeding-depth guidance for cool-season grasses in its planting rates table, which can help you avoid planting too shallow or too deep For sod, patches that turn brown and don't root usually mean the sod dried out before rooting or wasn't pressed firmly enough to the soil. .
Lift the edge, moisten the soil underneath, press back down, and water heavily for a week.
Pests
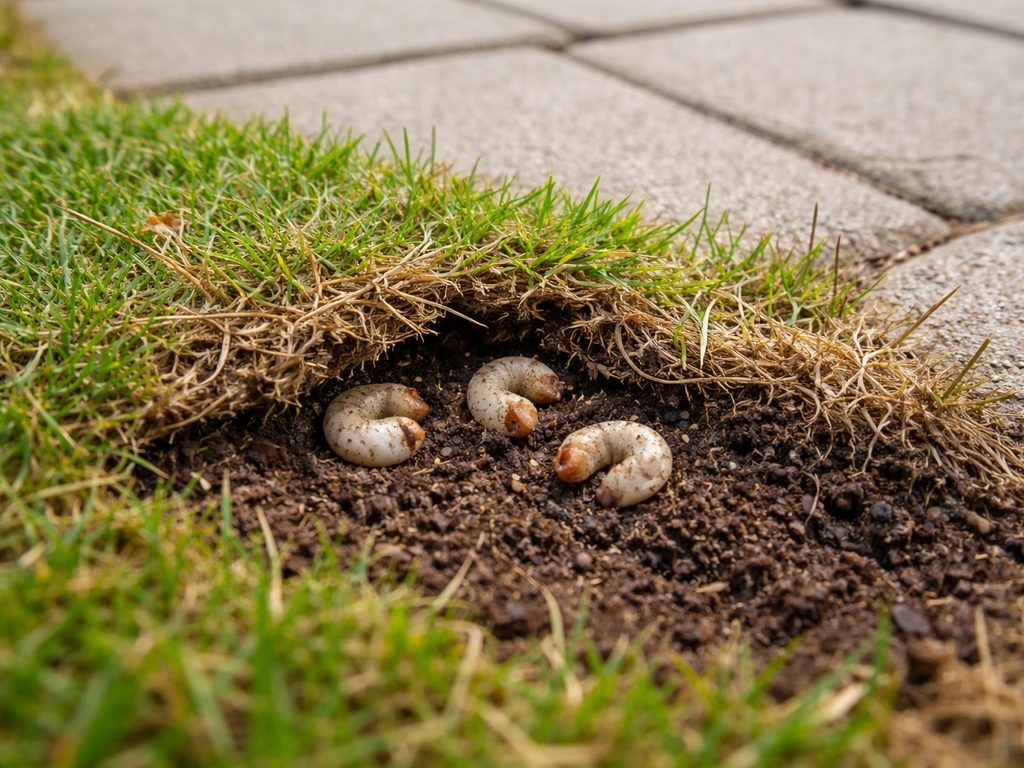
Grubs and sod webworms are the most likely turf pests in a patio setup. Signs include brown patches that peel back easily (grubs feeding on roots underneath) or small moths flying low over the grass at dusk (webworms). Beneficial nematodes are an effective, non-toxic treatment for grubs in a small contained area and are available at most garden centers. For webworms, a Bt (Bacillus thuringiensis) spray is safe to use in a patio setting. Always identify the pest first before reaching for any chemical treatment, since misapplication wastes money and can damage beneficial soil organisms.
FAQ
Can I grow real grass on a shaded patio under a roof?
Yes, but only if you can keep a contained 4 to 6 inches of real soil over the slab and give the grass at least part of the day in direct light. If your patio is mostly shaded or covered, turfgrass can thin out even with perfect watering, so a modular turf tile system or artificial turf is usually more reliable than seed or sod.
How often should I water patio grass, and how do I know I’m watering deep enough?
Use the top edge of your soil layer as the watering target, and water until the full soil depth is wet, not just the surface. A simple way to confirm is to insert a screwdriver near an edge, it should go in with damp resistance, not dry. On hot patios you may need more frequent cycles early on, but still aim for deep soak each time.
Is it better to seed or install sod for a patio lawn?
If you want to seed, plan to keep the area consistently moist for germination and early root establishment, usually longer than most people expect. For quick coverage and fewer “gaps,” sod can work better, but you still need firm soil contact, daily check of moisture for the first week, and protection from foot traffic until roots knit.
What if I already put plastic sheeting under the soil, will my grass still grow?
Avoid plastic sheeting under the soil. If you already installed solid plastic, the fix is to remove it and replace it with a permeable woven weed barrier. Trapped moisture reduces oxygen in the root zone and makes moss, fungus, and patchy die-off much more likely.
How deep does the soil need to be if I want grass on top of concrete?
Not exactly. You should plan a soil depth based on the root zone requirements and your comfort with heat and drying. For most turfgrass systems over concrete, 4 inches is the minimum, 6 inches is safer for summer performance, and anything less than 4 inches tends to compact and dry out quickly.
How low can I mow patio grass?
For cool-season grass on a shallow patio root zone, cutting too low is one of the fastest ways to cause thinning. A good rule is to mow no lower than the recommended height for your specific variety, and if you are unsure, start higher and adjust gradually rather than scalping.
Can I fertilize patio grass the same way as a yard?
Yes, but choose products carefully. In a contained soil over slab setup, nutrients can leach out faster, so use slow-release fertilizer in the recommended season, and stop if you see leaf tip burn or dark green, fast growth followed by stress. A soil test after the first season is especially helpful because patio mixes can vary widely.
Why am I getting weeds even though I installed a weed barrier?
Weeds usually come from two directions, gaps in the weed barrier or seeds landing from above. In a small contained area, hand-pulling is often the fastest clean-up method, then you can reduce future weed pressure with correct barrier overlap and pre-emergent control at the right time for your grass type.
My patio grass has bare spots, what’s the most likely cause and what should I do first?
If bare patches appear, first check seeding depth and moisture consistency during germination, uneven coverage is the next most common cause. If the surrounding soil dries faster than the patch, re-seed and keep it consistently moist, a thin straw mulch layer can help retain moisture without burying seed too deep.
Can I blend my patio grass with existing paving without it turning into muddy edges?
Yes, but only where you can maintain drainage and keep the edge from collapsing. For lawn integration with paved areas, install a clear border and keep the transition stable, so water doesn’t run off the concrete into the soil edge and saturate one strip. If you need a sharp separation, build a rigid edge like metal edging or a properly framed border.
What should I do if my patio grass soil stays wet after rain?
If you see water sitting or the soil stays soggy, don’t just add more watering or fertilizer. Start by inspecting drainage exits like weep holes for blockage, verify the soil mix is free-draining, and correct slope so water can leave the contained zone. Core aeration and topping with coarse sand can help if the soil has become too dense.
How do I tell grubs versus webworms on patio grass, and what treatment should I choose?
To avoid grubs and sod webworms wasting your money, identify first, then treat. Beneficial nematodes work best for grubs in many situations, and Bt is used for webworms, but timing matters. If you see damage that peels easily, treat roots as the likely issue before replacing large sections.
When does mold mean I should switch from real grass to a different system?
Yes, and it can be a bigger upgrade than people think. If your patio grass is regularly getting moldy, core aerate to improve airflow, reduce watering frequency, and consider switching to a turf system designed for better drainage if the patio is consistently humid or heavily shaded.
Next Article
How to Remove Grass for a Patio: Best Step-by-Step
Step-by-step ways to clear grass for a patio, choose best method, remove sod and roots, and prep for gravel base.