You can build a mulch patio yourself in a weekend for roughly $100 to $400 depending on size, using shredded bark or wood chips over a compacted gravel base and weed barrier, contained by metal or plastic edging. It won't last as long as pavers or concrete, but it's soft underfoot, drains well, handles uneven terrain gracefully, and is genuinely beginner-friendly. I've built two of them and made plenty of fixable mistakes along the way, so this guide covers everything from checking permits to topping up mulch two seasons later.
How to Build a Mulch Patio: Step-by-Step DIY Guide, Drainage

Nolan Lennox
14 Jul 2026
What a mulch patio actually is (and who it's right for)
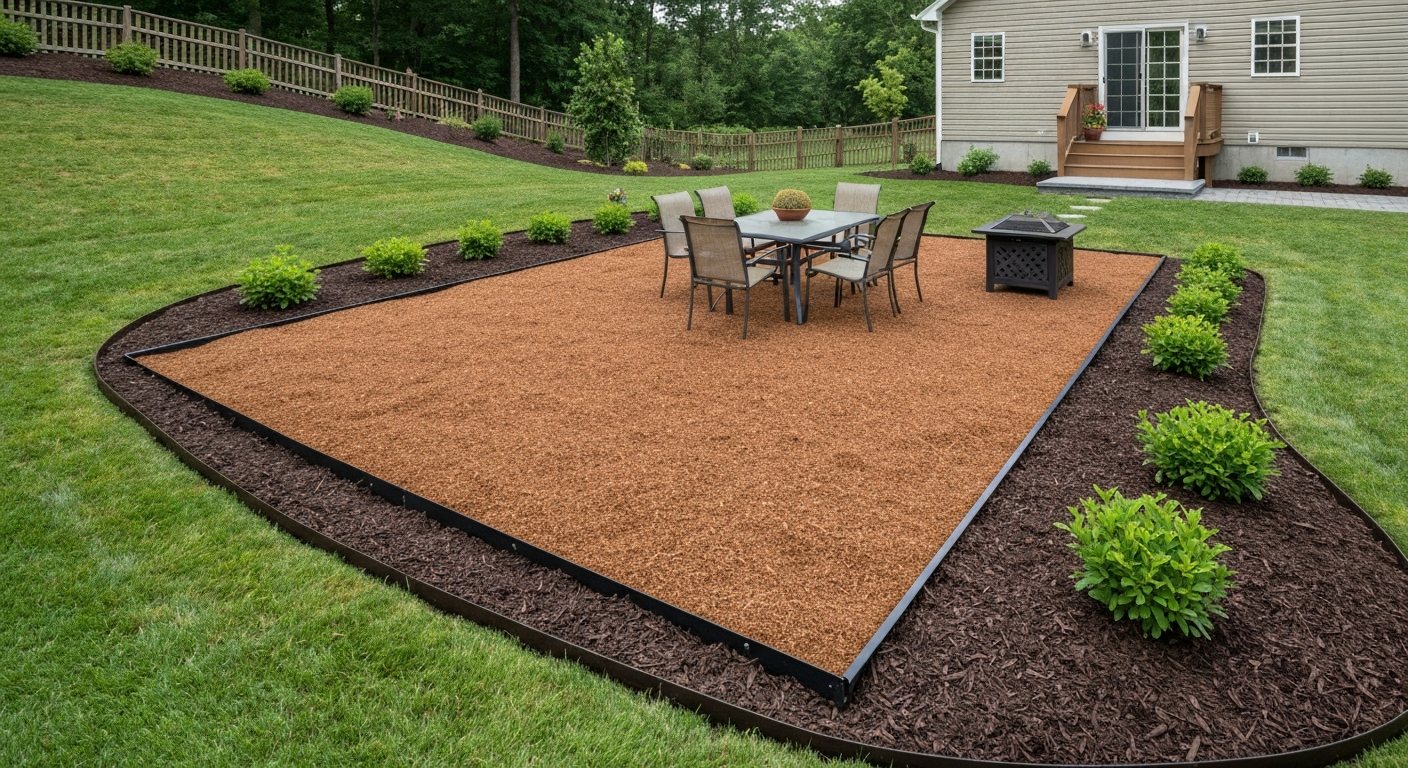
A mulch patio is a defined outdoor living area surfaced with a loose organic or rubber fill material, typically 2 to 4 inches deep, held in place by rigid edging and usually underlaid with a weed barrier and sometimes a compacted stone base. It's not a deck. It's not pavers. Think of it as a natural, cushioned ground-level space where you put a table, a couple of chairs, maybe a fire pit, and actually use your backyard. It looks intentional, not just like you dumped mulch in the corner.
It's the right choice if you want a low-cost outdoor area quickly, if your ground is uneven or slightly sloped (within reason), if you want something that blends into a garden setting, or if you're renting and need something reversible. It's not the right choice if you need a level surface for heavy furniture, expect high daily foot traffic, or want something maintenance-free for a decade. I'll be straight about those limits throughout this guide.
Honest pros, cons, and when mulch actually makes sense
Before you commit, here's what you're actually getting into. Wood chip and shredded bark mulch patios are forgiving to build, kind to knees and bare feet, good at absorbing rainwater, and much cheaper upfront than concrete or pavers. On the flip side, they need topping up every one to two years as the material decomposes, they're not great for wet climates without a proper stone base underneath, and they can shift if your edging is weak or your slope is too aggressive.
| Factor | Mulch Patio | Gravel Patio | Concrete/Pavers |
|---|---|---|---|
| Upfront cost (200 sq ft) | $100–$300 | $200–$500 | $800–$3,000+ |
| DIY skill level | Beginner | Beginner–Intermediate | Intermediate–Advanced |
| Drainage | Good (permeable) | Excellent | Poor unless designed in |
| Maintenance | Annual top-up | Occasional raking/refill | Low (but cracks over time) |
| Lifespan | 2–5 years per fill | 5–10+ years | 15–30+ years |
| Comfort underfoot | Soft, cushioned | Firm, loose | Hard |
| Load bearing | Light furniture only | Moderate | Heavy |
| Reversibility | Easy | Easy | Difficult |
Rubber mulch sits in its own category: it doesn't decompose, so you refill it far less often, but it costs more per cubic yard than wood, can get uncomfortably hot in direct sun, and raises fire-safety and toxicity concerns noted by university extension services. I'd avoid rubber mulch for a patio unless it's specifically for a play area where cushioning against falls is the priority.
Permits, property lines, and local code stuff you can't skip
Here's the part most DIY guides gloss over: whether you need a permit for a mulch patio depends on your municipality, and the rules vary more than you'd expect. Because mulch is permeable, it's much less likely to trigger an impervious-cover review than concrete or a paver patio would. Many zoning codes only flag surfaces when they push a lot's total impervious coverage past a threshold (often expressed as a percentage of the lot). Mulch and wood chips are generally considered pervious, which works in your favor.
That said, you still need to check a few things before you dig. If you're converting a driveway section, altering a curb cut, or building anything near a sidewalk apron, cities like Los Angeles require separate curb and driveway permits through the public works department, entirely separate from a standard patio permit. Federal and state stormwater programs also push municipalities to monitor post-construction runoff, so if your project is large or near a waterway, it's worth a quick call to your city's planning office. Setbacks from property lines, easements, and HOA covenants are separate from permits but equally important: check all three.
- Call or visit your city's planning or permits office and describe your project (size, material, location on lot)
- Ask specifically about impervious-surface thresholds and whether pervious materials like mulch are exempt
- Check your property survey or plat for setbacks, easements, and utility corridors before marking your layout
- If you have an HOA, review the CC&Rs for surface material restrictions before buying anything
- If your project touches a driveway, curb, or sidewalk, ask specifically about public-works or right-of-way permits
Planning your layout: size, shape, and drainage goals
The most common mistake I see (and made myself the first time) is underestimating the size. A 10x10 foot area sounds generous until you put a table and four chairs on it and realize you can't pull a chair back without stepping off the edge. Plan for at least 12x14 feet for a basic dining setup, or 10x12 at the absolute minimum. For a lounge area with an Adirondack or two and a small side table, 10x10 can work.
For shape, rectangles and squares are the easiest to edge and install. Curves look great but require flexible edging and more cutting/shaping of the weed barrier. If you're building in a corner of the yard next to a fence, an L-shape can be surprisingly efficient. Sketch it on graph paper first and walk the actual space with stakes and string before you commit.
Drainage should be part of the design, not an afterthought. Your finished mulch surface should slope away from your house at roughly 1 inch per 8 feet (about 1 to 2 percent grade). This is gentle enough to be nearly invisible but meaningful enough to prevent water from pooling under your chairs or wicking toward your foundation. If the site already drains well, you may not need a gravel base. If it's clay-heavy or low-lying, build in that crushed-stone layer from the start.
Site assessment: read your ground before you build
Spend 20 minutes honestly assessing your site before touching a shovel. Walk it after rain and look for standing water or soggy spots: those indicate poor infiltration (often clay soil) and mean you need a granular sub-base rather than laying mulch directly on the ground. Dig a test hole about 12 inches deep in your planned area and look at what's there. Sandy, loamy soil drains fast and is ideal. Dense, grey, or sticky clay soil needs more prep work.
Slope is the other big variable. A gentle slope (1 to 3 percent) is manageable and actually helpful for drainage. Anything steeper than about 5 percent (roughly a 3-inch drop over 5 feet) is going to cause mulch to migrate downhill after every rain or heavy footfall, and you'll be raking it back constantly. On steep slopes, consider terracing with timber or stone edging, or honestly reconsider whether a mulch surface is right for that spot.
Before marking your layout, call 811 (the U.S. national dig-safe number) to have underground utilities marked. This is free, takes 2 to 3 business days, and is not optional. I also do a quick visual check for buried irrigation lines, low-hanging electrical, and tree root zones before I break ground. If you're converting an existing lawn or grass area, the process of removing that grass is worth thinking through carefully, since it affects how much soil you need to excavate and what base prep you'll need. If you plan to keep or install turf instead of mulch, see our guide on how to grow grass on a patio for removal, soil prep, and establishment tips.
Decision checklist: is a mulch patio right for your situation?
Run through these questions honestly before you start buying materials. If you hit more than two or three 'no' answers in the right column, a different patio material might serve you better.
| Question | Mulch-Friendly Answer | Consider Alternatives If... |
|---|---|---|
| What's the slope? | 0–5% grade | Steeper than 5% (mulch migrates) |
| What's the foot traffic? | Light to moderate (occasional use) | Daily heavy traffic or wheeled furniture |
| What's the load? | Light: chairs, small table, fire pit | Heavy grills, hot tubs, large planters |
| How long do you want it to last? | 2–5 years per fill is acceptable | You want 15+ years with no refills |
| What's the drainage like? | Well-draining or moderate soil | Standing water regularly after rain |
| Are you OK with maintenance? | Yes, annual top-up is fine | You want zero ongoing maintenance |
| Is the budget tight? | Yes, keeping costs under $400 | Budget allows for pavers or concrete |
Mulch types: what to buy and what to skip
Not all mulch behaves the same underfoot. For a walking and sitting surface, coarse texture and structural integrity matter a lot more than they do for garden beds. Here's how the main options stack up.
Shredded bark and arborist wood chips (best overall)
This is what I use and recommend to everyone. Shredded bark and coarse wood chips from a single wood species interlock as you walk on them, resist displacement from wind and foot traffic far better than finely ground products, and provide good cushioning. University extension programs at UC ANR, Penn State, and Virginia Tech all list shredded bark or wood chips as the top choice for walkways and paths. Aim for pieces that are roughly 1 to 3 inches rather than fine, powdery shreds. You can often source arborist chips directly from local tree services for free or very cheaply, which is one of the best budget hacks in the whole project.
Dyed and decorative mulch (use carefully)
The bags of red, black, or gold mulch at big box stores look tidy but are often made from mixed wood sources including pallets and construction debris. Penn State Extension recommends verifying the origin and avoiding fresh, un-aged mixed debris mulch, especially near edible plants. For a patio that's purely decorative, dyed mulch is fine, but pay attention to where the dye ends up after heavy rain.
Rubber mulch (only for specific uses)
Rubber mulch doesn't break down, so you refill it far less often than wood, and it stays in place well. But it costs more per cubic yard, gets noticeably hot in full sun (not great for a seating area), and Illinois Extension flags fire safety and potential toxicity concerns for some recycled rubber products. I wouldn't build a dining patio from it, but if you're extending a play area into a sitting zone, it's worth considering.
| Mulch Type | Approx. Cost per Cu. Yd. | Lifespan per Fill | Best For | Watch Out For |
|---|---|---|---|---|
| Shredded bark | $25–$45 | 2–4 years | General patio surface | Fine grades that compact into mush |
| Arborist wood chips | $0–$20 (free locally) | 2–3 years | Budget builds, large areas | Variable chip size; occasional large chunks |
| Dyed decorative mulch | $35–$55 | 1–3 years | Appearance-focused spaces | Mixed wood origin; dye runoff |
| Rubber mulch | $80–$150 | 7–10+ years | Play areas, shaded spots | Heat buildup; higher upfront cost; fire concerns |
Tools and supplies you'll need
Most of this build can be done with tools you probably already own. The only rental you might consider is a plate compactor for larger areas or a sod cutter if you're removing a big section of lawn, though a flat spade works fine for smaller jobs.
Tools
- Flat spade or sod cutter (rental: ~$40/day) for removing grass and topsoil
- Garden rake and bow rake for leveling
- Rubber mallet for driving edging stakes
- Wheelbarrow for moving mulch and gravel
- Tape measure and stakes with string line for layout
- Level or line level for checking grade
- Utility knife for cutting weed barrier and landscape fabric
- Plate compactor (rental: ~$60–$80/day) for compacting gravel base (optional but recommended for larger patios)
- Hand tamper ($20–$35 to buy) for smaller areas
- Safety glasses and work gloves
Materials
- Edging: steel or aluminum strip edging (most durable, thin profile), HDPE/plastic roll edging (cheapest, flexible for curves), timber landscape timbers (natural look, shorter lifespan), or stone/paver edging (most durable but costlier)
- Edging stakes: typically included with metal edging kits or sold separately for timber
- Woven polypropylene landscape fabric (good for flat areas under gravel or mulch; woven holds up better than nonwoven under traffic)
- Crushed-stone base material: 3/4-minus or crusher run (3 to 4 inches compacted) for clay or wet sites
- Surface mulch: shredded bark or wood chips, 2 to 4 inches deep
- Landscape fabric pins or staples to hold weed barrier in place
Step-by-step: building your mulch patio
Step 1: Mark and clear the area
Stake out your perimeter with string lines and verify your dimensions and square corners (the 3-4-5 triangle method works well for this). Measure 3 feet along one string, 4 feet along the adjacent one, and confirm the diagonal is exactly 5 feet. If it's not, adjust until it is. Then cut the turf along your edges with a flat spade, remove the sod, and excavate to a depth that accounts for all your layers: typically 4 to 6 inches if you're doing a gravel base plus mulch surface, or 3 to 4 inches for mulch only over good soil. Remove roots and debris as you go.
Step 2: Grade for drainage
Use your level and string lines to check and establish your slope. You want about 1 inch of drop for every 8 feet of horizontal run, flowing away from the house and toward a lawn or planted area. Rake and tamp the subgrade by hand until it's firm and follows your drainage grade. Don't rush this step: a poor subgrade grade will plague you through every layer above it.
Step 3: Install edging
Set your edging before anything else goes into the excavation, because you'll need to stake it into the native soil. Steel and aluminum edging drives in with a mallet and holds a clean line for years; it's my first choice for most projects. Plastic roll edging is cheaper and handles curves well but can heave over winter freeze-thaw cycles if stakes aren't deep enough. Timber edging (landscape timbers or 4x4 lumber) gives a natural, chunky look but will eventually rot, typically within 5 to 10 years depending on wood species and moisture. Whatever you use, set the top edge at or just above finished-mulch height so it actually contains the surface material.
Step 4: Lay the weed barrier
Unroll woven polypropylene landscape fabric across the excavated area, overlapping seams by at least 6 inches, and pin it down every 18 to 24 inches with landscape staples. Tuck the edges under or behind your edging rather than leaving them exposed, because exposed edges get kicked up and torn. One honest note here: extension research shows landscape fabric weed suppression degrades after about 3 to 4 years under mulch, as soil and organic matter accumulate on top and weed seeds germinate in that layer. It still helps considerably in the early years, and woven fabric holds up better than the nonwoven felt type. If you want a more natural option, overlapping sheets of plain cardboard (corrugated, no tape or staples) work well as a biodegradable alternative for the first couple of years.
Step 5: Add a gravel base (if needed)
If your soil is clay-heavy, your site gets wet regularly, or you're expecting regular foot traffic, spread 3 to 4 inches of 3/4-minus crushed stone (also called crusher run) over the fabric and compact it in two layers. See Upland Pathwork Manual, construction standards and layer-depth guidance | NatureScot (2025) Construction manuals often recommend layered construction with minimum compacted depths (for example, 100 mm base plus 50 mm surface).. Compact the first 2 inches, add the second 2 inches, and compact again. A plate compactor makes this fast on larger areas; a hand tamper is fine for anything under about 100 square feet. This base layer is what separates a mulch patio that holds up well from one that turns into a muddy mess after a few rain events. In good-draining sandy soil, you can skip this step and lay mulch directly on the fabric.
Step 6: Spread and level the mulch
Dump mulch into the center of the area and rake it out evenly to a depth of 2 to 4 inches. Shallower than 2 inches and weed suppression suffers; deeper than 4 inches and you'll get matting and decomposition pockets underfoot. Extension guidance from the University of Minnesota recommends this 2 to 4 inch range specifically for walked surfaces. Lightly tamp the surface with a hand tamper or just walk back and forth across it to settle the material. Don't soak it immediately after installation; let it settle naturally with the first rain.
Step 7: Final check and furniture setup
Walk the whole area slowly and check for soft spots, uneven patches, or places where the edging has shifted. Press down any mulch that's mounded at the edges back toward the center. Set your furniture and check that chair legs aren't sinking excessively; if they are, you either need slightly more mulch in that spot or your base layer is missing. Furniture foot caps or wide pads under legs help a lot on loose surfaces.
Drainage and edging: keeping water and mulch where they belong
The two things that most often cause mulch patios to look bad within a year are mulch migrating into the lawn and water pooling under the seating area. Good edging addresses the first problem and proper grading addresses the second. If you're building a mulch patio adjacent to a grass lawn, you also need to think about how to keep them cleanly separated: a defined edging strip, a shallow trench between them, or a border of pavers or stone all work well. For step-by-step options on clean transitions, from edging types to shallow trenches and paver borders, see how to separate patio from grass. This separation matters both for aesthetics and for lawn mowing, since you don't want mulch constantly clogging your mower.
If your site has a persistent drainage problem, a perforated pipe running under the gravel base and daylighting at a lower point in the yard can carry excess water away. This is a more involved step but worth it on truly wet sites. For most average-draining backyards, the gravel base and proper surface grade are sufficient.
Cost breakdown for a DIY mulch patio
These estimates are based on a 12x14 foot patio (168 square feet) as a representative size. Costs will scale up or down with size and your local market. Getting arborist chips free from a local tree service can cut your mulch cost to near zero, which makes this one of the cheapest patio surfaces you can build.
| Item | Budget Option | Mid-Range Option |
|---|---|---|
| Edging (50 linear ft) | $15–$25 (plastic roll) | $50–$80 (steel strip) |
| Weed barrier (200 sq ft) | $15–$25 (basic nonwoven) | $30–$50 (woven polypropylene) |
| Gravel base (2 cu yd, optional) | $40–$70 (local quarry pickup) | $80–$120 (delivered) |
| Surface mulch (2 cu yd) | $0–$40 (free arborist chips) | $60–$100 (bagged or bulk delivery) |
| Stakes, pins, supplies | $10–$15 | $15–$25 |
| Tool rental (sod cutter/compactor) | $0 (hand tools only) | $60–$120 (1-day rental) |
| Total estimate | $80–$175 | $295–$495 |
Maintenance: what to expect each season
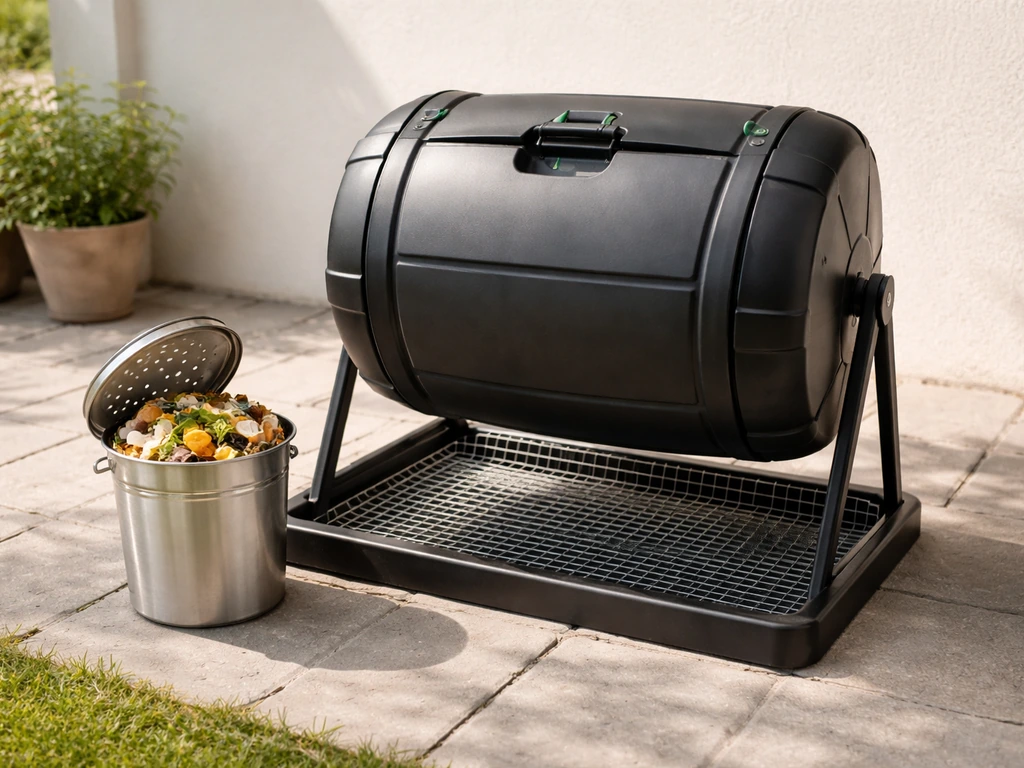
A mulch patio is not no-maintenance, but the annual workload is light. Each spring, rake the surface to redistribute mulch that has shifted, check that edging hasn't heaved or pulled loose, and top up low spots with fresh material. Most patios need a full top-up of 1 to 2 inches of new mulch every one to two years as the base layer decompresses. This is where organic mulch differs from rubber: organic material breaks down and adds to the soil over time, which is ecologically beneficial but means ongoing material cost. If you want to turn decomposing organic mulch into a useful amendment, see our short guide on how to compost on a patio for safe, space‑friendly tips. Budget about $30 to $80 per year for a medium-sized patio once your initial build is done.
- Spring: rake surface, re-level, check edging, top up thin spots
- Summer: watch for displacement around high-traffic entry points and rake back as needed
- Fall: rake off excess fallen leaves before they mat into the surface and accelerate decomposition
- Every 1–2 years: add a fresh 1- to 2-inch top layer of new mulch over the entire surface
- Every 3–5 years: lift edging, remove heavily decomposed bottom layer if it's raised the surface too high, and relay fresh mulch
Troubleshooting common problems
Mulch keeps washing or blowing away
This almost always means one of three things: your mulch pieces are too fine (switch to coarser shredded bark or wood chips), your surface slope is too steep, or your edging is too low and mulch is spilling over. Coarser texture interlocks better and is much more wind and rain resistant than finely shredded product. Raising or extending your edging a half inch can also make a noticeable difference.
Weeds are breaking through
If weeds are coming up through the mulch within the first year, they're likely germinating in the organic matter that has accumulated on top of your fabric, not pushing through from below. Pull them by hand, add a fresh layer of mulch, and accept that this is ongoing. If weeds are coming up from below and punching through your fabric, the fabric has either degraded or wasn't installed with enough overlapping seams. Lift the mulch in that section, repair or replace the fabric, and relay.
The surface is spongy or muddy in wet weather
This means your base layer is insufficient for your soil conditions. If you built directly on clay or poorly draining soil without a gravel base, this is the result. The fix is to pull back the mulch and fabric, add 3 to 4 inches of compacted crusher run, relay the fabric, and re-spread the mulch. It's more work after the fact, which is why the site assessment step up front is worth taking seriously.
Edging is heaving or coming loose
Plastic edging in freeze-thaw climates is the most common culprit. The stakes can pop out over winter and leave the edging listing sideways. Re-stake in fall before freeze-up and drive stakes deeper than the manufacturer suggests (12 inches rather than 6 is more reliable in cold climates). Switching to steel or aluminum edging, which holds position better, solves the problem at the next maintenance cycle.
Safety: a few things worth keeping in mind
Mulch patios are generally safe, but there are a few specifics to address. Keep mulch at least 6 inches away from the base of your house or any wooden structure; damp organic material against wood framing is an invitation for moisture damage and pests. If you're using a fire pit on a mulch patio, clear a non-combustible zone around it: a ring of pavers or gravel at least 3 feet in diameter is the minimum I'd feel comfortable with. And if you're sourcing recycled or dyed mulch, verify its origin before using it near vegetable gardens or where children play regularly, as some processed wood products contain chemical contaminants.
When to consider a different patio material instead
I'm a big fan of mulch patios for the right situation, but I'll tell you plainly when something else makes more sense. If you want a surface you can set and forget for a decade, consider pavers or a gravel patio instead. If you need to support heavy load-bearing items like a built-in grill station or a large ceramic planter, a compacted gravel or concrete surface is safer. If your slope is significant enough that mulch would migrate even with good edging, terracing with timber or stone and filling with gravel may be a better approach. And if you're converting an existing driveway into a patio space, the preparation work and base conditions are quite different from a grass-to-patio conversion, and that project has its own specific considerations around drainage and surface transition.
Mulch also isn't a good long-term answer if your goal is a completely maintenance-free surface. If annual raking and topping-up sounds like a chore rather than a minor seasonal task, be honest with yourself and choose a harder surface from the start. The upfront cost difference is worth it if the maintenance mismatch will leave you resenting the patio in year two.
FAQ
What is a mulch patio and is it right for my yard?
A mulch patio is a low‑cost, loose‑fill outdoor surface made from wood chips, shredded bark, rubber mulch, or similar material laid over prepared ground. It’s best for casual seating, fire‑pit areas, light foot traffic, and informal patios on well‑drained sites. Choose a mulch patio if you want an inexpensive, easy DIY surface and are willing to accept periodic replenishment and shorter lifespan than pavers. Avoid mulch patios on steep slopes, in very wet/clay soils, or where heavy furniture/vehicular loads are expected.
Do I need a permit to build a mulch patio or convert a driveway to one?
Permit requirements vary by locality. Many cities trigger reviews when impervious area, driveway/curb changes, or setback rules are affected. Check your city or county building/permits and public‑works departments before starting—especially for driveway conversions, curb/approach changes, or if your property is in a regulated watershed or HOA. Small, on‑grade mulch patios on private yards often don’t need a building permit, but local rules can differ.
How do I assess the site before building a mulch patio?
Inspect slope (ideal: near‑level to gentle slope for drainage), soil type (sandy soils drain well; clay holds water), sun/shade, existing utilities, and nearby trees/roots. Measure area and locate property lines. Test drainage by digging a small hole and observing infiltration after a rain or pouring in water. If water ponds for hours or soil is heavy clay, plan for a gravel sub‑base, better drainage, or choose another material.
What mulch material should I use for a patio surface?
Preferred: coarse shredded bark or large wood chips for stability, compaction resistance, and longevity (2–4 in. surface depth). Alternatives: rubber mulch (long‑lasting but hotter and more expensive), decorative dyed mulches (verify source), or recycled wood (avoid fresh pallet/contaminated wood). For most DIY patios, choose clean, aged wood chips or shredded bark from a reputable supplier.
Should I install a base or fabric under the mulch?
Yes in many situations. On wet, clay, or moderate‑to‑high traffic sites install a compacted angular crushed‑stone base (commonly 3–4 in.) to improve drainage and prevent rutting, then a geotextile fabric over the base to separate mulch from stone. On well‑drained sites with light use you can lay cardboard or a biodegradable weed barrier and then mulch; woven polypropylene fabric works better where long‑term separation is needed but may clog over time.
What edging options hold mulch in place best?
Durable, low‑profile options: steel or aluminum strip edging (thin, long‑lasting) and stone/paver edging (most durable, higher cost). Budget options: plastic/HDPE roll edging (flexible, cheaper) or timber sleepers (natural look, shorter lifespan). Choose edging that matches aesthetics, budget and expected loads; ensure edging is installed level and trenched to contain mulch and prevent spreading into lawn.
Next Article
How to Compost on a Patio: Step-by-Step DIY Guide
Step-by-step patio composting with container setups, odor and pest control, moisture balance, and quick troubleshooting.