You can build a live-edge wood patio by sourcing dried, flattened live-edge slabs or boards, setting them over a properly prepared base (gravel, crushed stone, concrete piers, or a full slab depending on your site), framing them with pressure-treated sleepers or joists, fastening them securely, and finishing them with a penetrating exterior oil or film-forming sealer. The result is a completely one-of-a-kind outdoor surface, no two are alike, that holds up well when the foundation and finishing work are done right. I've built a few of these now, made some expensive early mistakes, and this guide covers everything I wish I'd known before touching a chainsaw or a router flattening sled.
How to Make a Live-Edge Wood Patio: DIY Plans, Costs & Care

Nolan Lennox
13 Jul 2026
What a live-edge wood patio actually is (and who this guide is for)
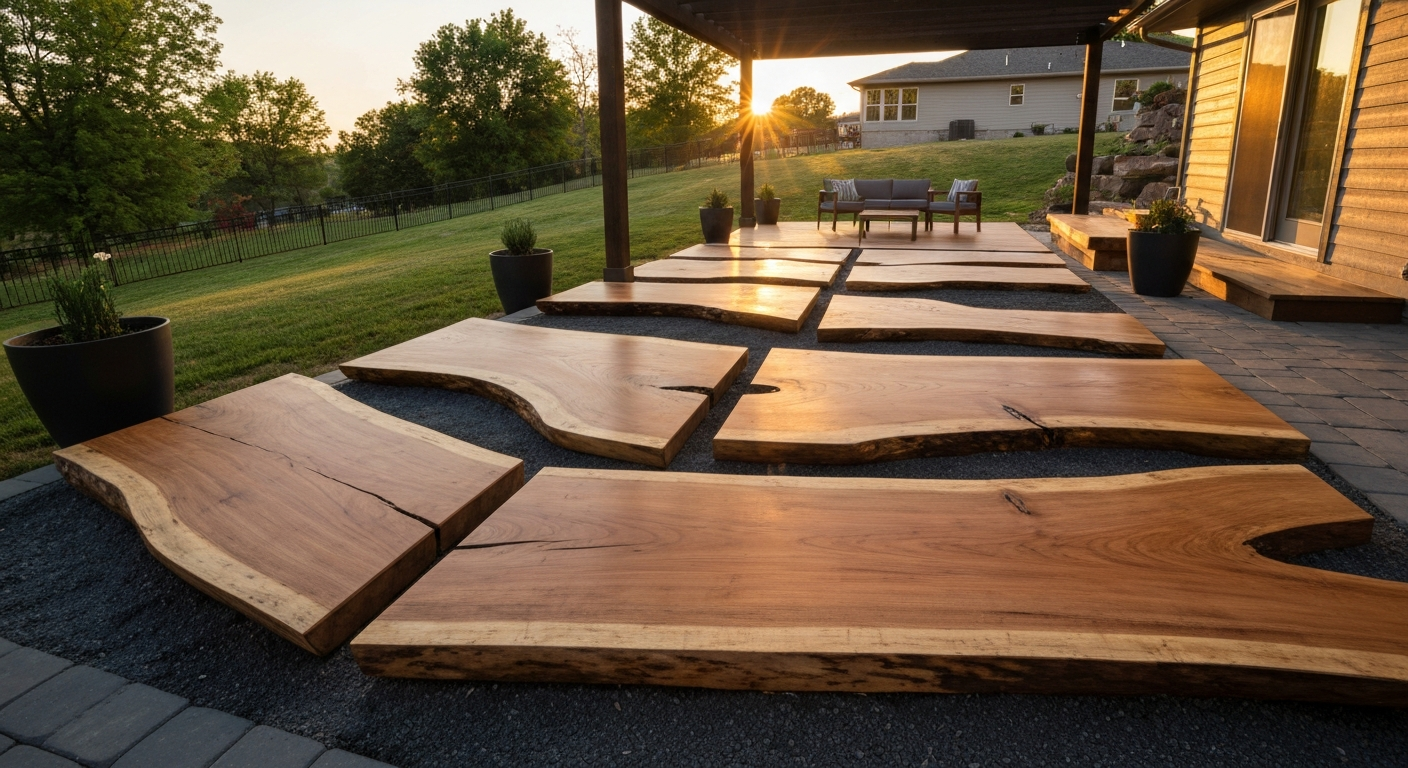
A live-edge wood patio uses lumber that retains the natural outer profile of the tree, the bark edge, irregular contour, and organic shape, as part of the finished surface or as a decorative border. You can use it in three ways: as the primary walking surface (large slabs or wide boards laid flat), as a border or edging around an existing patio material like pavers or gravel, or as accent planking integrated into a standard deck frame. Each approach has different engineering demands, material costs, and skill requirements.
This guide is written for homeowners who want to do the work themselves. It assumes you're comfortable with basic carpentry, you know how to use a circular saw, drill, and level, but you haven't necessarily built a patio from scratch before. I'll walk through every phase: design decisions, site assessment, sourcing wood, building the base, framing, fastening, edging, and finishing. I'll flag the steps where a helper or a professional is genuinely the smarter call.
Design choices: slab surface, live-edge border, or standard decking with live-edge accents
Before you price anything out, get clear on which version of this project you're actually building. The three approaches are not interchangeable, they have different material costs, structural requirements, and ongoing maintenance burdens.
| Approach | Best for | Typical cost range (materials) | Structural complexity | Maintenance level |
|---|---|---|---|---|
| Live-edge slab surface | Statement patios under 200 sq ft, low-traffic zones, covered patios | $15–$40/sq ft (slab cost alone) | High — slabs need very flat, rigid base | High — annual sealing minimum |
| Live-edge border/edging | Adding character to existing pavers, gravel, or concrete | $3–$10 linear ft (treated board or slab strip) | Low to moderate | Moderate — reapply finish every 1–2 years |
| Standard deck framing with live-edge boards | Larger areas, walkable family patios, raised platforms | $6–$18/sq ft depending on species | Moderate — standard joist layout applies | Moderate — similar to a standard wood deck |
Decision checklist: which approach fits your project
- Live-edge slab surface: you want maximum visual impact, the patio is under a roof or pergola, traffic is light, and you have budget for premium wood and a rigid base
- Live-edge border: you already have a patio surface you like, you want a natural look without a full rebuild, and you're comfortable with basic edging work — this pairs well with projects like edging a patio with wood or building traditional patio edging
- Standard deck framing with live-edge boards: the patio is larger than 150–200 sq ft, it's exposed to full weather, it needs to serve as a primary entertaining space, and you want a maintainable long-term surface
- Combination: live-edge boards on a standard deck frame with live-edge slab insets at a focal point (fire pit area, dining zone) — gives you visual drama without going full slab on the entire surface
Site assessment and planning before you break ground
Spend more time here than you think you need to. The single biggest source of live-edge patio failures I've seen, including one of my own early builds, is putting beautiful, expensive wood over a poorly prepared base. Measure the footprint, stake it out, and photograph it in wet conditions if you can.
Measuring and layout
Measure the length and width, then add 10–15% to your square footage for waste, live-edge slabs have irregular edges and you will lose material trimming around them. Sketch the layout on graph paper at 1/4-inch scale. Note where you want the natural edges to face outward (usually the perimeter) versus be hidden under structure.
Slope and drainage
Your finished surface needs to shed water. Industry guidance calls for a minimum 1% slope away from the house, that's about 1/8 inch per foot, but 2% (1/4 inch per foot) is a safer target for reliable drainage. Paver Patio Slope for Drainage, ICPI industry guidance summarized: the Interlocking Concrete Pavement Institute recommends a finished surface slope of roughly 1/8" to 1/4" per foot (≈1%–2%), pitched away from structures for reliable drainage Paver Patio Slope for Drainage — ICPI industry guidance summarized. Measure your existing grade with a long level and a tape measure. If the site slopes toward the house or sits flat, plan to regrade before you build anything. Directing concentrated runoff onto a neighbor's property is a code issue in most municipalities, so map where water will go and tie into a swale, French drain, or pop-up emitter if needed.
Load, soil, and access
Residential patio and deck design is based on 40 pounds per square foot live load plus 10 psf dead load, totaling 50 psf. PermitDeck's 'Deck Joist Span Tables and code basis (40 psf live + 10 psf dead)' summarizes the IRC/AWC span tables and confirms the 40 psf live plus 10 psf dead load basis used in AWC DCA‑6 and IRC prescriptive tables Deck Joist Span Tables and code basis (40 psf live + 10 psf dead) — PermitDeck summary (references IRC/AWC tables). For an on-grade patio over a solid compacted base that's usually not a structural concern, but for any raised or framed section you'll use AWC DCA-6 span tables to size your joists and beams. Check soil type, clay and organic soils compress and shift under load. If your site has soft or expansive soil, plan to remove it and replace with compacted granular fill, or use concrete piers that extend to competent soil. Also assess access: can you get a truck with slabs close enough to your patio site? Full slabs can weigh 200–800 lbs each and you'll need a plan for moving them before you commit to delivery.
Permits and code triggers
Many on-grade patios don't require a permit, but common triggers include: the structure attaches to the house, the walking surface is more than 30 inches above grade, or the area exceeds roughly 200 square feet (thresholds vary by jurisdiction). These are based on IRC R105.2 and common local amendments, never assume you're exempt without checking with your local building department. If you're installing concrete piers or footings, they must extend below the local frost line per IRC R403.1.4, and you'll find that depth listed in your jurisdiction's version of Table R301.2(1). Before any digging, call 811 (the national utility-locate service) to have underground lines marked, this is not optional.
Materials and tools you'll actually need
Essential materials
- Live-edge slabs or boards (species selection covered in the sourcing section below)
- Pressure-treated lumber (ACQ or CA-treated, rated for ground contact where touching soil or concrete) for sleepers, joists, and beams
- Structural screws or hidden fasteners rated for exterior/pressure-treated use (stainless steel or hot-dipped galvanized — do not use standard zinc screws with PT lumber)
- Compacted crushed stone base material (3/4-inch crushed stone or #57 aggregate)
- Landscape fabric or geotextile barrier for weed and fine-soil control under the base
- Concrete (bag mix or ready-mix) if using poured piers or footings
- Sonotube forms in 10- or 12-inch diameter for poured piers
- Post bases or standoff hardware (Simpson Strong-Tie or equivalent) to keep wood off concrete
- Penetrating exterior oil or film-forming sealer rated for exterior wood (TWP 100 series, DEFY, or Cabot Australian Timber Oil are commonly used options)
- Epoxy fill system (if using slabs with cracks, voids, or knot holes — Totalboat or similar two-part marine epoxy)
Recommended extras that save time
- Router sled or wide-belt drum sander for flattening slabs (rent before buying)
- Moisture meter (essential — wood above 19% MC should not go into service)
- Speed square, 4-foot level, and 8-foot straightedge
- Pocket-hole jig for blocking connections
- Oscillating multi-tool for trimming in tight spots
- Pedestal risers (Bison or similar adjustable composite pedestals for slab-on-grade installs)
Fastener and finish options compared
| Option | Best use | Approximate cost | Notes |
|---|---|---|---|
| Stainless structural screws (e.g., Deckmate, GRK) | Live-edge boards on joists | $25–$45/lb | Pre-drill to avoid splitting; countersink for flush finish |
| Hidden clip fasteners (Camo, Ipe Clip) | Consistent-width boards on standard joist layout | $0.30–$0.60 per clip | Clean look, harder to use with irregular live edges |
| Lag screws + wood plugs | Slabs to sleepers | $0.15–$0.40 each plus plug cutter cost | Strong mechanical connection; plugs can be matching species |
| Two-part epoxy adhesive (structural) | Slab-to-slab fills, stabilizing voids | $40–$80/kit | Not a primary fastener; use alongside mechanical connection |
| Penetrating oil finish (e.g., TWP, Cabot ATM) | Any live-edge exterior wood | $35–$65/gallon | Absorbs into wood, easy to reapply, no peeling |
| Film-forming sealer/varnish | Covered patios only | $30–$55/gallon | Peels in UV exposure; avoid on exposed outdoor surfaces |
Sourcing and preparing live-edge wood
Where to buy
Local sawmills and lumber yards that specialize in hardwoods are your best first stop. Search for 'urban sawyer,' 'local sawmill,' or 'live-edge slab yard' in your area. Sites like Woodfinder, Etsy, and Facebook Marketplace list individual sellers, but buying in person is worth the extra effort so you can inspect moisture content, check for hidden checks (cracks) and measure actual dimensions. Big-box stores do not carry true live-edge slabs. For exterior use, common species choices are white oak (excellent rot resistance, tannin-rich), black locust (the most naturally rot-resistant domestic species), teak (premium, expensive), cedar (moderate rot resistance, lightweight, easy to work), and Douglas fir (affordable, widely available, needs more aggressive finishing for outdoor use).
Milling and drying
Most slabs you find at a yard are air-dried or kiln-dried to some degree, but always verify moisture content before you buy. Use a pin-type moisture meter and take readings in multiple spots across the slab. For exterior use, target 12–19% moisture content, above 19% the wood is still actively drying and will move significantly after installation. Air-dried slabs typically need 1 year of drying per inch of thickness. A kiln can accelerate that to a few weeks but adds cost. If you find green (freshly cut) slabs at a bargain price, factor in 12–24 months of drying time before they're usable.
Flattening slabs
Almost every live-edge slab you buy will have some bow, cup, or twist, it's the nature of the material. For a walkable surface, you need it flat to within about 1/8 inch across the width. The standard approach is a router sled: two parallel rails wider than the slab, a router mounted on a crossbar that rides the rails, and a large surfacing bit (spoilboard cutter or bowl-and-tray bit). You work across the slab in overlapping passes, lowering the router in small increments until both faces are flat. Rental of a router sled or wide-belt drum sander is available at some tool-rental shops and hardwood lumber yards. Budget $200–$500 if you need to buy a basic sled kit, or $40–$100/day to rent equipment. For very thick slabs (3 inches plus), an Arbortech or angle grinder with a shaping disc can rough-flatten before the router sled finishes.
Stabilizing and filling with epoxy
Live-edge slabs often have natural voids, bark inclusions, bug galleries, or checks (cracks). For an outdoor walking surface, open voids are a tripping hazard and a place where water collects and accelerates rot. Fill them with a slow-cure penetrating epoxy before finishing. Mix two-part marine or bar-top epoxy, tint it if you want the fill to blend or contrast, and pour in layers no more than 1/4 inch deep at a time to avoid excessive heat buildup. Let each layer cure fully before adding the next. Tape the underside of the slab first to prevent drips. Sand flush with 80-grit then 120-grit once fully cured. This step also adds structural stability to slabs with deep checks along the grain.
Foundation and base options by site condition
The base you choose depends on your soil type, frost exposure, whether the patio will be freestanding or attached, and your budget. Here are the four main options with honest pros and cons.
| Base type | Best site conditions | Approximate material cost (per sq ft) | Pros | Cons |
|---|---|---|---|---|
| Compacted gravel pad | Well-draining soil, mild frost zones, on-grade patios | $1.50–$3.00 | Cheapest, DIY-friendly, good drainage | Can shift over time in poor soils; needs periodic re-leveling |
| Compacted crushed stone + geotextile | Most sites; good all-around base for on-grade wood | $2.00–$4.00 | Excellent drainage, stable with proper compaction, weed suppression | Requires plate compactor; 4"–6" depth minimum |
| Concrete piers (Sonotubes) | Frost-heave zones, raised patios, any attachment to house | $3.00–$8.00 (materials only) | Frost-protected if poured below frost line, very stable | Labor intensive, requires digging or drilling, permits likely |
| Full concrete slab | Large areas, permanent install, very heavy slabs | $6.00–$12.00 | Maximum stability, impervious to shifting, long life | Expensive, least DIY-friendly, drainage requires positive slope and planning |
Selection checklist
- If frost depth in your area is more than 12 inches and the patio is raised or attached: use concrete piers poured below frost depth (IRC R403.1.4)
- If soil is clay, organic, or soft: remove and replace with compacted granular fill, or use piers to competent soil; do not build over unimproved poor soil
- If the patio is on-grade, freestanding, and soil drains freely: compacted crushed stone base with geotextile is usually the most cost-effective choice
- If you're installing heavy slabs (over 150 lbs each): a full concrete slab or widely spaced concrete piers provide more reliable long-term support than a gravel pad alone
- For the aggregate base, compact in lifts no deeper than 4 inches and target 95% Standard Proctor compaction (ASTM D698); rent a vibratory plate compactor — don't skip this
- Always call 811 before any excavation, even shallow gravel work that requires digging a border trench
Framing and substructure: sleeper systems, joist layouts, and support details
Sleeper systems for on-grade slabs and boards
For on-grade live-edge installations, the most common substructure is a pressure-treated sleeper system: 4x4 or 4x6 PT beams laid flat on the compacted base, running perpendicular to the direction of your boards or slabs. Space sleepers at 16 inches on center for standard live-edge boards (1.5–2 inches thick), or at 24 inches on center for thick slabs (3 inches and above). Use ground-contact-rated PT lumber (0.40 pcf ACQ or CA treatment minimum) wherever sleepers contact or are near soil or concrete. Raise sleepers off a concrete base using standoff post bases or composite shims to prevent moisture wicking.
Joist layout for framed live-edge decks
For a raised or framed patio, use standard deck joist layout. Joists are typically 2x8 or 2x10 PT lumber. Maximum spans follow AWC DCA-6 prescriptive tables based on joist size, spacing, and species group. A common starting point: 2x8 PT joists at 16-inch spacing can span roughly 11–13 feet depending on species, but always verify against the actual span tables for your wood species and local code. If you're running live-edge boards diagonally across the joists (a popular look), reduce joist spacing by 25–33% to compensate for the reduced effective span.
Blocking and lateral support
Blocking between joists at midspan prevents rotation and stiffens the frame, especially important when slabs are heavy and loads are concentrated. Install solid blocking (same dimension as joists) at 8-foot intervals along the joist run. At slab joints, where two slab edges meet over a joist or sleeper, install doubled joists or a wider sleeper (6x6) so each slab edge has adequate bearing on separate structure. Never let two slab edges share a single joist without the doubled support, I learned this the expensive way when a slab rocked slightly and cracked a filled epoxy void.
Support details for slab vs. board installations
- Slabs: minimum 3-inch bearing on each support point; use two or more sleepers/joists per slab depending on width; shim level with composite shims or adjustable pedestals before fastening
- Live-edge boards: treat like standard decking for span purposes; 1.5-inch thick boards follow standard deck-board span rules (typically 16-inch joist spacing max for straight runs)
- At live edges facing outward: allow 1/4–3/8 inch gap between the live edge and any adjacent surface to allow drainage and prevent moisture trapping
- Use stainless or hot-dipped galvanized hardware throughout — regular zinc fasteners corrode rapidly against ACQ pressure-treated lumber
Leveling, drainage, and grade management under your patio
Getting the slope right
Set your target finish slope before you start placing any structure. Run a string line from the house-side to the outer edge, drop a line level on it, and calculate your total drop: for a 12-foot-deep patio at 2% slope you need 12 x 0.25 = 3 inches of drop from house to outer edge. Build that slope into the base preparation, it's much easier to do it at the subgrade and base stages than to try shimming everything afterward.
Drainage channels and edge management
On larger patios or sites with heavy rainfall, sheet drainage alone may not be enough. Linear trench drains set flush with the surface at the outer edge collect runoff before it saturates the soil at the base perimeter. If the site is bordered by a wall or fence, a French drain behind the outer edge sleeper redirects water away. For elevated patios, ensure the framing has adequate spacing between boards (minimum 1/8 inch, ideally 3/16 inch for live-edge boards) so rain passes through rather than pooling.
Pedestal and shim leveling techniques
Adjustable composite pedestals (Bison, Buzon, or similar) make leveling slabs on a concrete base far easier than shims alone. They adjust in height from about 1 inch to 4 inches, screw to fine-tune level, and hold the wood off the concrete surface for drainage and airflow. For sleeper systems on gravel, use composite shim stacks (not wood shims, which compress and rot) to fine-tune individual sleeper heights before fastening. Check level across each sleeper and across adjacent sleepers with an 8-foot straightedge before any wood goes down.
Vapor barriers and weed control under wood surfaces
Under on-grade wood patios, install a 4-mil minimum polyethylene vapor barrier over the compacted base before laying sleepers, or use a woven geotextile fabric that allows drainage while blocking weed growth. Do not use standard landscape fabric under a structural wood patio, it degrades and collapses under load over time. If the patio is in a damp climate or over a high water table, a drainage mat (dimple mat) between the concrete slab and your sleepers adds an air gap that dramatically extends wood life.
Step-by-step build sequence
- Mark and stake the patio footprint; call 811 and wait for utility locates before any digging
- Check permit requirements with your local building department; submit application if required before starting work
- Excavate the area to the required depth: 6–8 inches for a gravel base, or to the frost line for pier footings
- Install geotextile fabric over the compacted subgrade, overlapping seams by 12 inches
- Add crushed stone base in 4-inch lifts, compact each lift with a vibratory plate compactor until firm and stable
- For pier foundations: set Sonotube forms at layout locations, pour concrete, set post bases or threaded rod anchors before concrete sets, allow 48–72 hours cure before loading
- Establish your slope string line at 2% grade away from the house; adjust base height to hit target slope
- Set sleepers or beam framework level on the base; shim as needed with composite shims; check level in both directions across each sleeper
- Install blocking between sleepers or joists at 8-foot intervals; double up support at all slab-edge joints
- Bring slabs or boards to the site on rollers or with a material lift; do not drag them across the framing
- Dry-fit all pieces before fastening: check gaps, overhangs, and alignment of live edges
- Pre-drill all fastener holes to prevent splitting; fasten slabs to sleepers with lag screws + wood plugs, or structural screws countersunk and plugged
- Fill voids and checks with two-part epoxy if not already done; tape underside, pour in shallow layers, allow full cure
- Sand flat after epoxy cure; start at 80-grit, finish at 120-grit
- Apply first coat of penetrating exterior oil or sealer; allow to absorb, wipe excess after 15–20 minutes, let cure per manufacturer's directions
- Apply second coat after first coat cures (typically 24–48 hours); two-coat minimum for raw wood
- Install any edge trim, raised-edge boards, or live-edge border pieces (see edging section below)
- Final check: walk every board and slab, test for rocking or unevenness, tighten any loose fasteners
Edging options: live-edge borders, raised edges, and traditional wood edging
The edge is where a live-edge patio really earns its visual impact. There are several approaches, and the right one depends on whether you're building a full live-edge surface, adding a natural border to an existing patio, or finishing a raised platform edge. Projects focused specifically on patio edging with wood, how to build patio edging, or how to finish a patio edge involve many of the same principles at smaller scale, the fastening and finishing methods here apply directly.
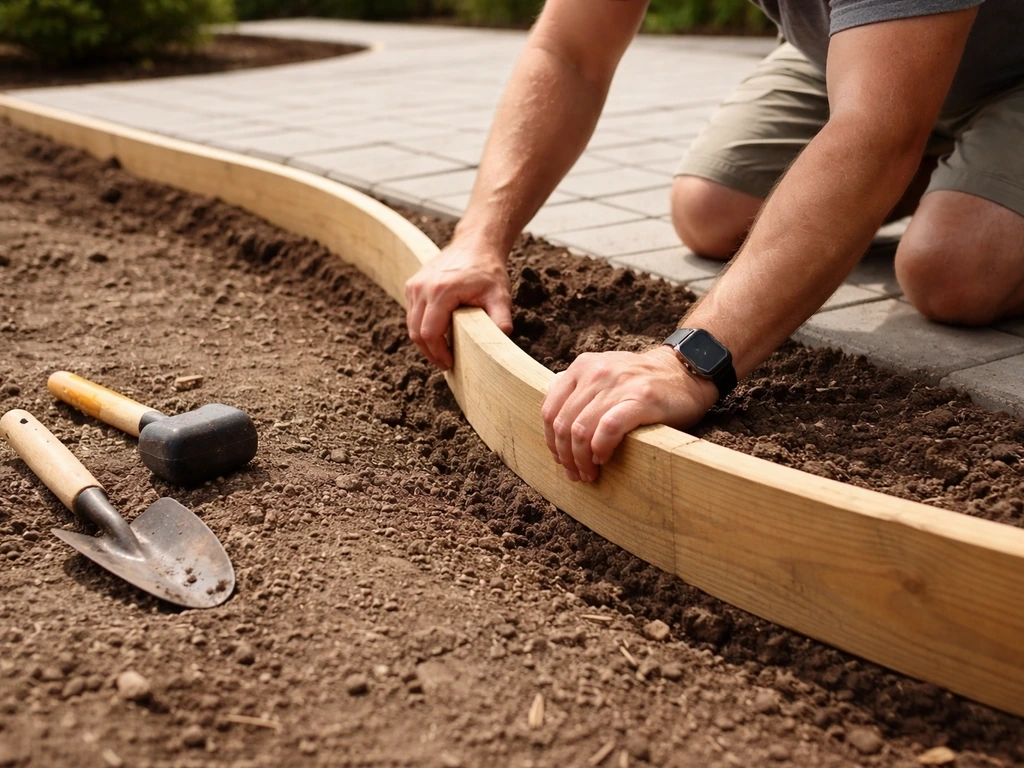
Live-edge slab or board as patio border
The most impactful approach for an existing patio is installing a live-edge board or thin slab section as a visible border, the natural contour faces outward and contrasts with the regular surface inside. For pavers or concrete, anchor the border with rebar pins driven into the base and through pre-drilled holes in the slab edge, with construction adhesive at the contact face. For a gravel patio, set the live-edge board on edge with compacted gravel backfill on both sides and metal stakes every 24 inches. For step-by-step instructions on constructing stable borders and anchoring edge boards, see how to build patio edging. Use species with natural rot resistance (white oak, black locust, cedar) and seal all cut end grain thoroughly, end grain absorbs water 10–15x faster than face grain.
Raised patio live-edge edge treatment
For a raised patio, one that sits more than a few inches above grade, the outer face of the perimeter joist or rim board is the most visible structural element. A live-edge slab fascia applied over the outer rim joist gives a dramatic natural look. Cut the fascia slab to length, pre-drill from the back, and fasten with stainless structural screws or construction adhesive plus mechanical fasteners. Keep a 1/4-inch gap between the bottom of the fascia and grade to prevent ground contact and rot. On raised patios with a vertical drop of more than 30 inches, a code-compliant guardrail is required, plan the edge treatment around the rail post locations before you cut your fascia pieces. Edging a raised patio requires thinking about both aesthetics and structural integration with any required railing system.
Finishing the patio edge cleanly
Where the live-edge surface meets a structure, door threshold, or step, finish the edge cleanly with a routed chamfer or eased radius to reduce the trip hazard of an uneven natural edge. For step-by-step instructions and material lists on how to edge a patio with wood, see how to edge a patio with wood. A 1/4-inch roundover bit on a router knocks down sharp points left by milling. Sand flush with adjacent surfaces, fill any remaining cracks in the edge with epoxy, and apply extra coats of sealer to all end-grain cuts, at least three coats on the ends. For a focused walkthrough on sealing, rounding, and protecting exposed ends and thresholds, see how to finish a patio edge.
Finishing and sealing: protecting your investment
Unfinished exterior wood degrades fast. UV light breaks down lignin, turning the surface gray and brittle. Water infiltration causes rot from the inside out. The good news is that proper finishing at installation followed by regular maintenance dramatically extends service life, I've seen well-maintained white oak slab patios hold up beautifully for 15-plus years under light cover, and five to eight years fully exposed with diligent reapplication.
Initial finishing steps
- Sand the surface to 120-grit after all epoxy fills have cured; blow off dust with compressed air
- Apply a penetrating wood stabilizer or end-grain sealer to all cut ends before any topcoat
- Apply first coat of penetrating oil (TWP 100, Cabot Australian Timber Oil, DEFY Extreme, or similar) to the entire surface including underside of slabs if accessible
- Wipe off any pooling oil that hasn't absorbed within 20 minutes to prevent sticky residue
- Allow manufacturer-specified dry time (typically 24–48 hours) then apply second coat
- Allow full cure (72 hours minimum) before foot traffic
Maintenance schedule
| Timeline | Task | Products/notes |
|---|---|---|
| Every spring | Inspect for cracks, loose fasteners, soft spots; tighten hardware | Screwdriver, mallet, moisture meter |
| Every 1–2 years (or when water stops beading) | Reapply penetrating oil finish | Clean surface first with wood cleaner; lightly sand if needed |
| Every 3–5 years | Full sand and refinish; inspect substructure | Belt sander or random-orbit; probe sleepers and joists for rot with an awl |
| As needed | Fill new cracks or checks with epoxy | Two-part marine epoxy; tape underside first |
| As needed | Replace individual boards or slab sections showing rot or structural failure | Match species and thickness; reapply finish to new pieces before install |
Realistic costs and lead times
Budget ranges vary significantly by species, region, slab quality, and whether you're doing a slab surface or a board surface on a standard frame. These are materials-only ranges for a 150–200 square foot patio as of mid-2026:
| Project type | Materials cost estimate | Lead time for wood | DIY labor days |
|---|---|---|---|
| Live-edge border on existing patio | $200–$700 | 1–3 weeks (local sawmill) | 1–2 days |
| Live-edge boards on standard joist frame | $1,800–$4,500 | 2–6 weeks (drying time if needed) | 3–5 days |
| Full live-edge slab surface on gravel/sleeper base | $3,500–$8,000+ | 4–12 weeks (slab sourcing and drying) | 4–7 days |
| Full live-edge slab on concrete slab base | $5,000–$12,000+ | 4–12 weeks + concrete cure time | 5–8 days |
Factor in tool rental ($150–$400 depending on what you need), fasteners and hardware ($100–$300), and finish products ($80–$200 for initial application on 200 sq ft). Slab prices are the most variable cost: expect $50–$200 per linear foot for quality, dried, wide hardwood slabs, depending on species and figure. White oak and walnut command premium prices; cedar and Douglas fir are significantly cheaper.
Troubleshooting and common mistakes to avoid
- Wet wood installation: the most common and costly mistake. Wood above 19% moisture content will shrink, cup, and crack as it dries in place. Always verify MC with a meter before installation.
- Skipping base compaction: a gravel base that isn't properly compacted will settle unevenly under load, causing slabs to rock and fasteners to loosen within one season.
- Ground contact with untreated wood: any structural wood touching soil or concrete must be ground-contact-rated PT lumber. Even cedar and white oak will rot at soil contact within a few years.
- No drainage slope: a flat or back-sloped patio pools water that accelerates rot from below. Build the slope into the base — don't try to fix it afterward.
- Ignoring end grain: cut ends absorb water rapidly and are the first place rot starts. Seal all cut ends with three coats of finish immediately after cutting.
- Undersized fasteners at slab joints: two slab edges meeting at a single joist without doubled support will rock and can crack epoxy fills or the slab itself. Double all slab-edge joists.
- Using film-forming finishes on exposed outdoor wood: they look great initially but peel within one to two seasons outdoors. Use penetrating oils for any exposed exterior surface.
- Forgetting about seasonal movement: live-edge hardwoods move significantly across their width with humidity changes. Leave 1/8–3/16 inch gaps between boards; don't butt them tight.
FAQ
When should I choose live‑edge slabs as the patio surface vs. using live‑edge wood only as a border/edge?
Choose live‑edge slabs as the walking surface when you want a dramatic, natural floor and can source flat, thick slabs (2"–4" finished thickness or thicker for heavy use). Slabs work best on a stable, level base (concrete slab, piers with a framed substructure, or compacted aggregate with sleepers) and when your budget allows milling and flattening. Choose live‑edge wood only as an edging/border when you want the live‑edge aesthetic with lower material cost, easier replacement, and simpler foundations—wood edging can be installed on a compacted aggregate base or attached to a conventional deck frame. Use slabs for a showpiece or furniture‑quality surface; use border edging for accent, containment (paver/stone infill), and lower ongoing maintenance.
What are the prioritized materials and tools I need for a DIY live‑edge patio?
Prioritized materials: (1) Live‑edge slabs or boards (species selected for exterior use: cedar, cypress, black locust, oak with proper treatment, or durable tropical hardwoods), (2) foundation materials: gravel (#57), compacted base, concrete (4" slab or piers), or concrete piers/pads and rebar as needed, (3) framing lumber: pressure‑treated joists/beams or naturally durable lumber, (4) fasteners: stainless or hot‑dip galvanized screws/bolts, hidden fastener systems if desired, (5) wood stabilizers/epoxy for checks and voids, (6) penetrating exterior sealer and UV finish (penetrating oil and/or spar urethane), (7) drainage materials: geotextile fabric, drain pipe/French drain components if needed. Prioritized tools: (1) circular saw/jigsaw or track saw for cutting, (2) portable planer/handplanes and router/jointing tools for flattening/slab milling, (3) belt sander / random‑orbital sander, (4) drill/impact driver, (5) plate compactor and tamp, (6) concrete tools (mixers, trowels) if pouring, (7) level/laser level/straightedge, (8) clamps, shop vacuum, safety gear (glasses, respirator, hearing protection), (9) chainsaw for slab trimming and (10) epoxy mixing tools.
What foundation and framing options work best for different site conditions?
On‑grade low‑frost, well‑draining sites: compacted aggregate subbase (4"–6"), geotextile fabric, then sleepers or gravel‑set slabs. For moderate frost areas or where patio is attached/raised: use concrete piers to frost depth or an engineered footing; piers support beams/joists. For unstable or frost‑susceptible soils: remove poor soil and replace with compacted granular fill, or use deep piers/helical piles to reach competent strata. For a continuous surface: pour a 4" reinforced concrete slab with proper subbase, vapor barrier, and slope (1%–2%)—this gives the flattest surface for slab installation. For raised patios (walking surface >30" above grade or attached to house), follow decking framing rules (joist spacing, beam sizing) per AWC DCA‑6 and local codes and use frost‑protected shallow foundation (FPSF) or traditional footings below frost line where required.
What slope, drainage, and grading rules must I follow?
Always slope the finished patio surface away from the house; industry practice is 1/8"–1/4" per foot (≈1%–2%) for reliable sheet drainage. Integrate drainage to site features (swales, downspouts, pop‑up drains). For edges that concentrate runoff, provide outlets or French drains. On frost‑susceptible sites, maintain proper subbase depth and consider insulation (FPSF) if using shallow footings. Never direct concentrated runoff onto neighboring property.
What is a clear, step‑by‑step build procedure for installing live‑edge slabs as the patio surface?
1) Site prep: mark patio, call 811 for utility locates, clear and grade, set final elevations. 2) Base: excavate to depth for subbase (4"–6" aggregate for good soils or deeper for poor soils), install geotextile where needed, place and compact aggregate in <4" lifts to ≥95% Proctor equivalency. 3) Substructure: choose concrete slab, concrete piers with framed joists, or sleepers on compacted base—install per the chosen method with 1%–2% slope. 4) Flatten slabs: mill/flatten live‑edge slabs using a planer/jointer or slab flattening service; stabilize with epoxy or resin and fill voids. 5) Layout and fastening: layout slab pattern leaving expansion gaps (1/8"–1/4" between boards/slabs and 1/4"–1/2" to fixed objects), fasten to sleepers or joists using stainless or HDG screws from top or hidden fasteners/torx bolts from underside; for floating slabs on gravel use a bedding mortar bed or sleepers with non‑rigid fasteners. 6) Edge support: install a perimeter beam or continuous support to prevent sag and seat the live edges. 7) Sanding/finishing: sand in stages to desired grit, clean, then apply stabilizer/penetrating sealer and UV topcoat per product instructions. 8) Final grading and drainage tie‑ins.
How do I fasten thick live‑edge slabs securely—hidden fasteners vs visible—what methods and hardware are recommended?
Visible top screws: use stainless or hot‑dip galvanized screws with countersunk heads; pre‑drill and use long screws or carriage bolts into framing for strong hold. Hidden fasteners: use slotted carriage bolts/through bolts with washers under the slab into the sleeper, Z‑clips, or specialty wood‑to‑wood hidden fastener systems. For heavy slabs, through‑bolting with stainless bolts and neoprene washers offers the most secure, adjustable option and minimizes surface damage. Allow for seasonal movement with slotted slots or elongated holes in the framing connector. Use exterior‑grade adhesives sparingly (suitable for intended substructure) and never rely solely on adhesive for load paths.
Next Article
How to Edge a Patio With Wood: Step-by-Step DIY Guide
Step-by-step DIY on edging a patio with wood: plan, dig, build a stable base, install curved sections, and maintain.