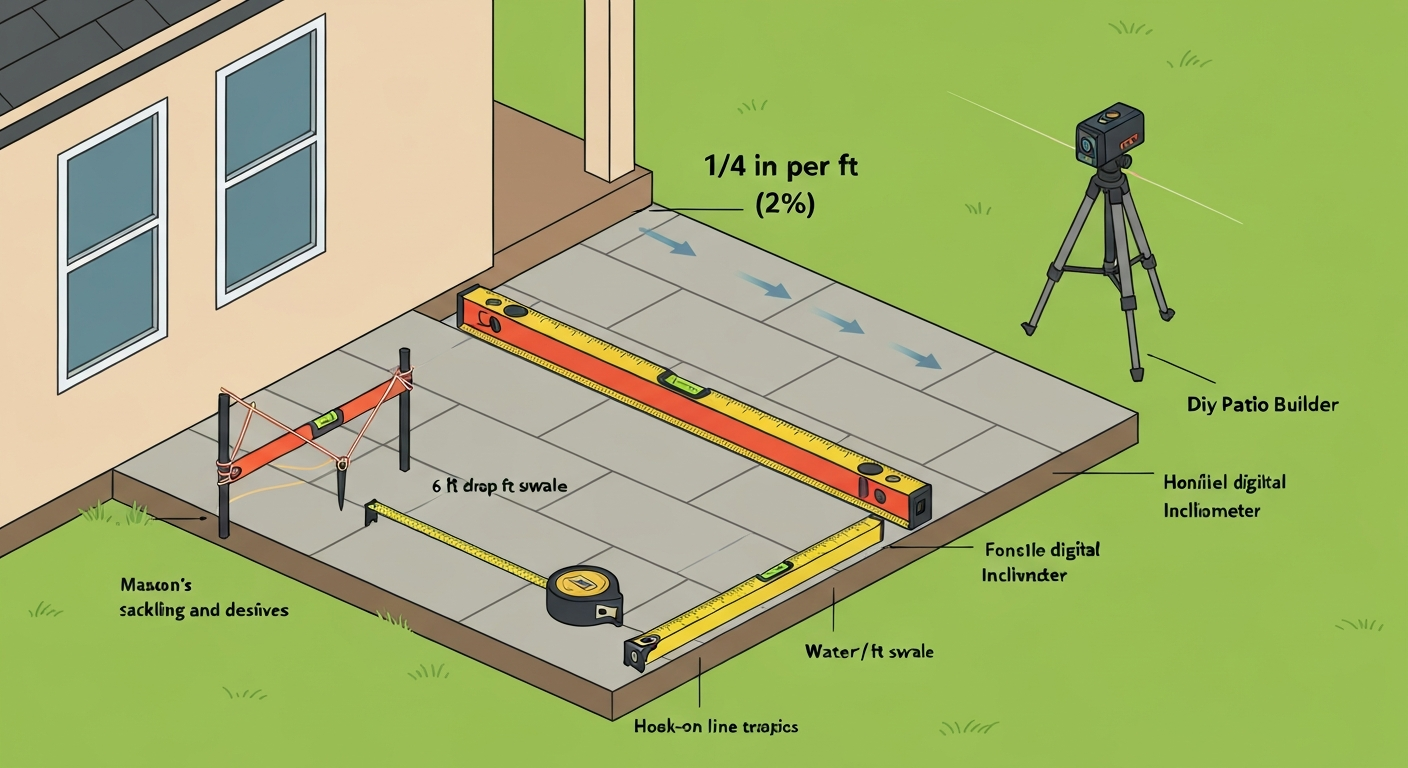
For proper drainage, your patio needs to slope away from the house at a minimum of 1/4 inch per foot (about 2%). That translates to a 2-inch drop over an 8-foot run. Too little slope and water pools at your foundation. Too much and the surface feels like a ramp. Getting that sweet spot right starts with measuring what you have, or planning what you need, and you can do it accurately with tools you likely already own.
How to Measure Patio Slope: DIY Methods, Rules & Fixes

Nolan Lennox
28 Jul 2026
Quick rules of thumb for acceptable patio slopes
These numbers come up repeatedly across building codes, manufacturer guidance, and trade standards, and they're worth memorizing before you pick up a single tool.
| Use case | Min. slope (% grade) | Rise per foot | Rise per 10 ft |
|---|---|---|---|
| General patio drainage (recommended) | 2% (1/4" per ft) | 0.25" | 2.5" |
| Minimum acceptable drainage | 1% (1/8" per ft) | 0.125" | 1.25" |
| Concrete flatwork (ACI/industry) | 1–2% | 1/8"–1/4" | 1.25"–2.5" |
| Sand-set pavers (ICPI guidance) | 1–2% | 1/8"–1/4" | 1.25"–2.5" |
| IRC foundation grading requirement | ~5% (6" in 10 ft) | 0.6" | 6" |
| ADA accessible route max running slope | 5% (1:20) | 0.6" | 6" |
| ADA cross-slope max | ~2.08% (1:48) | 0.25" | 2.5" |
| UK Part M preferred external ramp | 1:20 preferred, 1:12 max | — | — |
The 2% figure (1/4" per foot) is the practical sweet spot for most patios. It sheds water reliably without feeling noticeably tilted underfoot. The IRC's 5% foundation grading rule applies to the soil grade immediately around your house, not necessarily the finished patio surface, but if your patio is right against the foundation, you need at least that 6-inch fall within 10 feet, or you need to install drains or swales to compensate. For accessible patios (think aging-in-place builds or commercial-adjacent projects), the ADA 1:20 running slope cap and 1:48 cross-slope cap are hard limits you should not exceed.
Which way should a patio slope?
Always slope away from the house, toward a safe discharge point, a lawn area, a swale, a channel drain, or a storm system. Water against your foundation is the enemy. It causes settlement, damp, efflorescence on brickwork, and in bad cases, basement flooding. The U.S. Building America guidance is consistent on this: slope the slab away from the structure, or if that geometry is genuinely impossible, install drains or swales within 10 feet to intercept runoff before it reaches the foundation.
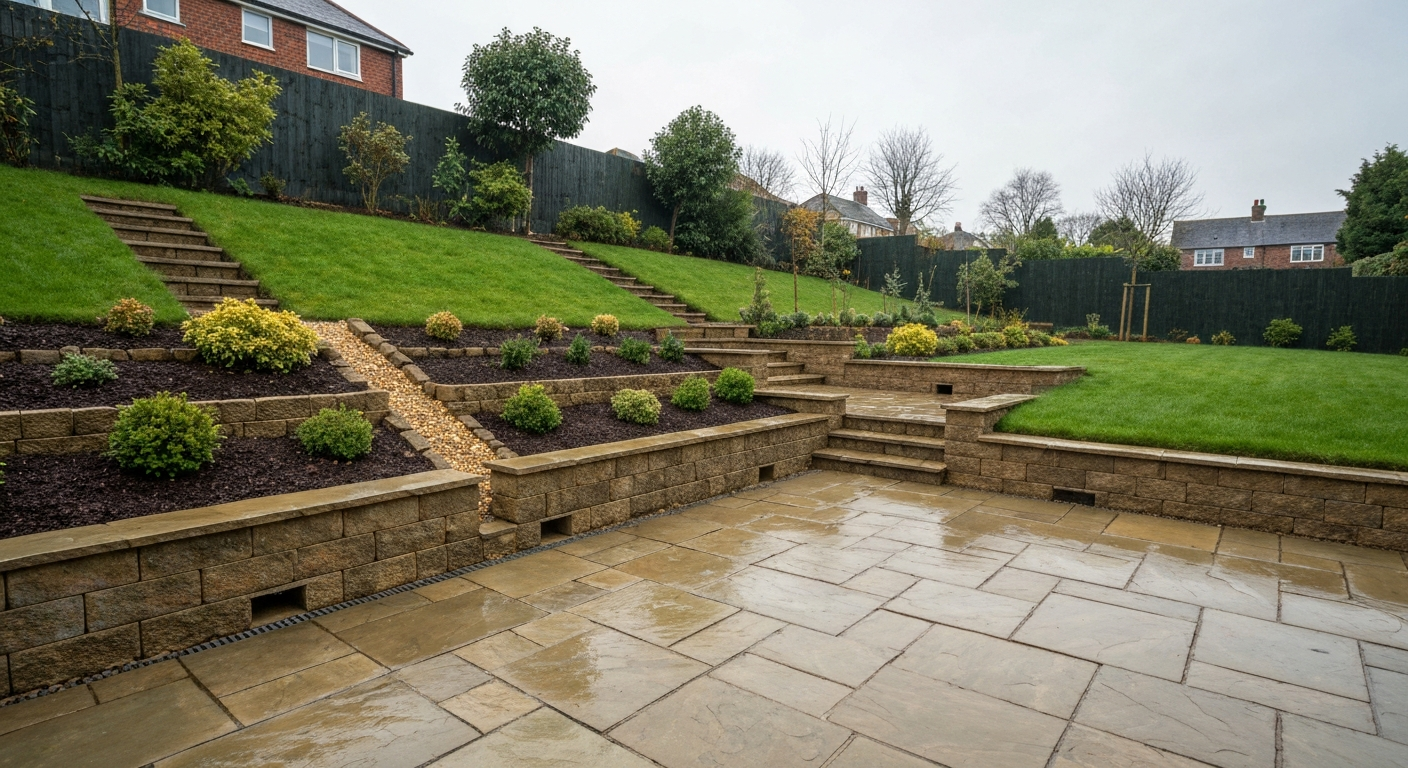
On a corner patio or an L-shaped layout, you may slope the main body straight away from the house and let one side drain toward a channel drain along the outer edge. On a hillside site, the slope direction gets more complex, the natural grade may want to direct water across the patio rather than away from the house. That's where you need to think carefully about crown profiles, two-directional slopes, or drain placement before you start laying any material. The topic of building on a hillside is closely related and covered in dedicated guides on this site. For clear guidance on which way a patio should slope, see the 'Which way should a patio slope?' section. See our how to build a patio on a hillside guide for detailed steps on terracing, drainage, and retaining walls.
Before you start: safety, codes, and what to gather
Safety and code notes
- Call 811 (USA) or your country's equivalent before any digging — utility lines can be shallow near patios.
- Check local planning/building requirements. In the UK, permitted development rules may apply; in the USA, some municipalities require permits for patios over a certain size or within a setback.
- If your patio is against the house foundation, local code may require a minimum 6-inch drop within 10 feet (IRC R401.3). Verify your local adoption of IRC or equivalent before finalizing plans.
- For accessible design (ADA in the USA, Part M / BS 8300 in the UK), confirm slope limits early — they may constrain your layout more than drainage requirements alone.
- On steep hillside sites, retaining wall work often requires an engineer's sign-off or a permit. Know the threshold before you start digging.
Tools checklist
- Mason's string line (50–100 ft roll)
- Line level (small hook-on bubble level for string) — or a water level for longer runs
- Wooden stakes or rebar pins
- 4-ft or 6-ft spirit level (longer = more accurate)
- Tape measure (25 ft minimum)
- Pencil and graph paper (or a phone notepad)
- Calculator (or phone)
- Optional: digital inclinometer or digital level (Bosch GIM 120 or similar)
- Optional: rotary grade laser + rod (rent if you don't own)
How to measure an existing patio with a string line and line level
This is my go-to method when I want accurate readings over a full patio run rather than just a short section. It takes maybe 20 minutes to set up and gives you reliable numbers across the whole surface. For a simple, low-cost method using a taut mason's line and a small line level to measure rise/run across a patio, see How to Use a String Line Level for Yard Grading, YardGradingCalculator How to Use a String Line Level for Yard Grading — YardGradingCalculator.
- Drive a stake at one corner of the patio (near the house). Tie your mason's line to it at a fixed height — about 6 inches above the patio surface works well.
- Run the string taut to a stake at the far corner (the low side, away from the house). Hook your line level onto the center of the string.
- Adjust the far stake up or down until the string bubble reads level. Mark that exact height on the far stake.
- Now measure the vertical distance from the string to the patio surface at the near stake. Write it down — call it 'A'.
- Measure the vertical distance from the string to the patio surface at the far stake. Write it down — call it 'B'.
- Measure the horizontal distance between the two stakes along the ground. Call it 'L'.
- Calculate the existing rise: Rise = B minus A (if the patio slopes away from the house, B will be larger because the patio surface is further below the level string at the far end).
- Calculate slope percent: (Rise ÷ L) × 100. For example: 1.5" rise over 72" run = (1.5 ÷ 72) × 100 = 2.08% — that's a good slope.
- Repeat across the width of the patio (take readings at both edges and the center) to check for cross-slope or low spots.
- Mark any areas where the string-to-surface measurement does not change as expected — those are flat or reverse-sloped spots that need attention.
Keep the string as tight as possible, any sag introduces error. If you're spanning more than about 20 feet without an intermediate support, a slight sag in even taut string is enough to throw off your readings by 1/4 inch or more. In that case, either add an intermediate stake or switch to the laser method below.
Simple household method: spirit level, straight edge, and tape
This method is faster for checking short sections, maybe an 8-foot span, and works perfectly for double-checking paver runs as you lay them.
- Lay your spirit level (or a long straight board with a level on top) on the patio surface in the direction of slope.
- If the bubble shows the surface is not level, slide a shim (a tapered piece of wood or folded cardboard) under the low end until the bubble reads level. Measure the shim thickness — that is your rise over the length of the level.
- Alternatively: hold one end of the level at the high point (near the house) and lift the far end until the bubble reads level. Use a tape measure to measure the gap between the far end of the level and the patio surface. That gap is your rise.
- Divide the rise (in inches) by the length of the level (in inches) to get slope as a decimal. Multiply by 100 for percent.
- Example: 4-ft (48") level, 1" gap at far end. Slope = 1 ÷ 48 = 0.0208 = 2.08%.
- Repeat in multiple directions across the patio and average the results. Note any spots where the surface dips or rises unexpectedly.
A 4-foot level gives you decent readings, but a 6-foot level reduces the effect of small surface bumps and gives more representative results. If you're checking a gravel patio, screed a flat board across the gravel surface first and measure off that, individual gravel pieces can throw individual readings off by a full percent.
Pro tools: laser level and digital inclinometer
Using a rotary grade laser
A rotary grade laser (like the Spectra Precision HV302G or similar) set on a tripod throws a rotating beam across the whole site. With a receiver rod, one person can take elevation readings at any point on the patio in seconds. These tools are accurate to about 1.5 mm at 30 meters, well under 1/16" across a typical patio. You don't need to own one; most tool hire shops rent them for $50–$100/day. Laser/grade instruments and price context, Gradelog (trade/pricing overview) summarizes typical retail and contractor price ranges for levels and lasers, from <$10 for line levels up to $2,000–$4,000+ for contractor-grade rotary grade lasers Laser/grade instruments and price context — Gradelog (trade/pricing overview).
- Set up the laser on a stable tripod well outside the patio area, with clear line-of-sight to all measurement points.
- Level the laser according to manufacturer instructions (most self-level within a degree or two).
- Hold or mount the receiver rod vertically at your reference point (ideally a benchmark like a door threshold or a known elevation).
- Note the rod reading at the reference point. This is your benchmark rod reading.
- Move the rod to each measurement point around the patio surface. Note each reading.
- A higher rod reading means the ground is lower at that point. A lower rod reading means the ground is higher.
- Difference in rod readings ÷ horizontal distance = slope. Multiply by 100 for percent.
- Example: benchmark rod reading 4.50 ft, far-corner rod reading 4.71 ft, distance 10 ft. Elevation drop = 0.21 ft = 2.52". Slope = 2.52" ÷ 120" = 2.1%.
Using a digital inclinometer
A digital inclinometer (the Bosch GIM 120 is a well-known example, accurate to ±0.05° at 0° and 90°) reads slope in degrees, percent, and mm/m simultaneously. It's ideal for one-person spot checks and for setting screed rails. Just lay it on the surface or on a straight edge, and read the display directly.
- Place the inclinometer on a clean, flat section of the patio surface, or on a long straight edge laid across the surface.
- Read the slope in your preferred unit (%, degrees, or mm/m). Most digital models display all three at once.
- Rotate 90 degrees to check cross-slope.
- For gravel or rough surfaces, use the longest straight edge you have and read off that rather than directly off the material.
- Note the reading from several points and average them to account for surface variation.
How to calculate slope: formulas, conversions, and worked examples
The core formulas
Slope has four common expressions and you'll see all of them depending on the source. Here's how they relate and how to convert between them:
| Expression | Formula | Example (2% slope over 10 ft) |
|---|---|---|
| Percent grade (%) | (Rise ÷ Run) × 100 | 2.4" ÷ 120" × 100 = 2% |
| Ratio (1:X) | 1 : (Run ÷ Rise) | 1:50 (120 ÷ 2.4 = 50) |
| Degrees (°) | arctan(Rise ÷ Run) | arctan(0.02) ≈ 1.15° |
| Rise per foot (in/ft) | Rise (in) ÷ Run (ft) | 2.4" ÷ 10 ft = 0.24"/ft ≈ 1/4"/ft |
Worked example 1: checking a 10-foot patio
You run a level string line across a 10-foot patio. At the house end, the string is 4 inches above the patio. At the far end, the string is 6.5 inches above the patio. Rise = 6.5 − 4 = 2.5 inches. Run = 10 ft = 120 inches. Slope % = (2.5 ÷ 120) × 100 = 2.08%. Rise per foot = 2.5 ÷ 10 = 0.25 in/ft (exactly 1/4" per foot). Ratio = 1:48. Degrees = arctan(0.0208) ≈ 1.19°. This patio is draining perfectly, right at the recommended 2% mark.
Worked example 2: a hillside terrace, 16 feet wide
You're measuring a natural slope to decide how much fill or cut you need for a level terrace patio. String line stretched 16 feet across the slope. Level string is 8.5 inches above the ground at the high end and touches the ground at the low end. So rise = 8.5 inches over a 16-foot (192-inch) run. Slope % = (8.5 ÷ 192) × 100 = 4.4%. That's a meaningful slope, too steep for a single flat patio without significant regrading, a retaining wall, or a two-tier terraced approach. Rise per foot = 8.5 ÷ 16 = 0.53 in/ft. For reference, a 1% finished drainage slope across the same 16-foot terrace would mean only a 1.92-inch total drop, much easier to manage.
Tool accuracy, cost, and ease of use compared
| Tool | Typical accuracy | Approx. cost (buy) | Ease of use | Best for |
|---|---|---|---|---|
| String line + line level | ~1/4" over 20 ft (taut line) | Under $10 | Easy | Full-patio slope checks, layout |
| 4–6 ft spirit level + tape | ~1/8" over level length | $40–$150 | Very easy | Short-run checks, setting screeds |
| Digital inclinometer (e.g. Bosch GIM 120) | ±0.05° (±~1 mm/m) | $150–$500 | Easy | Spot checks, reading % directly |
| Rotary grade laser + rod | ~1.5 mm @ 30 m | $2,000–$4,000 (or ~$50–100/day rent) | Moderate | Site-wide grading, complex slopes |
| Smartphone level app | Variable, ±0.5–2°+ depending on device | Free | Very easy | Rough indicative checks only |
My honest take: for most DIY patio projects under 15 feet, a good 6-foot spirit level and a tape measure is all you need. Add a string line for full-patio surveys. If you're building on a genuinely tricky hillside or doing a large poured concrete slab, rent a grade laser for the day, it's the single biggest accuracy upgrade you can make for under $100 and it removes the guesswork entirely. Smartphone apps are fine for a quick sanity check but I wouldn't rely on one to set final slopes, sensor calibration varies too much between devices.
Common measurement mistakes and how to avoid them
- Sagging string line: even a small sag in a string line over 20+ feet reads as false slope. Keep lines tight and add an intermediate support stake for longer runs.
- Measuring from a single point: one reading tells you nothing about the whole patio. Take measurements at the corners, the center, and along each edge — a minimum of 6 points for a rectangular patio.
- Confusing rise and run directions: always measure rise vertically and run horizontally. On a slope, measuring along the surface gives a longer 'run' than the true horizontal distance — for shallow slopes under 5% this error is negligible, but be consistent.
- Not accounting for surface texture: on gravel or rough-cut flagstone, individual high points skew readings. Use a straight edge or screed board to bridge the irregularities before measuring.
- Measuring just after rain: ponding water can mask surface low spots temporarily. Check the surface dry to see where water actually collects.
- Ignoring cross-slope: most people check slope in one direction (away from the house) but forget to check left-to-right. A patio with correct front-to-back slope but a 3% cross-slope will still channel water into unintended corners.
- Assuming the house foundation is a level datum: house foundations can rack and settle over decades. Always use a proper level reference, not the house wall.
What to do when the slope is wrong: corrective options
Finding out your slope is wrong isn't the end of the world, it's just a decision point. The right fix depends on how wrong it is and what you're working with.
Regrading
For an unbuilt or gravel patio, regrading is the most direct fix. You're adjusting the subbase elevation to achieve the right slope before laying any surface material. This is DIY-friendly for most sites, it's just careful shovel work and checking. On a sand-set paver patio, you can often lift and relay sections without starting over entirely.
Channel drains and French drains
When you can't change the slope (a concrete slab, for instance, or a patio constrained by walls on three sides), a channel drain cut across the low side is a practical solution. A linear channel drain intercepts surface runoff before it pools or runs toward the house. A French drain (perforated pipe in a gravel trench) works for subsurface water and groundwater seeping under the patio from a slope above.
Retaining walls and raised or terraced patios
On steeper hillside sites where regrading alone would require moving enormous amounts of soil, a retaining wall creates a level shelf for the patio. You excavate into the hill on one side and retain the cut face with a wall. In the UK, this approach is common where gardens slope sharply away from the rear of terraced houses. A raised or terraced patio lets you work with the natural topography rather than against it. These approaches are explored in detail in the hillside patio and raised patio build guides on this site.
Material-specific guidance for sloped sites
Pavers (concrete or natural stone, sand-set)
ICPI guidance recommends 1–2% finished surface slope for pedestrian paving. The real advantage of sand-set pavers on a slope is adjustability: you can re-screed the bedding sand and relay individual sections if your measurements reveal a problem. Keep the bedding sand layer consistent (typically 1 inch compacted) and set your screed rails to the planned slope before you start laying. Check slope every 4–6 feet with your level as you go, not just at the end.
Gravel patios
Gravel is the most forgiving material for a sloped site because it can be raked to grade at any stage. The challenge is that loose gravel on slopes above about 3–4% tends to migrate downhill over time. Use a weed-suppressing membrane and edging restraints on all sides, and consider a compacted angular gravel (not round pea gravel) for better interlocking on sloped ground. Measure the subbase slope, not the gravel surface, since the gravel will settle and spread. Building a gravel patio on a slope involves some specific subbase preparation that's worth reading up on separately.
Concrete slabs
Concrete is unforgiving, once poured, your slope is fixed. ACI and industry guidance recommends minimum 1% slope (1/8" per foot), with 2% preferred. Set your form boards to the correct slope before pouring: calculate the exact height difference end-to-end and set the far form board that much lower than the near one. Use a screed rail or a long level continuously during screeding to verify you're holding the planned grade. If you're pouring adjacent to the foundation, the IRC 5% grading requirement (6" in 10 ft) applies to the finished grade around the house, but your patio surface can achieve the same outcome with a 2% surface slope into a channel drain placed at the outer edge.
Timber and composite decking
Timber and composite patio/deck structures are built on posts or joists, so slope is controlled by adjusting post heights or joist bearing heights, the slope is engineered in, not graded in. Most decking manufacturers recommend 1–2% away from the house to shed rain off the surface. Measure post heights precisely with a laser or level during construction. On a hillside, the varying post heights can become significant (some posts may be 12"+ taller than others), so measuring and planning the slope from the outset avoids surprises when you're trying to set a consistent fall across a complex timber frame.
Before-building checklist for sloped sites
- Measure existing ground slope in both directions (front-to-back and side-to-side) before planning layout.
- Calculate required total fall for your planned patio dimensions at your target slope (e.g., 2% over 12 ft = 2.88" drop).
- Identify the discharge point for runoff — lawn area, swale, channel drain — and confirm it's at least as low as your patio's low edge.
- Check local code for minimum foundation grading requirements and any permit thresholds.
- Confirm accessibility requirements if the patio must meet ADA or Part M standards.
- Plan edge restraints and border details — especially at the low side where runoff exits.
- Mark utility locations before any digging or excavation.
- Decide on corrective approach (regrade, drain, retaining wall, terracing) before ordering materials.
- For hillside or raised patio designs, confirm whether an engineer's review is required.
Worked project examples with numbers
Example 1: fixing a 10-foot concrete patio with flat spots
A homeowner has a 10-foot-wide concrete patio running straight out from the back door. String line survey shows: at 0 ft (house end), string is 5" above surface. At 5 ft, string is 5.25" above surface. At 10 ft (far end), string is 5.3" above surface. Rise from 0–10 ft = 5.3" − 5" = 0.3". Slope = 0.3 ÷ 120 × 100 = 0.25%. That's well under the 1% minimum, water is essentially sitting still on this patio. The mid-point measurement (5.25") confirms the patio is nearly flat across its length. Options: (1) If the surface is deteriorating anyway, full removal and repour with correct 2% slope set in formwork. (2) If the slab is sound, install a channel drain at the outer edge connected to a drywell or garden drain, so even slow-moving water is intercepted before it backs up toward the house.
Example 2: measuring and planning a hillside terrace patio
A garden slopes at 4.4% across a 16-foot potential patio area (8.5" drop, from the earlier worked example). A single flat patio here would require either cutting 8.5" into the hill at the high side or building up 8.5" at the low side, or a combination. The DIYer decides to cut into the slope 4" and retain the cut face with a low retaining wall, then build up the far side 4.5" with compacted fill. Final result: a level terrace with a 2% drainage slope built in using a screed rail during subbase preparation. Total elevation correction needed at the retaining wall: 4 inches of cut. The patio surface then falls 2% (2.88") across its 12-foot finished depth toward a channel drain at the outer edge. All measurements were taken with a rented grade laser, 3 hours of total survey and planning time, saving significant guesswork before a single stone was moved.
When to call a professional
I'll be straight with you: most patio slope work is genuinely DIY territory. Measuring, calculating, and adjusting a subbase or relaying sand-set pavers is within reach for most homeowners willing to take the time. But there are clear situations where calling a pro is the right call:
- Retaining walls over 3 feet high (UK: typically 1 metre) — these involve significant lateral loads and usually need engineering calculations or at minimum a specialist contractor.
- Sites where water intrusion is already happening in the basement or foundation — a drainage contractor or structural engineer should assess before any paving work begins.
- Complex multi-direction grading on large sites (over 500–600 sq ft) where errors in slope layout could direct water toward the house or a neighbor's property.
- Any work requiring planning permission or building regulation approval — getting this wrong costs more to fix than the professional fee.
- Suspected underlying issues: if you're finding significant settlement, sinkholes, or very soft spots in the subbase, stop and get a structural or geotechnical assessment.
- UK-specific: if your project is within 2 metres of a public sewer or involves connecting to surface water drainage, a building regulations notification (Part H) or a Build Over Agreement may be required.
Quick printable checklist: measure, calculate, decide, fix
- Gather tools: string line, line level or laser, spirit level, tape measure.
- Measure existing or planned slope in two directions (away from house + side-to-side).
- Record rise (inches) and run (inches or feet) at each measurement zone.
- Calculate slope %: (Rise ÷ Run) × 100.
- Compare to target: 2% ideal, 1% absolute minimum, 5% max for most pedestrian use.
- Check against accessibility requirements if applicable (ADA: max 5% running, max ~2% cross).
- Identify the discharge direction and confirm runoff goes away from the house.
- Identify any flat spots, reverse slopes, or cross-slope issues.
- Choose corrective action: regrade subbase / adjust sand bed / install channel drain / add retaining wall or terracing.
- Re-check slope after correction before laying final surface material.
- Sign off: slope meets code, discharge point is clear, edge restraints are in place.
Related projects worth tackling next
Now that you've got a handle on measuring and calculating slope, the natural next step is putting that knowledge to work on a real build. If you're working with a sloped or uneven yard, building a gravel patio on a slope is one of the most accessible first projects, it's forgiving, relatively low-cost, and teaches you subbase preparation without the pressure of a permanent pour. For steeper ground or a significant elevation change, the hillside patio guide covers terracing, drainage, and structural approaches in detail. UK readers dealing with a rear garden that drops sharply away from the house will find the raised patio on a slope guide particularly useful, with guidance specific to UK materials, Part M requirements, and permitted development rules.
FAQ
What are quick rules-of-thumb for acceptable patio slopes (percent, rise per foot)?
Use these common, practical targets: - Minimum to shed water: 1% (1/8 in per ft). - Preferred for reliable drainage: 2% (1/4 in per ft). - Steep pedestrian limit for accessibility: running slope no steeper than 5% (1:20) and cross slope no steeper than ~2.083% (1:48) for accessible routes. - Very steep ramps (where permitted) may be up to 8.33% (1:12) only when designed as a ramp per local/regulatory rules. Aim for 1%–2% for general patios; keep any route required to be accessible within ADA/Approved Document M limits.
Which way should a patio slope relative to the house and drainage points?
Slope patios away from the house toward a safe discharge point: yard, swale, storm drain or channel drain. Never slope toward the foundation. If you cannot provide the recommended fall within the first few feet from the foundation, install a linear drain, catchbasin, or extend storm drainage to keep water away from the building.
How do I measure patio slope using a string line and line level (household method)?
Materials: two stakes, mason’s string, line level (bubble on the string), tape measure, marker. Steps: 1) Drive two stakes at the ends of the run you want to measure. 2) Tie a taut string between stakes at a convenient reference height near one end (e.g., 3 ft above surface). 3) Clip the line level on the string and adjust the string height at one stake until the line level reads level. 4) At the other end, measure vertical distance from the string down to the patio surface (drop). 5) Measure horizontal run between stakes. 6) Compute slope = (rise/run). For percent: (drop ÷ run)×100. Example: 1.5 in drop over 10 ft (120 in) → 1.5/120 = 0.0125 = 1.25% (≈1/8–1/4 in per ft).
How do I measure slope with a spirit level and tape (simple 1-person method)?
Materials: long spirit level (4–8 ft or longer), tape measure, small shim or block. Steps: 1) Lay the level on the patio surface aligned with the direction you want to measure. 2) Place a shim under one end of the level and slide until the bubble is centered (level). 3) Measure the vertical thickness of the shim (drop) and the length of the level (run). 4) Compute slope = drop/run; percent = (drop ÷ run)×100. Repeat along several parallel lines and use the average. Example: With a 6 ft (72 in) level you need a 1.5 in shim at the far end to level — slope = 1.5/72 = 0.0208 = 2.08% (≈1/4 in per ft).
How to use a water level for long runs or obstructed sight lines?
Materials: clear plastic tubing (length as needed), water, two stakes or straight-edge references. Steps: 1) Fill tubing partially with water, eliminate air pockets, and hold both ends so water levels settle. 2) Fix one end next to a known reference elevation (mark the water level on a stake or board). 3) Move the other end to the distant point and mark that water level on the surface/stake. 4) Measure vertical difference between the two marks and the horizontal run. 5) Compute slope as rise/run. Water levels are simple, inexpensive and accurate for long distances when line-of-sight or equipment is an issue.
How to measure slope with a laser level or rotating grade laser (pro method)?
Equipment: self-leveling rotary grade laser, laser receiver and grade rod, tripod. Steps: 1) Set up and level the laser on tripod per manufacturer instructions. 2) Set desired reference elevation or zero the receiver at a known point. 3) Walk the receiver/rod across the patio; the receiver reads elevation difference relative to the laser. 4) Record elevation differences at measured horizontal station points and compute slope between points (rise/run). Advantages: single-person operation, high accuracy over long distances, and ability to set dual slopes. For homeowners, renting a laser is common due to purchase cost.
Next Article
How to Build a Patio on a Hillside: Step‑by‑Step Guide
How to build a patio on a hillside: step‑by‑step DIY guide for planning, drainage, retaining walls, materials & costs.