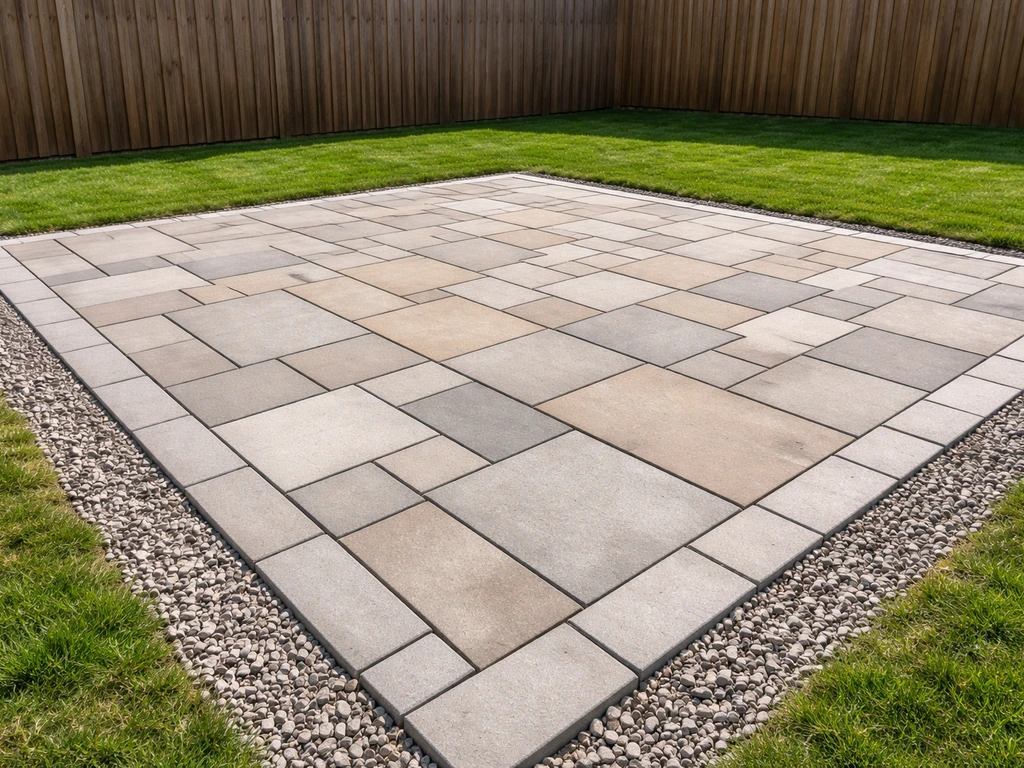
A patio needs to slope away from your house at a minimum of 1/8 to 1/4 inch per foot, depending on the material. For concrete slabs, aim for at least 1/4 inch per foot (roughly 2%). For pavers and brick, 3/16 to 1/4 inch per foot hits the sweet spot. Gravel and natural stone follow similar rules. Get this right during the build and your patio drains cleanly every time it rains. Get it wrong and you are dealing with puddles, frost heave, and potentially water sneaking toward your foundation.
How to Pitch a Patio: Slopes, Drainage & DIY Installation

Nolan Lennox
25 Jul 2026
What "pitch" actually means for a patio
Pitch, slope, grade, people use these words interchangeably, and they all mean the same thing: how much the surface drops over a given horizontal distance. For a patio, you are deliberately building a slight tilt so rainwater runs away from the house rather than pooling or, worse, flowing toward the foundation. This guide covers everything from understanding why that slope number matters, to measuring your existing ground, calculating the rise and run, setting up your work, and checking your finished surface before you call the job done. Whether you are laying pavers, pouring a concrete slab, spreading gravel, or setting natural stone, the drainage principles are the same, only the execution changes a bit.
Why getting the pitch right matters so much
I learned this the hard way on my first paver patio. The surface looked great until the first heavy rain, and I had a 4-inch-deep pond sitting against the back wall of the house for two days. Water is patient and relentless. Over time, standing water near a foundation causes erosion, frost damage to footings in cold climates, mold and efflorescence on masonry, and can eventually work its way into a basement or crawl space. Beyond the foundation issue, flat or back-pitched surfaces also destroy your patio surface itself. Trapped water in paver joints washes out the sand, causes bedding to shift unevenly, and in freeze-thaw climates heaves individual stones. On a concrete slab, trapped water accelerates cracking and spalling.
Proper slope solves all of this cleanly. A correctly pitched surface sheds water to a lawn, a planted bed, a swale, or a drain before any of those problems have a chance to start. It also makes your patio surface more comfortable to use after rain, you are not tiptoeing around puddles or waiting for things to dry out.
Building codes, permits, and what to check before you dig
Most jurisdictions follow the International Residential Code (IRC), and Section R401.3 is the relevant rule for grading near a building. It requires the finished grade to slope away from the foundation a minimum of 6 inches within the first 10 feet, that works out to roughly 5%, which is steeper than a typical patio slope. The exception is when drains or swales are in place to redirect water where physical grade change is not possible. Your patio surface slope of 1/4 inch per foot (about 2%) satisfies drainage requirements for the patio itself but does not substitute for the broader site grading requirement around the building.
Whether you need a permit for a patio depends almost entirely on your municipality and sometimes your HOA. Common triggers include: attaching the patio to the structure, total square footage over a threshold (often 200 sq ft), using a footing or frost wall, or adding covered overhead structure. Gravel and loose-laid patios often fly under the permit radar, while concrete slabs and anything attached to the house more commonly require one. Call your local building department before you start. Permit fees are real money but getting caught with an unpermitted structure that violates setback rules is far more expensive. Some areas also require stormwater management documentation for large impervious surfaces, so check both the building and public works departments.
- Call your local building department and ask whether your project requires a permit and what the setback requirements are from property lines and the structure
- Ask specifically about impervious surface limits — some municipalities cap total hard surface coverage in a yard
- Check HOA rules independently; they often have finish material and appearance restrictions that go beyond code
- Confirm whether your area requires inspections at the subgrade, base, or finished surface stage
- Ask about drainage requirements — some municipalities prohibit directing patio runoff onto neighboring properties
The slope numbers: exactly how much pitch do you need
Here are the industry-standard and code-backed slope ranges you should work to. The Interlocking Concrete Pavement Institute (ICPI) specifies pedestrian paver installations at approximately 1.5% to 2% slope, which translates to about 3/16 to 1/4 inch of drop per foot of run. ACI guidance and most municipal specs for exterior concrete slabs require a minimum of 1% slope, but contractors and inspectors consistently recommend designing to 2% (1/4 inch per foot) as a practical minimum to account for construction tolerances. Some permeable pavement manuals allow very low slopes (for example, 0.5%) but require additional subbase design, drain pipes, and provisions for upslope runoff, see Montgomery County Permeable Pavement Technical Manual (PICP guidance / slope criteria). Gravel patios should match or slightly exceed paver minimums. Natural stone follows the same targets as pavers.
| Material | Minimum Slope | Recommended Slope | Notes |
|---|---|---|---|
| Concrete slab | 1% (1/8" per ft) | 2% (1/4" per ft) | Design to 2% to absorb finishing tolerances |
| Interlocking pavers / brick | 1.5% (~3/16" per ft) | 2% (1/4" per ft) | ICPI Tech Spec 2 industry standard |
| Natural stone (dry-laid) | 1.5% (~3/16" per ft) | 2% (1/4" per ft) | Uneven stone surfaces benefit from being toward the higher end |
| Gravel / decomposed granite | 1.5%–2% (~3/16"–1/4" per ft) | 2%+ (1/4" per ft) | Slightly steeper helps compensate for loose surface |
| Permeable pavers (PICP) | 0.5% minimum (some systems) | 1%–2% | Requires additional subbase drain pipe design; verify with local specs |
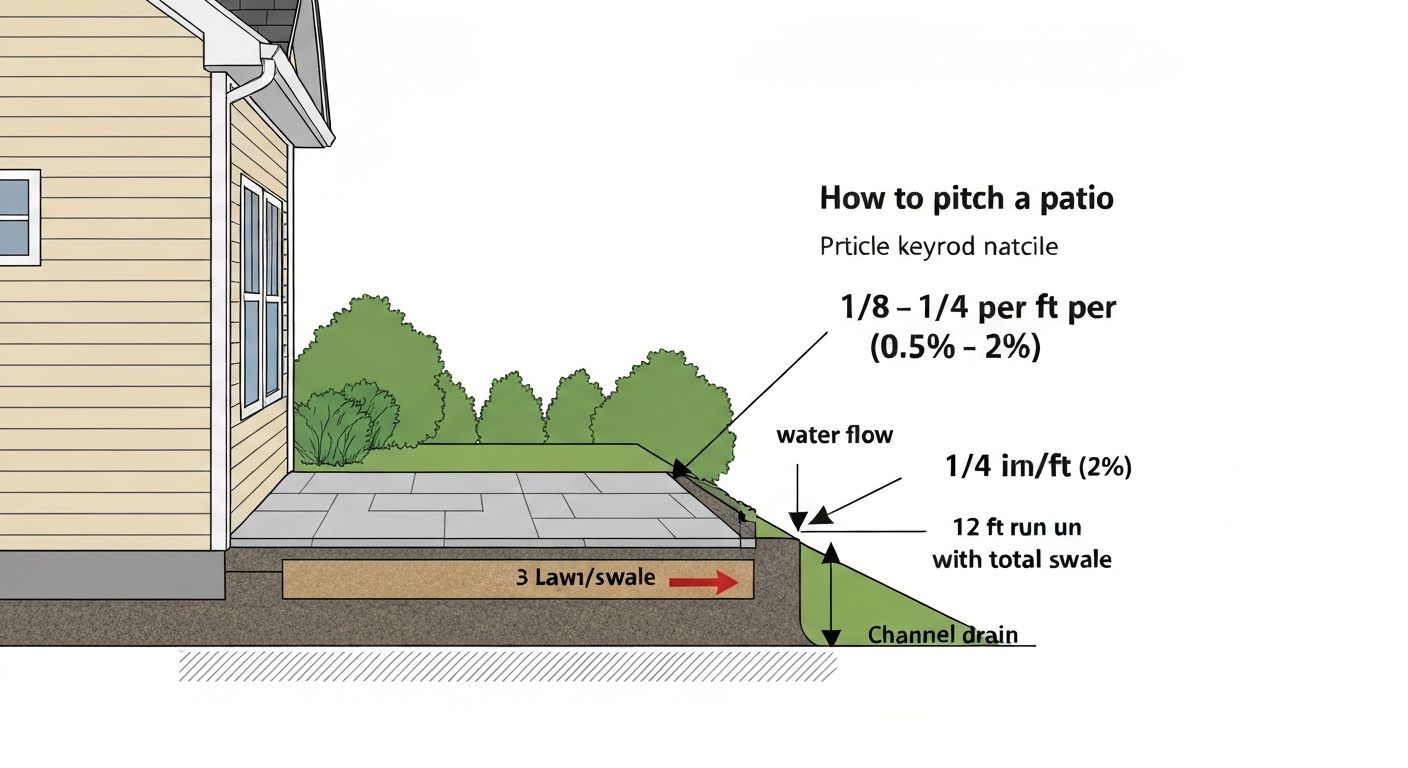
To put those numbers into plain practice: on a 12-foot-wide patio sloping away from the house, a 2% slope means the far edge sits 3 inches lower than the house edge. On a 10-foot patio at 1/4 inch per foot, you get 2.5 inches of total drop. These are very gentle slopes, you will not notice them when you are sitting outside, but a water drop absolutely will.
Planning decisions that affect your pitch
Where the water goes after it leaves your patio is just as important as how it gets off the patio in the first place. Think through these factors before you lock in any design decisions.
Site drainage and where runoff ends up
The slope of your patio needs to push water toward somewhere that can absorb or carry it away: a planted bed, a lawn area, a swale, a storm drain, or a dry well. If the low end of your patio runs into a fence, retaining wall, or an uphill grade, you have created a bathtub. Walk your yard after a hard rain before you design anything. See where water already collects naturally, and route your patio drainage around those low points or toward them deliberately with a channel drain outlet.
Run length and total drop
The longer the patio, the more total elevation change you need to maintain your target slope. A 20-foot-deep patio at 1/4 inch per foot drops 5 inches. That is manageable in most yards. A 30-foot patio drops 7.5 inches, which starts to feel steep at the edges and may require you to either step the grade, add a channel drain partway out, or adjust the slope slightly and accept a modest mid-patio drain. Measure your run before committing to a single slope across the whole surface.
Gutters, downspouts, and roof runoff
This one catches a lot of DIYers off guard. If a downspout dumps onto or near the corner of your patio, the volume of water hitting that point during a heavy storm is far more than the patio surface slope alone can handle. Route downspouts away from the patio using a splash block, an extension, or ideally hard-pipe underground out to daylight, a swale, a storm sewer connection (where local code allows), or a correctly sized dry well. Do not let your trench drain serve as the primary collection point for roof runoff unless it is sized specifically for that flow, residential linear drain channels typically handle 9 to 21 GPM depending on outlet size, which is not always enough during a heavy downpour from a large roof section.
Adjacent structures and grade ties
Your patio needs to tie in gracefully to whatever surrounds it: the house foundation, a garage slab, steps, a fence post line, or a retaining wall. The house connection is the most critical, the patio surface should sit below the house's finished floor level and below any door thresholds, with the slope carrying water away. Check the height of your existing foundation waterproofing or siding termination; the patio surface should not cover or be within a few inches of wood framing. At the far edge, make sure your finished elevation ties in to the surrounding grade without creating a sharp drop that becomes a trip hazard or causes edge erosion.
How to measure existing grade and calculate pitch
You do not need surveying equipment for a backyard patio. A string line, a line level (or a builder's level app on your phone as a backup), some stakes, and a tape measure will get you accurate enough numbers to build from.
Step-by-step: measuring existing grade
- Drive a stake at the house edge of your planned patio location, right where the patio surface will meet the building
- Drive a second stake at the far edge of the patio, in line with the first
- Tie a string line taut between the two stakes and clip a line level to the center of the string
- Adjust the string at the far stake up or down until the level reads perfectly level (bubble centered)
- Measure the distance from the string down to the ground at the far stake — that measurement is the existing grade change between the two points
- Divide that drop (in inches) by the run (in feet) to get your existing slope per foot
- Compare that number to your target slope to understand how much excavation, fill, or base adjustment you need
Calculating pitch: rise over run example
Say your patio is 14 feet deep and you want a 2% slope (1/4 inch per foot). Multiply 14 feet by 0.25 inches to get 3.5 inches of total drop from the house edge to the far edge. When you measure your existing grade, you find the ground already drops 2 inches over that 14 feet. That means you need to create an additional 1.5 inches of engineered drop by building the base higher at the house end and tapering it toward the far end. If the ground slopes back toward the house, you need to cut that existing grade down and re-establish it with compacted fill before placing your base. Never rely on soft or uncompacted backfill to hold slope over time, it will settle unevenly.
Setting up slope reference strings for installation
Once you know your target slope, set up a grid of slope-reference strings across the entire patio area before you touch the base material. Use batter boards outside the patio footprint so you do not disturb them during excavation and base work. Set one string along the house edge at your planned finished height, then set parallel strings across the patio each dropping the correct amount per foot of run. For a 12-foot run at 1/4 inch per foot, the string at the far edge sits 3 inches lower than at the house. Check string heights frequently as you work, these are your grade control throughout the whole project.
Tools you need for measuring and installing a pitched patio
You can rent most of the heavier equipment. Owning the measuring and layout tools is worth it since you will use them again.
- String line and line level (or a digital/laser level for larger patios — a 30-ft line with a bubble level works fine for most DIY projects)
- 4-foot builder's level and a torpedo level for checking individual pavers or screed rails
- Digital level or smartphone level app (useful double-check but not a substitute for a real level on critical measurements)
- Measuring tape (25 ft minimum)
- Batter boards and stakes for setting grade reference outside the work area
- Plate compactor (rent one — hand tampers are not adequate for base compaction under pavers or concrete prep)
- Screed rails or screed pipes (for setting bedding sand depth and slope on paver installs)
- Straight 2x4 or magnesium screed board (8–10 ft) for screeding sand or concrete
- Rubber mallet for setting pavers without cracking them
- Bull float and finishing trowels for concrete slabs
- Wet saw or angle grinder with diamond blade for cutting pavers and stone
- Hand tamper for tight spots the plate compactor cannot reach
- Wheelbarrow and square-nose shovel for moving base material
- Safety glasses, work gloves, knee pads, and hearing protection for power tool use
Materials breakdown and cost considerations by patio type
Your material choice changes the layer cake under your feet but the slope requirements stay consistent across all of them. Here is a concise breakdown of what you need for each patio type, what it costs, and where you can save money if budget is tight.
| Patio Type | Subgrade Prep | Base Layer | Bedding / Setting Layer | Edge Restraint | Approx. DIY Material Cost (per sq ft) | Where to Save |
|---|---|---|---|---|---|---|
| Interlocking pavers / brick | Excavate, compact to 95% Proctor | 4" compacted ASTM D2940 aggregate base | 1" ASTM C33 screeded bedding sand | Plastic, aluminum, or steel spike-down edging (mandatory) | $6–$14 materials only | Use big-box paver products vs. premium brands; rent compactor rather than buying |
| Concrete slab | Excavate, compact subgrade, add gravel base | 4" compacted gravel sub-base + wire mesh or rebar | None (concrete is the surface) | Forms during pour, remove after cure | $5–$10 materials only (mix/delivery) | DIY forming and finishing saves $4–8/sq ft over hiring; consider ordering ready-mix for larger slabs |
| Gravel / decomposed granite | Excavate, compact | 3–4" compacted crushed stone base | 1–2" gravel or DG finish layer | Landscape edging, timber, or concrete border | $2–$5 materials only | Cheapest option overall; reusable and regrade-friendly — ideal for first-time builders |
| Natural stone (dry-laid flagstone) | Excavate, compact to 95% | 4" compacted aggregate base | 1" screeded coarse sand or DG | Rigid edge restraint or buried concrete edging | $8–$20 materials only (stone cost varies widely) | Source local stone vs. imported; irregular flagstone is cheaper than cut pieces |
| Natural stone (mortar-set on slab) | Excavate and form concrete slab first | Concrete slab base (see above) | 3/4"–1" mortar bed over cured slab | Slab edge is the restraint | $12–$25+ materials | Stone sourcing is the biggest variable; DIY mortar work is learnable but requires practice |
A note on base depth: the 4-inch compacted aggregate base is the minimum for pedestrian patios per ICPI guidance. Paver & Patio Calculator / ICPI summary (base depth, compaction targets) recommends compacting the subgrade to at least 95% of Standard Proctor (ASTM D698) for pedestrian use and compacting aggregate base in 2–4" loose lifts to about 98% of the appropriate Proctor (ASTM D698/D1557) to avoid settlement and edge spreading. If your soil is clay-heavy, poorly draining, or soft, go to 6 inches. Skimping on base depth is the single most common DIY mistake and the leading cause of settlement, uneven surfaces, and edge spreading on paver and stone patios. On the concrete side, the sub-base beneath the slab serves primarily to provide a stable, uniform bearing layer, slope is built into the forms and finished surface, not into the sub-base grade alone.
Material-specific installation: how to build and hold the slope
Pavers and brick
Set your compacted aggregate base to within 1 inch of finished paver height and get it to within plus or minus 3/8 inch over a 10-foot straightedge before you even think about bedding sand (that is the ICPI surface tolerance). Then set your 1-inch screed pipes parallel to each other across the slope direction, dropping your target slope amount per foot as they travel away from the house. Screed the ASTM C33 bedding sand flat relative to the pipes, pull the pipes out, fill the voids, and lay pavers directly on that surface without disturbing it. Install rigid edge restraints along all exposed perimeter edges before compacting the finished surface, plastic spike-down edging is the most affordable and works fine for residential patios. Final compact the pavers with a plate compactor to seat them into the sand, then sweep polymeric sand into joints and compact again.
Concrete slab
Slope is built into the form work. Set your forms so the high edge (at the house) is at the correct finished height and the low edge drops your target amount per foot of run. Check form slope with a level and tape before any concrete arrives. When the concrete is poured, use screed boards or a vibrating screed to strike off the surface level with the forms, the forms themselves carry the slope. Bull-float the surface to close it up, and finish with a broom or trowel to your desired texture. ACI 302.1R is the gold-standard reference for exterior slab finishing, and one of its key points is that a designed slope of 2% helps you maintain positive drainage even after minor slab deflection or settlement over time. Cut control joints to 1/4 of the slab thickness (typically every 10 feet for a 4-inch slab) to control where cracking occurs.
Gravel and decomposed granite
Grade your compacted sub-base to your target slope, compact it thoroughly, then install your edging first to contain the loose material. Add your finish layer of gravel or DG on top, rake level, and compact lightly. Because gravel is permeable, some of the drainage happens through the surface rather than across it, but you still want a slight slope to move water off the top efficiently and avoid a muddy, rutted surface. Gravel patios are the most forgiving to regrade later if your initial slope is off, which makes them a good option if you are learning the process. Edge restraint is still critical, without it, gravel migrates outward within the first season.
Natural stone (dry-laid and mortar-set)
For dry-laid flagstone, follow the same base and bedding approach as pavers, compacted aggregate base, 1-inch screeded sand or decomposed granite setting bed, and slope built into the base. The uneven surface of natural stone means individual pieces need hand-adjustment to hold the correct plane; use a long straightedge frequently as you set each stone. For mortar-set stone over a concrete slab, the slab itself must already be pitched correctly because the mortar bed (3/4 to 1 inch) does not give you much slope-correction room without becoming too thick or too thin in spots. Get the slab right first, then set stone with uniform mortar bed thickness.
Edge restraints, channel drains, and handling low spots
Edge restraints on paver and stone installations are not optional, ICPI Tech Spec 3 is explicit about this. Without them, the sand bedding migrates outward over time, pavers spread, and you get low edges that collect water. Plastic spike-down edging is adequate for most residential patios. For heavier loads or cleaner aesthetics, aluminum or steel edging is worth the slightly higher cost. Bury it so the top lip is flush with or just below the finished paver surface.
Channel drains (trench drains) are your best tool when the patio slope alone cannot carry all the water away, for example, where the patio meets the house, where a downspout discharges nearby, or at the base of a long run. Residential linear drain channels from brands like ACO and NDS are designed to connect to 2-inch or 3-inch outlet piping. Standard residential models typically handle around 9 GPM at standard flow; high-flow versions tied to a 3-inch outlet can handle roughly 21 GPM. Size your drain for the drainage area it serves, not just the visual width of the patio. The outlet pipe needs to daylight somewhere, into a lawn, a swale, a dry well, or a storm drain connection where your municipality allows it.
If you have an unavoidable low spot, a corner hemmed in by the house on two sides and a fence on a third, for example, a catch basin with a grated top and a pop-up emitter outlet is a cleaner solution than trying to fight gravity. Set the basin grate just slightly below the surrounding surface so water flows to it naturally.
Testing and validating your slope before you call it done
Do not skip this step. Once everything is set, run these three checks before you pack up the tools.
- String line check: pull a string line from the high edge to the low edge and measure the drop at multiple points across the patio width. Compare to your target slope calculation. Correct any high or low spots in pavers while you can still pull and reset them
- Digital level check: lay a digital level on a long straight board placed in the slope direction at several locations across the patio width. You are looking for consistent slope reading throughout, with no reverse pitch in any zone
- Water test: the definitive check. Pour a 5-gallon bucket of water onto the highest point of the finished patio surface and watch where it goes. It should flow steadily and completely toward the intended drainage direction within 30 to 60 seconds, with no pooling anywhere. Do this at multiple locations
Paver installations have a window to fix slope issues: before the polymeric sand joints cure, you can still pop individual pavers, add or remove a little bedding sand, and reset them. Concrete is obviously more permanent, this is why form inspection before the pour is non-negotiable. Natural stone and mortar-set installations need issues caught before the mortar sets, typically within 30 to 60 minutes of placement depending on conditions.
Fixing an existing patio that doesn't drain properly
If you already have a patio and it is ponding, here is how to diagnose and address it by material type.
Pavers and brick
Paver patios are the most repairable. If you have a low spot or reverse slope, mark the affected area with chalk after a rain, then pull the pavers in that zone, add bedding sand to raise the low area, screed it to correct slope, and reset the pavers. You do not need to remove edge restraints or surrounding pavers unless the issue is widespread. Re-sweep polymeric sand after resetting and compact lightly. If the problem is pervasive across the whole patio, the base likely settled unevenly, that requires more significant work pulling sections and re-establishing the base.
Concrete slab
Options for a ponding concrete slab are more limited. If the ponding is minor, you can apply a self-leveling concrete overlay with a built-in slope, but this only works when the existing slab is structurally sound and the slope correction needed is less than about 1/2 inch. For significant reverse pitch or large ponding zones, the realistic options are: grinding high spots (expensive but sometimes appropriate), adding a channel drain at the low point to manage water that the surface cannot redirect, or, in severe cases, breaking out and replacing the slab. That last option is more work, but pouring a replacement slab correctly is not as hard as it sounds, and the process is similar to a new installation.
Gravel
Gravel is the easiest to regrade. Rake out the affected area, add or remove material, re-establish slope, and compact. This is often a 30-minute fix.
When to add a secondary or mid-patio drain
If your patio is deeper than 20 feet, if you have a low-pitch area that cannot be regraded, or if downspout volume routinely overwhelms the surface slope, adding a mid-patio channel drain is a legitimate and effective solution rather than a band-aid. It also means you can sometimes design the patio to slope from both the house edge and the far edge toward a center drain, which gives you more flexibility in long patios and unusual lot shapes.
Troubleshooting common drainage problems
| Problem | Likely Cause | Fix |
|---|---|---|
| Ponding in center or far edge | Insufficient slope, settled base, or reverse pitch zone | Pull pavers / add drain / regrade base |
| Water running toward house | Back-pitched surface or grade tied too high at building | Regrade base, lower surface elevation at house edge, or add house-edge channel drain |
| Paver joint sand washing out | Water velocity too high across joints, no polymeric sand used, or slope too steep | Resweep polymeric sand; reduce slope if over 3%; check for concentrated flow from downspout |
| Uneven settlement creating dips | Under-compacted base or subgrade, poor soil, or inadequate base depth | Pull affected area, rebuild base to correct depth and compaction, reset surface |
| Edge spreading / pavers migrating outward | Missing or failed edge restraint | Install or replace rigid edge restraint along all exposed perimeter edges |
| Erosion at low edge of patio | Water discharging onto unprotected soil | Add splash pad, planting bed, river rock, or pipe to daylight at discharge point |
Maintenance tips to keep your slope working long-term
- Inspect the patio surface every spring (and after any significant erosion event) for low spots, settled sections, or reverse slope areas — catch these early when they are easy to fix
- Resweep polymeric sand into paver joints every 1 to 3 years as it depletes; joint integrity maintains slope by keeping individual units stable
- Keep edge restraints intact and re-spike any that have lifted or shifted — a few minutes with a mallet and some replacement spikes saves a full repaving job later
- Clear debris from channel drain grates seasonally — a blocked grate defeats the whole system during heavy rain
- After any significant soil disturbance near the patio (new planting, tree root growth, utility work), re-check that surrounding grade still slopes away from the house per IRC R401.3 requirements
- On concrete, inspect and re-seal control joints every 3 to 5 years to prevent water infiltration that causes slab lifting in freeze-thaw climates
DIY or call a pro? Honest decision points
Most patio pitch and drainage work is genuinely DIY-appropriate, and I say that as someone who has made expensive mistakes and learned from them. Measuring grade, setting slope strings, compacting base, screeding sand, and laying pavers are all learnable skills. Where things get genuinely complicated: if your yard has significant drainage problems that involve neighboring properties, if you need to connect to the municipal storm system (almost always requires a licensed plumber or contractor), if the subgrade is soft fill or expansive clay that needs engineered stabilization, or if you are pouring a very large concrete slab and have no experience reading forms and placing concrete. For most backyard patios under 400 square feet with reasonable site conditions, the pitch and drainage work is within reach for a motivated DIYer who is willing to rent a plate compactor and take the layout measurements seriously.
Safety note: working around underground utilities is not optional, call 811 (in the US) before you dig, every time, no exceptions. Excavating through a gas or electrical line is dangerous and expensive in ways that no amount of DIY savings is worth.
Your next steps
Once you have your slope plan dialed in, the next step is building the actual surface. For a step-by-step patio construction how to, see our detailed guide. For step-by-step instructions on building the surface, see our guide on how to install patio. For step-by-step instructions on building the surface, see how to do patio. The core concepts here, base preparation, compaction, grade control, and slope validation, apply across every patio material and every build approach. Whether you are planning a full patio installation from scratch, learning how to put in a patio on a challenging site, or working through the specific steps of patio construction for your chosen material, the drainage fundamentals you have nailed down here are the foundation everything else builds on. Slope is not the glamorous part of a patio project, but getting it right is what separates a patio that lasts 20 years from one you are fixing every spring.
FAQ
Why does patio pitch (slope) matter and what problems does it prevent?
Pitch moves water away from the house and off the patio surface. Proper slope prevents ponding, joint washout, undermining of the base, freeze/thaw damage, algae/mold growth, and foundation water infiltration. It also reduces long‑term maintenance and liability from standing water on walking surfaces.
What slope (pitch) should I design for different patio materials?
Common practical targets: - Pavers/brick (sand‑set): 1.5%–2.0% (≈3/16"–1/4" per foot). - Concrete exterior slabs: minimum 1% (1/8" per ft) required by some jurisdictions; 2% (1/4" per ft) is recommended for reliable drainage. - Gravel/aggregate patios: 1%–2% (1/8"–1/4" per ft) to encourage runoff while avoiding washout — use stabilizers if low slope. - Natural stone (dry‑laid): 1.5%–2% typical for positive surface drainage; mortar‑set on concrete follows slab guidance. Check local code: IRC R401.3 requires final grade to slope away from buildings 6" in 10' (~5%) or provide drains if that's impractical.
How do I measure existing grade and calculate pitch with simple tools?
Measure rise over run. Steps: 1) Run a string line from the patio edge near the house to the far edge. 2) Use a line level or digital level on the string. 3) Measure vertical drop from string to patio surface at the low end (or use a transit/laser level). 4) Pitch = (vertical drop ÷ horizontal run) × 100 for percent, or vertical drop ÷ run to get inches per foot. Example: 1/4" per ft over 12' = 3" drop (0.25"×12). Tools: tape measure, string, line level, 4' spirit level, digital level or laser level, long straightedge.
How should I plan pitch relative to the house, gutters/downspouts, and site drainage?
Plan to send patio runoff away from the foundation per IRC (6" in 10'). Options: slope patio away from house, install a linear trench/channel drain along the house, or route gutter downspouts to daylight, a drywell, or a storm connection. Consider where water from upslope areas will enter the patio and avoid creating concentrated flows over edges. Keep run lengths and ramped slopes within comfortable walking grades and local accessibility rules.
What base preparation and compaction are needed to hold a slope for each material?
General rule: compact subgrade (≥95% Standard Proctor) and compact aggregate base in lifts to ~98% where possible. - Pavers: compacted aggregate base 4" (patio) compacted in 2" lifts (6" for driveways), 1" screeded bedding sand, edge restraint mandatory. - Concrete slab: remove soft soil, use compacted engineered fill or aggregate subbase (depth per soil), use reinforcement/mesh as needed, screed to slope, place control joints per ACI. - Gravel: compact subgrade, 3–4" compacted crushed stone base with top layer of 1–2" decorative gravel; use geotextile for separation; consider stabilization grid if slope >2%. - Natural stone dry‑laid: compacted aggregate base 3–4" with 1" bedding (sand or crusher‑run), edge restraint, fill joints with polymeric sand or DG.
Exactly how much drop do I need for a 12' patio if I want 1/4" per foot?
1/4" per foot × 12 feet = 3 inches total drop from the high edge to the low edge.
Next Article
Patio Construction How To Plan, Build, and Finish
Plan, excavate, build and finish a durable DIY patio with materials, base prep, drainage, leveling, and finishing tips.