Planting around a patio is one of the most rewarding upgrades you can make to an outdoor space, and it doesn't require a landscape degree or a big budget. The basic approach is this: assess your site first (sun, soil, drainage, and any tree roots), make a few key design decisions, pick plants that suit those real conditions rather than an idealized catalog photo, then install beds, containers, or raised planters using straightforward prep and proper edging. Done in that order, you end up with planting that looks intentional, survives without constant fussing, and actually belongs with your hardscape rather than fighting it. For a concise, step-by-step guide on how to landscape around a patio, see our detailed how to landscape around a patio guide.
How to Plant Around a Patio: DIY Plan, Plants & Steps and Budget Tips

Quick planning checklist before you dig anything
Before you buy a single plant or pull out a shovel, run through these decisions. Skipping even one of them is usually how people end up with soggy beds, cracked pavers, or plants that outgrow the space in two seasons.
- Sun exposure: how many hours of direct sun does each edge of your patio receive? Full sun is 6 or more hours, partial sun or part shade is roughly 3 to 6 hours, and full shade is under 3 hours.
- Soil condition: is it sandy, clay-heavy, or compacted fill left from the original patio construction? A quick ribbon test tells you more than you'd expect.
- Drainage: where does water pool after a rain? Does the patio slope water toward beds or away from them?
- Root risks: are there mature trees within 20 to 30 feet? Surface roots near paving can heave hardscape and damage tree health if cut carelessly.
- Style and scale: do you want a formal clipped look, a loose cottage feel, or a low-water xeriscape? That shapes every plant decision that follows.
- Budget: are you buying nursery stock, starting from seed, or dividing plants from elsewhere in your yard?
- Long-term maintenance commitment: be honest here. A high-maintenance design you never tend looks worse than a simple one you actually keep up.
Site assessment, step by step
The most useful thing I ever did before a patio planting project was sketch a simple basemap on graph paper. It takes maybe 30 minutes and saves hours of second-guessing later. Draw the patio footprint to rough scale, mark which direction is north, note any downspouts, utility lines, fences, and existing plants. Then layer in the observations below as you collect them.
Step 1: Map sun and shade through the day
Walk out to your patio in the morning, at midday, and again in the afternoon, and mark on your basemap where shade falls at each visit. Different edges of a patio often land in completely different light categories. The south-facing edge of a 12-foot patio might get eight hours of full sun while the north side sits in full shade from the house. Matching plants to those specific zones (not just "around the patio" as a whole) is the single biggest factor in whether they thrive or slowly decline.
Step 2: Test your soil
For a quick texture read, grab a small handful of moist soil and try to form a ribbon between your thumb and forefinger. Sandy soil feels gritty and won't ribbon. Silty soil feels smooth like flour. Clay soil forms long plastic ribbons and stays slippery. That result tells you immediately whether you're dealing with drainage issues (clay) or nutrient retention problems (sand). For actual pH and nutrient data, send a sample to your state university extension lab. Take 10 to 15 small sub-samples from the top 4 to 6 inches across each planting area, mix them together, and send one composite sample per distinct zone. The fee is usually under $20 and the results include actual lime or sulfur recommendations, which home kits often get wrong. Plan to retest every 3 to 5 years, or any time you're doing major planting or construction work.
Step 3: Check for compaction and drainage
Push a long screwdriver straight down into moist soil alongside the patio. If you can't get 4 to 6 inches with hand pressure alone, the soil is compacted and roots will struggle. Next, check drainage by digging a hole about 12 inches deep and 12 inches wide in any area you plan to plant, filling it with water, and watching how fast it drains. It should be mostly gone within an hour or two for good drainage. If it's still sitting there after several hours, you've got a drainage problem that needs fixing before you plant anything. Where soils drain and there's space, dry wells (infiltration basins or prefabricated tanks) are a DIY option to collect runoff and let it percolate underground, but they must be sited away from foundations and include a maintenance/inspection plan to prevent clogging. Also spend a few minutes watching where water flows off the patio surface during or after a rain. Patio edges that collect runoff need either proper re-grading (targeting about 1/8 to 1/4 inch of slope per foot), a channel drain, or a French drain along the edge before you add plants that will sit in that flow.
Step 4: Survey root risks from nearby trees
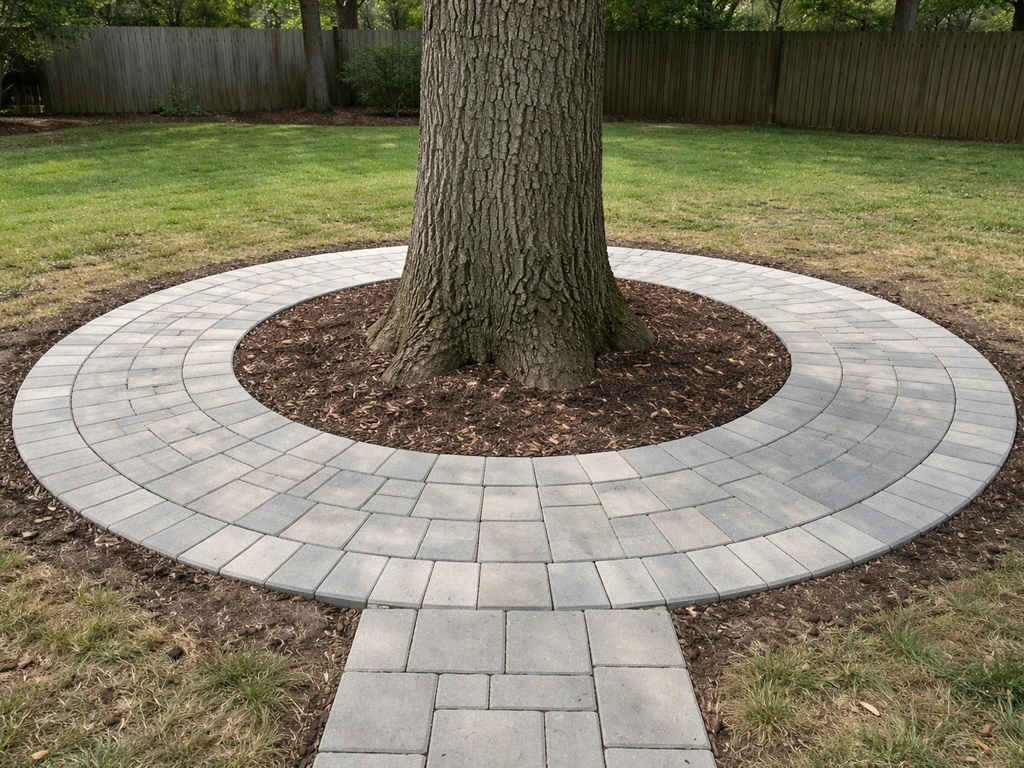
If you have any mature trees within about 20 to 30 feet, mark their driplines on your basemap and look for surface roots near the patio edges. The ISA (International Society of Arboriculture) recommends treating roughly blank" rel="noopener noreferrer">1 foot of radius per inch of trunk diameter as a protected root zone where trenching, heavy equipment, and grade changes should be avoided. If your planting plan requires working close to tree roots, hand-prune small peripheral roots only, and get an arborist's eye on it before cutting anything significant. Severing major roots doesn't just damage the tree, it can create long-term instability and void any permits if the tree eventually fails. There's more detail on navigating this when you're building directly around or over large tree roots, but for planting purposes, the rule is: work around roots where you can, and protect the zone around any tree you want to keep. For step-by-step guidance, see how to build a patio over tree roots, which covers protective techniques, material choices, and when to consult an arborist.
Design decisions that shape everything else
Once you know what you're working with on site, you get to make the fun decisions. These five choices will define how your planting looks, how much it costs, and how much upkeep you're actually signing up for.
- Style: formal (clipped hedges, symmetrical beds), naturalistic (layered perennials and grasses), cottage (mixed shrubs, perennials, self-seeders), or xeriscape (drought-adapted plants with gravel mulch). Pick one and stick with it — mixed styles usually look accidental rather than intentional.
- Scale: beds should be wide enough to hold three or more plant layers (groundcover, mid-height perennial, background shrub or grass) without looking skimpy. A 3-foot-wide bed along a patio edge often looks too narrow once plants mature; 4 to 6 feet is more comfortable.
- Function: are you screening for privacy, softening a hard edge, adding fragrance near seating, or attracting pollinators? Each function pushes you toward different plant types.
- Budget: bare-root perennials, seeds, and divisions from neighbors cost a fraction of gallon-container nursery stock. Investing in one or two statement shrubs and filling around them with inexpensive groundcovers is a common budget-stretching approach.
- Maintenance level: be honest about how much time you'll spend. Low-maintenance planting means fewer annuals, more natives and ornamental grasses, heavy mulch (2 to 3 inches), and plants sized to fit their space at maturity so you're not constantly cutting them back.
How to choose the right plants for a patio setting
Patio planting has a few constraints that typical garden beds don't. Heat reflection from paving raises temperatures significantly, especially with concrete or brick. Root space is often limited by the hardscape edge. And plants closest to a seating area get a lot more scrutiny than those out in the yard, so messiness, thorns, or excessive dropping of seed pods or fruit matters more here. Keep these criteria in mind for every plant you consider.
- Mature size: choose plants that fit the space at maturity without constant pruning. A shrub that tops out at 4 feet is a better edge plant than one that reaches 10 feet and needs annual hard cutting.
- Root habit: avoid plants with aggressive, surface-running roots (some willows, silver maples, bamboo) near pavers. Deep-rooted or clump-forming plants are a much safer bet.
- Maintenance: consider deadheading needs, pest susceptibility, and whether the plant drops fruit, seeds, or sticky resin where people walk and sit.
- Seasonality: layer plants that provide interest across seasons — spring bloomers, summer foliage, fall color, winter structure — so the bed never looks completely empty.
- Hardiness: match plants to your USDA zone, but also account for patio microclimates. South-facing beds against a masonry wall often run a half-zone warmer, which opens up options but also stresses marginally hardy plants in summer heat.
- Water needs: group plants with similar irrigation requirements together. Mixing drought-tolerant natives with thirsty annuals creates a maintenance headache and usually means one group gets the wrong amount of water.
Recommended plant palettes for every patio condition
These lists are starting points, not a complete catalog. Every one of these plants has worked reliably for me or for other hands-on DIYers in typical residential patio settings. They're also widely available at most garden centers and, importantly, forgiving of the occasional missed watering or imperfect soil.
Full sun edges (6+ hours)
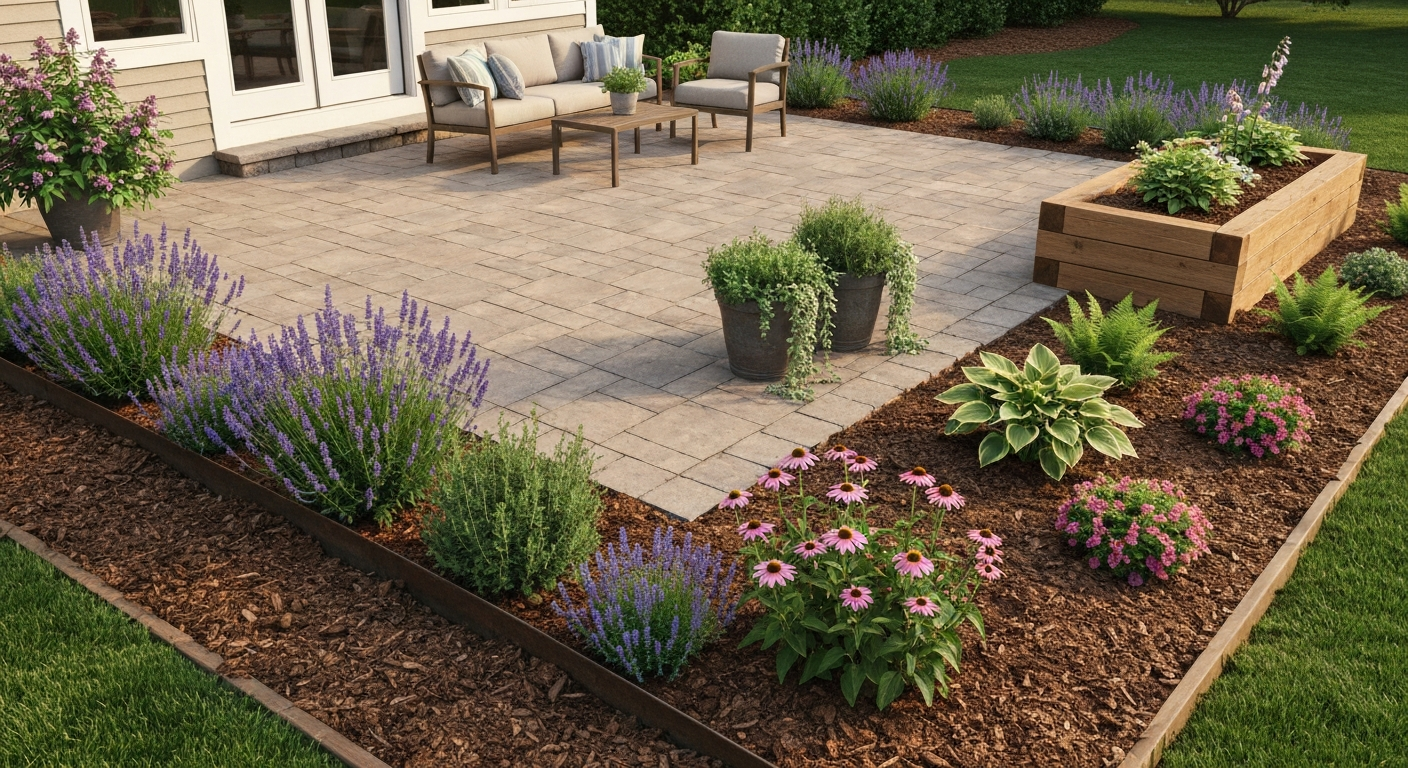
- Lavender (Lavandula angustifolia): low-maintenance, fragrant, drought-tolerant once established, stays tidy with one annual trim
- Ornamental grasses (Blue oat grass, Karl Foerster feather reed grass): excellent texture, low water, no deadheading
- Black-eyed Susan (Rudbeckia fulgida): tough, long-blooming, pollinator magnet, self-seeds modestly
- Salvia (Salvia nemorosa or S. greggii): compact, repeat-blooming, heat-tolerant
- Coneflower (Echinacea purpurea): native, drought-tolerant once established, feeds birds in winter if you leave the seed heads
- Agastache (hyssop): very heat-tolerant, fragrant, hummingbird and bee magnet
- Sedum 'Autumn Joy': succulent foliage all season, late-season bloom, handles reflected heat well
Partial sun or part shade (3 to 6 hours)
- Astilbe: feathery plumes, many color options, prefers consistently moist soil
- Hellebore (Lenten Rose): early-season bloom, evergreen in mild climates, slow to establish but long-lived
- Coral bells (Heuchera): huge range of foliage colors, compact, works well as an edging or container plant
- Japanese forest grass (Hakonechloa): bright golden or variegated foliage, soft mounding habit, ideal for edges
- Hostas: reliable, wide range of sizes and foliage colors; pair large-leaf varieties as anchors with small ones as edging
- Bleeding heart (Lamprocapnos spectabilis): spectacular spring display; goes dormant in summer so pair with later-emerging partners
Full shade (under 3 hours)
- Hostas (large-leaf varieties like 'Sum and Substance' or 'Elegans'): the most reliable full-shade performers
- Ferns (Ostrich fern, Autumn fern, Japanese painted fern): excellent texture, native options available
- Epimedium (barrenwort): nearly bulletproof groundcover once established, semi-evergreen
- Foamflower (Tiarella): native, spreads into a good groundcover, delicate spring bloom
- Sweet woodruff: quick-spreading groundcover with tiny white flowers, good under trees
- Lungwort (Pulmonaria): early bloom, attractive spotted foliage all season
Small-space and container mixes
- Thriller, filler, spiller formula: one upright focal plant (dwarf grasses, small cordyline, compact salvia), two mid-height fillers (heuchera, bacopa, calibrachoa), one trailing spiller (sweet potato vine, creeping Jenny, trailing petunias)
- Compact herbs for patio containers: basil, thyme, chives, and flat-leaf parsley; all do well in 10- to 14-inch pots with good drainage
- Dwarf conifers or compact boxwood in large containers: provide year-round structure, especially useful for flanking a patio entry
- Dwarf ornamental grasses in pots: Blue fescue and Fiber Optic grass stay compact and require minimal feeding
Evergreen and winter-interest options
- Dwarf mugo pine: slow-growing, tough, excellent year-round structure for sunny beds
- Hellebores: evergreen in zones 6 and warmer, flowers from late winter through spring
- Blue oat grass or Blue fescue: semi-evergreen, retain color and form through mild winters
- Inkberry holly (Ilex glabra): native, evergreen shrub for part-shade to shade, good for screens
- Nandina (compact cultivars like 'Firepower' or 'Gulf Stream'): evergreen foliage with strong fall and winter color; use non-fruiting cultivars to avoid wildlife spread issues
Plant palettes matched to specific goals
Low-water and drought-tolerant
- Russian sage (Perovskia atriplicifolia): tall, airy, silver-blue, extremely drought-tolerant once established
- Catmint (Nepeta 'Walker's Low'): long-blooming, fragrant, almost no supplemental water needed after year one
- Ornamental grasses (Blue oat, Prairie dropseed, Little Bluestem): all handle dry conditions once roots are established
- Sedum and stonecrop varieties: rock garden plants that thrive in hot, dry patio edges
- Lavender: once established, prefers lean and dry over amended and watered
Pollinator-friendly
- Agastache: one of the best hummingbird and bee plants available, heat-tolerant
- Coneflower (Echinacea): native, supports bees, butterflies, and finches
- Salvia: excellent bee and hummingbird plant, long blooming season
- Joe Pye weed (compact varieties like 'Little Joe'): tall late-summer bloomer, monarch magnet
- Anise hyssop and native asters: extend the pollinator season into fall
Privacy screening
- Clumping bamboo (non-invasive varieties like Fargesia or Chusquea): fast, dense, beautiful — always use clumping types near hardscape, never running bamboo
- Arborvitae ('Green Giant' or 'Emerald Green' for smaller spaces): reliable evergreen screen, faster than most conifers
- Tall ornamental grasses (Miscanthus 'Gracillimus' or Calamagrostis 'Karl Foerster'): seasonal screen with excellent movement and texture
- Ninebark (Physocarpus): large native shrub with interesting bark, foliage color options, and fast growth
- Viburnum (various): multi-season interest, can be used as an informal hedge or screen
Fragrance near seating areas
- Lavender: plant within arm's reach of seating so you can brush it when walking by
- Gardenias (zones 7 and warmer) or in containers brought in for winter: incredible fragrance, manageable in a large pot
- Roses (compact shrub types like Knock Out or 'Carefree Beauty'): choose disease-resistant varieties to keep maintenance reasonable
- Sweet autumn clematis: fast-growing vine, intensely fragrant in late summer; use on a trellis or arbor near the patio edge
- Phlox (Phlox paniculata): evening-fragrant, long-blooming, works well in part-sun beds near seating
- Chocolate mint or lemon thyme in containers: low-effort fragrant herbs that do well right on the patio surface
Beds, containers, or raised planters: which one makes sense where
This is the decision that gets glossed over in a lot of planting guides, but it genuinely matters for both looks and practicality. Each approach has a different cost profile, maintenance demand, and set of situations where it clearly wins.
| Option | Best for | Pros | Cons | Rough DIY cost |
|---|---|---|---|---|
| In-ground beds | Open perimeter areas with decent existing soil and good drainage | Lowest cost, most plant options, natural look, supports larger plants long-term | Requires good drainage and soil prep, root risks near hardscape, weeding required | $0.50–$2 per sq ft for soil amendment and mulch, plus plants |
| Containers | Small patios, renters, areas with poor or no soil, temporary displays, moving plants seasonally | Completely flexible, no drainage issues in the ground, easy to change, zero root risk to paving | Need regular watering (sometimes daily in heat), limited root space for large plants, pots can be expensive | $15–$60+ per container depending on size and material |
| Raised planters | Areas with compacted or contaminated soil, slopes, over tree root zones needing minimal excavation, formal structured looks | Total soil control, better drainage than ground, no-dig solution, visually defined structure | Highest material and labor cost, wood needs eventual replacement, can dry out quickly if not irrigated | $3–$10+ per linear foot depending on material (wood, block, steel) |
My general recommendation: use in-ground beds wherever the soil is workable and drainage is reasonable, because they're the cheapest and most forgiving long-term. Bring in containers for spots right on the patio surface, for seasonal interest, and for fragrant or tender plants you want to move inside in winter. Use raised planters when you're dealing with compacted construction fill, a rocky or root-dense zone, or when you want a formal, architectural edge along a specific side of the patio. If you're working around a large tree, a low raised planter that sits on top of the existing grade (rather than requiring deep excavation) is almost always a safer choice than digging a bed that cuts through roots.
Preparing the soil and installing beds
Don't skip soil prep, even if it's tedious. The planting prep stage determines whether your plants establish quickly or limp along for years. Here's the process I use for a new patio bed.
- Remove existing sod or weeds and strip the top layer cleanly. A flat spade works fine for smaller areas; a sod cutter rental ($70–$100 per day) pays for itself on anything bigger than about 100 square feet.
- Loosen the top 6 to 12 inches with a fork or tiller. Do this in moist (not wet) soil. You're breaking compaction, not pulverizing the structure.
- Add organic matter based on your soil test results. As a rule of thumb, work compost or aged bark into the top 6 inches, but don't amend more than about one-third of the total volume — adding too much organic matter creates an interface layer that can actually trap water rather than drain it. For a typical suburban bed, a 2-inch layer of compost worked in is a good starting point.
- If pH needs adjusting, add ground limestone to raise it or sulfur to lower it, following your lab's specific rate recommendation. Don't guess on rates — overliming causes more problems than it solves.
- Rake to a rough final grade, sloping slightly away from the patio edge if possible. Even 1 to 2 inches of fall over a few feet helps keep water moving.
- Install edging before planting. For a clean, low-maintenance edge against the patio, steel landscape edging (1/8-inch thick) or precast concrete edging driven flush with the paving surface is the most durable option. Plastic edging flexes and lifts over time. Budget about $1.50 to $3 per linear foot for steel edging installed yourself.
- Plant at the correct depth — the root flare should sit at or just above the final soil surface, not buried. Water in thoroughly right after planting.
- Mulch immediately with 2 to 3 inches of shredded bark or wood chips, keeping mulch 2 inches away from plant stems and not piled against any hardscape edge where it'll hold moisture against the paving.
When to plant: during construction vs. after
If you're building a new patio, the ideal sequence is to install underground irrigation lines and drainage infrastructure before the paving goes in, plant beds after the paving is complete, and save containers for the very end. Trying to plant before paving is done means foot traffic, material storage, and concrete or sand work will damage or kill plants. The one exception is large existing trees or established shrubs you're designing around, those obviously stay in place, but you need to protect their root zones during construction with fencing and ground protection boards, not just hope for the best.
Irrigation and the first two years of maintenance
Most new plants need consistent moisture for the first full growing season to establish roots, even drought-tolerant species. A simple drip irrigation system for patio beds costs $50 to $150 in materials for a typical perimeter and takes a few hours to install, it pays for itself in plant survival rates and time saved over hand-watering. For containers, a battery-powered timer and drip emitters remove the daily chore almost entirely, which matters in summer.
Year one maintenance is mostly watering, weeding before weeds get established, and resisting the urge to over-fertilize. If you amended with compost, you don't need supplemental fertilizer the first season for most perennials and shrubs. Year two, most plants have enough root system to handle dry spells without intervention. That's when a well-chosen, well-planted patio border really starts to look like it was always supposed to be there.
Adding vertical interest: arbors, trellises, and climbers
Vertical planting dramatically increases the sense of enclosure and privacy around a patio without using much horizontal square footage. A simple trellis panel anchored to a fence post costs almost nothing and supports a clematis or climbing rose that creates privacy within one to two seasons. A freestanding arbor over a patio entry adds both structure and a planting opportunity for fragrant climbers. When you're selecting climbers for patio use, stick with species that don't self-seed aggressively (sweet autumn clematis is fragrant but seeds everywhere), and make sure the support structure is anchored properly before the plant reaches full weight.
Common problems and how to fix them
- Plants too close to paving and causing root heave: remove the plant, install a root barrier (geotextile-wrapped plastic sheeting buried vertically along the bed edge) and replant at least 18 to 24 inches from the nearest paver. For mature trees already causing heave, consult an arborist before cutting any roots.
- Soggy bed after rain: check that the patio surface is sloping away from the bed, not into it. If the bed itself is the low point, add a simple trench drain or regrade the back edge to give water somewhere to go. A French drain along the uphill side of the bed solves persistent subsurface water.
- Plants not thriving despite correct light: check compaction and drainage first (the screwdriver test and the percolation test), then check pH. Chlorotic foliage in an otherwise adequate-looking bed is often a pH problem blocking nutrient uptake, not a nutrient deficiency itself.
- Mulch washing onto paving: install a low steel edging strip or a single course of brick or cobble between the bed edge and the paving to contain mulch. This also gives a clean visual line that makes the whole planting look more intentional.
- Deer or rabbit pressure: use deer-resistant plant lists from your local extension service, and for new plantings, wrap individual plants with wire mesh cages for the first season while roots establish. Lavender, ornamental grasses, and Russian sage are generally left alone by deer.
Materials and tools you'll actually use
| Item | What it's for | Approximate cost |
|---|---|---|
| Steel landscape edging (3-inch depth) | Clean edge between bed and paving | $1.50–$3.00 per linear foot |
| Bulk compost or aged bark | Soil amendment and mulch | $25–$45 per cubic yard delivered |
| Soil test (university extension lab) | pH, P, K, and amendment recommendations | $15–$25 per sample |
| Flat spade | Sod removal, edging cuts | $30–$60 |
| Garden fork | Loosening compacted soil | $30–$55 |
| Long screwdriver | At-home compaction check | Already own or $5 |
| Drip irrigation kit (1/2-inch mainline + emitters) | Low-volume watering for beds | $50–$150 depending on area |
| Root barrier panels | Blocking lateral root spread near paving | $1–$3 per linear foot |
| Shredded bark mulch (2–3 inch layer) | Moisture retention and weed suppression | $25–$40 per cubic yard |
Budget-saving approaches worth knowing
- Buy perennials in small (quart) containers rather than gallon pots for planting in groups — they establish almost as fast and cost 40 to 60 percent less.
- Divide existing perennials from other parts of your yard or trade with neighbors. Hostas, daylilies, ornamental grasses, and coneflowers all divide easily in spring or fall.
- Use free municipal compost (many cities offer it) instead of bagged compost for soil amendment at large scale.
- Collect arborist wood chip mulch, which is often available free from local tree services. It's coarser than shredded bark but works well and breaks down to improve soil over time.
- Start slow-growing shrubs from cuttings or buy in smaller sizes and let them fill in — most shrubs reach a useful size within 2 to 3 seasons.
- Use decorative containers for focal points and cheap annuals (grown from seed) for quick seasonal color while perennials fill in during the first season.
FAQ
What is the first step when planning planting around a new or existing patio?
Start with a site assessment basemap and checklist: draw a simple plan (property edge, house, patio, utilities) with a north arrow and scale; map sun/shade (observe or trace shadows morning, midday, afternoon and mark full sun ≥6 hrs, partial sun 3–6 hrs, shade <3 hrs); note prevailing winds, microclimates (heat reflection from walls, cold pockets), slope and drainage flow paths, canopy driplines of nearby trees, existing plant locations/health, and any visible surface or subsurface drainage issues. Use this to identify constraints and planting zones before choosing plants or changing hardscape.
What should be on a quick planning checklist for patio planting?
Essential checklist: 1) Sun exposure zones (full sun, part sun/part shade, full shade); 2) Soil tests for pH and nutrients (collect separate samples for distinct areas); 3) Soil texture and compaction checks (ribbon test and screwdriver/probe check); 4) Drainage assessment (ponding, percolation test); 5) Root risks (tree driplines, surface roots, proximity to trunks); 6) Utilities and legal setbacks; 7) Desired functions (privacy, screening, seating, containers); 8) Maintenance tolerance and water source; 9) Budget and timing (plant now vs. after construction).
How do I test soil and drainage affordably at home?
Soil: collect 10–15 sub‑samples per distinct area from the root zone (top 4–6 inches), mix into one bag per area and send to a university or commercial extension lab for pH and nutrient recommendations. For a quick home check, use a pH kit and the texture-by-feel (ribbon) test to estimate sand/silt/clay. Compaction: try a long screwdriver or soil probe—if it won’t penetrate 4–6 inches by hand pressure, soil is compacted. Drainage: observe where water ponds after rain; dig a 12–18" test pit, fill with water and time percolation (aim for few inches/hour for good drainage).
When should I plant: during patio construction or after?
Prefer planting after major hardscape work unless plants are temporary/protected: - If you install a new patio, keep planting staged for after heavy machinery leaves to avoid soil compaction and root damage. - For existing patios you’re upgrading, you can add containers and built raised planters immediately; beds that require excavation should usually wait until grading and drainage are stable. - If you must plant near trees before construction, fence a Root Protection Zone and consult an arborist before any trenching or soil/grade changes.
What plant palettes work well around patios for sun, shade and small spaces?
Sun (full sun, low‑water option): ornamental grasses (Pennisetum, Festuca glauca), lavender, Salvia, sedum, dwarf ornamental shrubs (dwarf rosemary, dwarf spirea), creeping thyme for joints. Part shade/shade: Hosta, Heuchera, ferns (Dryopteris), Tiarella, hydrangea (partial shade), boxwood for evergreen structure. Small spaces/containers: dwarf conifers, dwarf Japanese maples (compact varieties), compact boxwood, rosemary, herbs (basil, thyme, oregano), annual color (petunia, calibrachoa). Choose plants matched to microzones and maintenance tolerance (choose drought‑tolerant for lower maintenance).
How do I design a low‑maintenance, budget‑conscious planting plan?
Principles: group plants by water and light needs (hydrozoning), favor hardy perennials, shrubs and grasses over high‑maintenance annuals, choose native or regionally adapted species, use mulch and drip irrigation to reduce weeds and water use, limit lawn areas, use containers or raised beds where soil is poor. Cost-savers: buy smaller plants (plugs) and allow time to fill in, reuse salvaged materials for edging/planters, seed groundcovers where appropriate, phase planting over seasons, and select multi‑season interest plants to reduce replacement. Provide a basic maintenance schedule so tasks stay manageable.
How to Build a Patio Around a Large Tree: DIY Guide
Plan, protect tree roots, manage clearances and drainage, then build a durable ring patio with DIY-friendly steps.