Pointing a patio means raking out the deteriorated material in the joints between your bricks, pavers, or slabs and packing in fresh mortar or jointing mix so the surface locks together again, sheds water properly, and stops weeds from setting up camp. It does not mean re-leveling or re-bedding your slabs (that is a different job), and it does not mean adjusting your patio's slope for drainage. If your slabs rock or have obvious voids underneath, you need to lift and re-bed those sections first before any pointing will hold. But if your joints are crumbling, sandy, cracked, or just empty, pointing is exactly the right fix and it is very doable in a weekend.
How to Point Patio Joints: Step-by-Step DIY Guide

Nolan Lennox
29 Jun 2026
What 'pointing a patio' actually means for your project
A lot of homeowners search 'how to point a patio' and end up confused because the word gets used for a few different things. Let me clear that up before you buy materials or start chiseling.
Re-pointing (or repointing) specifically means removing failing jointing material from the gaps between masonry units and replacing it with fresh material. For a patio, that usually means one of two approaches: traditional mortar for brick or natural stone patios, or polymeric jointing sand for concrete pavers and flagstone. The goal is the same either way: restore the joint's ability to bond the surface together, resist water ingress, and prevent weed germination.
What pointing is NOT: it is not lifting and re-leveling slabs, it is not adjusting the drainage slope of your patio, and it is not filling deep voids caused by sunken bedding. If individual pavers or bricks rock when you stand on them, that bedding layer has shifted or washed out and no amount of pointing will fix it. You need to lift those units, top up the base/bedding material, and re-set them before you do anything with the joints. Pointing after lifting and re-bedding is the correct sequence, every time. If you are also wondering about drainage slope or where your patio sits in the garden, those are separate planning questions worth sorting before you seal everything up with fresh joints.
Tools and materials you will need
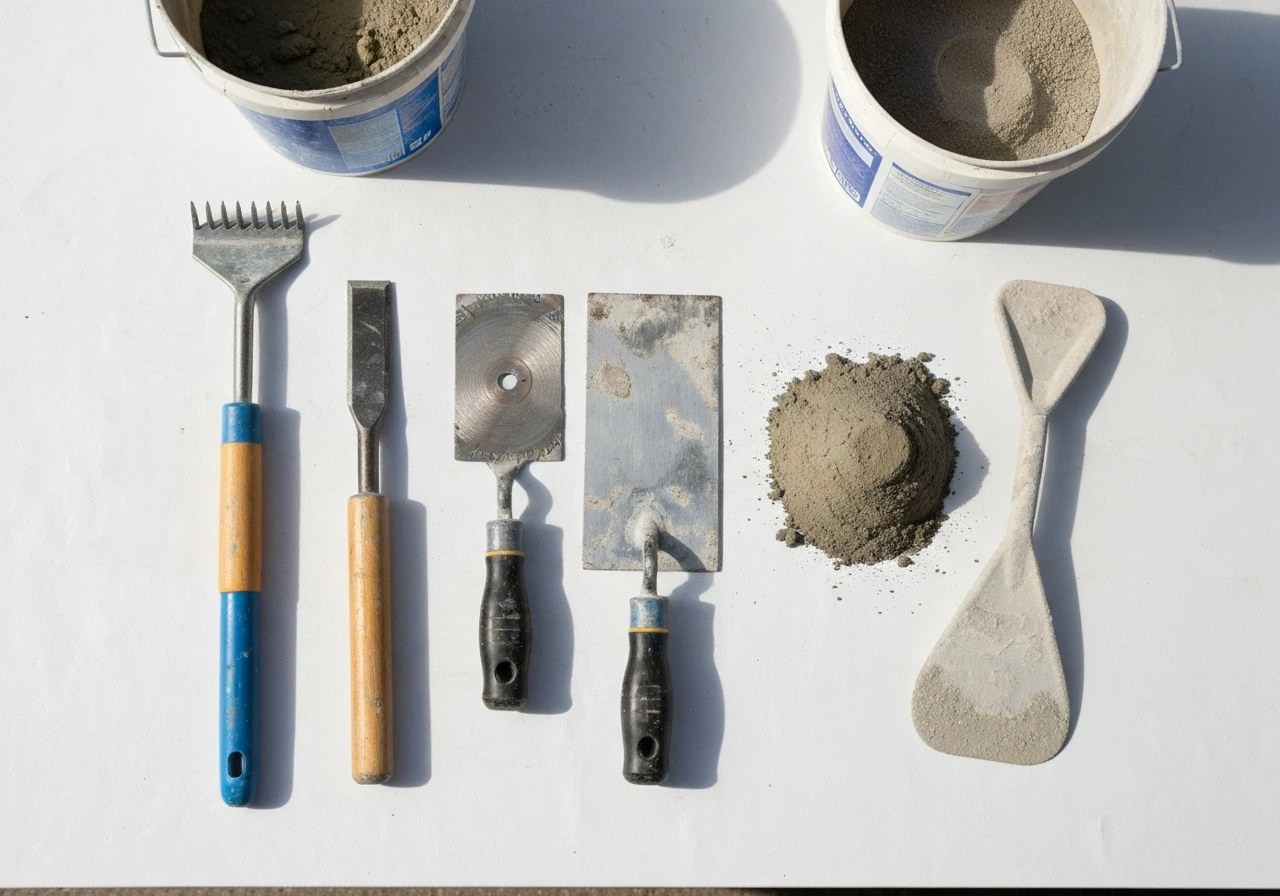
You do not need a lot of specialist kit for this job, but having the right tools makes the difference between a tidy finish and a frustrating mess. Here is what I always gather before I start.
For clearing out old joints
- Joint raker or plugging chisel and club/lump hammer (a wheeled joint raker tool speeds up long straight runs significantly)
- Angle grinder with a diamond blade (useful for large areas, but take it slow near brick edges to avoid chipping)
- Stiff natural-fiber brush and wood scraper for clearing dust and debris after raking
- Garden hose or pressure washer for cleaning down before you fill
For filling and finishing
- Pointing trowel (a small, narrow one for mortar work; a margin trowel if you are working with a jointing compound)
- Bucket and mixing paddle (or use a drill with a paddle attachment for larger batches of mortar)
- Leaf blower (essential for polymeric sand — you need to blow all surface residue off before wetting)
- Soft broom or brush for sweeping sand into joints
- Garden hose with a gentle shower head or rose attachment for activating polymeric sand
- Rubber mallet (useful for tapping units back into position if any shifted during prep)
- Safety goggles and dust mask — non-negotiable when raking or using a grinder
Choosing your jointing material
This is the biggest decision you will make. Your choice depends on the patio material, joint width, and how much maintenance you want to do going forward.
| Material | Best for | Joint width | Durability | DIY difficulty |
|---|---|---|---|---|
| Polymeric jointing sand | Concrete pavers, some flagstone | 1/4 in minimum, up to ~2 in | Good, may need re-application after several years | Easy to moderate |
| Traditional mortar (Type N or Type S) | Brick, natural stone, larger format slabs | Any width | Very durable when mixed correctly | Moderate — needs mixing and timing |
| Ready-mix jointing compound / slurry | Paving slabs (especially UK-style pointing) | Medium to wide joints | Good, lower skill threshold than mortar | Easy to moderate |
For most concrete paver patios, polymeric jointing sand is the go-to. It sweeps in dry, activates with water, and hardens enough to resist weed growth and wash-out. For brick or natural stone patios with traditional mortar joints, you need a proper masonry mortar. Type N mortar is generally recommended for above-grade exterior patio work because it is flexible enough to handle freeze-thaw movement without cracking the bricks themselves. Type S is stronger and suits areas with more load or exposure. The key is matching the new mortar strength to the original, using a mortar that is harder than your bricks can actually cause the bricks to crack over time.
How to prep the patio before you point
Prep is genuinely the most important part of this job. Rush it and your new joints will fail just as fast as the old ones. I have made that mistake and had to redo sections within a season, never again.
Step 1: Inspect and diagnose

Walk the whole patio and press down on every unit. Anything that rocks needs to be lifted and re-bedded before you point. Mark those with chalk. Also check the depth of your existing joints: the general rule for brick mortar repointing is that you should repoint when the existing mortar has eroded to roughly twice the width of the joint. For polymeric sand, most manufacturers require a minimum joint depth of around 1.5 inches (about 4 cm) before you fill, if the joints are shallower than that, the product will not cure properly.
Step 2: Clear weeds and loose material
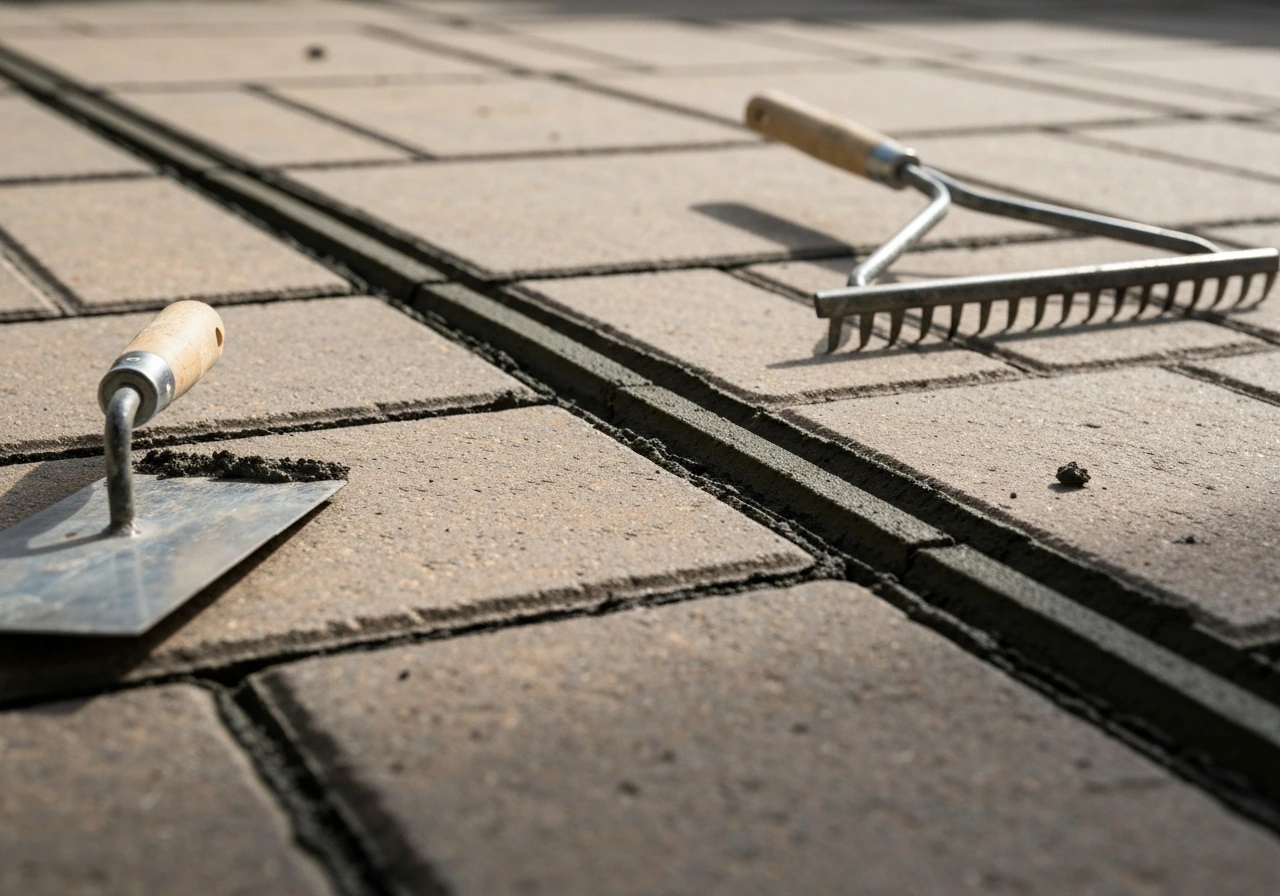
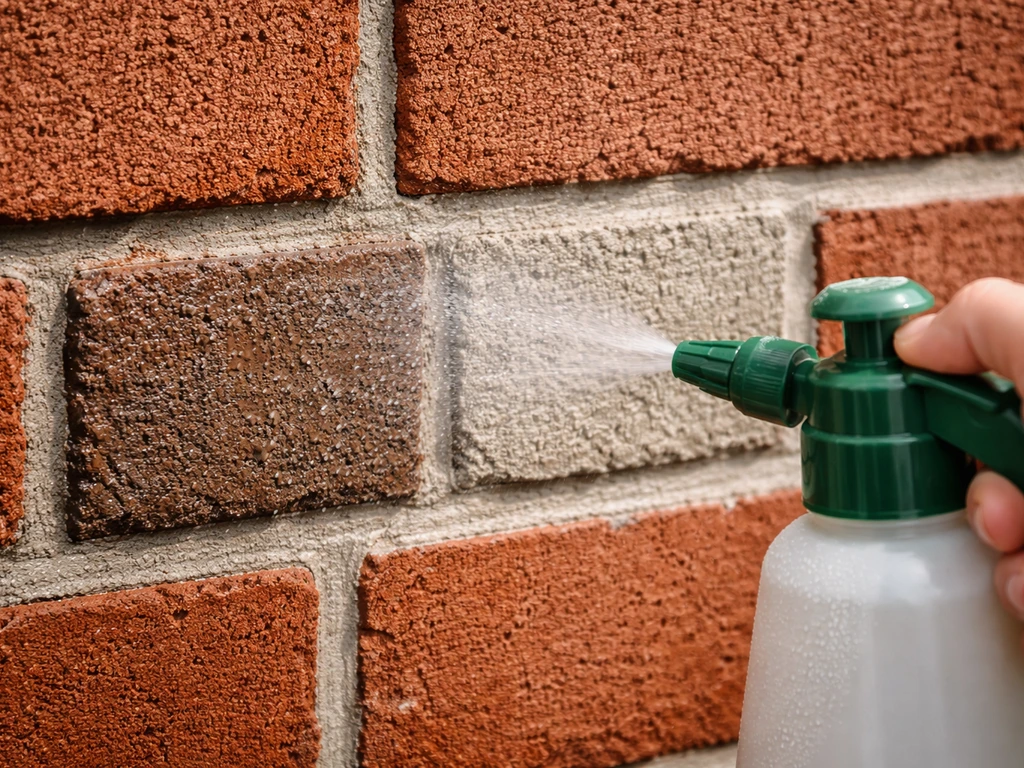
Pull or kill any weeds growing in the joints first. If you just point over them, they come straight back within weeks. A weed killer applied a day or two before you start helps, or carefully use a heat gun along the joints. Then use your joint raker, chisel, or angle grinder to remove all loose, crumbling, or sandy material from the joints. For mortar joints, the GSA's guidance on historic masonry repointing recommends removing to a minimum depth of 2.5 times the height of the existing mortar joint, and never raking back more than half the width of the masonry unit. That sounds technical but in practice it means rake until you hit solid material, then keep going a bit further. Loose mortar is not worth leaving in place.
Step 3: Clean down thoroughly

Brush all the debris out of the joints with a stiff brush, then rinse everything down with a hose. For dirty or stained patios, a pressure washer at this stage is fine and actually very useful. Just make sure all the joints are fully dried out (or just damp, not wet) before you start filling. For mortar work, slightly damp joints help with adhesion and stop the surrounding masonry from drawing moisture out of the fresh mortar too fast. For polymeric sand, joints and surfaces need to be completely dry before you sweep the product in.
Step-by-step: how to fill and finish the joints
The process splits into two tracks depending on whether you are using mortar (for brick/stone) or polymeric sand (for pavers). I will walk through both because they feel quite different to do.
Repointing with mortar (brick and natural stone)
- Mix your mortar to a firm, not sloppy, consistency. It should hold its shape when squeezed in your fist but not crumble. For most DIY bags, follow the pack ratio but err toward slightly stiffer rather than wet.
- Lightly dampen the joint with a brush or spray bottle just before you apply. This slows suction and helps the mortar bond.
- Load your pointing trowel and press mortar firmly into the joint in layers, not all at once. Pack it in so there are no air voids. For deep joints (over about 3/4 inch), build it up in two or three passes rather than trying to fill it in one go. This layered approach is what makes joints actually hold.
- Work in manageable sections — about one square meter at a time in warm weather, more in cool damp conditions.
- Once the mortar is thumb-print firm (it leaves an impression but does not smear), tool the joint to your chosen profile. A concave (rubbed) finish is the most practical choice for outdoor patios because it sheds water naturally and looks clean. A straight edge or length of metal tube dragged along the joint creates this profile.
- Once tooled, brush off any smears from the paver or brick faces with a dry stiff brush before the mortar fully cures. Dried mortar on stone or brick faces is a pain to remove.
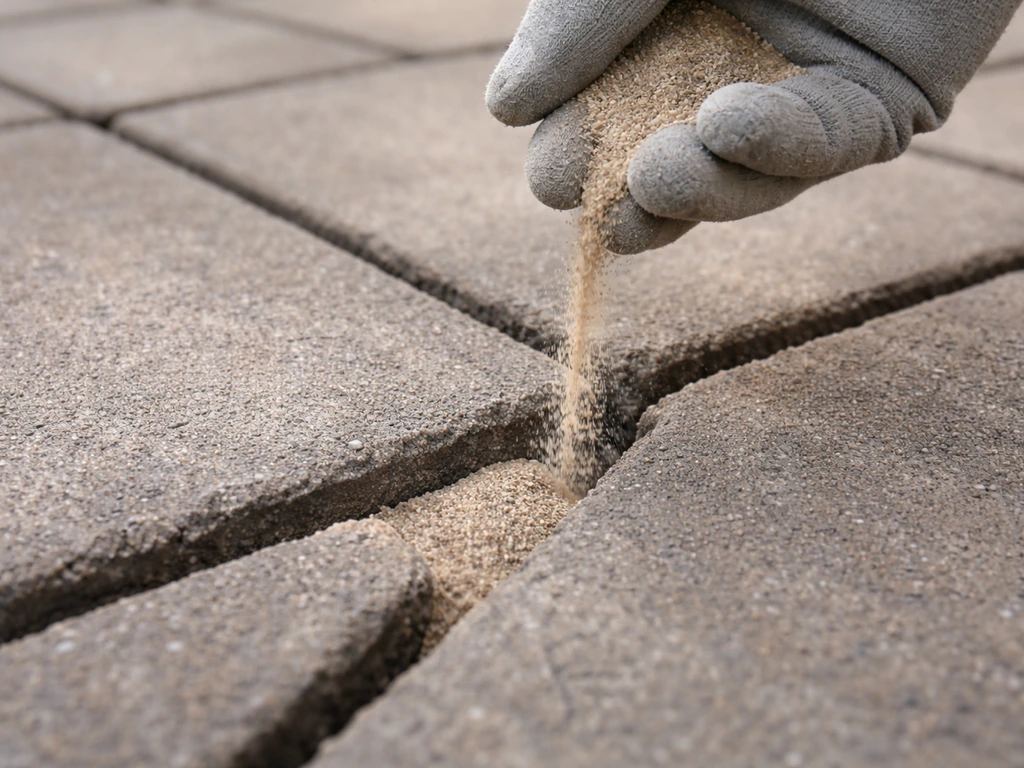
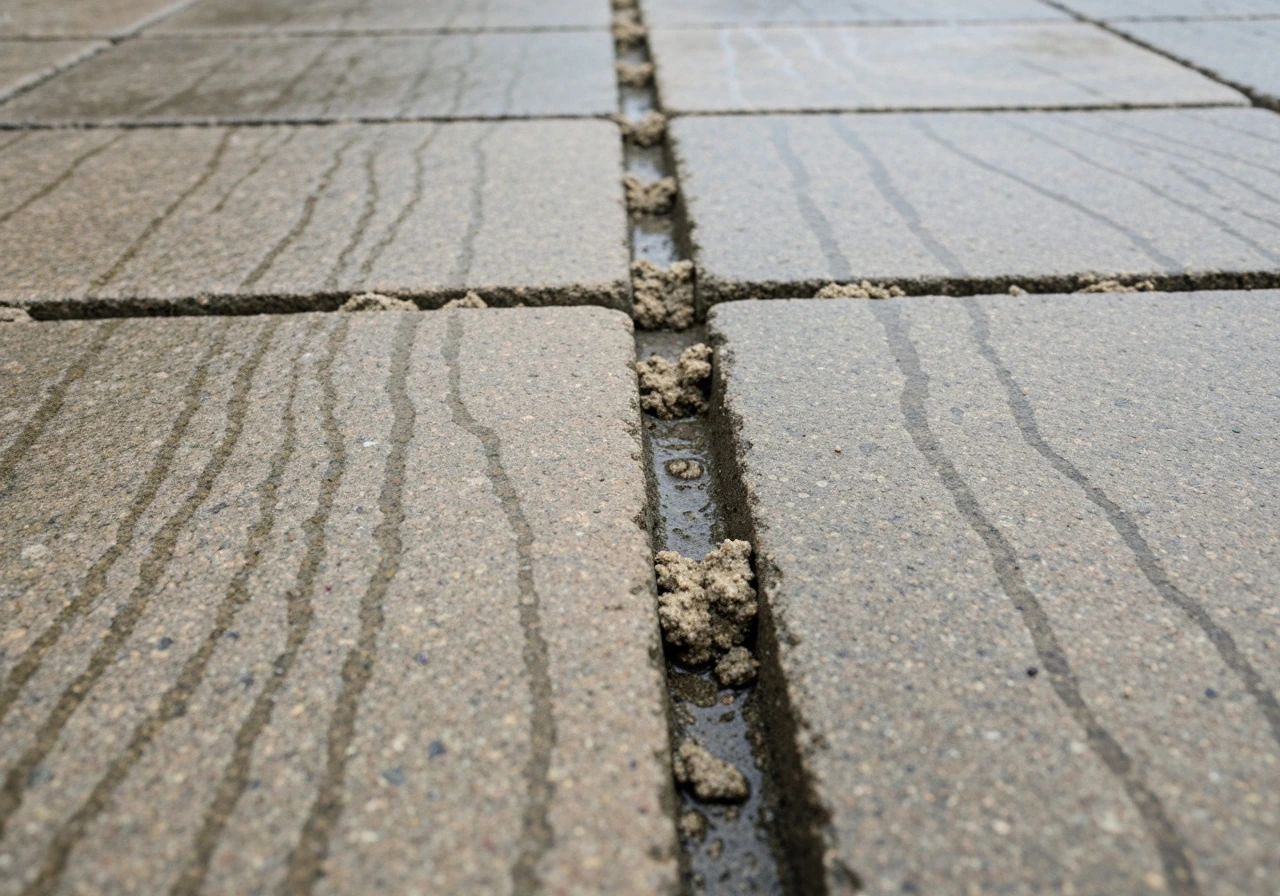
Repointing with polymeric jointing sand (concrete pavers)
- Make sure the patio surface and joints are completely dry. Even slight dampness will cause the resin in the sand to clump and stick to the surface.
- Pour the polymeric sand onto the surface and sweep it into the joints with a stiff broom or brush, working it back and forth in multiple directions to fully pack the joints.
- Use a rubber mallet and a flat board to vibrate or tamp the units slightly — this helps the sand settle down into the full joint depth.
- Sweep more sand in and repeat until joints are filled to about 1/8 inch (3 mm) below the top of the pavers or just below the chamfered edge. Do not overfill to the surface.
- Use a leaf blower to blow all remaining sand off the paver faces. This step is critical. Any sand left on the surface when you wet it will bond there and cause a hazy residue that is genuinely difficult to remove later.
- Shower the entire surface gently with a garden hose rose or shower head. Work in sections of roughly one square meter, letting the water penetrate at least 1 inch into the joint before moving on. Avoid using a jet — you want a gentle shower, not a stream that blows the sand back out.
- Stop watering each section when you see water pooling briefly on the surface rather than soaking straight in — that tells you the joint is saturated.
- Leave to cure undisturbed. Keep the patio off-limits to traffic and out of rain for at least the first 24 to 48 hours.
Finishing, curing, and protecting the pointed surface
Curing is where a lot of DIY repointing jobs go wrong. People do the hard work and then ignore the cure window.
For mortar joints: keep the freshly pointed surface slightly moist for the first day or two, especially in hot or dry weather. Mortar cures best slowly, and direct sun or wind can dry it out too fast and cause surface cracking. Drape damp hessian or an old sheet over the area if conditions are harsh. Full mortar strength takes around 28 days, but the surface can handle gentle foot traffic after about 24 to 48 hours in good conditions.
For polymeric sand: the opposite applies. You want it to stay dry after activation. Heavy rain within the first 24 to 48 hours is the number one enemy, it can literally wash the activated sand straight out of the joints before it has set. Check the weather forecast before you start. Most manufacturers require no rain for at least 12 to 24 hours after installation and temperatures above 35°F for a minimum of 48 hours. If a shower rolls in unexpectedly, cover the patio with plastic sheeting.
On sealing: for natural stone and brick patios, applying a penetrating masonry sealer after the mortar has fully cured (wait at least 28 days) helps protect the joints from moisture and makes future cleaning easier. For polymeric sand patios, check the specific product guidance before sealing, some polymeric sands need to have fully set and been left dry for several days before a sealer goes on top. Applying a sealer too early can trap moisture and cause the joints to go soft or discolor.
Common pointing problems and how to fix them
Even when you follow the instructions, things can go sideways. Here are the most common issues I have seen (and personally experienced) and what actually fixes them.
Sand washing out of the joints
This almost always comes down to one of three things: the rain got in too early during cure, the joints were not packed deep enough for the polymeric product to grip, or the drainage underneath is so poor that water is constantly flowing through the joint bed. Manufacturer guidance for Hanover Pavers notes that polymeric sand joints should be filled to the full joint depth and installed at the proper level (not flush) to help prevent wash-out and water ingress filled to the full joint depth and placed at the proper level (not flush). The fix is to wait for a long dry spell, rake out the remaining loose sand, sweep in fresh polymeric sand, and this time either cover it or check the forecast more carefully. If wash-out is a recurring problem, check the slope and drainage situation too, a patio that sits in standing water after every shower will keep destroying jointing material no matter how carefully you apply it.
Cracked mortar joints
Cracking in fresh mortar joints is usually caused by mixing mortar too wet, curing too fast in heat or sun, or using mortar that is harder/stronger than the surrounding masonry. Hairline cracks are less serious but allow water in. If cracks are significant, rake them out completely and repoint again with correctly mixed mortar, shade the area during cure, and consider dropping to a Type N mix if you used Type S on a softer brick.
Weeds coming through the joints
Weeds do not grow through solid joints, they germinate in dust and debris sitting on top of a cracked or poorly filled joint. If weeds are back quickly after pointing, it means either the joints were not fully filled, or fine windblown material is sitting in a joint that did not cure hard enough. Remove the weeds, kill the roots, and top up or redo those joints. Polymeric sand handles this better than plain sand but is not permanently weed-proof, it typically needs re-application every few years as joints erode.
Hazy staining on the paver surface
This is a polymeric sand issue almost every time. If you wet the surface before blowing off all the excess sand, the resin bonds to the paver face and leaves a visible haze that is very difficult to shift. Prevention is the only real solution: blow the surface completely clean with a leaf blower before a single drop of water touches it. If the haze is already there, try a specialist paver cleaner or efflorescence remover, but test in a hidden corner first because some cleaners can lighten certain paver colors.
Mismatched joint width or height
If your joints look inconsistent after pointing, some thick and proud, some sunken, it is usually because the raking depth was uneven or mortar was not packed in layers. The fix is more patience during application: always check joint depth before filling, apply mortar in stages, and tool all joints to the same profile while the mortar is still workable. A cheap joint raker tool with a depth guide helps enormously if you are doing a large area.
Keeping your joints in good shape long-term
Pointing done right should last several years without needing attention, but a few habits will stretch that lifespan significantly.
Check and maintain drainage
Your patio should slope away from the house at roughly 1:80 (about 1 inch of fall per 6. Once your joints are stable and draining well, you can focus on making the patio dog friendly with slip-resistant areas and safer edging. 5 feet of patio). If water is pooling on the surface or running back toward the building, your jointing material will always fail faster than it should. Poor drainage is the hidden cause of most joint erosion problems. Fix the slope when you can, even if that means re-laying a section of the patio.
Inspect joints annually
Once a year, spring is a good time, walk the patio and press each unit. Check for any sunken joints, new cracks, or areas where sand or mortar has dropped below the surface. Top up any shallow spots before they become full voids. It takes maybe 20 minutes and prevents the kind of widespread failure that means a full repoint.
Sealing the right way
Sealing slows moisture penetration, reduces staining, and can help joints last longer. For brick and stone, a breathable penetrating sealer applied every three to five years is usually enough. For paver patios with polymeric joints, some manufacturers recommend a paver sealer on a compatible timeline, typically once the polymeric sand has fully cured and the surface is thoroughly clean and dry. Never seal over damp surfaces or recently activated polymeric sand. When done right, sealing ties the whole surface together and makes the next clean-up season dramatically easier.
If this is your first time tackling the joint work, there is a companion guide aimed specifically at beginners that walks through the same process at a slower pace with more detail on material choices. And if you are still deciding between different application methods, the best method for pointing patio covers the trade-offs in more depth. Either way, the fundamentals here will get you through the job with solid, long-lasting results.
FAQ
Can I point a patio if the joints are only partially missing, or do I need to redo all the gaps?
You can usually spot-repoint only the failing sections, as long as you remove all loose and sandy material back to solid substrate around each area. Feather the edges of the new joints so the profiles match, and do a quick test patch to confirm the new mortar or polymeric sand adheres and cures without crumbling at the boundary.
How do I tell if I should use polymeric sand versus mortar for my patio joints?
A reliable rule is concrete pavers and most flagstone setups use polymeric jointing sand, while brick and natural stone typically require mortar in the joints. If your patio was originally installed with mortar, switching to polymeric sand often fails early because the bonding and curing behavior are different, so match the existing jointing type when possible.
What if I point the joints and everything still rocks when I walk on the patio?
Rocking units indicate a base or bedding problem, not a jointing problem. After pointing, you can make the joints look better, but the mechanical movement will reopen the gaps. Lift and reset any units that move, then let the bedding settle or top it up as needed before you repoint.
Is it okay to use regular sand in the joints instead of polymeric sand?
Regular sand can work briefly, but it rinses out more easily and usually leaves joints weak, weed-prone, and prone to wash-through. If you choose regular sand anyway, treat it as temporary maintenance and expect more frequent re-filling, especially in areas exposed to heavy rain.
How can I avoid washing out polymeric sand when there is unexpected rain?
The safest approach is to start when rain is not forecast during the activation and early set window, then be ready with coverage. If a shower threatens, cover the patio with plastic sheeting immediately after installation and keep it in place until the minimum dry period required by the product label has passed.
Should I hose down the patio between mortar repointing and curing?
Generally no. For mortar joints, you should keep the joints slightly moist, but use light misting only if conditions are very hot and dry, and avoid soaking the surrounding area. Over-wetting can weaken the surface and increase the chance of surface damage or uneven curing.
Why do my mortar joints look blotchy or lighter in spots after curing?
Blotching often comes from uneven moisture, rapid drying in sun or wind, or mortar mix inconsistencies (such as added too much water after mixing). Shade the work area during cure and follow the water amounts exactly, then keep the surface uniformly damp for the first day or two in dry weather.
Can I seal the patio right after pointing if I’m using mortar?
No, plan for a full cure before sealing, typically at least 28 days for mortar so moisture can escape. Sealing too early can trap water in the joints, leading to discoloration, reduced performance, and faster deterioration of nearby materials.
How do I clean off excess polymeric sand without causing haze or hard residue?
Avoid using water before the surface has been cleared and the manufacturer’s timing is met. After sweeping the joints, use a dry clean-up approach first (leaf blower is often effective), then follow the product guidance for any gentle misting or finishing steps. If haze appears, test a cleaner in a hidden area because some products can alter paver color.
How often should I inspect and top up joints after the job is done?
A practical schedule is an annual walk-through, plus a check after the first major freeze-thaw season or a heavy rain period if you get frequent runoff issues. Look for shallow spots, new hairline cracking, or areas where sand or mortar has dropped below the top of the units before the joints become fully voided.
What’s the best way to stop weeds if they come back quickly after pointing?
If weeds return fast, it usually means the joints were not filled firmly to the correct depth or there is debris sitting on top that can capture windblown seeds. Remove weeds, kill roots, then top up or redo the joint areas that stayed hollow or underfilled, and keep the patio surface debris-free during cure.
Does pointing affect patio drainage, and when should I fix slope instead?
Jointing does not correct standing water. If you regularly see pooling or water flowing back toward the building, address grading or the base drainage route before expecting long-term joint stability. Even a perfectly packed joint bed will fail faster when water is constantly moving through the joint area.
Next Article
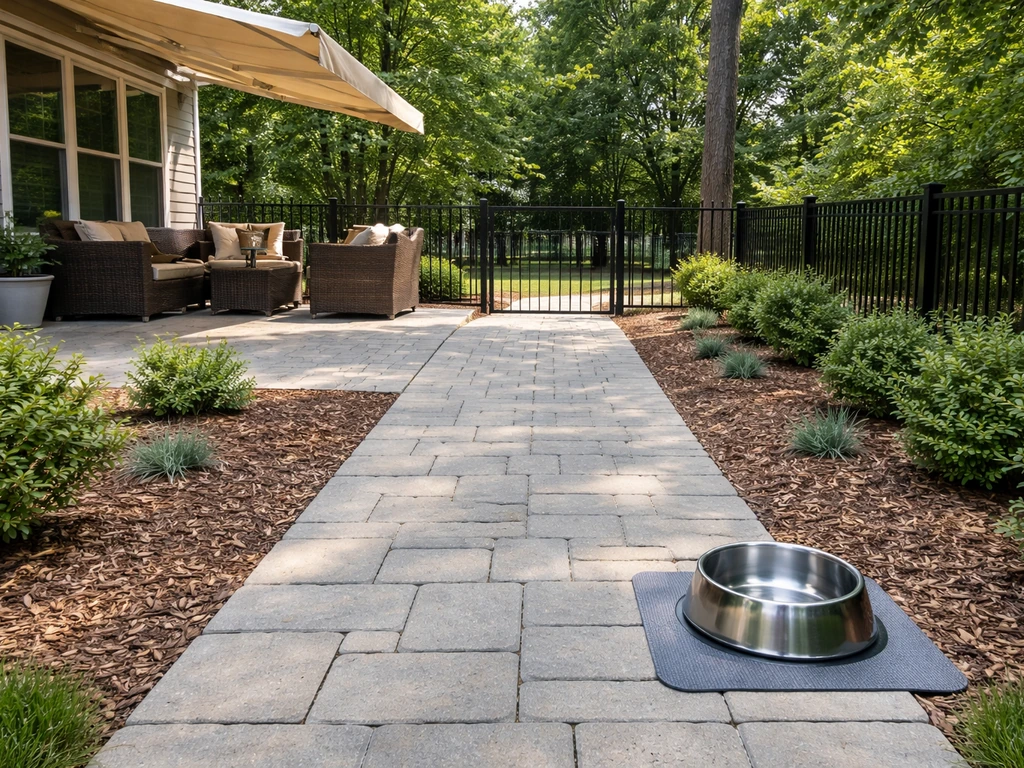
How to Make a Patio Dog Friendly DIY Guide
DIY steps to make a patio dog friendly: non slip traction, secure fencing, shade and water, safe landscaping, training r