Put your patio where you'll actually use it, not just where it fits. That usually means within easy reach of your back door, in a spot that gets the right amount of sun for how you plan to spend time there, with ground that drains away from the house and doesn't require moving a mountain of soil to level. Get those three things right and almost everything else is solvable. Get them wrong and you'll be fighting the spot for years.
Where to Put a Patio: Spot, Drainage, and DIY Checklist

Nolan Lennox
13 Jun 2026
Start with how you'll actually use it
Before you walk around the yard with a tape measure, answer one question: what is this patio mainly for? Grilling and eating, morning coffee, evening drinks, kids' play space, a fire pit hangout? Your primary use should drive the location more than anything else. A dining patio needs to be close to the kitchen. A grilling station needs airflow and distance from low-hanging branches. A lounge or fire pit area can sit further from the house where you get better views and more privacy. If you try to cram all those uses into one spot, the space fights itself. Pick the dominant use, place the patio for that, and plan secondary zones around it. how to point patio.
Think about size at this stage too. A basic two-chair seating area needs about 6x6 feet of usable space. A dining table for four needs at least 10x12 feet, and that's tight. A full outdoor kitchen setup with seating can easily run 16x20 feet or more. Sketch the furniture on paper before committing to a spot, because the footprint required is almost always bigger than people expect.
Checking sun, shade, wind, drainage, and grade
This is the part most people skip and then regret. Spend a full day in the yard before you commit. Walk the candidate spots in the morning, midday, and evening. South and west-facing patios get hammered by afternoon sun, which is brutal in summer if there's no tree cover. East-facing spots are beautiful in the morning but shaded by afternoon, great for hot climates. North-facing areas stay cool and shaded most of the day, which works well in warm regions but makes for a cold, dark space in northern climates. None of this is disqualifying on its own, but you need to know what you're working with before you start digging.
Wind is underrated. If your yard has a prevailing wind direction, a patio directly in that path is miserable on breezy days. Fences, walls, hedges, or even a pergola can fix this, but you need to plan for it. Privacy is the same: look at your sightlines from neighbor windows and the street while you're standing in the candidate spot, not after you've built.
Drainage is non-negotiable and it's the number one thing to get right. Watch where water goes in your yard during a heavy rain, or run a hose for 20 minutes and observe. Any spot where water pools or sits for hours after rain is a problem. You can fix grade, but fixing a natural low point that collects runoff from the whole yard is a much bigger job. The ground under your patio needs to drain away from the house. The IRC requires impervious surfaces within 10 feet of the foundation to slope at least 2% away from the building (that's about 1/4 inch per foot). Even if you're further out, aim for a minimum 1% slope (1/8 inch per foot) across the patio surface. That's not much, but it has to be consistent or water finds its way under your base material.
Grade matters for your build method too. A flat spot requires minimal prep. A gentle slope (up to 6 inches of drop over 10 feet) is manageable with excavation and base adjustments. A steep slope means you're either cutting and filling aggressively, building a raised deck instead, or using a retaining wall to create a level pad. Steep slopes aren't impossible, but they add real cost and labor. If the ideal functional spot has a bad slope, run the numbers on the extra work before assuming you can just power through it.
Setbacks, permits, and property lines: don't skip this step
This is the part that can stop a project cold after you've already bought materials. Most municipalities have setback requirements: minimum distances from property lines, easements, and sometimes from the house itself. A common residential setback for an accessory structure or impervious surface is 5 to 10 feet from property lines, but it varies widely. Some areas treat a paved patio the same as a structure; others don't. You need to check with your local zoning or planning office before you finalize your location.
Easements are the other landmine. Utility easements often run along the back or sides of residential lots, and you typically can't put permanent structures over them. Your deed or a property survey will show easement locations. If you don't have those documents, your county recorder's office can help. Also check for HOA rules if they apply to your property. Some HOAs require approval for patio materials, colors, or placements.
As for permits: a ground-level patio that's not attached to the house and uses permeable materials often doesn't require a permit, but an attached patio, a concrete slab over a certain size, or anything with a covered roof structure almost always does. Call your local building department and describe what you're planning. It's a five-minute call that can save you from having to tear out work later.
Access, flow, and furniture layout
Think about how you'll move between the house and the patio every single day. The best patio is one you walk straight out to from the room you're in most: the kitchen, the living room, a mudroom. A patio tucked around the side of the house that requires a 40-foot walk through the yard sounds fine in theory but ends up barely used. If the patio isn't on the same side as your main door, you'll want a clear, well-surfaced path connecting them.
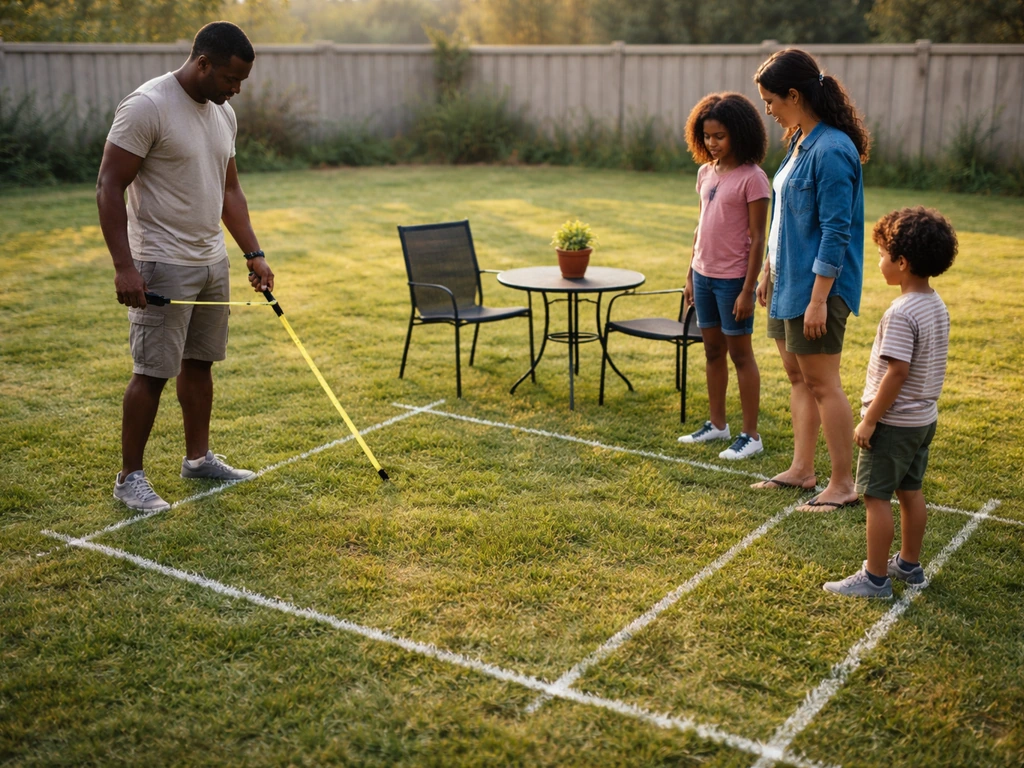
Plan the furniture placement before you finalize the shape and size. A common mistake is building a square patio and then realizing the furniture arrangement you actually want is L-shaped or needs more depth on one side. Tape out the footprint on the ground (use chalk or flour if the ground is dark) and set up your actual chairs, table, and grill. Walk around them. Open the grill lid. Pull chairs out from the table. You want at least 3 feet of clearance behind chairs for people to walk past comfortably, and the grill should be positioned so smoke doesn't drift into the seating area with the prevailing wind.
If you're planning a grilling zone, keep it toward the edge of the patio with access to the yard rather than hemmed in by walls or fencing. For outdoor kitchens, think about routing a gas line or running electrical during the build, because adding it after the patio is done is a pain. Also plan where your path to the yard will be: you don't want to have to walk across the patio to mow, and kids and dogs need a clear route out to the lawn. You can make your patio dog friendly by planning for safe, comfortable flooring and a layout that gives your dog shade, drainage, and easy access to the yard dog friendly patio.
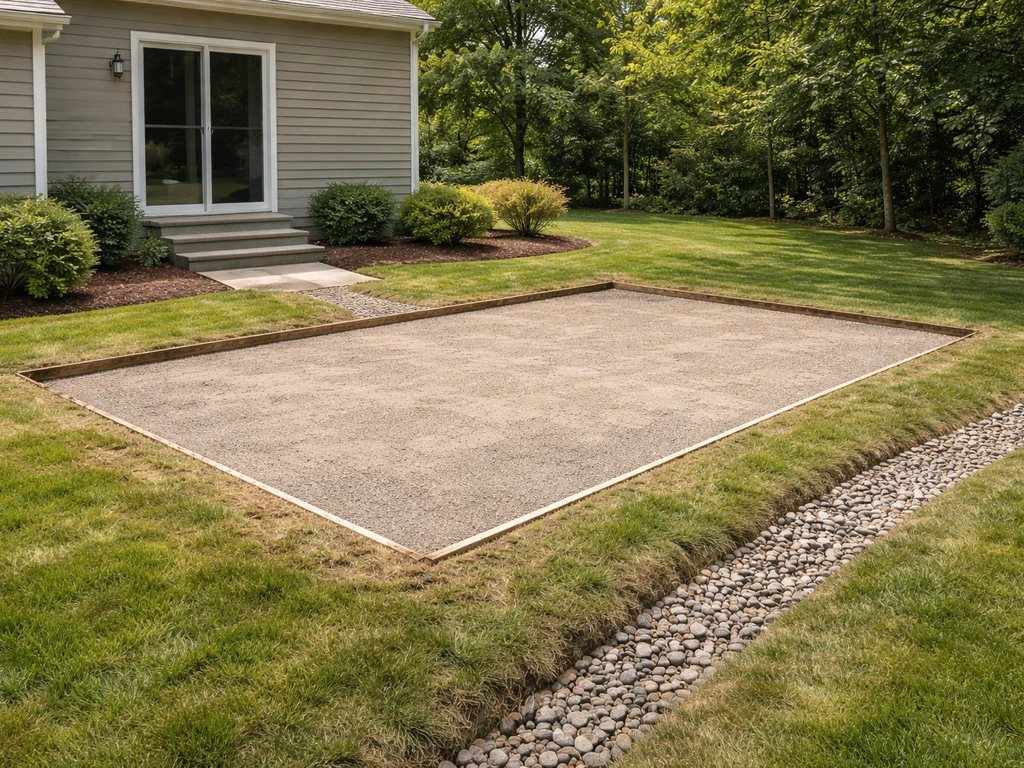
Ground prep changes depending on where you build
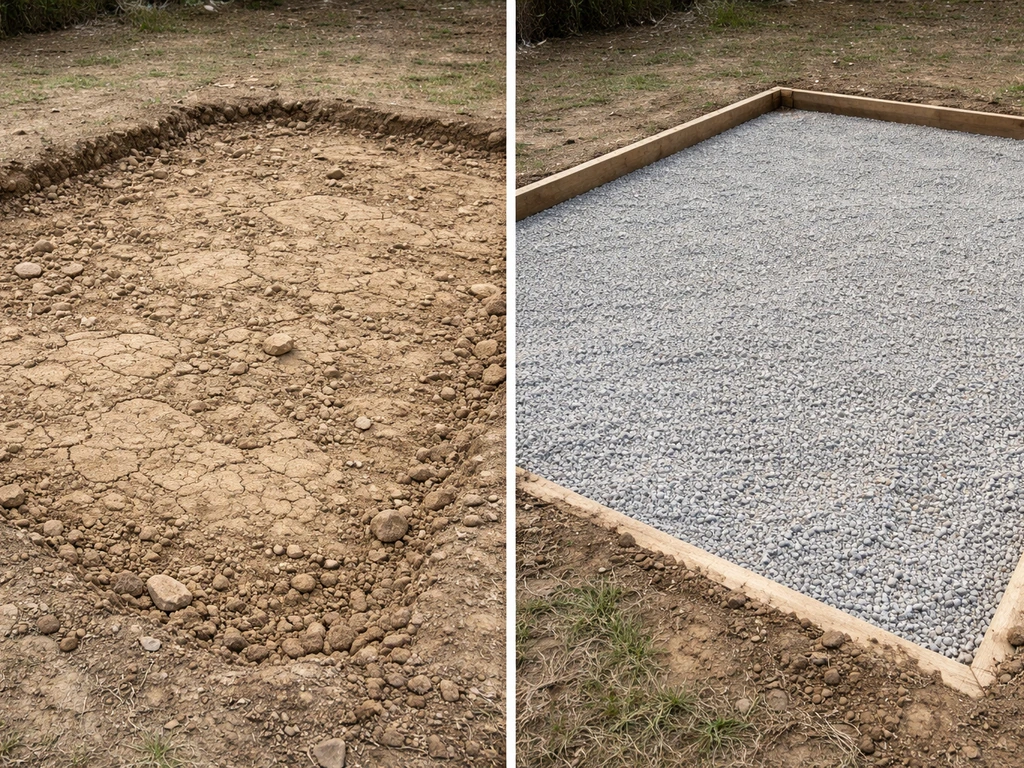
Once you've picked the spot, the ground conditions there determine your prep requirements. This isn't a one-size-fits-all situation. Clay-heavy soil drains slowly and moves with freeze-thaw cycles. Sandy or gravelly soil drains fast and is more forgiving. Rocky ground is stable but hard to excavate. Each soil type changes how much base material you need and how much time you'll spend preparing the sub-grade.
For paver patios, industry guidance from Techo-Bloc and Unilock consistently recommends blank" rel="noopener noreferrer">6 to 8 inches of compacted granular base for clay or silty soils, and 4 to 6 inches for sandy or gravelly soils. That base depth is what keeps your surface stable and allows water to drain through rather than pooling under the pavers. Skimping on base depth is the number one reason paver patios fail within a few years.
Slopes that run toward the house need to be corrected before anything else. You can excavate the high side and use the fill to build up the low side, but compaction is critical: uncompacted fill settles unevenly and your patio surface follows. Rent a plate compactor rather than relying on hand tamping for any area over about 50 square feet. For spots near the house within 10 feet of the foundation, the IRC's 2% minimum slope away from the building applies to any impervious surface, so this isn't optional. If you're doing permeable pavers, you get a little more flexibility, but Techo-Bloc's permeable installation guide still recommends at least 0.5% slope (about 1/16 inch per foot) even for those systems.
Which material fits which spot
The location you choose largely steers your material options. Here's how the most common DIY-friendly materials stack up against different site conditions.
| Material | Best placement scenarios | Ground prep needed | DIY difficulty | Rough cost (materials) |
|---|---|---|---|---|
| Concrete slab | Flat, near house, high-use areas | Formwork, gravel sub-base, reinforcement | Moderate to hard | $4–8 per sq ft |
| Concrete pavers | Most locations, sloped sites manageable | 6–8 in compacted gravel base (clay soils) | Moderate | $8–15 per sq ft |
| Natural stone pavers | Feature areas, sloped terrain workable | Same as concrete pavers, heavier pieces | Moderate to hard | $12–25 per sq ft |
| Gravel / decomposed granite | Low-budget, informal, good drainage areas | Edging, weed barrier, 3–4 in gravel | Easy | $1–3 per sq ft |
| Wood / composite decking | Slopes, uneven terrain, raised applications | Posts, footings, framing required | Moderate to hard | $10–25 per sq ft |
Gravel is the easiest and cheapest option for informal spots further from the house, especially if the ground is already reasonably level. It drains naturally, which is a real advantage in wet areas, and you can install it in a weekend with basic tools. The trade-off is that it's not the best surface for furniture with thin legs or for high-heeled outdoor shoes, and it needs occasional topping up and raking.
Concrete pavers hit the sweet spot for most DIYers. They're durable, look sharp, handle moderate slopes well once you've corrected the sub-grade, and individual pavers can be lifted and reset if something shifts. A concrete slab is cheaper if you have the skills to form and pour it, but any cracking or drainage error is much harder to fix after the fact. Wood and composite decking are your best answer for genuinely steep or uneven sites where a ground-level patio would require too much excavation, though they do involve more structural work and ongoing maintenance (especially for wood).
Cost, timeline, and where DIY risk actually lives
Location type affects your cost and timeline more than most people realize. A flat, well-drained spot near the back door with good soil is a weekend project for an experienced DIYer and maybe two or three weekends for a beginner. Add a problematic slope, clay soil, or a location that requires a long access path and you can double both the timeline and the material cost.
- Flat ground near house: lowest prep cost, fastest build, lowest risk of drainage mistakes
- Gentle slope (under 6 inches per 10 feet): manageable with excavation, adds half a day to a day of prep work
- Moderate slope (6–12 inches per 10 feet): likely requires renting a plate compactor, more base material, possible retaining edge, adds 1–2 days
- Steep slope or poor drainage low point: consider raised deck framing instead; ground-level patio here carries high risk of water and settling problems
- Near trees with surface roots: roots will eventually heave pavers; a gravel or decomposed granite surface is more forgiving here than rigid pavers or slab
- Clay-heavy soil anywhere: budget for extra base depth (go 6–8 inches minimum), more compaction passes, and possibly a layer of geotextile fabric under the base
The biggest DIY risk is underestimating drainage. Drainage errors don't always show up immediately. They show up two winters later when pavers start rocking, or three years in when water is finding its way into a crawl space. If you're at all unsure about how your site drains, it's worth spending $100–200 on a consultation with a local landscaper or excavating contractor to walk the site with you before you start. That's cheap insurance.
Permit-related delays are the other wildcard. If you need a permit, budget two to six weeks for approval in most municipalities. Some areas are faster, some slower. Start the permit process before you order materials or schedule equipment rentals.
Your checklist for picking the spot
Run through this before you commit to a location. It takes less than an hour and will save you headaches later.
- Define your primary use (dining, lounging, grilling) and confirm the spot supports it with enough square footage
- Observe sun patterns at morning, midday, and late afternoon in the candidate spot
- Note prevailing wind direction and check sightlines for privacy issues
- Run a hose or watch the spot in rain: does water drain away or pool? Mark where it goes
- Measure the slope with a level and a tape measure: you need at least 1–2% grade (1/8 to 1/4 inch per foot) draining away from the house
- Check your deed or survey for easements on that part of the property
- Call or check online for your municipality's setback requirements and permit rules
- Tape out the footprint on the ground and physically place furniture to confirm fit and flow
- Assess soil type by digging 6 inches: is it clay (sticky, slow draining) or sandy/gravelly (crumbly, fast draining)? This determines your base depth
- Confirm access path from the house and decide whether you need to build a connecting walkway
What to do first once you've decided
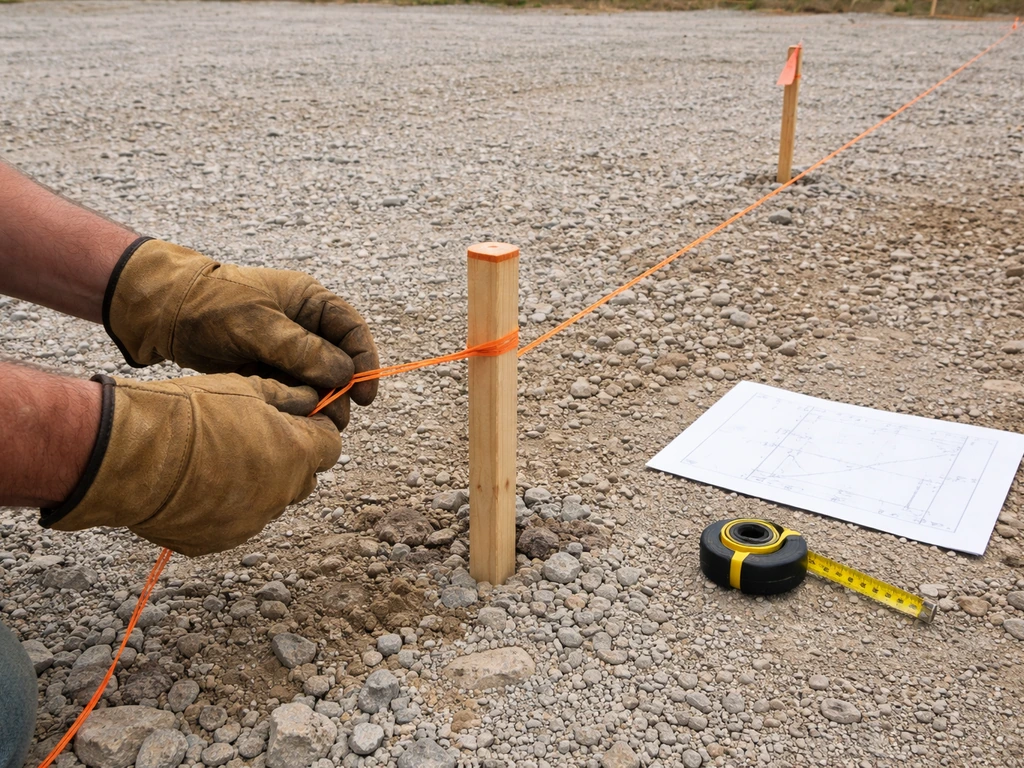
Once the location is locked in, the sequence matters. Start by sorting out permits if you need them. While that's in process, do your soil assessment and rough grade the area by eye to get a feel for how much excavation is required. Order or borrow a long level and stakes so you can establish your slope correctly before any base material goes down. If you're doing pavers, decide on your edging system (plastic restraint, aluminum, or soldier course) because that affects how you lay out the perimeter.
From there, the build follows the location. A flat spot near the door in decent soil lets you get straight to excavation, base compaction, and laying your surface. A sloped or problematic site needs more time on grading and drainage before anything else. Either way, the time you spend on site selection and prep is what determines how well the patio performs five and ten years from now. The surface material gets all the attention, but the decisions you make before you break ground are what actually matter.
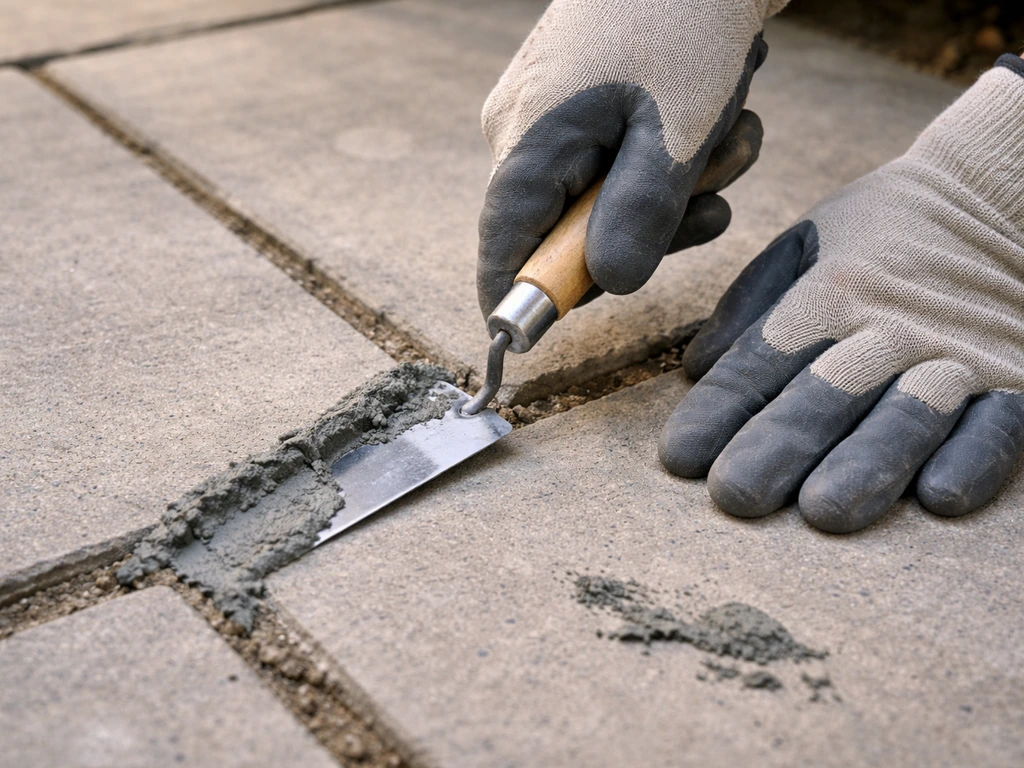
After your patio is built, the next questions that tend to come up are about finishing details: how to fill and point joints between pavers, how to make the space work for pets, and how to maintain the surface long term. Those are all solvable problems, but they're a lot easier to deal with when the foundation and location are right from the start.
FAQ
Can I put a patio on a low spot in the yard if I just re-level the patio area?
Yes, but only if you can fix drainage without changing the whole yard. For a slight grade, you can rework the pad area and maintain consistent slope across the patio surface, then build the base accordingly. If the site is a natural low point that collects runoff from elsewhere, expect much more excavation and possibly underdrain work, and in many cases a patio there is the wrong location.
What’s the best way to tell if a patio location has drainage problems?
To catch slow drainage issues, test the spot after a full rain, not just during one short storm. Mark the wettest areas and note how long water stays pooled, then repeat the test in a different season if possible (spring thaw and late fall reveal problems quickly). If water is still obvious after 4 to 6 hours, plan on drainage correction rather than hoping it will “dry out.”
How do I account for shade changes throughout the day when choosing where to put a patio?
Avoid planning around “half sun.” Instead, decide the patio’s use hours, then observe the exact area for those windows. A dining patio you’ll use for dinner needs to be comfortable in late afternoon and evening, not just bright at midday. If you can, take notes on shadow lines from trees or structures every hour during your typical use window.
What should I do if wind makes grilling smoke blow into the seating area?
If your prevailing wind carries smoke toward seating, rotate the grilling setup or shift the patio so the seating is crosswind or sheltered. You can also reduce smoke by placing the grill at the patio edge, away from overhangs, and avoiding tall walls that trap air movement. A practical check is to stand where the chairs will be and do a “smoke test” with a small controlled burn source in the same wind conditions.
If I put the patio near the back door, how do I make sure I can still access the yard easily?
Don’t place the patio where you’ll be constantly walking over it for yard access. A good rule is to keep a dedicated mowing and tool route that connects lawn to storage without crossing the patio surface. If the patio blocks your main path, redesign the patio shape early or shift the location so the route goes along a side, not through the center.
What clearance measurements should I plan for between furniture, doors, and edges of the patio?
Give yourself room for real circulation, not just furniture clearance. For walkways, ensure at least about 36 inches of clear path width for comfortable traffic, and more if you’ll wheel a grill, stroller, or cart across the patio. Also avoid creating pinch points between furniture and the door so guests do not crowd into corners.
Besides permits, what location-related paperwork can stop a patio project?
For most builds, check three things: property lines and easements, local zoning rules for impervious surfaces, and any HOA architectural approvals. Even if a patio seems “small,” some areas treat it like an accessory structure and require review. If you can’t find your survey or easement documents, get a boundary/easement locate before digging, because correcting an encroachment later is expensive.
Will permeable pavers let me ignore slope and drainage planning?
Yes, but choose the right base and install method for the surface. Pavers and permeable systems still need slope away from the house, and they still need compaction and correct thickness so the system doesn’t migrate or heave. If your patio area has clay or freezes, don’t assume permeable equals “no drainage prep,” it means you’re relying on the system to move water correctly through the full build-up.
What location and site conditions cause patios to fail in colder climates?
For freeze-thaw areas, protect against frost heave by keeping the pad properly sloped and fully compacted, and by using the correct base depth and gradation for your soil type. Also avoid installing pavers over areas that settle (uncompacted fill or organic topsoil). If you see heaving or rocking after the first winter, the fix is usually base correction, not surface replacement.
Should I plan for future upgrades like outdoor lighting or an outdoor kitchen when deciding where to put a patio?
It depends on what you plan to do later. If you might add lighting, speakers, a pergola, or an outdoor kitchen, plan conduit and cable routes during the patio install. Retrofitting around installed pavers often means cutting sections, disturbing bedding and edges, and risking drainage disruption, so it’s smart to map future utilities before locking the final layout.
Next Article
Best Method for Pointing a Patio: DIY Repointing Steps
Step-by-step DIY patio repointing: remove failed joints, choose mortar or sand, refill neatly, protect, cure, and troubl