Pointing a patio means cleaning out the damaged or crumbling joints between your pavers or bricks, then filling them back up with fresh jointing material so water, weeds, and frost can't keep eating away at the base underneath. It's one of those jobs that looks intimidating but is genuinely beginner-friendly once you understand what you're dealing with, and tackling it early saves you from a much bigger and more expensive repair later.
How to Point a Patio for Beginners: Step-by-Step Guide

Nolan Lennox
18 Jun 2026
What 'pointing' actually means for patios (and when it's time to do it)
In masonry, pointing (or repointing) refers to repairing the mortar or jointing material that sits between individual paving units. Those joints aren't just cosmetic, they lock the surface together, shed water, and stop the whole structure from shifting around. When they fail, water finds a path down to the sub-base, frost heave starts, weeds colonise the gaps, and what looked like a small surface problem becomes a foundation problem.
A useful rule of thumb: if the joint material has eroded to a depth more than roughly twice the width of the joint itself, it's definitely time to repoint. In practice that often means you can see gaps of 10mm or more, or weeds are rooted deep enough that they don't pull out easily. You should also repoint if you notice any paving units rocking underfoot, which can indicate water has already started washing out the base below, at that point you'll want to check whether the base needs attention before you point, since fresh pointing over a failed base won't hold.
Work out what type of patio you have before you buy anything
This step matters more than most guides admit. The right approach for a concrete block paved driveway is completely different from an old mortared brick terrace, and buying the wrong product wastes money and can actually make things worse. If you're also thinking about where to put a patio in the first place, plan the layout and drainage early so later repointing is less likely to be needed.
Pavers with sand or polymeric sand joints
Most modern patios laid on a compacted sub-base use concrete or natural stone pavers with kiln-dried sand or polymeric sand brushed into the joints. The sand locks the units together through friction and acts as a flexible filler. Over time, rain washes it out, ants excavate it, or it simply compacts and drops below the surface. If you look closely at your joints and they're open, sandy, or have a thin crust of old polymeric sand that crumbles away, this is your situation. The fix is re-sanding, not mortaring.
Brick or stone with mortar joints
Older patios, particularly those with natural stone flags, clay bricks, or concrete slabs laid on a full mortar bed, often have proper mortar joints between units. These crack with ground movement, freeze-thaw cycles, or just age. If your joints are hard but crumbly, you can chip pieces off, or they've cracked lengthways, you're dealing with mortar failure and you'll need a pointing mix.
A quick test: scrape across a joint with a screwdriver. If it powders or comes away easily, the mortar has lost its bond and needs replacing. If it's solid and intact, the issue might just be surface staining or moss rather than structural joint failure.
Is re-pointing enough, or do you have a bigger problem?
If individual slabs are rocking, sitting proud or sunken compared to their neighbours, or if there are large hollow-sounding areas when you tap, the sub-base or mortar bed underneath has likely failed. Re-pointing over that won't fix it, you'd need to lift those slabs, sort the base, and relay them before pointing. Don't skip this check. It's annoying to discover after you've spent a day pointing.
Tools and materials: what to get and what to actually choose
You don't need a lot of equipment for this job. Here's an honest breakdown of what's genuinely useful versus what you can skip:
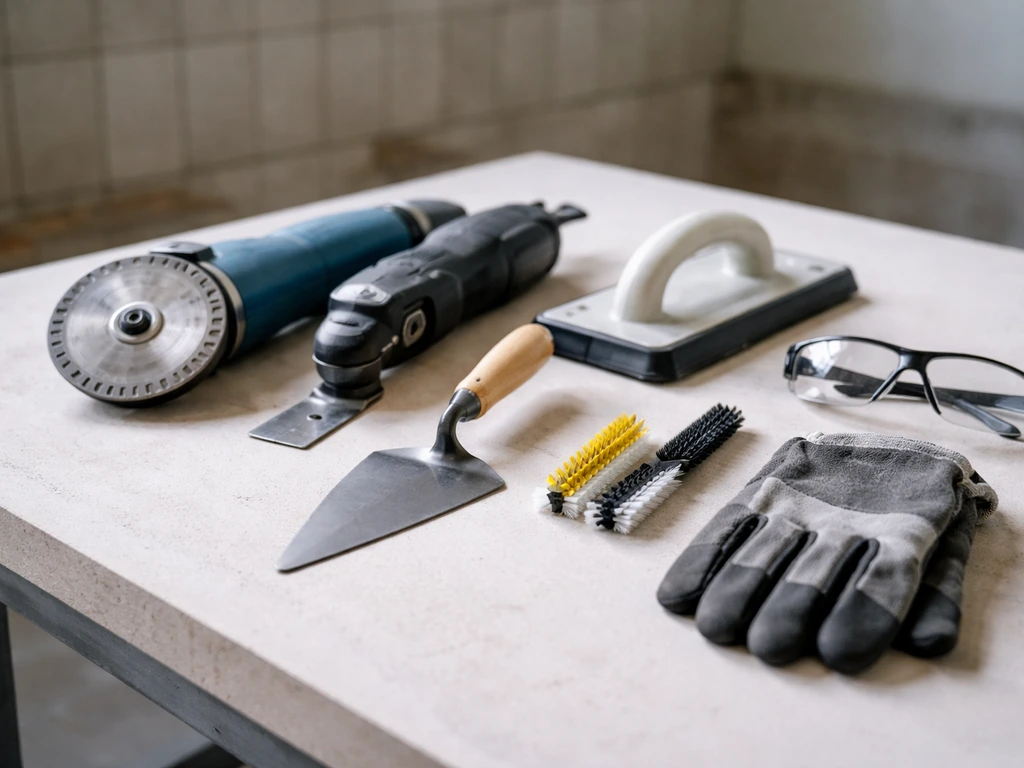
Essential tools
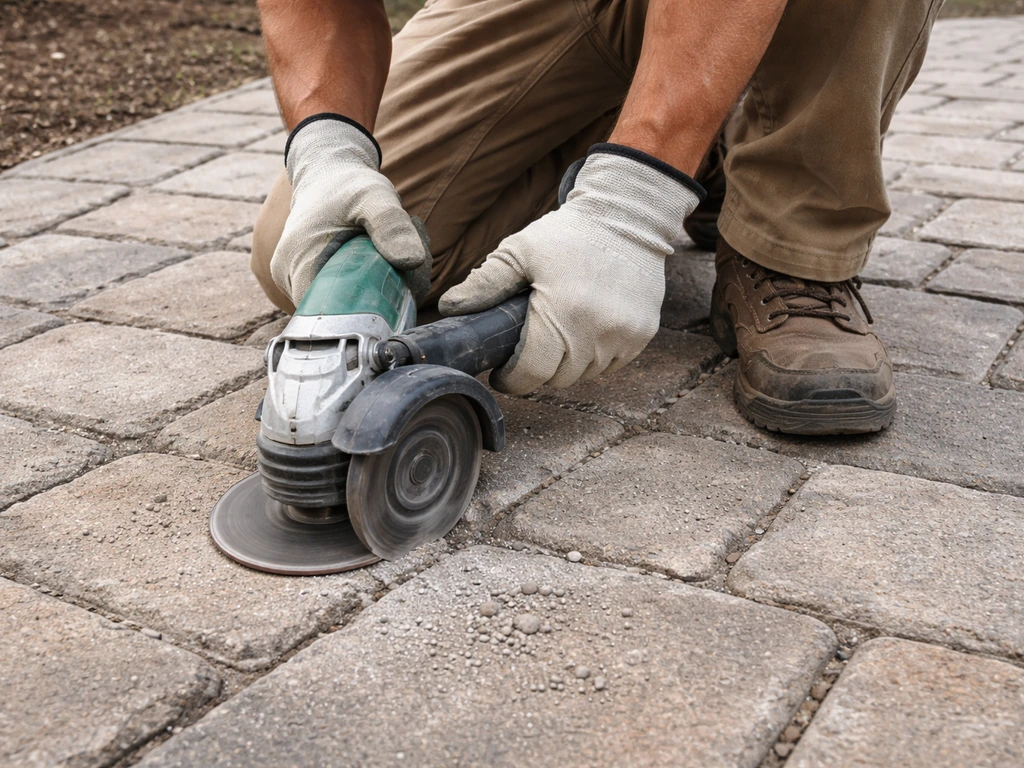
- Angle grinder with a diamond disc (for cutting out old mortar) or an oscillating multi-tool with a grout blade — the angle grinder is faster but the multi-tool is more controllable for beginners around shaped edges
- Cold chisel and club hammer — useful for hand-removing loose mortar in spots the grinder can't reach
- Stiff brush or wire brush — for clearing debris from joints
- Jointing trowel or pointing trowel (narrow blade, around 12–18mm) — for pressing mortar in
- Margin trowel or hawk — for mixing and holding small amounts of pointing mix
- Rubber mallet and wooden float — for tamping polymeric sand into joints
- Garden hose or watering can with a rose head
- Sponge and bucket of clean water — for cleaning excess from faces
- Dust mask (FFP2 minimum), safety glasses, and knee pads
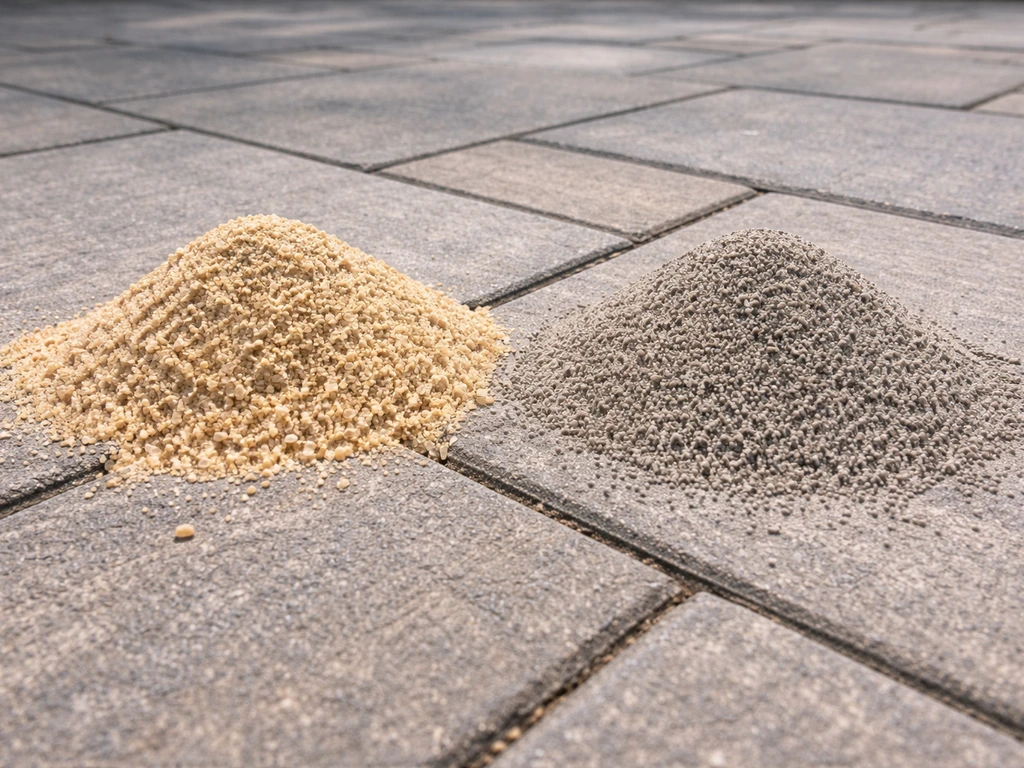
Choosing your jointing material
| Material | Best for | Pros | Cons | Rough cost |
|---|---|---|---|---|
| Kiln-dried jointing sand | Paver patios on flexible base | Cheap, easy to apply, flexible | Washes out over time, doesn't inhibit weeds on its own | £5–10 per 20kg bag |
| Polymeric sand | Paver patios, any size joint | Locks hard when activated, inhibits weeds and ants, lasts years | Needs careful activation; haze can be hard to remove if misapplied | £20–35 per 20kg bag |
| Pointing mortar mix (ready-mix) | Mortared stone or brick joints | Strong, durable, colour-matched options available | Less flexible, can crack if applied too thick or base moves | £8–15 per bag, covers 5–10m² depending on joint width |
| Flowable grout / pointing compound | Tight joints under 5mm, decorative stone | Self-levelling, easy to apply, minimal tool marks | More expensive, not suitable for wide joints | £15–25 per bag |
| Mortar pointing mix (DIY from scratch) | Any mortar joint, larger areas | Cost-effective, controllable mix ratio, widely available | Requires mixing, more skill to get consistency right | £5–8 for cement + sharp sand separately |
For most beginners with a standard block pave or concrete paver patio, polymeric sand is the best choice, it's almost foolproof to apply, looks clean, and genuinely resists weeds and washout far better than plain kiln-dried sand. For natural stone or brick with mortar joints, go with a ready-mixed pointing mortar in a colour that matches the existing joints. You can test a small dab in a hidden corner and let it dry before committing to the whole job.
Prep the joints properly, this is where the job is won or lost
Skipping prep is the number one reason pointing fails within a year. New material applied over loose, dirty, or wet joints simply won't bond or compact properly. Give this stage as much time as it needs.
Clear weeds and moss first
Pull out any weeds by hand or use a weed torch to kill roots before you start cutting. Apply a path weedkiller a week before your planned work date if the infestation is heavy, this makes the roots easier to remove and stops re-growth from any roots left behind after pointing. For moss, a diluted path moss killer or a stiff brush on a dry day is enough. Don't leave dead moss in the joints, it holds moisture and stops new material bonding.
Remove the old mortar or sand
For mortar joints: use your angle grinder (with the disc running along the centre of the joint, not the edge of the paving) or an oscillating tool to cut out the top 15–20mm of old mortar. The target depth is at least equal to the joint width, so a 10mm-wide joint needs at least 10mm depth removed, ideally 15–20mm for good mechanical key. Keep the disc away from the faces of the pavers to avoid chipping. For hand removal in corners, use the cold chisel and club hammer carefully, tapping rather than levering. Suck or brush out all the loose material.
For polymeric sand: if there's a hardened crust of failed polymeric sand, use a stiff brush or chisel to break it up, then sweep it out. If the old sand was applied correctly and is just depleted rather than failed, you can often top it up rather than remove everything, though a full refresh gives a better result.
Clean and dampen the joints
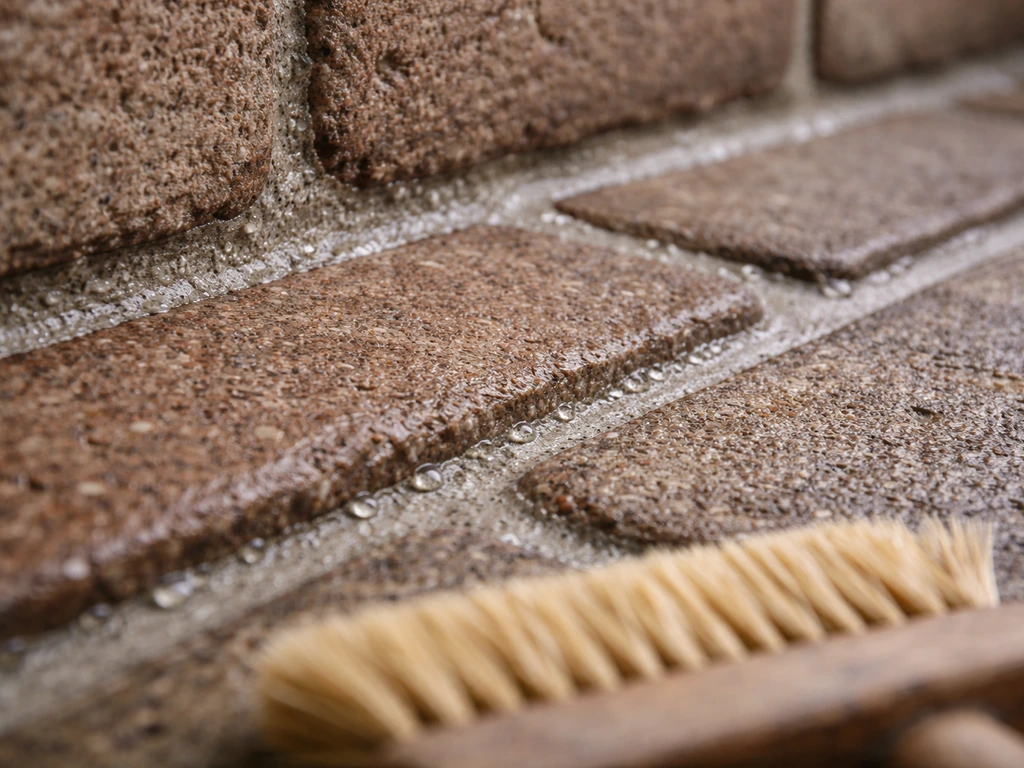
Blow or sweep out all dust, then rinse the joints with water and let them drain. You want the joint surfaces damp but with no standing water, this stops dry masonry from sucking moisture out of the mortar too fast, which causes poor adhesion and cracking. If you're applying polymeric sand, keep the surface dry until after you've swept the sand in, then activate it with water as directed.
Protect surrounding areas
Mortar and cement dust are hard to get off render, timber fences, and planted areas once dry. Tape polythene sheeting or cardboard along walls and borders, and water the soil around planted edges before you start work so any dust that settles doesn't stick. It's a five-minute job that saves an hour of cleaning.
Step-by-step: applying the pointing material
Option A: Polymeric sand (paver patios)
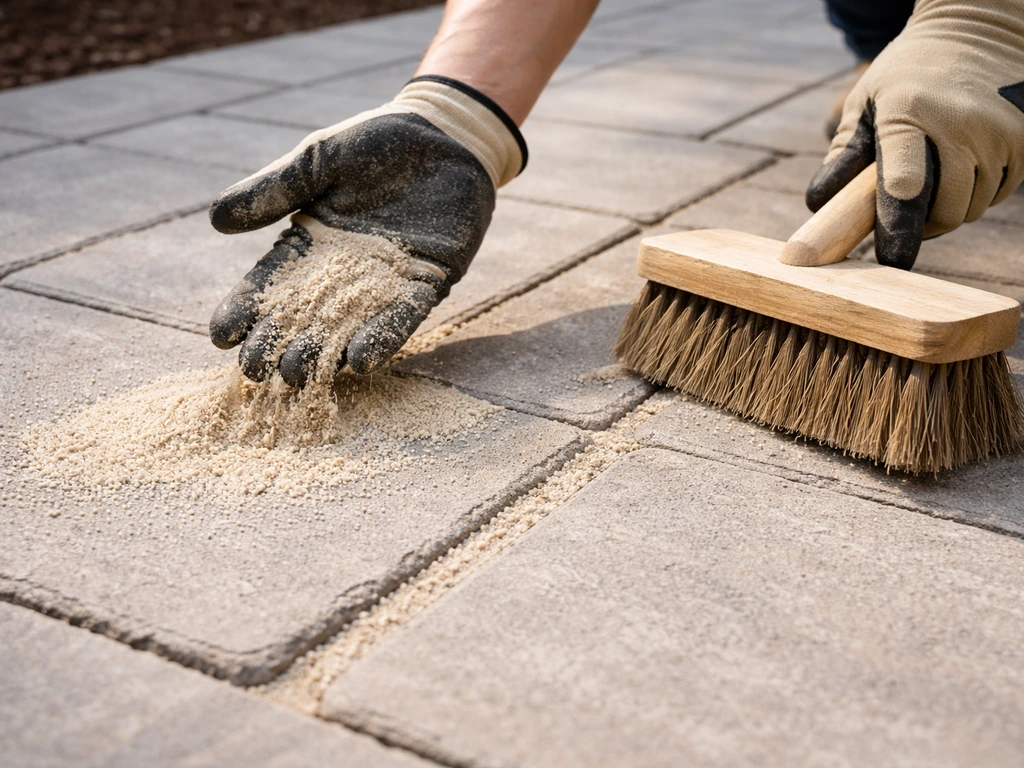
- Make sure the patio surface is completely dry — polymeric sand must go in dry or it clumps and won't compact properly.
- Pour the sand onto the patio and spread it loosely across the surface with a soft brush, working it into the joints.
- Run a plate compactor over the patio (you can hire one for around £50–70/day) to vibrate the sand deep into the joints. This is important — just brushing it in leaves it loose and prone to washout. If you don't have a compactor, tamp firmly with a rubber mallet across a wooden board.
- Sweep in a second layer of sand to top up any joints that have settled during compaction. Joints should be filled to within about 3–5mm of the top surface.
- Sweep the surface thoroughly to remove all sand from the paver faces — this is critical. Any sand left on the surface will bond when you activate it and leave a haze that's very difficult to remove.
- Activate with a fine mist of water from a hose or watering can — use a gentle spray, not a hard jet that could wash sand back out. Let the water soak in for 15 minutes, mist again if the manufacturer recommends a second pass, then leave undisturbed.
Option B: Mortar pointing (stone flags, brick, mortar joints)
- Mix your pointing mortar to a firm but workable consistency — it should hold its shape when pressed but not crumble. For a DIY mix, a 1:4 ratio of cement to sharp sand (with a small splash of washing-up liquid as a plasticiser) works well. Ready-mix bags just need water added per the instructions.
- Load a small amount onto your hawk — don't mix more than you can use in about 20 minutes, especially in warm weather.
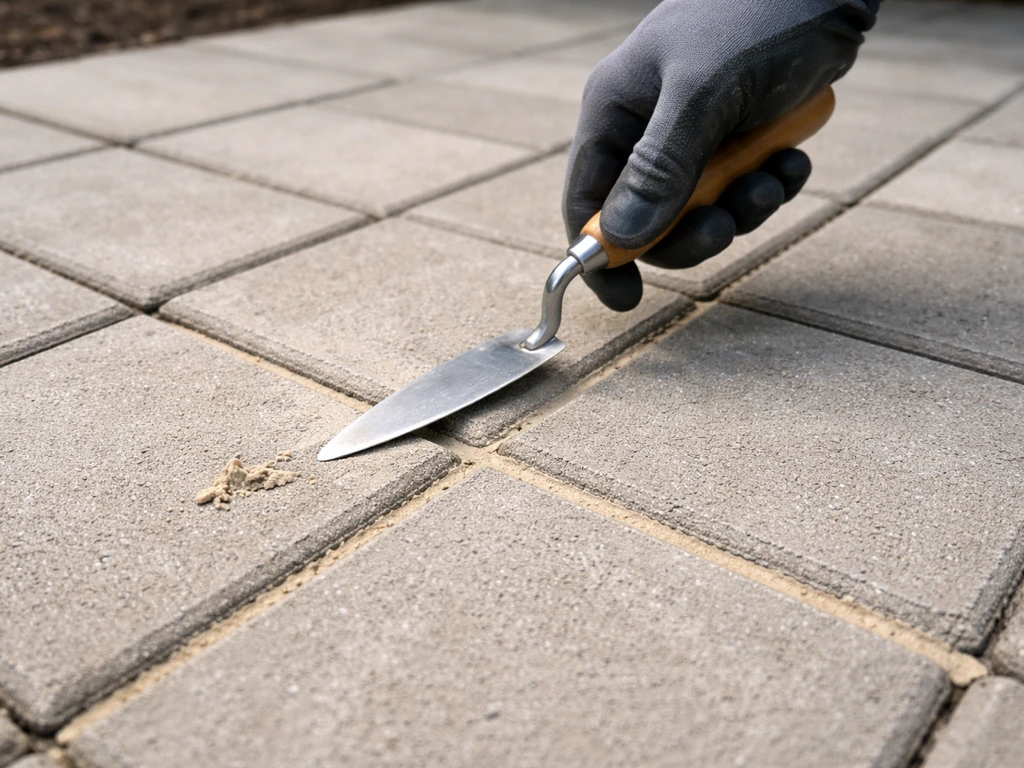
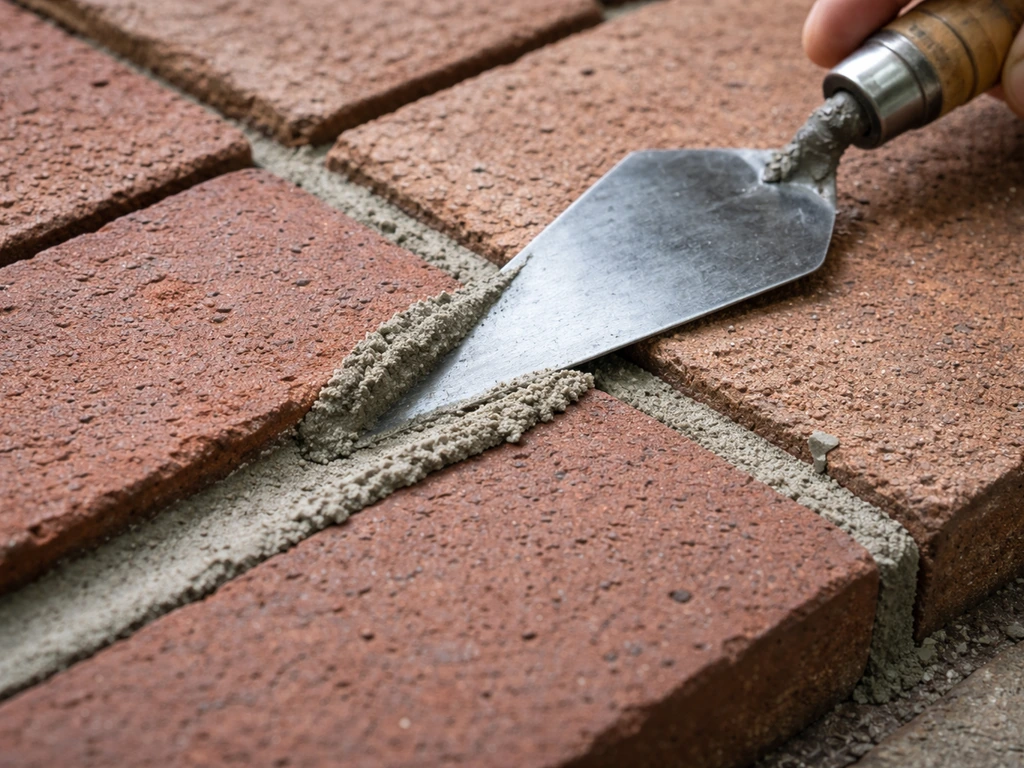
- Press the mortar firmly into the joint using a pointing trowel, pushing it in layers if the joint is deep rather than trying to fill it all at once. The mortar should be compacted, not just dropped in.
- Fill to just slightly proud of the paving surface, then come back once it's firmed up (usually 20–30 minutes, depending on temperature) to tool the joint.
- Tool the joint by running a jointing iron, the rounded handle of a trowel, or even a piece of hose pipe along the filled joint to create a slightly concave or flush profile. This compresses the mortar surface and sheds water better than a flat finish.
- Work in manageable sections of around 1–2 square metres at a time so you're always tooling mortar at the right stage of cure — not too wet, not too hard.
One thing beginners get wrong: overfilling and spreading mortar across the paver face, then trying to clean it off later. It's much easier to keep your trowel disciplined and work in the joint only. Keep a damp sponge to hand and wipe any smears off the paving face immediately.
Curing, cleanup, and keeping the finish clean
Curing mortar joints
Mortar pointing needs to cure slowly to gain full strength. Keep foot traffic off the area for at least 24 hours, and ideally 48 hours in cooler or damp weather. If you're pointing in warm or sunny conditions (above about 20°C), lightly mist the joints with water a few hours after tooling to slow the cure and reduce cracking. Don't work in freezing temperatures, fresh mortar below about 5°C won't cure properly and can fail completely.
Cleaning off mortar haze
Cement haze, that white dusty film, is the curse of pointing. The best solution is prevention: keep paving faces clean as you go with a damp sponge, and never let mortar dry on the surface. If you do get haze, wait at least 7 days for the mortar to fully cure, then use a proprietary cement haze remover (a diluted acid solution, always wear gloves and eye protection). Test it on a small area first, especially with natural stone, as some stones react badly to acid. Plain water and a stiff brush works for light haze caught early.
Sealing after pointing
Sealing isn't compulsory but it's worth considering, especially for natural stone or lighter-coloured paving where staining is a concern. Wait at least 28 days after pointing before applying any sealer so the mortar has fully cured. A penetrating impregnating sealer (rather than a surface sealer) gives protection without changing the look much. The tips for pointing a patio topic covers sealing decisions in more detail if you want to dig into that question separately. The tips for pointing a patio topic covers sealing decisions in more detail if you want to dig into that question separately.
Troubleshooting common pointing problems
Mortar crumbling or falling out within weeks
This almost always means the mortar was too weak (too much sand in the mix), the joints weren't cleaned properly before filling, or the mortar was applied to dry joints and lost moisture too fast before curing. Remove the failed material and start again with cleaner prep and a slightly richer mix.
Polymeric sand washing out after rain
Either the joints weren't filled deep enough, the activation water was applied too hard and displaced the sand, or you applied it in wet conditions. The sand needs to fill the full joint depth, not just the top 10mm, and the activation step must use a very gentle mist. If it keeps washing out, it's worth checking whether you have a drainage issue causing water to run hard across the surface.
Weeds coming back fast
If weeds are re-establishing quickly after you've re-pointed, the roots weren't fully killed before you started, or wind-blown seeds are germinating on the surface. Polymeric sand is significantly better than plain sand at resisting this, but it's not infallible, especially in shaded, damp areas. A weed membrane under the paving is the proper long-term solution but that obviously requires lifting and relaying. As a surface fix, regular brushing and a path weedkiller each spring are your best maintenance tools.
Mortar not bonding to old mortar
New mortar won't bond well to contaminated or dusty old mortar. Make sure you've cut or chipped back to sound, clean masonry before applying anything new. If adhesion is still poor, a diluted PVA bond primer painted into the joint and allowed to go tacky before pointing can help, it's a trick worth knowing for old, porous brickwork.
Keeping your joints in good shape long-term
The main enemies of patio joints are standing water, frost, and weed roots. Managing drainage around the patio, making sure water is directed away from the edges and that no area is pooling, does more to extend joint life than any product you can apply. Make sure the patio still has a slight fall (around 1:60 is the standard recommendation) away from the house.
Once a year, in spring, spend half an hour walking the patio and checking joints. On r/landscaping, users note that polymeric sand needs maintenance so it doesn't wash out and allow weeds to take hold in the joints.
Catch areas where sand has dropped or hairline cracks have appeared in mortar early, and top them up. It's a fifteen-minute job to fill a handful of joints, and it prevents you needing a full re-pointing day every few years. A stiff brush to clear debris and moss from the surface regularly also makes a real difference, since organic matter sitting in joints accelerates deterioration.
The best method for pointing your patio can inform whether you want to switch approaches entirely next time, for instance, moving from standard mortar to a flexible pointing compound if your patio is in an area with significant ground movement.
Pointing isn't a glamorous job but it's one of the most effective things you can do to protect a patio you've worked hard to lay. Get the prep right, choose the correct material for your joint type, and the actual application is very manageable for a first-timer. Most patios can be fully repointed in a single day's work, and the difference it makes to both the look and long-term durability is immediate.
FAQ
How do I know whether I should top up polymeric sand or remove it and repoint the whole joint?
For polymeric sand patios, plan to re-apply sand when joints look empty or the surface crust has turned brittle, usually after a heavy winter or sustained washout. If you cannot keep joints filled at all (re-sanding still leaves gaps quickly), stop and investigate drainage and base movement, because repeated failure is often a “water route” problem, not just depleted sand.
Can I just patch a few bad joints instead of doing the entire patio?
Yes, but only in the sense of maintaining joints. If you see cracked mortar joints, rocking units, hollow-sounding spots, or weeds that root deep, you will need proper joint excavation and new pointing, not just patching. Patch fixes tend to break again at the edges because the old, contaminated or shallowly cut joint area keeps failing.
If my patio keeps getting wet, should I point it anyway?
Before you point, check the patio’s fall by using a long level or string line. A typical guideline is about 1:60 (roughly 1 cm drop over 60 cm). If water runs back toward the house or pools anywhere for more than a short time, fix grading or drainage first, otherwise the new joints will keep getting saturated.
What’s the quickest way to confirm the joints are actually failing and not just stained or mossy?
Do a light screwdriver scrape in several random joints, not just one spot. If many joints powder easily, treat the job as a full repoint, because isolated “surface loss” is less common than widespread mortar bond failure on older work. Also tap more than one slab, because edge rocking can hide base washout underneath.
Can I use mortar for a paver patio that is usually filled with sand?
Choose the product by joint type: polymeric sand for dry-laid block pavers and many concrete paver patios, and mortar pointing for brickwork or stone with true mortar joints (or where you excavate and cut back mortar). If you use mortar in a joint system meant to be dry-filled, you can create hard spots and trap moisture, increasing cracking.
What should I do if I get mortar on the face of the pavers?
If you accidentally spread mortar onto the faces, wipe it off immediately with a damp sponge while it is still plastic, do not wait for it to set. Once cured, remove haze later with a proprietary haze remover only after full cure and patch-test on your specific paving, especially natural stone that can etch or discolour.
How should I adjust the job if the weather is hot and sunny?
In warm weather, curing can outpace adhesion. Lightly misting a few hours after tooling can help reduce surface cracking, but do not flood the joints or wash out the filled material. If it is windy and the joints are drying too fast, consider postponing until a cooler period or working in smaller sections so the mortar stays workable.
Is pointing possible after rain, or do I need dry weather?
Yes, if you must work in damp conditions, postpone if there is standing water in the joints or you can’t keep them damp-not-wet during priming and filling. Mortar bonds poorly when moisture is not controlled, and polymeric sand activation can fail if the surface is too wet. Let joints drain fully before you start filling, then follow the activation timing exactly.
When can I walk on the patio and use it after pointing?
Cure time affects strength. Avoid heavy foot traffic for at least 24 hours, then consider delaying patio use longer in cool or damp weather. If you plan to place furniture or vehicles soon, treat it as a longer cure situation than a “quick walk-on” job.
Do I need to seal right away to stop staining and weeds?
A simple way to reduce future staining is to avoid sealing immediately after pointing. Wait at least 28 days for cure, then use a penetrating impregnating sealer if you want less darkening and better water resistance on stone or lighter pavers. Test on a hidden area first to confirm the colour response matches what you expect.
Next Article
Where to Put a Patio: Spot, Drainage, and DIY Checklist
Guide to where to put a patio: spot choice, drainage checks, permits, layout, and DIY build options for sloped sites.