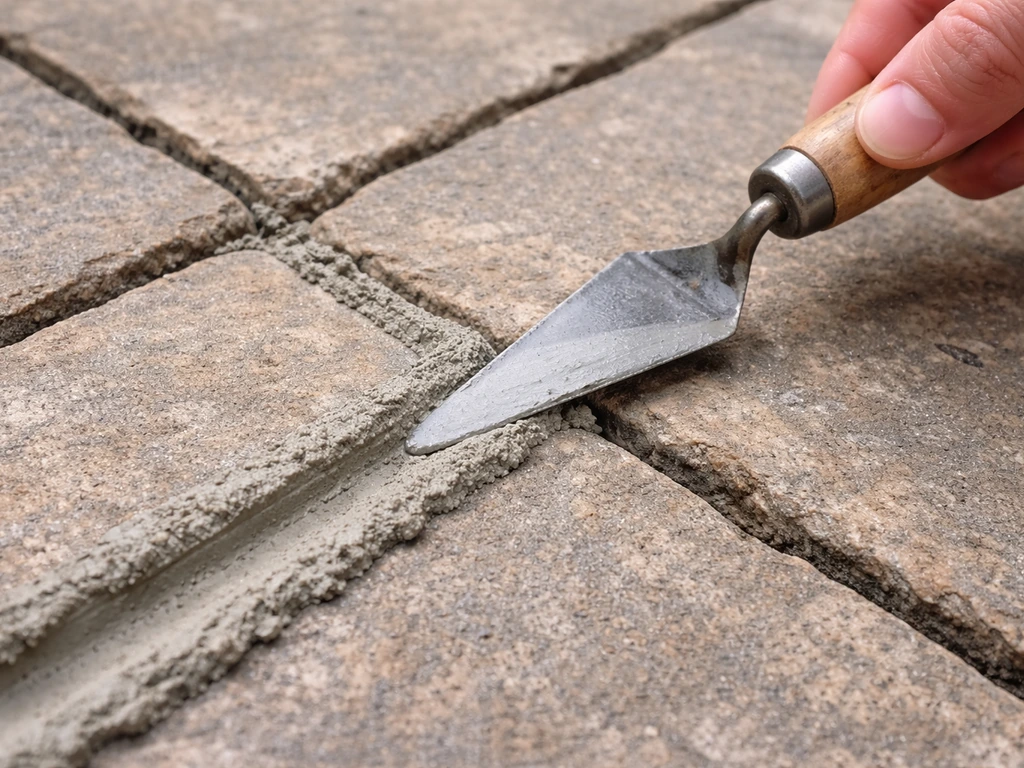
Pointing a patio means filling or replacing the mortar in the joints between your slabs, bricks, or pavers, not relaying the patio itself. If your joints are crumbling, cracking, or letting water sit, repointing is the fix. Done right, it takes a weekend, costs very little, and adds years to a patio that might otherwise heave or shift. Once you’ve repointed, the next step is making sure the patio is installed in the right location and set up to drain properly so it doesn’t heave or shift where to put a patio. The keys are matching your mortar correctly, raking out enough of the old material, and giving the new mix time to cure before rain or traffic hits it.
Tips for Pointing Patio Joints: DIY Step-by-Step Guide

Nolan Lennox
4 Jul 2026
What 'pointing' actually means on a patio
Pointing is the process of filling the joints between masonry units, bricks, pavers, or stone slabs, with mortar or another jointing material. Repointing (which is what most patio jobs actually are) specifically means removing the old, deteriorated mortar and replacing it with fresh material. The SPAB defines it simply as 'taking out and replacing the mortar from the face of a masonry joint,' and the U.S. National Park Service describes the joint itself as masonry's 'first line of defense' against water. That framing is useful: once those joints fail, water gets under your slabs, freezes, thaws, and slowly wrecks your base. Repointing stops that cycle.
People sometimes confuse pointing with grouting (used for tiles) or with laying new pavers. They are different jobs. If you're reading this after searching for how to point a patio for beginners or looking for the best method for pointing a patio, the core task is the same: get the old failing material out, get compatible new material in, and tool it so it sheds water. If you are choosing the best method for pointing a patio, focus on matching the mortar to the existing joints and using a proper raking and tooling technique to shed water. That's it.
Choosing the right mortar and matching what's already there
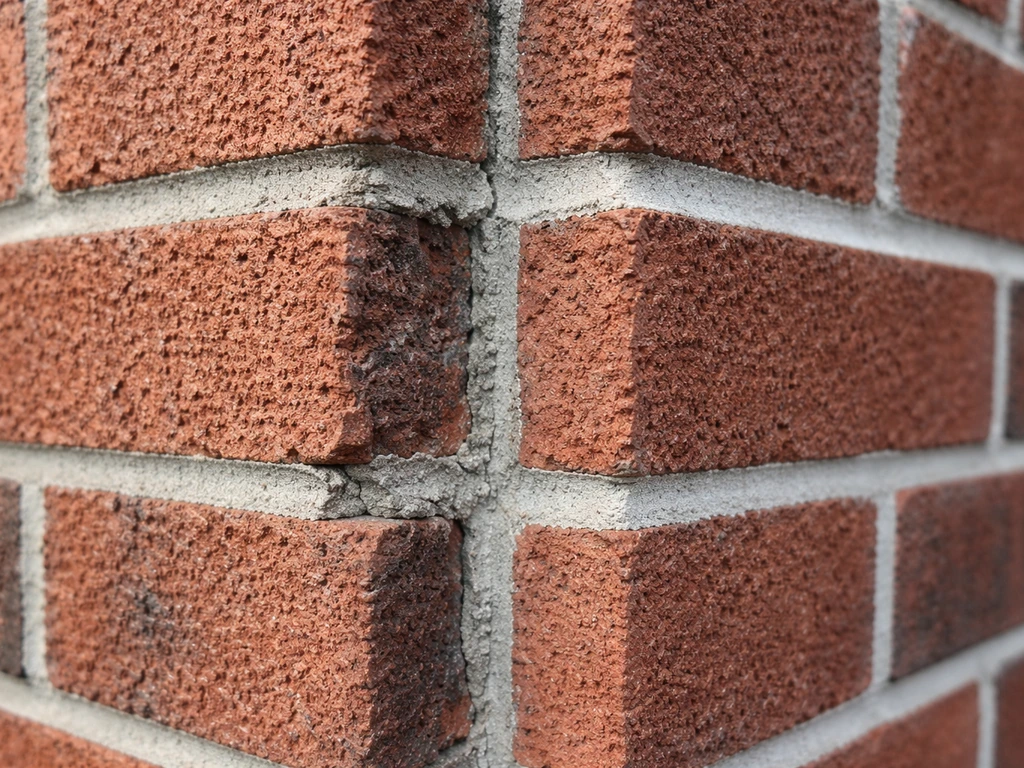
This is where a lot of DIYers go wrong. Using too-strong mortar on older brick or softer stone doesn't make the joint tougher, it makes it harder than the surrounding material, which shifts where stress concentrates. When frost or load pushes against those joints, the damage goes into the paver or brick instead of the mortar, which is the more replaceable of the two. The guiding rule, backed by both the NPS and GSA, is that repointing mortar should be equal to or softer (in compressive strength) than the masonry units and the original mortar.
For a modern concrete paver or hard engineering brick patio, a standard Type S mortar (roughly 1 part Portland cement : 0.5 parts lime : 4.5 parts sand) is a solid match. For older clay brick, reclaimed stone, or any heritage-style paving, go lime-rich: Type O mortar, or a mix like 1 part white Portland cement : 3 parts Type S hydrated lime : 6 parts sand. If the original joints are clearly lime-based, slightly soft, sandy, and buff-colored, do not replace them with straight Portland cement mix. Portland is far less permeable than lime, and trapping moisture behind a hard cement face causes spalling, especially through freeze-thaw cycles. A Department for Communities technical note cautions that modern cement mortar should not be used as a replacement for lime mortar on older or heritage masonry because it removes the ability of the wall to release moisture Portland is far less permeable than lime, and trapping moisture behind a hard cement face causes spalling.
If you're dealing with a paver patio rather than a traditional mortared brick or stone surface, polymeric sand is often the right jointing product rather than mortar. Belgard’s installation guidance for paver systems uses the sequence base layer, bedding sand, pavers, and jointing material, then notes that polymeric sand is swept into joints so a compactor can help distribute it evenly into the joints polymeric sand is often the right jointing product rather than mortar. It brushes in, activates with water, and cures to a semi-flexible joint that handles slight movement well. The minimum joint depth for most polymeric sands is around 1.5 inches (4 cm) for proper activation, products like Techniseal's Smartsand spec this exactly, and the finished sand level should sit at least 1/8 inch (3 mm) below the top of the paver. Mortar-set stone or brick patios, though, need traditional mortar.
| Mortar/Material Type | Best For | Relative Strength | Flexibility | Typical Mix or Product |
|---|---|---|---|---|
| Type S mortar | Modern concrete pavers, hard brick | High | Low | 1 : 0.5 : 4.5 (cement : lime : sand) |
| Type O / lime-rich mortar | Old clay brick, reclaimed stone, heritage paving | Low-medium | Medium | 1 : 3 : 6 (white Portland : Type S lime : sand) |
| Straight Portland mortar | Avoid on older/softer masonry | Very high | Very low | Not recommended for repointing |
| Polymeric sand | Sand-set paver joints | Medium (flexible cure) | High | Branded product, e.g., Techniseal EZSAND |
When in doubt, chip a small piece of the old mortar out and take it to a masonry supplier. They can usually tell by sight and feel whether it's a lime or Portland base, which saves you a bad match.
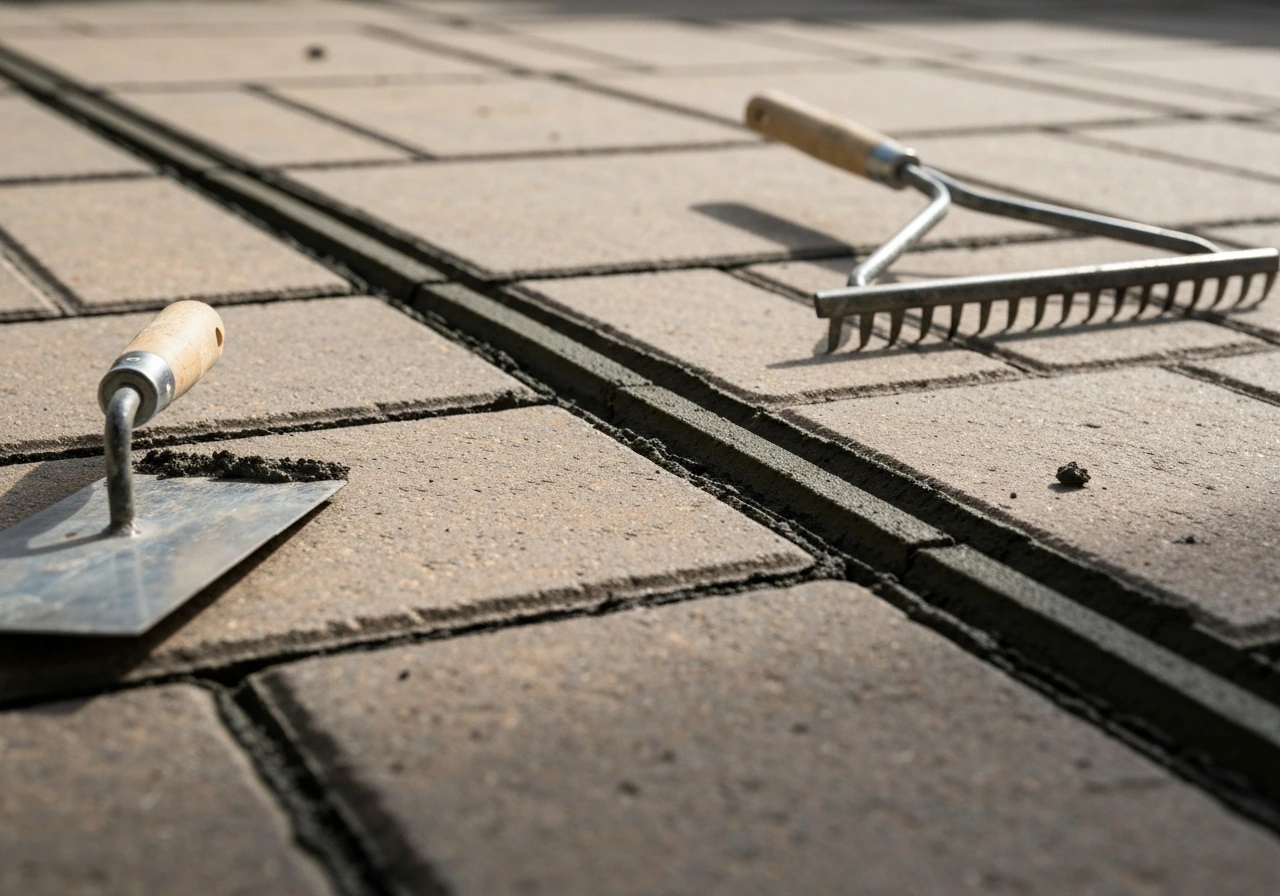
Tools, supplies, and getting the prep right
What you'll need
- Joint raking tool or oscillating multi-tool with a grout blade (for soft old mortar)
- Cold chisel and club hammer (for tougher mortar — work carefully to avoid chipping the paver edges)
- Angle grinder with a thin-kerf masonry blade (last resort, high risk of damage — use only on straight, wide joints)
- Stiff natural-fiber brush and soft brush for cleaning out dust
- Pointing trowel or a hawk and trowel for traditional mortar
- Pointing gun or mortar bag for deep, narrow joints where a trowel is awkward
- Bucket, mixing paddle, and drill (or a pre-mixed bag product)
- Clean water, sponge, and spray bottle
- Masking tape or cardboard to protect paver surfaces
- Knee pads — you'll be on the ground for hours
Raking out the old mortar correctly
The single most common mistake I've seen (and made myself early on) is not raking deep enough. If you only scratch out the surface layer of failing mortar, the new mix has nothing to bond to and will pop out within a season. The practical standard is to rake out to a minimum of 15–20 mm (about 3/4 inch), or until you hit solid, undamaged mortar underneath. DIY Doctor recommends 10 mm at an absolute minimum and ideally 15–20 mm. The GSA's guideline for structural masonry is a minimum depth of 2.5 times the joint height, but for a patio that's sitting on a prepared base rather than a load-bearing wall, aiming for 20 mm is the reliable rule of thumb. For resin or polymeric products on paver joints, you often need more, Pavingexpert cites 20–30 mm minimum for those products to perform properly.
Use your raking tool or chisel to work horizontally along each joint. Don't lever against the paver edges, push the tool straight back into the joint. Tap with the hammer rather than forcing it. After raking, brush the joint out thoroughly with a stiff brush, then blow or vacuum out the dust. Any loose grit left in the joint will weaken the bond. Lightly dampen the cleaned joints before you apply new mortar, it slows the initial water absorption from the substrate, which helps the mortar cure rather than dry out too fast.
Protecting surfaces and landscaping
Mortar stains are hard to remove from paver surfaces, especially textured or rough-faced stone. Before you start, tape cardboard strips along the joint edges or apply masking tape to paver faces immediately adjacent to the joints you're working on. Cover any nearby plants or grass with plastic sheeting, lime in mortar raises soil pH if it washes in. Keep a bucket of clean water and a sponge close by so you can wipe drips immediately before they set.
Step-by-step: how to point a patio
- Assess the joints first. Walk the whole patio and mark any joints that are crumbling, sunken, hollow-sounding when tapped, or visibly cracked. Decide whether you're doing spot repairs or a full re-point.
- Rake out old mortar to at least 15–20 mm depth, working carefully with a raking tool or cold chisel. Never use an angle grinder close to textured or uneven pavers — it will grind the edges.
- Brush and vacuum all dust and debris from the joints. Lightly mist the cleaned joints with water — don't flood them, just dampen them.
- Mix your mortar to a firm but workable consistency. It should hold its shape when squeezed but not be crumbly or sloppy. Pre-bagged mortar products are fine for small to medium patio jobs and remove the guesswork from ratios.
- Load a small amount of mortar onto a hawk or into a pointing gun. Work in manageable sections — about 1 square metre at a time — so the mortar doesn't dry out before you can tool it.
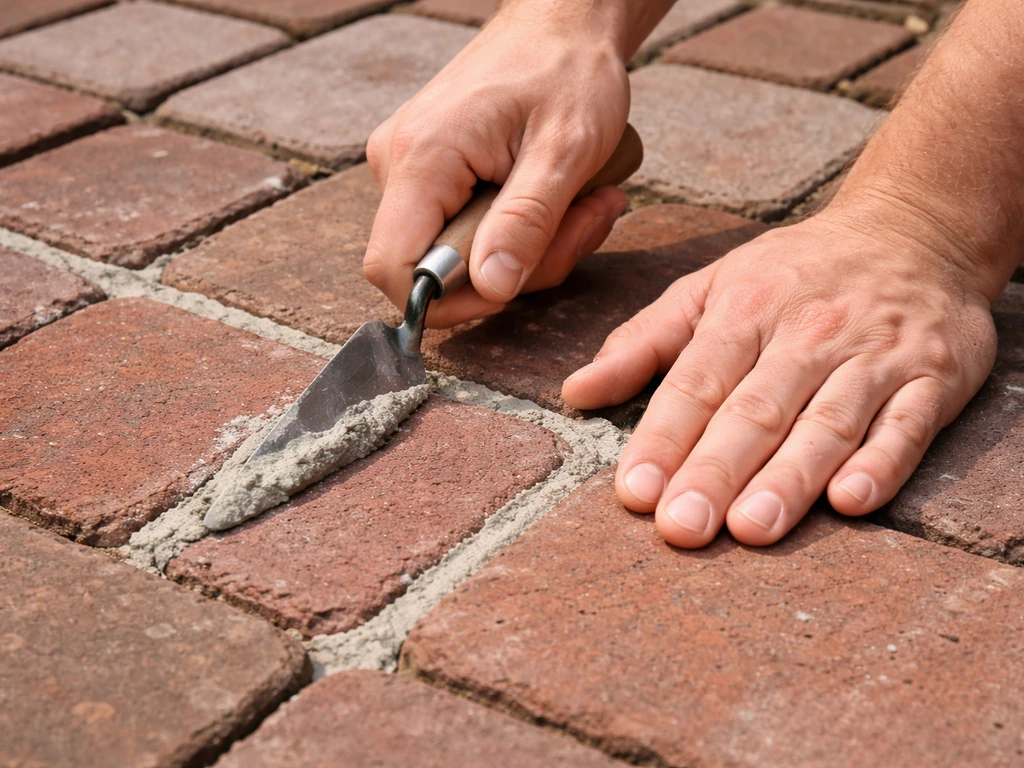
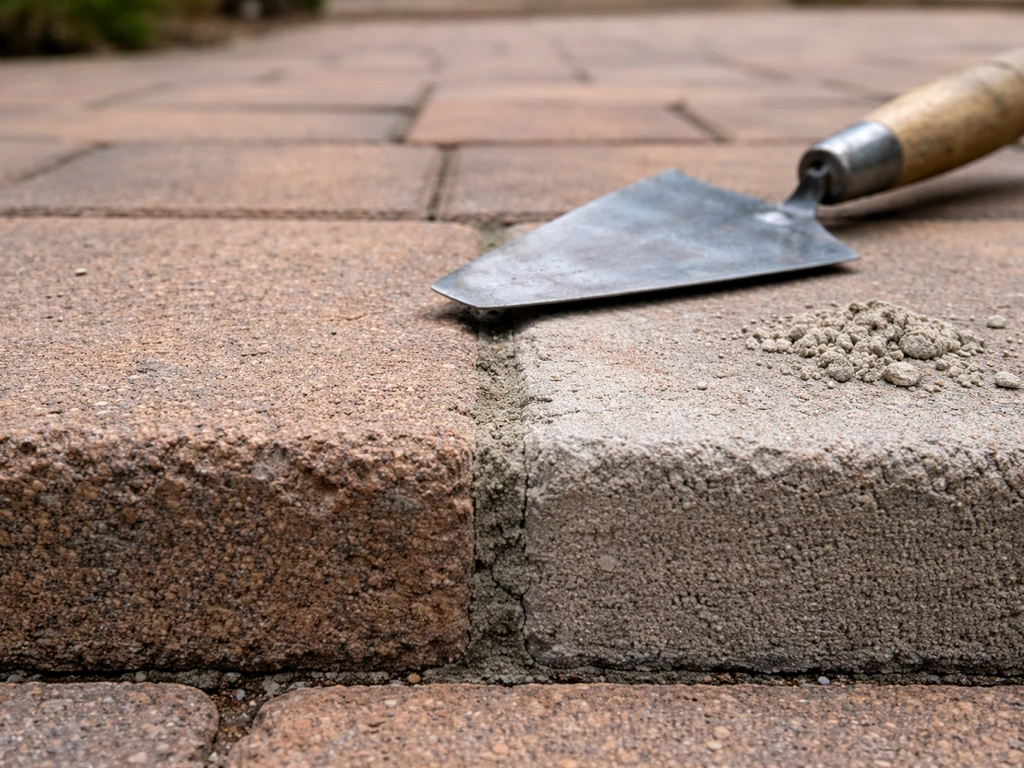
- Press mortar firmly into the joint using a pointing trowel or the gun nozzle, working it in from one end. Fill in two passes for deep joints: pack the bottom half first, let it stiffen slightly (15–20 minutes), then fill to just proud of the surface.
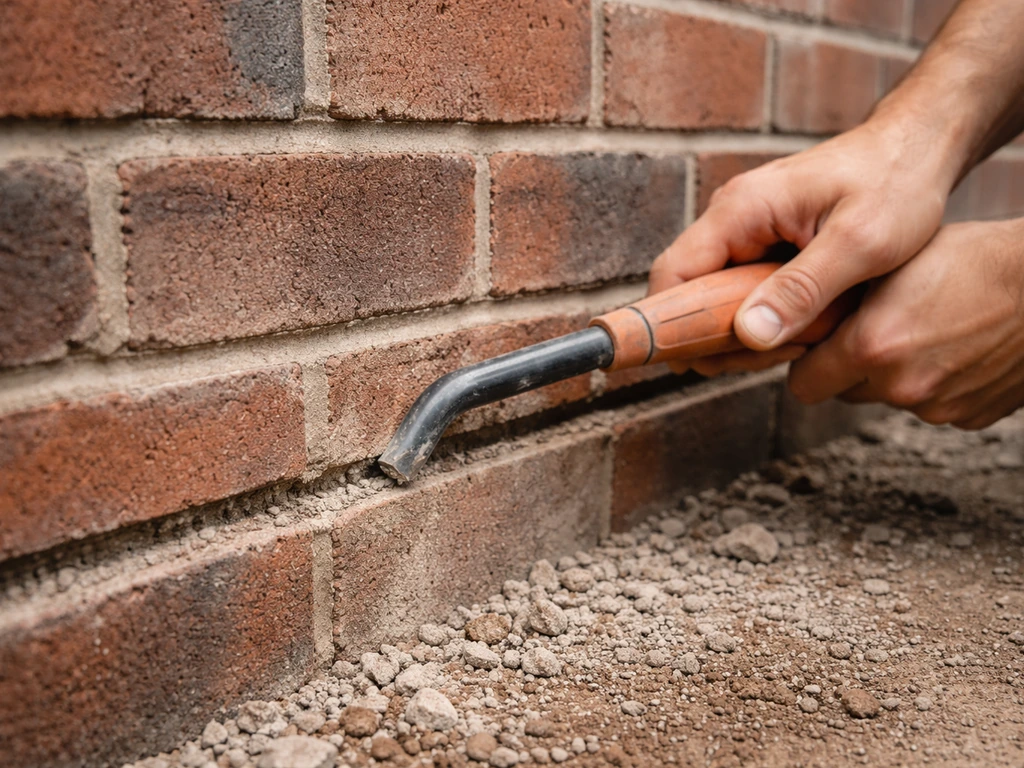
- Tool the joint while the mortar is still 'thumbprint firm' — firm enough to hold shape but soft enough to compress slightly. A pointing iron or a dowel dragged along the joint creates a slightly recessed, smooth finish that sheds water effectively. This is sometimes called a 'weather-struck' finish.
- Brush excess mortar off the paver surface with a soft brush before it fully sets. If any smears remain, clean with a barely-damp sponge — not soaking wet.
- For polymeric sand on paver joints: sweep the dry sand across the surface, work it into joints with a brush, plate-compact the patio to vibrate it down, then blow off excess surface sand with a leaf blower held at a low angle. Activate with a gentle mist of water — don't flood it. Never apply polymeric sand to damp pavers or in wet conditions.
Curing, sealing, and weather windows
Curing time and conditions
Standard Portland or Type S mortar takes about 24–48 hours to be rain-safe and around 28 days to reach full compressive strength. Keep foot traffic off for at least 24 hours, and keep heavy loads (furniture, BBQs) off for 72 hours minimum. Lime mortars cure more slowly, they carbonate as they absorb CO2 from the air, and can take weeks or even months to reach full hardness. That's normal. Don't rush them. For polymeric sand, block foot traffic for at least 48–72 hours and keep vehicles off for the same period, per Techniseal's own installation guidance.
Temperature matters. Don't apply mortar when temperatures are below 5°C (40°F) or forecast to drop below freezing within 48 hours, the water in the mix will freeze before the mortar can cure and the joint will crumble. Hot, direct sun above 30°C is also a problem; it dries the mortar too fast and causes surface cracking. Ideal conditions are 10–25°C, overcast or shaded, with no rain forecast for at least 24 hours. For polymeric sand, Techniseal's EZSAND specifies that temperatures must stay above 0°C for 48 hours post-installation.
To seal or not to seal
Sealing depends on the material. For concrete pavers and manufactured stone, a penetrating paver sealer applied after the mortar has cured (typically 28 days for full cure) adds genuine protection against staining, moss, and water ingress. For natural stone, especially limestone, sandstone, or travertine, use only a breathable, impregnating sealer, never a film-forming one, so moisture can still escape. For older lime-mortared brick or traditional stone, sealing can be counterproductive: it traps moisture inside and shifts frost damage into the masonry rather than letting it escape at the joint. In those cases, the compatible lime mortar itself is the protection, leave it unsealed. Polymeric sand jointed pavers are often sealed after the sand has fully cured to lock the joints and protect the surface in one step.
Common problems and how to fix them
Mortar crumbling or falling out shortly after application
Almost always a bonding failure, which comes down to one of three things: the joint wasn't raked deep enough, the substrate was too dry when you applied the mix, or the mortar dried too fast due to heat or wind. Fix it by raking back out to clean, solid material, damping the joint, and reapplying. If the joint was shallow to begin with, you now have a good reason to go deeper this time.
Cracks appearing in new mortar
Hairline cracks in the surface are usually a curing problem, mortar dried too fast (common in direct sun or wind) or was mixed too wet. Structural cracks that open up over a few weeks can signal that the mortar is too strong (too much Portland cement) relative to the masonry, or that the patio base is moving. If the base is moving, no amount of repointing will hold, check for drainage issues or a failing sub-base. For surface cracks from drying, rake and redo the affected section.
Mortar shrinking below the joint surface
A slightly sunken joint won't shed water well. This happens when mortar is mixed too sloppy (too much water) or when you tried to fill a very deep joint in one pass. Always fill deep joints in two layers, letting the first stiffen before topping up. GSA guidance on lime mortar specifically warns that tooling too early (when the mix is still very wet) causes shrinkage and lighter color, wait for thumbprint firmness before tooling.
White salt deposits (efflorescence)
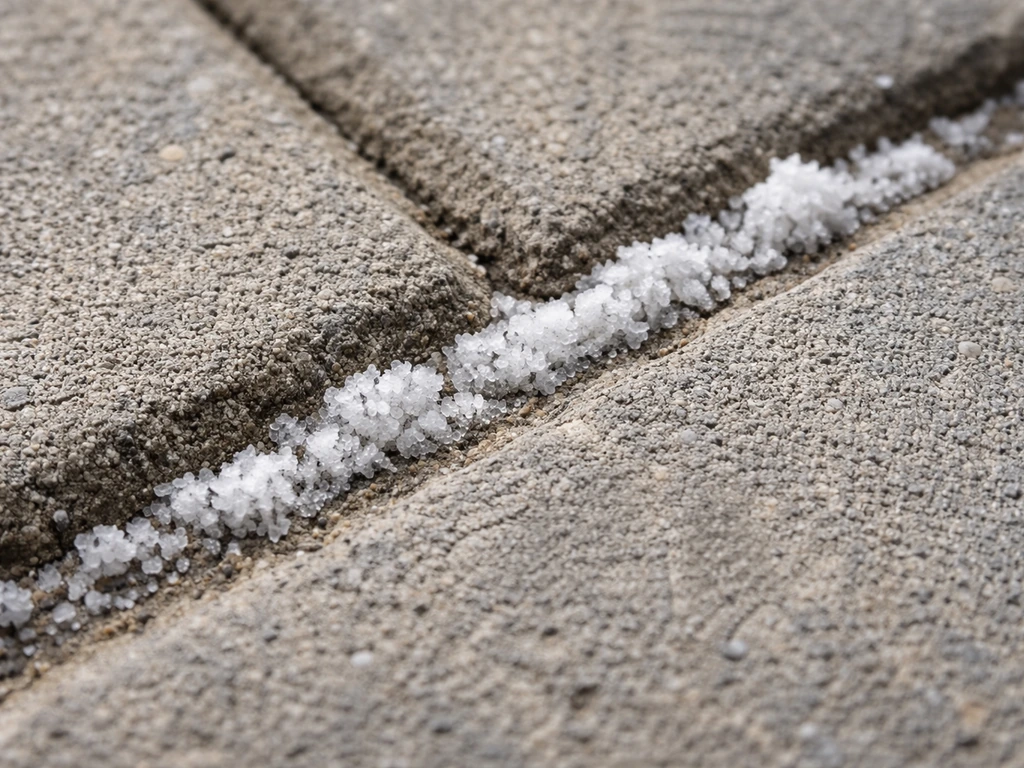
That white powdery or crystalline bloom on the surface is efflorescence: water has moved through the mortar or masonry, dissolved soluble salts, and deposited them when it evaporated. It's very common with Portland cement products and with any application where water has been trapped or moved through the joint. It's not usually structural, but it looks terrible. For fresh efflorescence, dry-brush it off with a stiff brush, don't wet it first, which can push the salts back in. For persistent bloom, a diluted masonry efflorescence cleaner (follow the product instructions carefully) will dissolve the deposits. To prevent recurrence, improve surface drainage, ensure mortar joints slope slightly to shed water, and consider whether a breathable sealer makes sense for your material.
Weak adhesion and water still getting in
If water is pooling at or seeping into joints even after repointing, check the joint profile. A joint that sits flush or is slightly proud of the paver surface will collect water. The finish should be slightly recessed or weather-struck (angled so the top face slopes away from the joint center toward the paver edge). Also check whether the patio itself has adequate fall, a slope of 1:80 to 1:60 away from the house is standard. Poor drainage at patio level overwhelms even well-pointed joints. If you need to point a patio, plan the joint depth and mortar type first so the mix matches the paving and sheds water correctly.
Keeping joints healthy long-term
Once you've repointed, maintaining the joints is mostly about staying on top of small problems before they become big ones. Here's the simple maintenance routine that actually works: A big part of long-term joint care is making sure your patio stays dog-friendly, with safe, low-risk materials in the joints and no slick or toxic surfaces how to make a patio dog friendly.
- Inspect joints every spring and autumn. Look for cracks, hollows, or any mortar that sounds loose when you tap it. Catch it early and a spot repair takes 20 minutes.
- Keep joints clear of moss, weeds, and debris. Moss and plant roots hold moisture against the mortar and accelerate breakdown. A stiff brush and a proprietary moss killer deal with this cheaply.
- Avoid high-pressure washing directly into joints. A patio power wash is fine across the surface, but aiming the jet straight down a joint strips mortar and forces water deep under the slab. Use a wider fan setting and keep it moving.
- Repoint any failing sections promptly — don't wait until whole areas have gone. A failed joint lets water under the slab, which can undermine the bedding layer and cause the paver to rock or sink, which then cracks adjacent joints.
- On a well-maintained patio, full repointing shouldn't be needed more than every 10–15 years. If you're repointing more often than that, the issue is usually base movement or drainage rather than mortar quality.
The honest truth about pointing a patio is that the prep, raking deep enough, cleaning out thoroughly, getting the mortar match right, is where the job is won or lost. If you're starting from scratch, this guide breaks down how to point a patio for beginners, step by step. The application itself is satisfying and forgiving once you've done the groundwork properly. Take your time on the diagnosis and preparation, work in small sections, don't rush the curing, and you'll end up with joints that stay solid through years of weather and use.
FAQ
Can I point over existing mortar or should I remove everything?
Yes, but only if the old material is still sound. If the joint edges are crumbling, you need to remove deteriorated mortar first, otherwise the new mix will bond to loose bits and fail again quickly. A practical check is to scrape with a fingernail or small screwdriver, if it flakes out easily, full raking out is the safer choice.
How full should patio joints be after pointing?
For most concrete and brick jobs, aim to fill the joint slightly below the paver or brick face (or use weather-struck tooling) so water sheds away from the joint. If your joint is even or proud, it can collect water and accelerate efflorescence and freeze-thaw damage, even when the mortar is the right type.
What should I do about white powder after repointing?
If you are seeing mortar staining or efflorescence, remove it after curing rather than immediately wetting and scrubbing repeatedly. For fresh bloom, dry-brush first (to avoid pushing salts back in), for persistent deposits use a dedicated masonry efflorescence cleaner exactly per instructions, then reassess whether drainage and mortar type are contributing.
If the joints crack soon after repointing, does it always mean the mortar is wrong?
Stop and find the movement cause if joints crack repeatedly in the same pattern, or if surface cracks widen over weeks. Repointing can only stabilize the joint itself, it cannot fix a failing base, inadequate patio slope, or water undermining the sub-base.
Can I repoint if rain is coming or temperatures drop at night?
Generally no. Repointing usually needs curing conditions, freezing nights or sudden rain can disrupt bond and lead to crumbling. If weather turns bad, cover the work area to protect from splash and keep temperatures above freezing for at least a couple of days, then continue only when conditions meet the product guidance.
Should I seal the patio after pointing, and does it differ by material?
Use breathable, impregnating products only after full curing when the manufacturer says you can, and only if your patio material benefits from it. For lime-mortared brick and traditional lime-based joints, sealing often traps moisture and worsens frost damage risk, so leaving lime joints unsealed is usually the safer default.
What’s the best way to fix joints that keep debonding or popping out?
If the bond fails because the joint was too dry or too dusty, re-rake back to solid material, vacuum out fine dust, then lightly dampen before applying fresh mortar. If the joint was shallow, going deeper often solves the recurring failure, otherwise the new mortar will be forced to handle loads it cannot resist.
When should I use polymeric sand instead of mortar?
For pavers, polymeric sand is not a one-size-fits-all replacement for mortar. Confirm you truly have a paver system meant for polymeric infill, then respect joint depth and the recessed finish level, because the activation water and curing behavior depend on those tolerances.
How wet should the joint be before applying mortar?
Avoid over-wetting. You can dampen the joint lightly to slow suction, but if you flood it, you can create weak layers or washing out during tooling and early cure. The joint should look clean and slightly damp, not dripping, and excess water should be wicked away.
Is it okay to fill deep joints in one go?
For deep joints, fill in layers so you can tool and compact each lift. If you try to pack a very deep joint in one pass, the middle can stay wetter longer, shrink more during cure, and end up lower or lighter in color than the surrounding joints.
How do I prevent mortar from staining the patio surface?
Yes, but take care to avoid contaminating paver faces. Use tape or cardboard barriers right up to the joint edges, wipe drips immediately, and keep a separate clean water and sponge. Once mortar cures on a textured surface, removal is much harder and can damage finishes.
What if I accidentally chose the wrong mortar type for older brick or stone?
If you suspect you used a mortar that is too hard for the original paving, look for signs like repeated cracking at the joint lines while surrounding units remain intact, or new failures that redirect into brick or paver faces. In that case, the long-term fix is usually removing the incompatible mortar and replacing it with a softer match, then confirming joint profile and drainage.
Why are my joints still getting water after repointing?
Most of the time, you should not rely on pointing to solve pooling. Check patio fall first, typical guidance is around a 1:80 to 1:60 slope away from the house, then correct any joint profile that is flush or proud. If water keeps entering from the surface, the joints are being over-supplied with water.
How do I handle hairline cracks that show up after the job?
For hairline cracks in the joint face, first determine whether they stabilize or widen. If they are surface-only and do not open further, it is often due to drying too fast, mixing too wet, or tooling too early. The practical response is to rake out and redo only the affected surface sections, after correcting heat and wind exposure next time.
Do I need to repair the base before repointing?
Replace the whole jointing system if the surrounding material is moving. If the patio base is settling, repointing will keep getting stressed, so you may need base repair or drainage correction before redoing joints. A simple indicator is coordinated cracking across many adjacent joints, rather than isolated spots.
Next Article
How to Point Patio Joints: Step-by-Step DIY Guide
Step-by-step DIY re-pointing guide: tools, prep, mortar mix, neat joint filling, curing, troubleshooting weeds cracks an