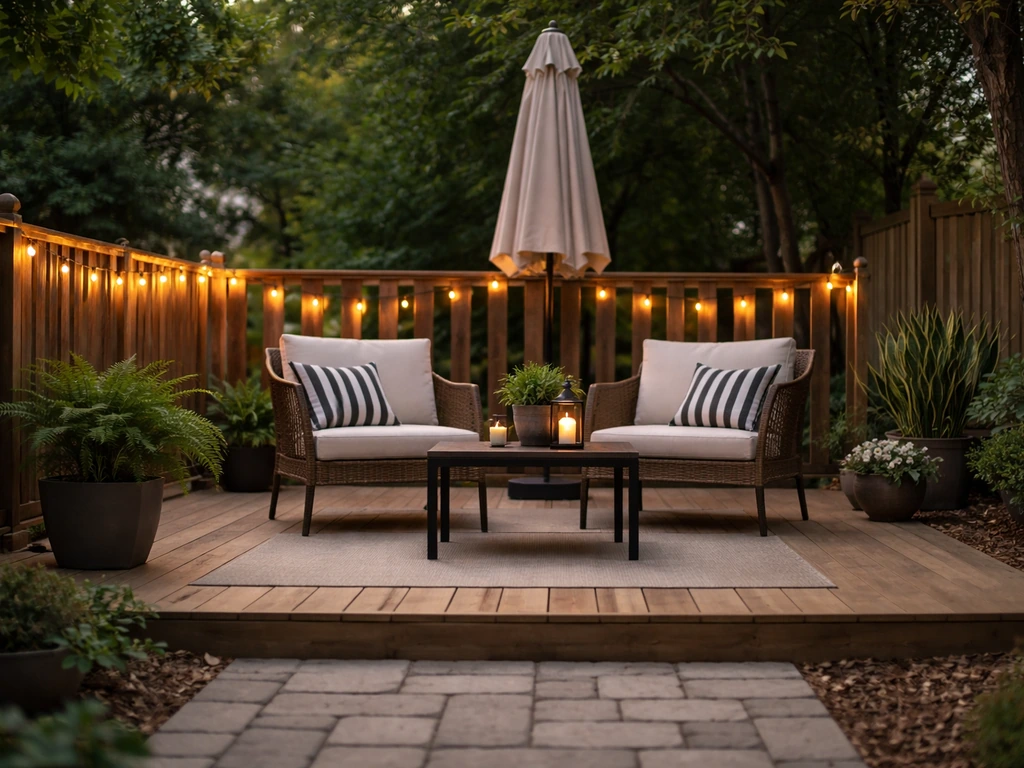
Good patio installation comes down to three things done right: a solid base, proper drainage, and matching your material choice to your actual site and budget. Get those three right and almost everything else is forgiving. Get them wrong and you'll be resetting pavers or jackhammering cracked concrete within a few years. This guide walks you through every stage of a DIY patio build, from reading your soil and pulling permits to compacting base gravel and jointing pavers, with real cost ranges, tool lists, and the mistakes I've personally had to fix.
Patio Installation Tips: DIY Guide to Planning & Building

Nolan Lennox
21 Jul 2026
Who This Guide Is For and What You'll Learn
Whether you're building your first 10x12 gravel pad or a multi-level interlocking paver patio with a built-in drainage channel, this guide is written for you as a hands-on homeowner. You don't need construction experience, but you do need the patience to do the prep work properly. By the end you'll understand how to assess your site, choose a patio type that fits your budget and ground conditions, estimate materials and costs accurately, build a code-compliant base, and finish the surface professionally. Along the way I'll flag where different materials (interlocking pavers, resin-bound, gravel, concrete slabs, and raised wood or composite decks) diverge in technique, so you can jump to the method you're actually using.
Quick Decision Flow: Picking the Right Patio Type
Before you buy a single bag of gravel, spend ten minutes on this decision. The right patio type isn't just about what looks good in photos. It's about your budget, your soil, your slope, how you'll use the space, and how much maintenance you're willing to do in five years. Here's a practical framework.
| Patio Type | Best For | Budget Range (materials, per sq ft) | Skill Level | Key Limitation |
|---|---|---|---|---|
| Gravel/crushed stone | Low-budget, informal spaces, good drainage sites | $1–$4 | Beginner | Migrates underfoot; needs edging |
| Interlocking pavers | Most residential uses, permeable options available | $8–$18 | Intermediate | Labor-intensive base prep |
| Concrete slab | High-use areas, low long-term maintenance | $5–$10 | Intermediate–Advanced | Cracking without control joints or proper mix |
| Resin-bound | Decorative, permeable, low-maintenance finish | $12–$22 | Advanced/subcontract-friendly | Strict weather/substrate requirements |
| Raised wood/composite | Sloped sites, deck-style living, elevated views | $15–$35 | Intermediate–Advanced | Requires footings; permit likely needed |
If your budget is under $1,500 and the space is informal, gravel with steel edging is a genuinely great choice and takes a weekend. If you want something that looks premium, handles foot traffic well, and allows some DIY repair down the road, interlocking pavers are the sweet spot for most homeowners. If your yard slopes significantly, a raised patio on footings is usually cleaner than fighting grade. Resin-bound surfaces look stunning but are unforgiving of beginner mistakes on mixing ratios and weather timing, so be honest with yourself before committing.
Site Assessment: Measure Everything Before You Move Anything
I've seen people start digging based on a rough idea in their head and end up with a patio that drains toward the house foundation or sits directly over a gas line. Site assessment is the unsexy part of this project, but it saves you from genuinely expensive problems.
Measuring and Mapping the Area
Use stakes and mason's line to define your intended patio perimeter. Measure the diagonal corners to check for square (equal diagonals confirm a true rectangle). Note the distance from the house foundation, property lines, fences, and any existing structures. Sketch this on graph paper at a consistent scale, like one square equals one foot. This sketch becomes your working plan and will be required if you apply for a permit.
Utilities: Call Before You Dig
In the U.S., call 811 at least three business days before any excavation. This is free and required by law in all states. A utility locating service will mark gas, electric, water, sewer, and telecom lines. In Canada, call your provincial one-call service. No patio project is worth a ruptured gas line or a severed fiber cable that leaves your neighborhood without internet. Mark the flags with paint before you remove them so you remember where the lines run during construction.
Soil, Slope, and Sun
Probe the ground with a steel rod or soil probe at several points across the patio area. Sandy or gravelly soil drains well and is ideal for paver installations. Clay-heavy soil drains slowly, expands when wet, and is prone to frost heave, meaning you'll need a deeper base or a geotextile layer to separate soil from aggregate. The USDA NRCS Web Soil Survey gives you a free, parcel-specific soil map with engineering data including bearing capacity, permeability, shrink-swell rating, and depth to seasonal water table. That information directly tells you how deep your base needs to be and whether you need to plan for underdrainage. For slope, use a long level and a tape measure to calculate the grade across your patio footprint. A 1% to 2% fall away from the house (roughly 1/8 inch per foot) is your drainage target. More than 5% starts to cause problems with paver sand washout. Finally, note where the sun hits the space at different times of day since it affects material choice (some resin-bound surfaces and dark pavers become extremely hot in full sun).
Planning and Design: Size, Layout, Drainage, and Permits
Getting the Size Right
The most common DIY mistake at this stage is undersizing the patio. A 10x10 foot space feels generous on paper and cramped with a table and four chairs. The general rule is: measure your intended furniture layout, then add at least 2 feet of clearance on each side for movement. A dining set for four realistically needs a 12x14 foot minimum. Go bigger if you can, because it's much easier to do it once than to extend it later.
Drainage Plans
Every patio needs a positive slope away from any structure, targeting 1/8 inch drop per foot of run. For larger patios, plan a drainage channel or French drain along the low edge to capture runoff before it pools. If your soil has poor permeability or you're in a heavy rainfall area, permeable interlocking concrete pavement (PICP) is a code-recognized stormwater management solution per ASCE Standard 68-18. It allows water to infiltrate through the joints rather than sheet-flow off the surface. The EPA supports permeable pavement as a green infrastructure practice specifically for reducing runoff volume. EPA guidance (Soak Up the Rain: Permeable Pavement, U.S. EPA) summarizes design considerations, cold‑climate performance observations, and maintenance needs such as regular vacuuming or sweeping to prevent clogging Soak Up the Rain: Permeable Pavement — U.S. EPA. The tradeoff is that permeable systems need vacuum sweeping at least twice a year to prevent joint clogging.
Setbacks and Permits
Most jurisdictions set minimum setback distances from property lines, easements, and structures. These are typically 3 to 10 feet depending on your municipality and zoning designation. Check with your local building department before finalizing your layout. As for permits: a simple ground-level gravel or paver patio often doesn't require one, but the rules vary. You're most likely to need a permit if your patio attaches to the house, alters existing grade significantly, exceeds a certain area (common thresholds are 200 to 500 square feet), involves structural elements like footings or retaining walls, or if it includes a roof or cover. The International Residential Code (IRC) sets minimum footing and frost-protection rules (footing depth not less than 12 inches below undisturbed ground, and extending below the local frost line per IRC R403.1.4), but your local authority having jurisdiction (AHJ) may adopt stricter requirements. Frost line depth varies enormously across North America, from effectively zero in coastal Florida to 48-60 inches or more in northern Minnesota or Maine. Confirm your local frost depth with the building department before designing any footings.
Tools, Equipment, and Materials Checklist
Universal Tools (Every Method)
- Measuring tape (at least 25 ft) and steel stakes
- Mason's line and line level
- 4-ft spirit level and a long straightedge
- Spade and flat-nosed shovel
- Wheelbarrow
- Plate compactor (rent, approx. $80–$120/day)
- Hand tamper for edges and tight spaces
- String line clamps
- Safety glasses, work gloves, steel-toe boots
- Knee pads (you'll thank yourself)
- Rubber mallet
- Utility knife
- Marking paint or chalk line
Method-Specific Tools and Materials
| Patio Method | Additional Tools Needed | Key Materials |
|---|---|---|
| Interlocking pavers | Paver splitter or angle grinder with diamond blade, screed pipes (1 in. conduit), broom | Compacted aggregate base, coarse bedding sand, pavers, polymeric jointing sand, edge restraints + spikes |
| Concrete slab | Forms/lumber for formwork, bull float, concrete finishing trowel, control joint tool or circular saw | Ready-mix concrete (3,000–4,000 psi, air-entrained in freeze-thaw climates), rebar or wire mesh, expansion joint material |
| Resin-bound | Forced-action paddle mixer (not drum), gauge rake, spiked roller | Resin binder, kiln-dried aggregate, primer, substrate (typically existing concrete or asphalt) |
| Gravel patio | Rake, garden hoe, edging stakes | Crushed gravel or decorative stone, landscape fabric (optional), steel or plastic edging |
| Raised wood/composite | Circular saw, drill/driver, post-hole digger or auger, level, framing square | Pressure-treated lumber or composite decking, post anchors, hardware, concrete for footings |
Estimating Quantities and Cost Ranges
Material Quantities
For aggregate base material, a 4-inch compacted depth over 150 square feet requires roughly 2 cubic yards of crushed stone. Use this formula: (Area in sq ft x depth in inches) divided by 324 equals cubic yards. Always add 10-15% for waste and compaction loss. For interlocking pavers, order the exact square footage of your patio plus 5-10% for cuts and breakage. Bedding sand at 1 inch deep requires about 0.31 cubic yards per 100 square feet. Polymeric jointing sand: most manufacturers rate one 50-lb bag at 40-80 square feet depending on joint width, so check your product's spec sheet.
Realistic Cost Ranges
| Cost Category | Gravel Patio | Interlocking Pavers | Concrete Slab | Resin-Bound | Raised Wood/Composite |
|---|---|---|---|---|---|
| Materials (per sq ft) | $1–$4 | $8–$18 | $5–$10 | $12–$22 | $15–$35 |
| Tool rental (per project) | $0–$100 | $150–$300 | $200–$400 | $100–$200 | $50–$150 |
| Permit fee (if required) | $0–$200 | $0–$300 | $50–$400 | $0–$200 | $100–$500 |
| Typical DIY labor time (150 sq ft) | 4–8 hrs | 2–4 days | 1–2 days | 1 day (substrate must be ready) | 3–5 days |
| Approx. total DIY cost (150 sq ft) | $200–$700 | $1,300–$3,000 | $900–$1,800 | $2,000–$3,500 | $2,500–$5,500 |
These ranges assume you're doing the labor yourself. Hiring out excavation or delivery significantly changes the numbers. Renting a plate compactor and an angle grinder for a weekend is almost always worth it compared to buying, since you won't use them again for years. Check Home Depot, Sunbelt, or a local tool rental shop for current daily and weekend rates.
Preparing the Site: Clearing, Excavation, and Subgrade
Clearing and Stripping
Strip all vegetation, topsoil, and organic material from the patio footprint, plus about 6 inches beyond your finished edge. Topsoil and organic matter compress unevenly over time and must be completely removed. You're looking for stable, undisturbed native soil or fill that's already been compacted. If you hit soft, spongy spots (common near old tree stumps or disturbed fill areas), dig them out and replace with compactable aggregate. Don't skip this step and try to build over soft spots. I've seen patio sections settle three inches in two winters because someone thought a soft patch would compact out. It won't.
Excavation Depth
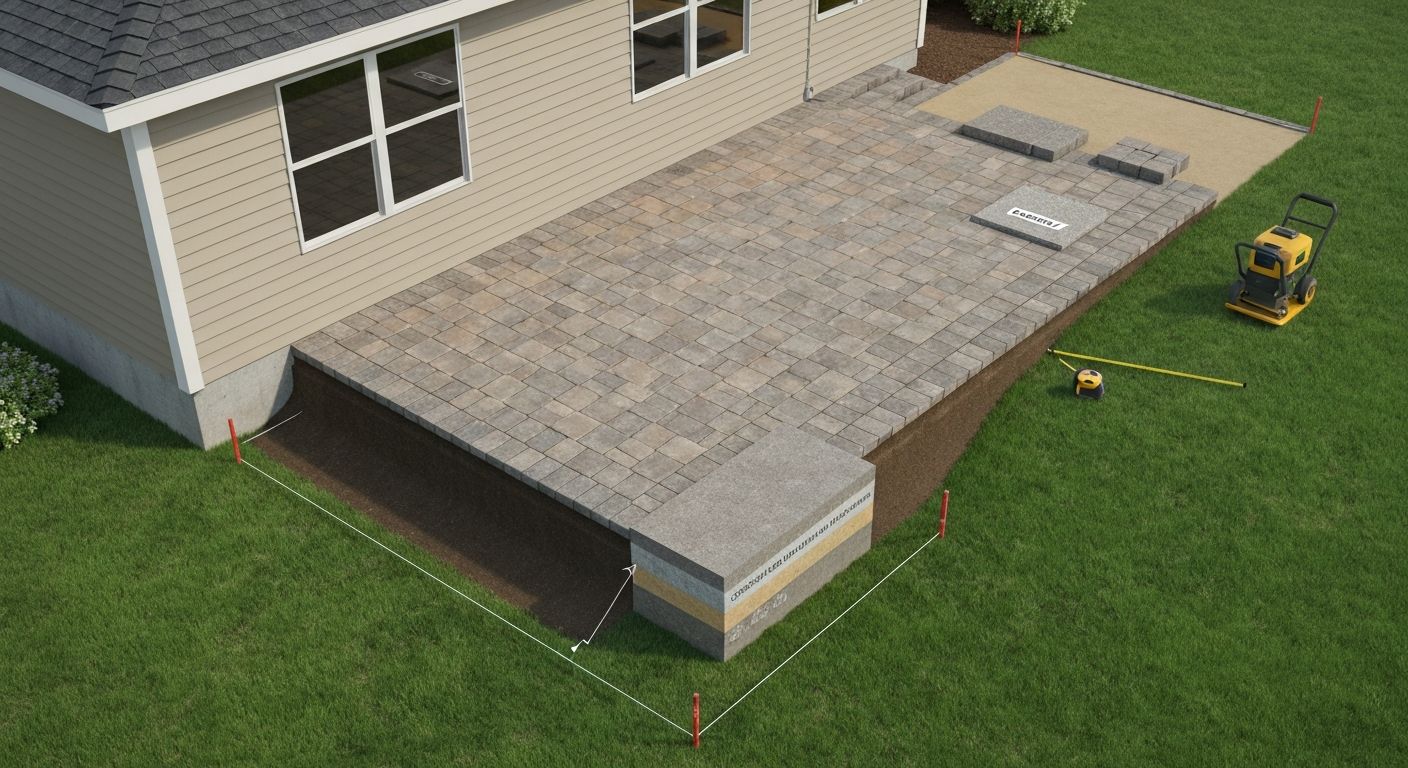
Your excavation depth depends on the finished surface height you want and the base layers required. For interlocking pavers at grade, a typical excavation is 7 to 9 inches deep: 4-6 inches of compacted aggregate base, 1 inch of bedding sand, and the paver thickness (typically 2.375 to 3.125 inches). For a concrete slab, you need 4 inches of base plus 4 inches of slab thickness, so about 8 inches total. Resin-bound surfaces are typically installed over an existing hard substrate like concrete, so your excavation is for the sub-base layer only. Raised patios require digging footing holes to below the frost line, which again varies by region.
Subgrade Evaluation and Utility Protection
Once you've excavated, walk the subgrade and probe it with a steel rod. Any area where the rod penetrates more than a few inches easily needs to be dug out further and replaced with compacted stone. If utility flags are in or near your excavation zone, hand-dig those areas within 18 inches of the marked lines and never use a power excavator near them. After excavation, re-check your marked utility line locations and keep a 12-inch clearance above any buried line as you build your base layers.
Base Materials and Compaction: The Foundation That Actually Matters
This is the part most DIYers rush through, and it's the number one reason patios fail. A well-compacted base is what separates a patio that looks great in year ten from one that's heaving and sinking by year three. Here's exactly how to do it right.
Choosing Your Base Aggregate
Use a dense-graded crushed aggregate, commonly called crusher run, road base, or Class II base depending on your region. This material contains a mix of particle sizes from coarse down to fines that lock together tightly when compacted. Avoid clean crushed stone (no fines) for your base layers beneath pavers, as it can shift under load. Clean stone is appropriate as a drainage layer beneath a geotextile or beneath permeable pavers as a reservoir layer, but that's a different application. For pedestrian-use patios on well-drained soils, a 4-inch compacted aggregate base is the industry minimum (ICPI/Belgard guidance). On clay-heavy, poorly draining, or frost-susceptible soils, increase that to 6 inches. Vehicular-rated patios need 8-12 inches or more, but that's outside typical patio scope.
Geotextile Fabric: When to Use It
A non-woven geotextile fabric placed between the native subgrade and your aggregate base serves two purposes: it prevents base aggregate from migrating into soft soil below (separation), and it can provide some additional tensile reinforcement. Use it when your native soil is silty, clayey, or soft, when the subgrade feels spongy after compaction, or when you're building over very wet ground. Install it at the bottom of your excavation before placing any aggregate. Fold the edges up the sides of the excavation. Do not use landscape fabric (the thin woven type sold for weed suppression) as a structural separator, it's too permeable and weak for this purpose.
Placing and Compacting Base Lifts
This is where the plate compactor earns its rental fee. Place your base aggregate in lifts no deeper than 6 inches loose before compacting. Dumping your entire base depth in at once and running a plate compactor over it once does not work. The compactor only effectively densifies the top 3-4 inches. For a 6-inch compacted base, place roughly 4 inches loose, compact thoroughly, then add a second lift of about 3 inches loose and compact again. Make overlapping passes with the plate compactor, moving at a slow walking pace. Run a minimum of 3-4 passes over every area, and do a final pass perpendicular to your first direction. The target compaction is approximately 95% of the laboratory maximum dry density (the Proctor test standard referenced in FHWA and AASHTO specifications). You can't measure this at home, but the practical test is: the surface should not deflect or shift when you walk on it, and a steel rod pushed by hand should not penetrate more than half an inch. After compacting, check your grade with a long straightedge and level. Adjust high spots by scraping away material. Do not add loose material to low spots and assume the compactor will fix it during bedding installation.
Bedding Sand Layer (For Paver Installations)
For interlocking paver installations, the bedding layer goes on top of your compacted aggregate base. Use coarse, washed concrete sand (ASTM C33 gradation). Avoid mason's sand or fine play sand, which are too fine and will compact unevenly. Screed the sand to a consistent 1-inch depth using screed pipes (1-inch diameter conduit works perfectly) as guides. Construction of Permeable Interlocking Concrete Pavement Systems, CMHA/ICPI recommends a 1 in. coarse bedding sand before setting pavers, with bedding thickness typically targeted at no more than 1¼ in. after compaction Construction of Permeable Interlocking Concrete Pavement Systems — CMHA/ICPI. The target after paver installation and final compaction is no more than 1-1/4 inches. Do not compact the bedding sand before setting pavers. Its purpose is to provide a stable, screeded setting bed that allows minor adjustments as you set each paver, and it compacts down to final density when you run the plate compactor over the finished paver surface.
Edge Restraints: Non-Negotiable for Pavers
ICPI technical guidance identifies missing or inadequate edge restraints as the primary cause of paver patio failure through lateral movement. The pavers at the edges migrate outward, the joints open up, and the whole surface destabilizes. Install plastic or aluminum edge restraint (Snap-Edge or similar) around the entire perimeter of every paver installation. Spike it into the base with 10-inch steel spikes at 12-inch intervals, or 6-inch intervals on curves. The restraint should be pinned below the top of the paver but above the base aggregate, so it's invisible once the patio is done. Don't skip this to save $40 in materials.
A Note on Resin-Bound Base Requirements
Resin-bound surfacing (a UV-stable polyurethane resin mixed with kiln-dried aggregate, typically applied at 18-20mm depth per FeRFA guidance) is different from every other patio method in that it requires an existing hard, bound substrate. You cannot apply it directly to compacted gravel. It goes over a properly cured concrete slab or asphalt base that is clean, dry, and primed. The substrate must be structurally sound with no cracks wider than hairline, and the surface must be dry at installation. FeRFA and manufacturer guidance set strict temperature and humidity limits (typically surface temperature above 5°C/41°F and rising, relative humidity below 80-85%). If these windows aren't met, the resin won't cure correctly and you'll have a failed, sticky, or discolored surface. This is why resin-bound patios on new concrete require allowing the slab to cure fully first (typically 28 days minimum). For a step-by-step tutorial on preparing substrates and applying resin surfaces, see a practical guide on how to do resin patio.
Common Mistakes That Will Cost You Later
- Skipping the 811 utility locate call before any digging.
- Not removing all organic topsoil before base installation.
- Dumping the full base depth at once instead of compacting in lifts.
- Using mason's sand or pea gravel as a bedding layer under pavers.
- Forgetting or skimping on edge restraints around the paver perimeter.
- Installing polymeric jointing sand in cold temperatures (below freezing) or immediately before rain, which prevents proper curing.
- Pouring a concrete slab without control joints, leading to random cracking. ACI and PCA guidance recommends control joint spacing of roughly 2-3 times the slab thickness in feet (so every 8-10 feet for a 4-inch slab).
- Building a raised patio with footings that don't reach below the local frost line, resulting in seasonal heaving.
- Applying resin-bound surfacing over a damp substrate or in humid/cold conditions.
- Undersizing the patio, then realizing two chairs and a BBQ don't fit.
Your Pre-Build Checklist Before Breaking Ground
Run through this before you touch a shovel. A few hours of preparation here genuinely prevents days of rework later.
- Utility locate (811 or provincial equivalent) completed and flags on site
- Patio perimeter staked and measured, diagonals checked for square
- Local building department consulted on permit requirements and setbacks
- Frost line depth confirmed for footing designs
- Soil type assessed (probe or USDA Web Soil Survey reviewed)
- Drainage slope planned (min 1/8 in. per foot away from structure)
- Materials calculated and ordered with 10-15% waste allowance
- Plate compactor rental scheduled
- Weather window confirmed (3+ dry days for pavers with polymeric sand, no freeze forecast for concrete, dry and above 5°C for resin-bound)
- Edge restraint and spikes on hand before paver installation begins
- Permit applied for and approved if required
Next Steps: Building Your Specific Patio
Once your site is assessed, your plan is drawn, your permit is in hand if needed, and your base is properly compacted, the actual surface installation is the rewarding part. Each patio type from there has its own step-by-step process: interlocking pavers involve setting, cutting, and jointing with polymeric sand; concrete slabs require formwork, mix placement, and proper curing for 28-day strength development; resin-bound systems demand forced-action mixing and immediate spread before pot life expires; raised patio builds need footing forms, frame construction, and composite or wood decking installation. If you're building an interlocking paver patio specifically, a detailed interlock installation guide covers the cutting, pattern setting, and polymeric sand activation process in full. For raised or elevated patio builds, a step-by-step raised patio guide covers footing sizing and frame construction. See our raised patio how to for detailed footing sizing, ledger and post layout, and step‑by‑step framing and decking instructions. Thinking about cost management alongside your build? A dedicated guide on how to pay for a patio covers budgeting, financing options, and strategies to reduce material costs without cutting corners on the build quality that actually matters.
FAQ
Do I need a permit to build a patio?
Possibly. Many jurisdictions require permits when you alter grade, add structural elements, exceed area/height thresholds, or tie into existing structures. Check your local building department and zoning office before work starts. Follow adopted code provisions (e.g., IRC footing and frost-depth rules) and obtain any required stormwater/impervious-surface approvals.
How do I size and site a patio for proper drainage and use?
Start by defining use (dining, grill, hot tub, vehicles) and traffic loads. Size to fit furniture/paths with 6–8 ft clear zones for seating areas. Slope surface away from the house 1/8 in.–1/4 in. per ft (≈1–2%) for positive drainage or use a permeable system with engineered subbase and underdrains. Identify downspouts/existing grades and avoid placing patios over shallow utilities or seasonal water tables.
How should I evaluate the soil and frost risk on my site?
Obtain local soil data (e.g., NRCS Web Soil Survey) to check bearing capacity, permeability, shrink–swell potential, and depth to seasonal water table. Verify local frost-line depth with your building authority; footings and permanent supports typically must extend below frost depth (or follow local exceptions). Poor soils may require deeper engineered base or geotextile separation.
Which patio material is best for my budget and climate?
Choose by use, budget, climate, and DIY skill: gravel is lowest cost and easy to install but needs edging and regrading; interlocking pavers are durable, moderate cost, and good for freeze–thaw when properly installed; concrete pads are cost-effective and low-maintenance but can crack without control joints; resin-bound surfaces offer smooth permeable finishes but require strict installation conditions and are higher cost; wood/composite raised patios add elevation and aesthetics but need structural framing, footings, and maintenance. Match material to expected loads and local freeze/thaw conditions.
What are the key base and drainage specs for interlocking pavers?
Typical pedestrian patios: compacted aggregate base 4–6 in. (well‑drained 4 in., poorer soils 6 in.). Place base in lifts (commonly ≤6 in. loose) and compact each lift to ~95% of laboratory maximum dry density. Add a 1 in. bedding sand layer (target ≤1¼ in. after compaction). Use geotextile separation over very soft soils and install a firm edge restraint—lack of edge restraint is a primary cause of failure.
What compaction standards should I follow for bases and subgrades?
Compact subgrade and base lifts to commonly accepted thresholds—about 95% of Proctor maximum dry density (use AASHTO/ASTM test methods referenced in specs). Compact lifts in uniform thickness with a plate compactor; verify soft spots and rework as needed. Over-compaction of bedding sand is unnecessary; bedding thickness should be controlled.
Next Article
How to Pay for a Patio: DIY Budget and Financing Guide
Budget, cost breakdown, and financing options for a DIY patio build with payment plans, deposits, and quote tips.