Premade patio steps (also called prefab or prebuilt steps) are factory-made step units you buy, deliver, and set into place rather than forming and pouring yourself. For most homeowners, they're a genuinely smart shortcut: you skip the formwork, the concrete mixing, and the curing wait, and you end up with a finished, structurally sound step in an afternoon. The catch is that they only work well when you measure carefully, prep the base properly, and choose the right unit for your patio's height and style. If you're looking for temporary steps for patio projects, the same measuring and base-prep discipline helps you keep everything stable until you build a permanent solution. Following the right trex steps to patio sizing, setup, and material matching is what keeps everything level and stable over time measuring carefully, prep the base properly, and choose the right unit. Get those three things right and premade steps are one of the most satisfying, cost-effective wins in a DIY patio project.
Premade Patio Steps DIY Guide: Fit, Install, and Finish

What premade patio steps are (and when they actually make sense)
A premade patio step is a manufactured unit built to standard dimensions, shipped to you or picked up at a supplier, and installed without any on-site forming or casting. The most common type is precast concrete, where the step is cast in a mold at a plant and arrives as a solid or hollow finished unit. You can also buy prefab steps in brick, natural stone, pavers assembled into a step block, wood (typically pressure-treated or cedar), and composite materials like Trex. The defining feature is that the structure arrives ready to set, not ready to build.
They make the most sense when you have a defined, predictable height to span, a relatively level landing area, and you want the project done in a day or a weekend rather than over multiple sessions. If your patio has a single step down to the lawn, or two or three steps from a door to a paver pad, a prefab unit is almost always faster and often cheaper than building from scratch. Where they get tricky is on uneven terrain, very wide spans, or situations where you need a custom rise that doesn't match standard dimensions. In those cases, a fully custom build or a modular stacking system (more on that below) makes more sense.
It's worth knowing the difference between a single precast block and a modular stacking system. A single precast unit gives you a fixed number of steps at fixed dimensions. A modular system, like the stacking concrete step designs offered by some precast suppliers, lets you build a 2- or 3-step configuration by stacking standardized components with spacer units between them. If you are comparing patio steps design options, modular systems are a great way to tailor the rise without going fully custom modular stacking system. That flexibility closes the gap between premade and custom for a lot of mid-complexity projects.
Measuring your patio and matching step dimensions
The most common mistake people make with prefab steps is buying the unit before they measure. Standard precast concrete steps typically come with a 7-inch riser height and a 12-inch deep tread. If your patio door threshold is 14 inches above the patio surface, that's two steps. If it's 21 inches, that's three. The math has to work before you order, because you can't adjust a precast unit the way you can adjust a pour.
Here's what to measure and record before you shop:
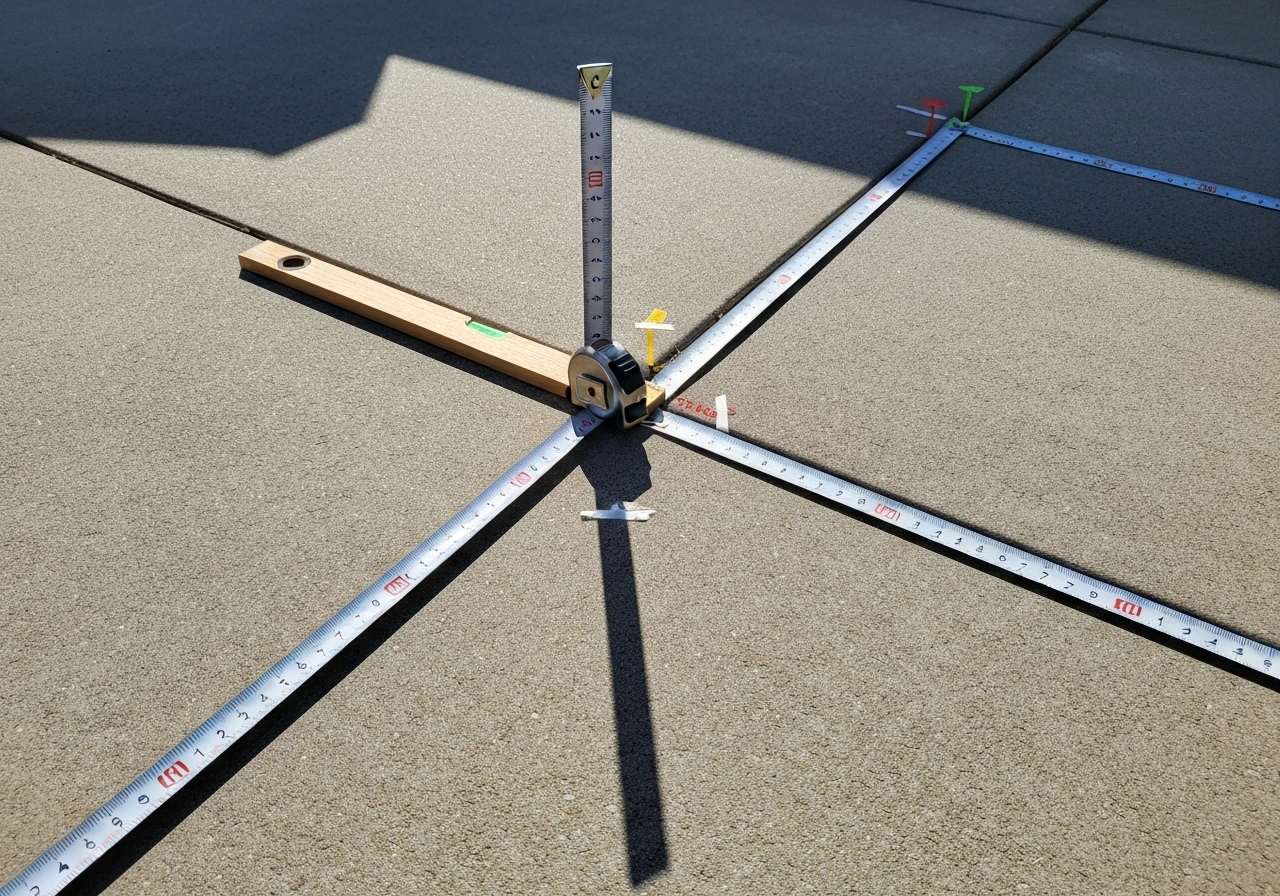
- Total rise: The vertical distance from the top of the patio surface (or ground level at the base of the steps) to the threshold or surface the steps lead to. Measure this in inches.
- Total run: How much horizontal space you have for the steps to extend outward from the structure. Each 12-inch tread adds 12 inches of run, so three steps need at least 36 inches of clear space projecting away from the door or edge.
- Width: How wide do you need the steps? Standard precast units often come in widths of 3 to 6 feet. Measure the opening or the patio edge the steps will align with.
- Landing clearance: Make sure there's enough flat, stable ground or patio surface where the bottom step will land. A minimum of 36 inches of clear level space at the base is a reasonable starting point for safety and comfort.
Once you have your total rise, divide it by 7 inches (the standard riser height) to get the number of steps you need. If it doesn't divide evenly, you have two options: choose a unit with a slightly different riser height (some manufacturers offer 6-inch or 8-inch risers), or adjust the grade at the base slightly by adding or removing fill. A difference of half an inch per riser across three steps is perfectly workable. A difference of 2 inches is a trip hazard you should not ignore.
Choosing the right material and style
The material you pick should match your existing patio surface as closely as practical, hold up to your local climate, and fit your budget. Here's an honest breakdown of the main options available in prefab and prebuilt form.
| Material | Durability | Maintenance | Typical DIY Cost (per step) | Best Match For |
|---|---|---|---|---|
| Precast concrete (solid) | Excellent, 30+ years | Low (seal every few years) | $200–$600 | Concrete or paver patios, utilitarian look |
| Precast concrete (hollow) | Good, shorter lifespan | Low | ~$200 | Budget projects, light use |
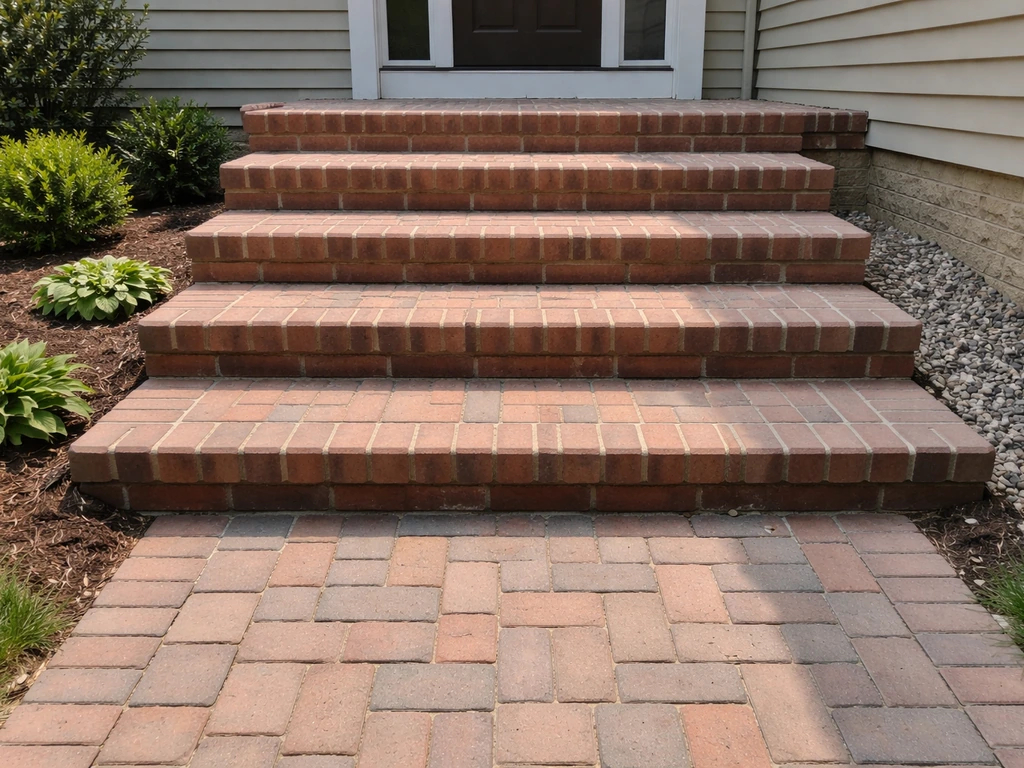
| Brick/paver step units | Excellent | Low to moderate | $150–$400 | Brick or paver patios, traditional style |
| Pressure-treated wood | Good (10–15 years with upkeep) | Moderate (stain/seal regularly) | $80–$200 | Wood decks, informal garden settings |
| Composite (e.g., Trex) | Excellent, low rot risk | Very low | $200–$500 | Composite deck or patio transitions |
| Natural stone slabs | Excellent | Low | $200–$600+ | Flagstone or natural stone patios |
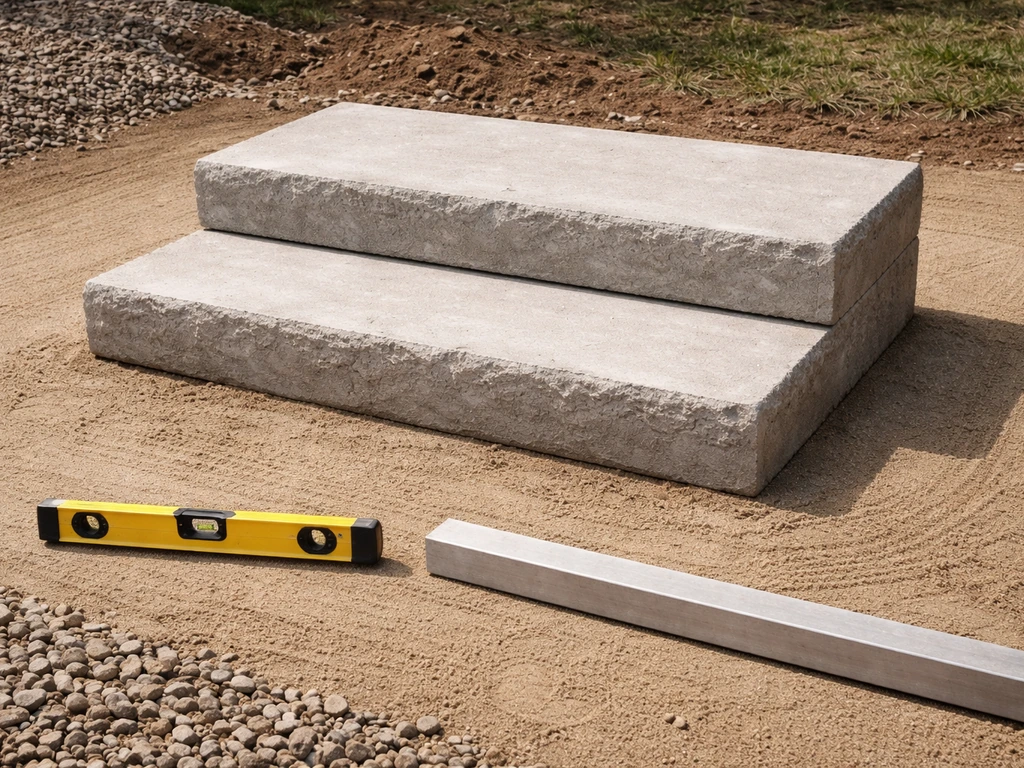
For most paver or concrete patios, solid precast concrete steps are the practical default. They're heavy (which is actually a stability feature), widely available, and match the look of a hardscape better than wood. If your patio is a wood or composite deck transitioning to a ground-level pad, composite steps or pressure-treated wood steps are a better visual and structural match. If you're building a patio step setup with Trex-style composite, follow the same careful base prep and leveling rules to keep the unit from shifting over time Composite steps in a Trex-style system. If you have a wood or composite deck, composite patio steps are often the best match for both look and structural feel. If you are choosing wooden steps for a patio, focus on matching the tread and riser dimensions and using a base prep that prevents settling wooden steps for patio. Brick step units and paver step blocks are great when you want a more refined look that blends with an existing brick patio design. Composite steps in a Trex-style system are worth the extra upfront cost if low maintenance is a priority for you.
One thing people overlook is weight. A solid precast concrete step unit that's 4 feet wide and 3 steps tall can weigh over 500 pounds. You cannot hand-carry that into place. Make sure you plan for delivery, a pallet jack, or at minimum a few strong helpers and a come-along strap before you order.
Prepping the base so your steps don't sink or shift
Base prep is where most DIY step installations succeed or fail. Precast steps are heavy enough that loose or poorly drained soil will cause them to settle unevenly over time, especially through freeze-thaw cycles. This is not a step you can skip and fix later without pulling the whole unit up.
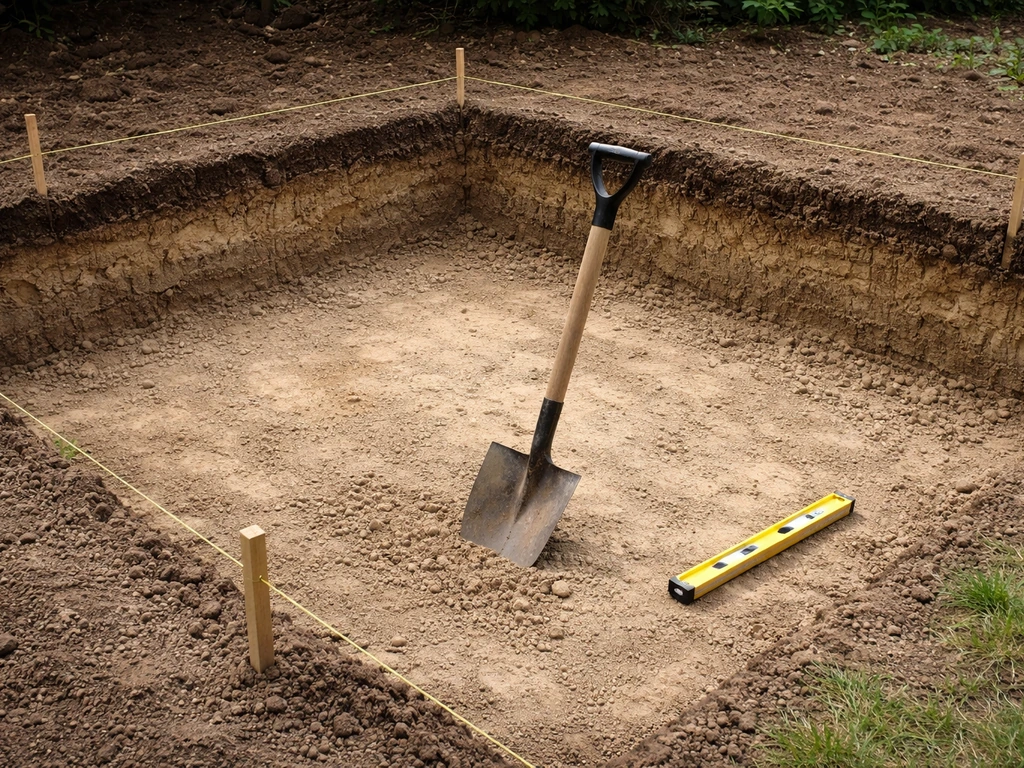
Excavation and compaction
Start by excavating the footprint where the steps will sit. You need to remove any soft topsoil, grass, or organic material and get down to firm subgrade. For light pedestrian use, a compacted gravel base of 4 to 6 inches is typical. If your soil is particularly soft or you're in a freeze-thaw climate, go to 6 inches minimum. Compact the gravel in 4-inch lifts with a plate compactor, not just by stomping it down. Skipping the compactor is the single most common reason prefab steps tilt within a season.
Setting bed and leveling layer
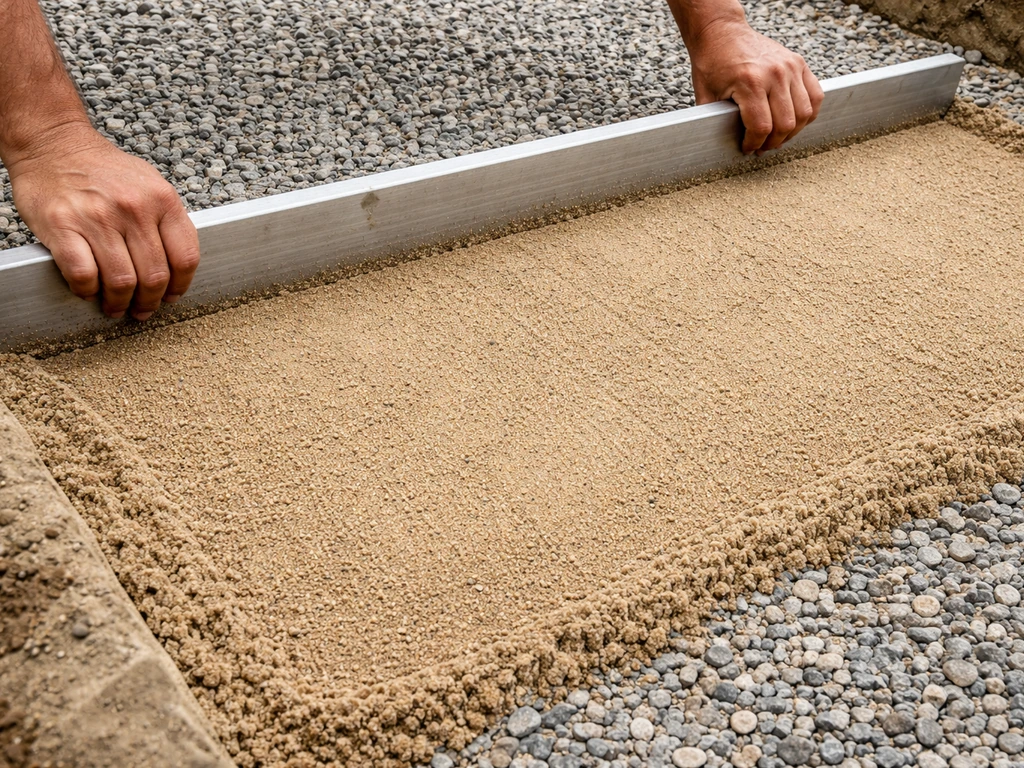
On top of the compacted gravel, you need a thin, level setting bed. For paver-style and brick step units, spread 1 to 1.5 inches of coarse bedding sand and screed it flat. For precast concrete step units specifically, some manufacturers (including NuCast) recommend a thin mortar bed of 1/4 to 3/8 inch applied to the bottom of the unit before setting, which helps seat it firmly and fill any small voids. An alternative approach used by many precast suppliers is to place flat concrete blocks or paver pads under each corner of the unit on the compacted sand or gravel, then shim to level. Either method works, but the mortar bed gives you a more permanent, rattle-free result.
Drainage
Water that pools under your steps will destroy any installation over time, especially in climates with frost. Make sure the finished grade around the base of the steps slopes away from the structure at roughly 1/4 inch per foot. If your installation area is low-lying or has clay soil that holds water, consider adding a perforated drain pipe at the base of the gravel layer, sloped to daylight, before you compact and fill.
Do you need a concrete footing?
For most single-unit precast steps at a patio edge, a compacted gravel base is sufficient. However, if the steps are attached to a house foundation, spanning more than two steps, or in an area with particularly unstable or expansive soil, a poured concrete footing is worth the effort. NuCast's installation guidance actually recommends a concrete base even for single-step precast units in soft-soil conditions. When in doubt about your soil, go with concrete under the unit rather than hoping gravel will be enough.
Installing premade patio steps: a DIY walkthrough
This walkthrough covers the most common scenario: setting a solid precast concrete step unit on a prepared gravel-and-sand base. Adjust as needed for your specific material and manufacturer instructions.
- Mark the footprint. Use stakes and string to mark exactly where the step unit will sit. Double-check your measurements against the step dimensions (width, depth, and total rise).
- Excavate. Dig out the marked area to a depth of 6 to 8 inches below finished grade (more in freeze-thaw climates). Remove all organic material.
- Add and compact gravel. Fill with clean crushed gravel or crushed stone in 4-inch lifts, compacting each lift with a plate compactor. Your total compacted gravel depth should be 4 to 6 inches.
- Add the setting bed. Spread 1 to 1.5 inches of coarse sand (or use the mortar bed method if your unit's manufacturer requires it) and screed it level. Check with a long level in multiple directions.
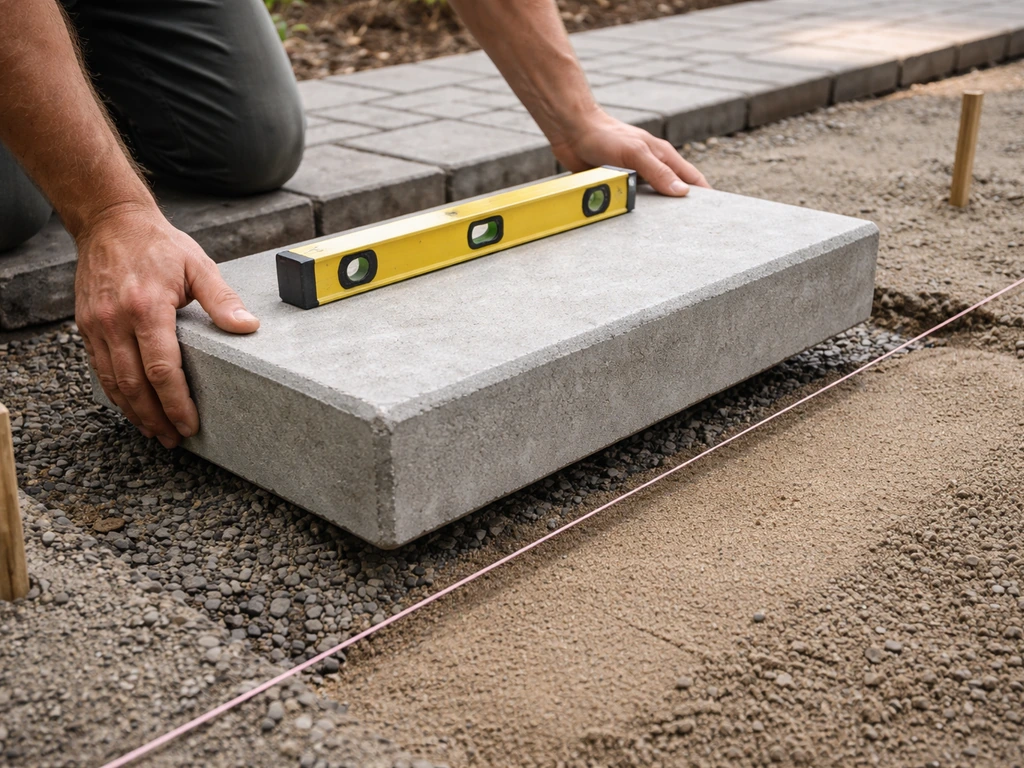
- Position the step unit. With help (and the right equipment for heavy precast units), lower the step unit onto the setting bed. Do not drag it into position—lower it as straight as possible to avoid disturbing the bed.
- Check level and plumb. Use a 4-foot level to check side-to-side level and front-to-back. The top tread should be very slightly pitched forward (about 1/8 inch per foot) to shed water away from the door. Tap the unit gently with a rubber mallet to adjust, or add thin shims of solid material under low corners.
- Check alignment with the patio and door opening. Make sure the step is centered on the opening and flush or gapped correctly at the top where it meets the threshold or patio surface.
- Fill gaps and edges. Pack coarse sand or stone dust around the perimeter of the unit to stabilize the base and prevent soil from washing under the steps. Install edge restraints on the sides if adjacent pavers or gravel could shift.
- For modular stacking systems: Set the bottom unit first and get it perfectly level before stacking the next unit on top. Each unit should be set in mortar or a manufacturer-specified adhesive or setting material. Check level at each course.
- Seal (for concrete and paver units). Once everything is set and the mortar or bedding has cured, apply a penetrating concrete or paver sealer if you want to reduce staining and water intrusion. Let the unit cure for at least 24 to 48 hours before heavy use.
Common problems and how to fix them
Uneven base: If the unit rocks or won't sit level, pull it back off and re-screed the setting bed. Don't try to shim a unit that's significantly off-level with thin material, it will shift. Incorrect rise: If the total rise doesn't match your step unit, correct the grade at the base before you set the unit, not after. Add or remove fill to bring the base height to the right elevation. Movement after installation: If the unit shifts or rocks after a few weeks, the most likely cause is an insufficiently compacted base. The only real fix is to pull the unit, recompact, and reset it. Poor drainage: If water pools at the base after rain, add a shallow gravel trench around the low side, pitched to carry water away.
What premade patio steps cost and how long installation takes
Costs vary significantly based on material, size, and whether you're doing it yourself or hiring out. Here's a realistic range based on current pricing data.
| Scenario | Estimated Cost Range | Typical DIY Time |
|---|---|---|
| Single hollow precast concrete step | $150–$250 (unit only) | 2–4 hours including base prep |
| Single solid precast concrete step (4 ft wide) | $200–$600 (unit only) | 3–5 hours |
| 2–3 step precast unit or modular stack | $400–$1,500 (unit only) | 4–8 hours |
| Full exterior stair to basement (pro install) | $1,500–$5,000 | Not a DIY project |
| Composite prefab step system | $200–$500 per step | 2–4 hours per step |
| Brick or paver step unit | $150–$400 per step | 3–6 hours per step |
A few things that push costs up quickly: delivery fees for heavy precast units (often $100 to $300 depending on distance and equipment needed), site conditions that require more excavation or a poured footing, and add-ons like handrails or custom widths. If your access is tight and a standard delivery truck can't reach the install site, factor in renting a hand truck, pallet jack, or even a small loader.
On the time side, plan for a full half-day for a basic single-unit install if you're doing it solo for the first time. Two or three steps in a modular system will take a full day including base prep. If you've done it before, you can move faster, but base prep cannot be rushed without consequences.
Safety, permits, and the finishing details that matter
Do you need a permit?
Permit requirements vary by jurisdiction, but in general, adding steps to an existing patio is considered a minor improvement and often doesn't require a permit. The situations where permits become more likely: steps attached to the house structure, a rise of more than 30 inches above grade, steps that are part of a larger deck or addition project, or steps serving a commercial or rental property. When in doubt, a 5-minute call to your local building department will save you a lot of potential headache. Don't skip it just because the project feels small.
Handrails and guards
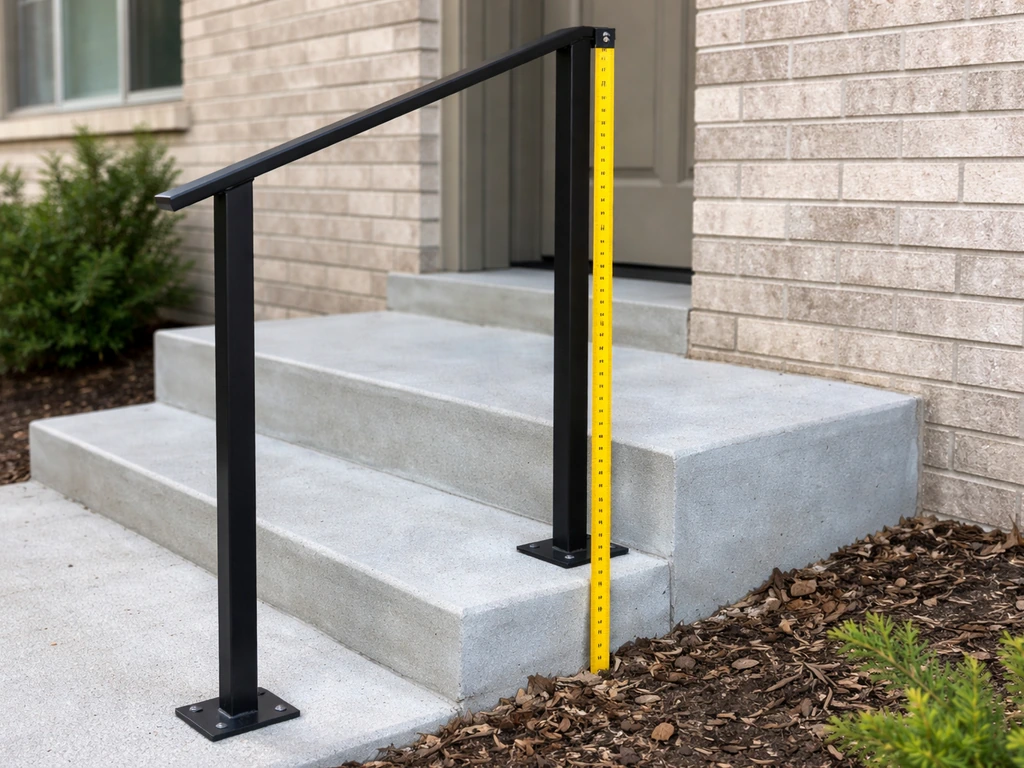
Federal guidelines (and most local codes that follow them) require handrails to be installed between 34 and 38 inches measured vertically from the leading edge of the treads. If the open side of your steps rises more than 30 inches above the grade below, guards of at least 34 inches in height are required. For typical patio steps of 2 or 3 treads, you're usually below that threshold, but if your patio is elevated, take the measurement seriously.
Even when a handrail isn't technically required by code, it's often worth adding one for usability and safety, especially if older adults or kids will use the steps regularly. Post-mount handrail kits for precast steps are widely available, and most precast manufacturers sell compatible anchor hardware. Make sure any handrail you add is graspable (typically a circular cross-section of 1.25 to 2 inches in diameter) and secured solidly into the step unit or adjacent structure, not just surface-mounted with short screws.
Stability and long-term checks
After the first winter (or first heavy rain season if you're in a mild climate), get down and physically push and rock the step unit. Any movement means the base has settled unevenly and needs to be corrected before it becomes a bigger problem or a safety issue. Check that the front edge of the top tread is still flush with or slightly below the threshold it connects to, and that water isn't pooling on any tread surface.
Sealing and surface protection
Concrete and paver steps benefit from a penetrating sealer applied every 2 to 4 years depending on your climate and traffic. This reduces water absorption, resists freeze-thaw cracking, and helps prevent staining. Apply sealer to a clean, dry surface using a roller or pump sprayer, and let it cure fully before use. For composite steps, check the manufacturer's recommendations, as most composite materials are designed to be maintenance-free and don't need sealing. Wood steps (pressure-treated or cedar) should be sealed or stained annually or biannually to prevent moisture damage and cracking.
If you're still deciding whether to go the premade route or build custom, the honest answer is that premade steps handle 80% of common patio situations cleanly and easily. Where they fall short is when your rise doesn't match standard dimensions, your site has unusual access challenges, or you want a very specific aesthetic that off-the-shelf units can't deliver. For those situations, a fully custom build using brick, individual pavers, or poured concrete gives you more control, though at the cost of more time and skill. Either way, the base prep and leveling fundamentals are the same, so the work you do here carries over regardless of which direction you go.
FAQ
What’s the correct way to measure rise when my patio surface height varies (pavers, gravel, or uneven ground)?
Measure the vertical rise from the patio surface that the top tread will land on, not from the lawn or an uneven dirt edge. If you have a thick patio paver base, include its full thickness in the total rise so the riser count stays correct when the unit is seated on the setting bed.
Should I pour or patch under premade patio steps to fine-tune the height after delivery?
Most people do not add a second “finish concrete” layer. You usually install the step unit on a compacted base plus a setting bed, then blend the surrounding patio grade to meet the step edges. If you pour or place additional material under one side, you can defeat the intended leveling and create future rocking.
Why do my premade steps tilt after a season, even though they looked level when installed?
Treat a base with different compaction under the step as a common failure point. Use a plate compactor and compact in 4-inch lifts, then keep the surface level with a straightedge. If you see soft spots after compaction, remove more soil and recompact before setting the unit.
My unit is slightly crooked, can I just shim it more after it’s placed?
If the step is off-level, do not rely on extra bedding sand or mortar thickness as a permanent fix. Pull the unit back, correct the setting bed, and reset. Shimming heavily tends to work loose under freeze-thaw and traffic.
Can I switch between mortar bed and bedding sand depending on what my site needs?
Yes, but it needs to match the material and the manufacturer’s intent. For precast on sand or gravel, a mortar bed is typically kept thin to seat firmly, while paver-style units often use a bedding sand approach. Using the wrong combination can prevent proper drainage or bonding.
How do I ensure the installed steps won’t hold water where they meet the patio or door threshold?
Plan for a dry-fit first, but finalize the grade and drainage before you open the setting bed. The surrounding slope should carry water away from the steps, and you should confirm the top tread lands flush or slightly below the connecting threshold so water does not run over the tread edge.
Do I need a drain pipe or trench under premade patio steps in freeze-thaw climates?
If your site freezes, do not trap water at the base and do not skip drainage features on clay or low-lying areas. A shallow gravel trench and sloped perforated drain at the bottom of the gravel layer can reduce frost-related heaving and settlement.
Can modular stacking systems handle unusual doorway heights without custom work?
You can, especially with modular stacking systems, but you still need to correct the total rise before ordering. Standard modular components let you adjust configurations, yet extreme nonstandard rises or irregular framing near a doorway may require a custom unit to keep tread-to-threshold relationships correct.
At what point should I add handrails or guards for safety, even if my steps seem short?
If the open side has a significant drop, use the same measurement approach your code official uses, from the leading edge area to the finished grade below. Even when code may not require a guard for small residential runs, a handrail or guard can be the difference between “fine” and “not safe” for kids and seniors.
Do I need a permit just to install premade steps, or only if I attach them to the house?
Often, yes. Many codes treat exterior stairs differently by context, and enforcement varies. Call your local building department before you set anchors or attach to a house wall, especially if the steps are part of a deck transition or involve structural connection.
How often should I reseal concrete or paver premade steps, and how do I tell it’s time?
For small maintenance, use a sealer schedule based on exposure. Concrete and pavers commonly need a penetrating sealer every 2 to 4 years, but high-sun or high-salt areas may shorten that window. If water stops beading or staining increases, it’s a sign to reseal.
Can I add a handrail kit later, and will any kit fit any premade step unit?
Confirm compatibility before purchase. Some handrail kits are designed for specific step profiles, and post spacing or anchor hardware can vary by manufacturer. If you plan to install a rail, buy the kit at the same time as the steps so the anchoring method matches the unit.
What should I check on delivery and site access before ordering heavy precast patio steps?
Yes, but treat it as an access and stability plan, not just a delivery note. If you cannot unload safely, the unit can get damaged or you can create a safety hazard. Measure gate width, turn radius, and pathway grade, and consider renting equipment like a pallet jack or hand truck where needed.
Brick Patio Steps: Design Ideas and DIY Build Guide
Brick patio steps design ideas plus a DIY build guide: layout, sizing, drainage, materials, and step-by-step constructio