You can cover an existing patio floor with pavers, tile, resurfacing coatings, or interlocking deck tiles, and which one makes sense depends on what's actually wrong with your current surface, how much prep work it needs, and what you want to spend. The good news is that most concrete, brick, and slab patios can be transformed in a weekend or two without tearing anything out, as long as you do the prep work right. If you want a durable result, follow a complete step-by-step plan for how to make an outdoor patio floor that matches your slab condition and chosen materials.
How to Cover a Patio Floor: DIY Step-by-Step Guide

Nolan Lennox
26 Jun 2026
First, figure out why you're covering the floor
Before you buy a single thing, get honest about your goal. The covering system that works best for a cosmetic refresh is completely different from the one you'd use to waterproof a patio over a basement, and different again from what you'd use to hide a cracked, uneven slab. Getting this wrong is the most expensive mistake you can make.
- Refreshing the look: Your slab is structurally sound but stained, faded, or ugly. Almost any covering works here — resurfacing coatings, tile, or snap-together deck tiles are all solid options.
- Covering cracks or uneven spots: Cracks under 1/4 inch wide can usually be filled and covered. Wider cracks or significant settling means you may need to grind high spots, fill low ones, and choose a covering system with some flexibility built in.
- Improving slip resistance: Smooth concrete gets dangerously slick when wet. A resurfacing coating with broadcast aggregate, textured tile (look for a wet DCOF rating above 0.42 per ANSI A137.1), or rubber deck tiles solves this quickly.
- Waterproofing: If your patio is above a conditioned space or you need to keep water from migrating below the slab, you need a dedicated waterproofing membrane (like LATICRETE 9235 or Schluter DITRA under tile) as part of the assembly — not just a surface coating.
- Seasonal durability: If freeze-thaw cycles are destroying your surface, you need a freeze-thaw rated tile or paver system, not a coating that will peel by spring.
Write your reason down. It will guide every decision that follows.
Choosing the right covering system for your situation
Here's a practical breakdown of the most DIY-friendly patio floor covering options. None of these are exotic, you can source all of them at a big-box store or local tile/masonry supplier.
| Covering Type | Best For | Typical DIY Cost (per sq ft) | Durability | Skill Level |
|---|---|---|---|---|
| Paver/brick overlay | Cracked slabs, uneven surfaces, classic look | $3–$8 | Excellent (20+ years) | Intermediate |
| Porcelain or ceramic tile | Clean look, waterproofing, design flexibility | $4–$12 | Excellent with proper install | Intermediate–Advanced |
| Concrete resurfacing coating | Budget refresh, minor cosmetic fixes | $1–$3 | Good (5–10 years) | Beginner |
| Interlocking deck tiles | Renters, quick installs, no adhesive | $3–$7 | Moderate (varies by material) | Beginner |
| Rubber patio tiles | Slip resistance, kids' play areas | $2–$5 | Good | Beginner |
My honest recommendation: if your slab is flat and in decent shape and you just want it to look better fast, go with interlocking deck tiles or a resurfacing coat. If you want something that'll last 20 years and look great, porcelain tile over a proper membrane or a paver overlay is worth the extra work. If budget is the top priority, check out options for making a cheap patio floor, you can get a good result for under $2 per square foot with the right approach. If you’re wondering how to make a cheap patio floor, start by picking an option that matches your slab condition and budget, then put real effort into prep making a cheap patio floor.
When an overlay doesn't work
If your existing slab is heaving, has major structural cracks (wider than 1/2 inch, actively moving), or has more than 3/8 inch of height variation across 10 feet, no covering system will fix the underlying problem. At that point you're better off looking at how to build a new patio floor from scratch rather than covering something that's going to keep moving and destroy whatever you put on top.
Prep work: clean, level, and repair before you cover anything
This is where most DIY patio projects fail. People get excited about the finish material and skip the prep, and six months later the tiles are cracking or the coating is peeling. If you’re aiming for a clean, long-lasting result, learning how to diy patio floor starts with prep like leveling, crack repair, and proper bonding. Spend as much time on prep as you do on installation, it genuinely matters that much.
Step 1: Clean the surface thoroughly
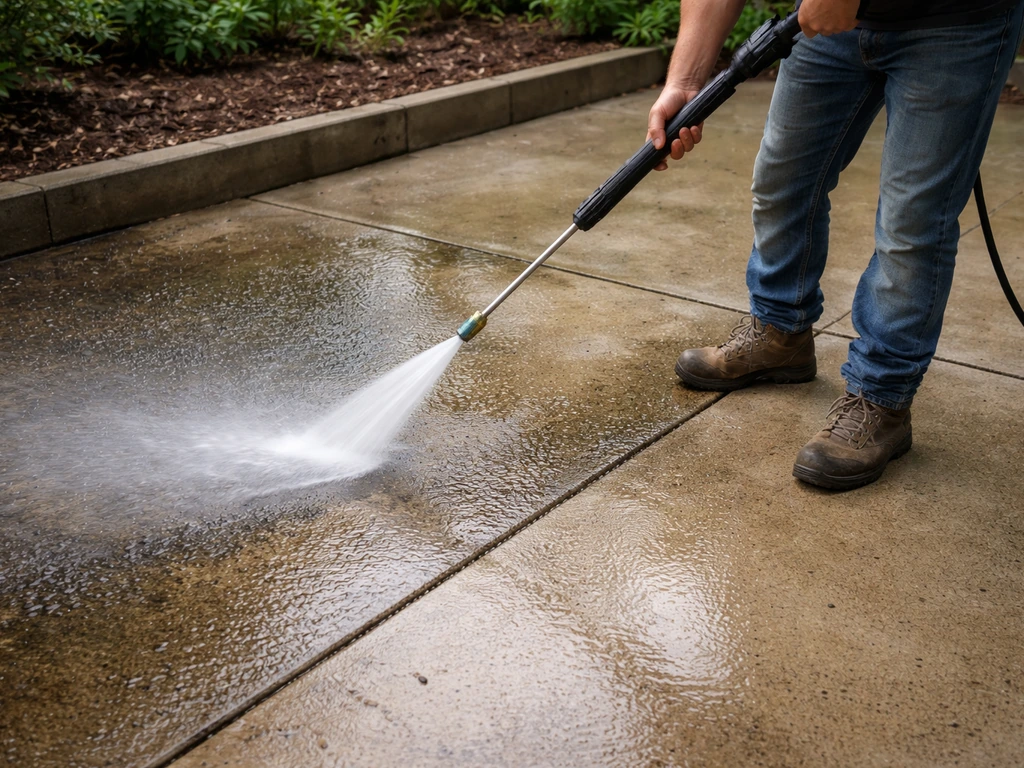
Pressure wash the entire patio to remove dirt, mildew, efflorescence, and any loose material. Stay at or below 3000 PSI, going higher risks spalling or scaling the concrete surface permanently. If you have oil stains, treat them with a degreaser first. For old sealers or coatings, you'll need to either chemically strip them or grind them off; adhesives and thin-sets won't bond to a sealed surface. If you're planning a tile install, follow up the pressure wash with a mild acid etch (muriatic acid diluted 10:1 with water) to open up the concrete pores for better bonding. Rinse completely and let it dry for at least 24 hours.
Step 2: Assess and repair cracks
Fill cracks up to 1/4 inch wide with a polyurethane concrete crack filler. For wider cracks, use a hydraulic cement or vinyl concrete patching compound, feathering the edges smooth. Let patches cure fully, usually 24 to 72 hours depending on the product. If you're tiling over cracks, you still need to use a crack isolation or uncoupling membrane (more on that below) or those cracks will telegraph right through your tile within a season.
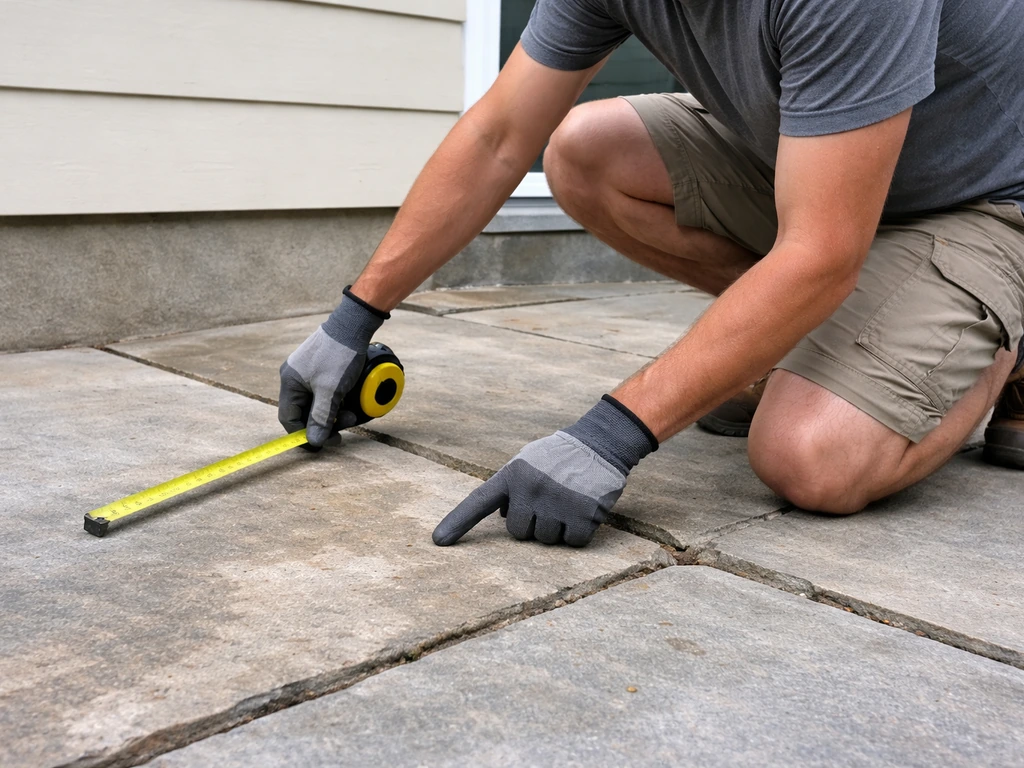
Step 3: Check for level and fix low spots
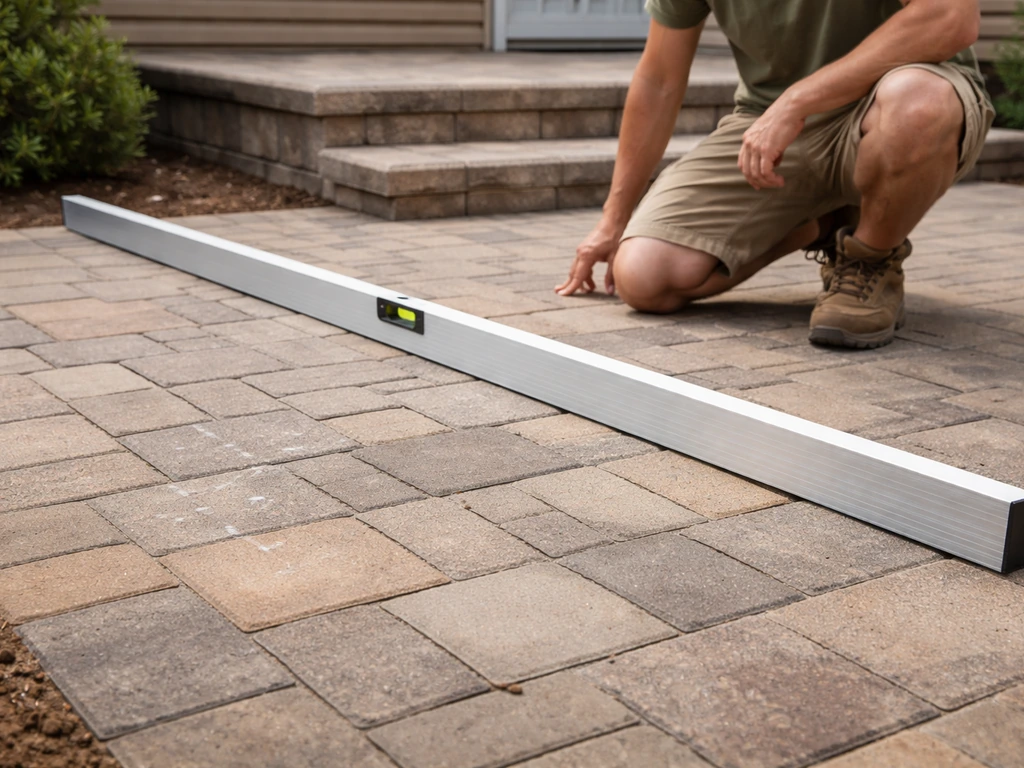
Use a 6-foot or 10-foot straightedge to check for high and low spots. For tile or pavers, you want no more than 3/16 inch of variation under a 10-foot straightedge. Grind down high spots with an angle grinder and a grinding cup wheel. Fill low spots with a self-leveling underlayment or polymer-modified floor patch, these are available at any home improvement store and are easy to work with. For resurfacing coatings, you can often address minor unevenness with the coating itself, but anything over 1/4 inch low still needs to be filled first.
Step 4: Check the slope
Your patio needs to slope away from the house, a minimum of 1/8 inch per foot, preferably 1/4 inch per foot. Check this with a long level and a tape measure. If your slab is sloping toward the house or is essentially flat, water will pool and eventually get under your new covering. You can correct minor slope issues with a self-leveling compound applied thicker on the high side, but significant re-sloping may require grinding or grinding plus overlay.
Step-by-step install for the most common DIY options
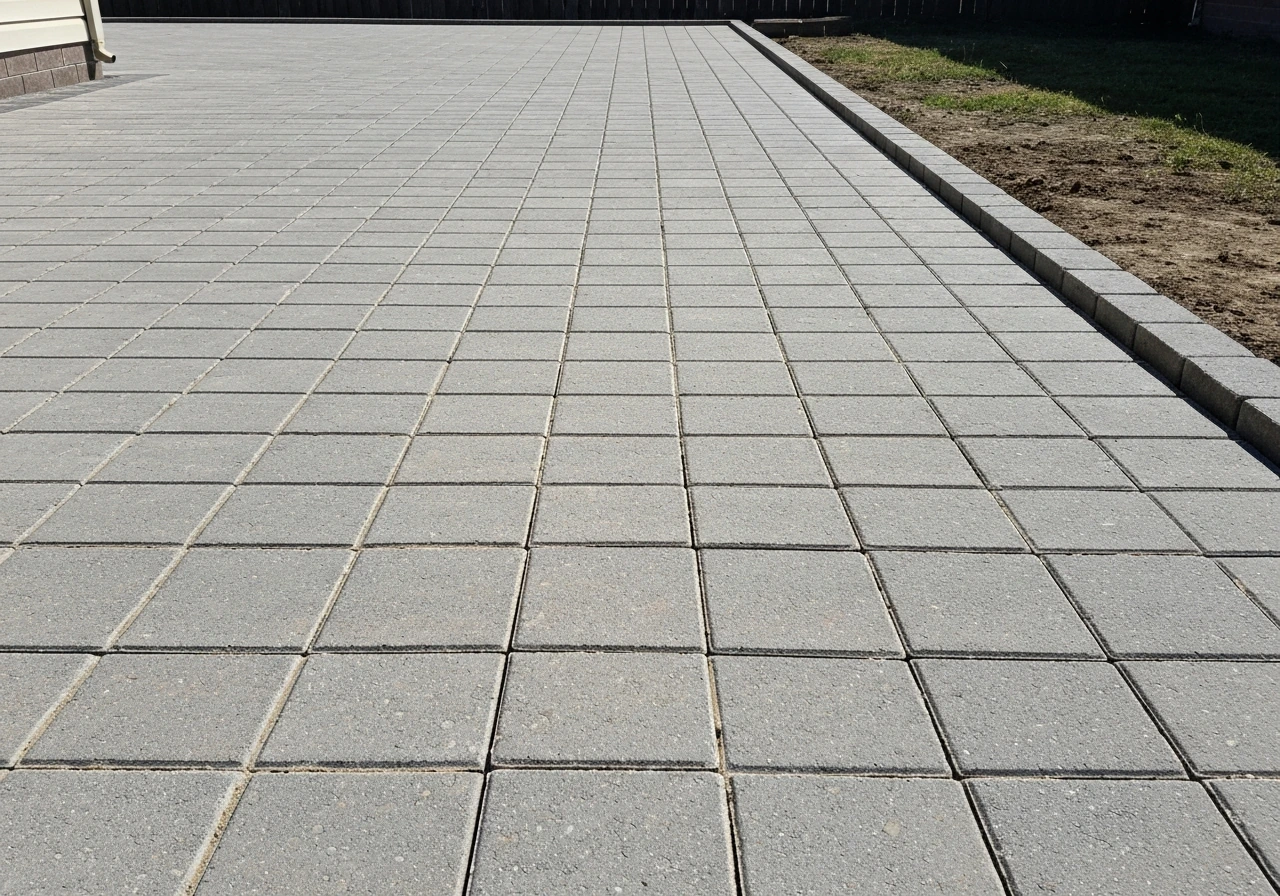
Option 1: Paver or brick overlay
A paver overlay over a solid concrete slab is one of the most forgiving DIY installations you can do, and the result looks fantastic. The ICPI-recommended approach uses a compacted aggregate base plus bedding sand, but for an overlay over an existing slab, you replace the base with your existing concrete and go straight to the bedding sand layer.
- Prep the slab as described above — clean, crack-repaired, and properly sloped.
- Install edge restraints around the perimeter to keep pavers from shifting over time. Plastic or aluminum edge restraint systems work well and are available at masonry suppliers.
- Spread a 1-inch-deep layer of coarse bedding sand (concrete sand) evenly across the slab. Use screed pipes and a straight 2x4 to level it.
- Lay pavers in your chosen pattern, starting from a straight reference line. Use spacers or rely on the paver's built-in lugs for consistent joint spacing.
- Once all pavers are laid, spread dry polymeric jointing sand across the surface and sweep it into the joints. Compact the entire field with a plate compactor (rent one — don't skip this). Sweep in more sand until joints are full. Repeat compaction.
- Mist lightly with water to activate the polymeric sand binder. Avoid heavy rain for 24 hours.
Belgard and ICPI both specify bedding sand at a minimum of 1 inch deep, don't go thinner trying to save material or the pavers will rock. Polymeric jointing sand is worth the extra few dollars per bag over regular sand; it locks the joints and resists ant and weed infiltration. For interlocking paver overlays, ICPI's mechanical installation guidance also emphasizes joint and edge design concepts, including how joint widths can vary with paver thickness and the need for bedding/base continuity to prevent sand loss and discontinuities jointing sand locks the joints.
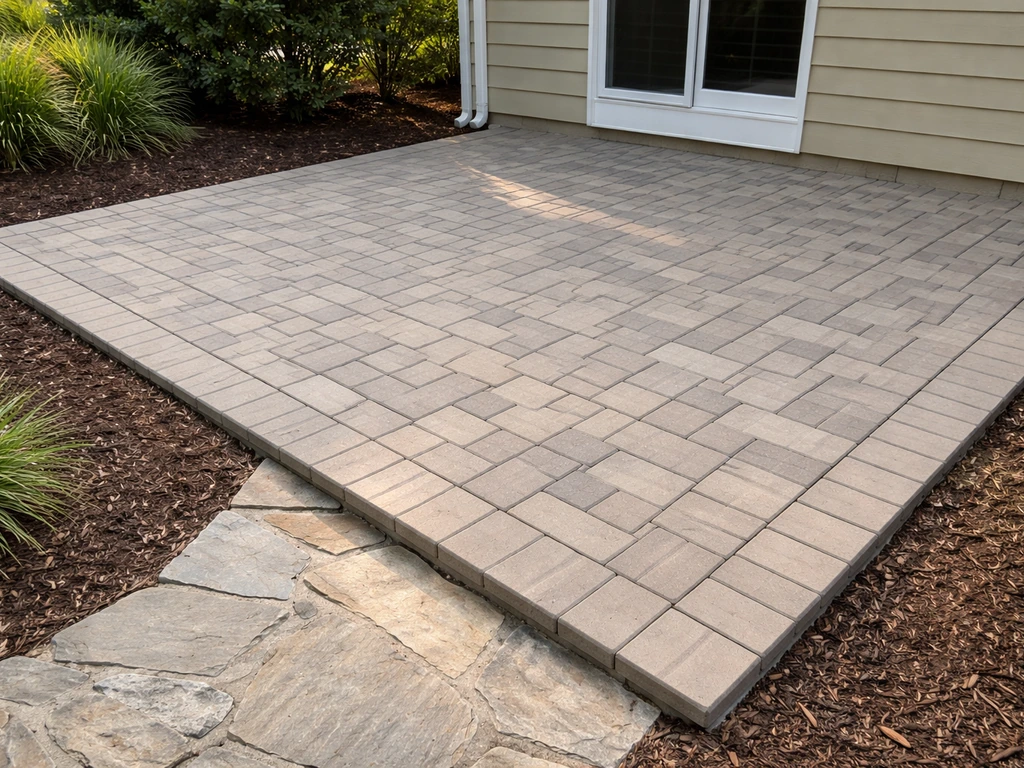
Option 2: Porcelain or ceramic tile
Tile is the most precise installation on this list but also the most durable. The key to a tile patio that doesn't crack and fail is the assembly: waterproofing membrane, proper thin-set, correct coverage, and movement joints. In a r/Tile thread about first-time Ditra membrane installs, commenters emphasized checking mortar coverage by occasionally lifting tiles to confirm you have good coverage across the surface blank" rel="noopener noreferrer">people advise pulling tiles occasionally to check coverage. If you want a full deep-dive on this, the guide on how to make a tile patio covers the process in detail. If you are also building a DIY tile patio table top, the same waterproofing and movement-joint ideas help prevent cracking. Here's the essential workflow:
- Clean and prep the concrete slab as described. Make sure it's structurally sound with no active movement cracks.
- Install an uncoupling and waterproofing membrane such as Schluter DITRA over the slab using unmodified thin-set. DITRA provides waterproofing, vapor pressure equalization, and crack isolation in one product. Roll it flat, eliminating air pockets.
- Mix polymer-modified thin-set (Schluter ALL-SET or equivalent) to a peanut-butter consistency. Spread with a notched trowel — a 1/4" x 3/8" square-notch trowel works for most standard format tiles and gives you roughly one 50 lb bag per 40–50 square feet of coverage.
- Set tiles firmly, twisting slightly to collapse the notch ridges. Every few tiles, pull one up and check that coverage is even and at least 95% of the tile back is covered — this is the ANSI A108.5 target for exterior applications and it matters for durability and load bearing.
- Leave movement joints (not grout — actual soft joints filled with backer rod and ASTM C920 sealant) every 8 to 12 feet in each direction, at all changes of plane, and wherever the tile meets a wall or fixed structure. Do not tile over existing expansion joints in the slab.
- After thin-set cures (typically 24 hours minimum), grout joints with an exterior-rated sanded or epoxy grout. Exterior tile assemblies need a grout formulated for outdoor temperature swings.
- Seal grout lines with a penetrating grout sealer after the grout cures.
For slip resistance, choose a tile with a wet DCOF AcuTest value above 0.42 (per ANSI A137.1), this is the baseline for wet applications. A DIY mosaic patio table top uses many of the same surface prep habits you would use for patio tile, so you get a cleaner bond and a longer-lasting finish wet applications. Ask your tile supplier specifically for the DCOF rating; most porcelain pavers sold for outdoor use meet or exceed it, but smooth polished tiles often do not.
Option 3: Concrete resurfacing coating
This is the budget-friendly option that works great for cosmetic refreshes on solid, sound slabs. You're essentially applying a thin bonded topping (usually 1/8 to 1/4 inch) directly to the concrete.
- Clean the slab thoroughly — acid-etch it if needed for mechanical bond. The surface must be damp but not wet at application.
- Fill cracks and low spots with concrete patching compound and let cure fully.
- Mix the resurfacer per package directions (most are polymer-modified Portland cement blends). Consistency should be like pancake batter.
- Pour and spread with a long-handled squeegee across small sections (5x5 ft at a time). Work quickly — these materials set fast.
- For slip resistance, broadcast aluminum oxide or silica carbide aggregate into the wet surface immediately. This gives you a gritty texture that stays grippy even when wet.
- Let cure per the product specs — typically 24 hours before foot traffic, 72 hours before furniture. Seal with a concrete sealer rated for exterior use.
Option 4: Interlocking deck tiles
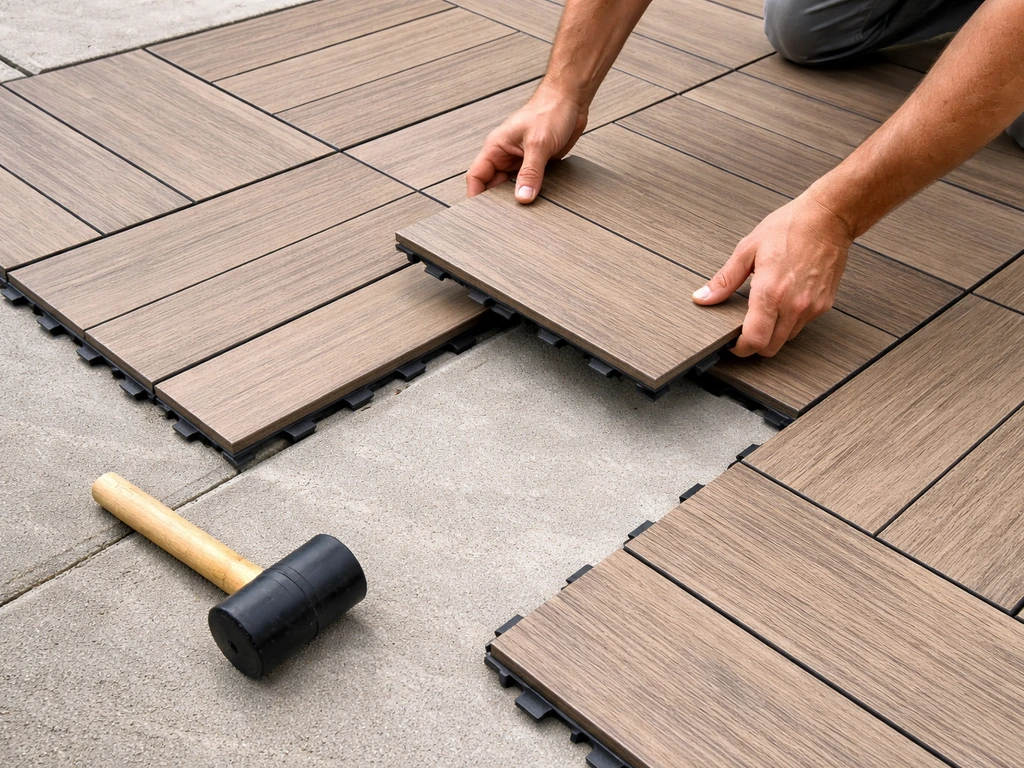
If you want the fastest, most beginner-friendly installation, and especially if you're renting or want something removable, snap-together deck tiles are hard to beat. These are either solid wood (like ipe or teak), composite, or rubber tiles that click together and sit on top of any flat surface without adhesive.
- Clean and sweep the existing surface. It doesn't need to be perfect, but large dips or humps will show through.
- Start from a corner or center point depending on your layout preference. Most tiles have a grain or pattern direction — decide which way you want it before you start.
- Click tiles together as you go. Most systems let you cut tiles with a circular saw or miter saw for edges and obstacles.
- At perimeter edges, install finishing border pieces or trim pieces per the manufacturer's instructions.
- No sealing or grouting needed. Wood tiles should be oiled annually with a deck oil to prevent drying and cracking.
The main limitation is durability in freeze-thaw climates, water can get trapped between the tile and the slab and cause damage. If you live somewhere with hard winters, bring wood deck tiles in for the season or switch to a composite option designed for outdoor permanence.
Weather, drainage, and expansion gaps: how most DIY installs go wrong
This is the section people skip, and it's exactly why patio coverings fail. Outdoor installations face thermal expansion, freeze-thaw cycles, and water movement in ways that indoor floors never do. Build these details in from the start, or you'll be redoing the job in a few years.
Slope and drainage
Your finished surface needs to maintain that 1/4 inch per foot slope away from the house. Adding a covering layer can change your effective slope, especially if you're adding to one side more than another. Check your finished slope before you grout or compact. Water that pools on the surface will work into any joint, crack, or seam and cause damage over time, especially in freeze-thaw climates.
Expansion and movement joints
For tile installations, the TCNA EJ171 standard calls for movement joints every 8 to 12 feet in each direction outdoors. These are not grout lines, they're soft joints filled with a backer rod and an ASTM C920-rated sealant (silicone or polyurethane). Schluter makes dedicated expansion joint profiles like the DILEX-BT that give these joints a clean, professional look. MAPEI's Projoint is another good option. Never tile over an existing concrete expansion joint, mirror those joints through your tile assembly or the tile will crack right there when the concrete moves.
Temperature and timing
Don't install tile or resurfacing coatings when temps are below 50°F or above 90°F, and avoid direct hot sun during installation, thin-set and resurfacers skin over too fast and you lose bond. For paver installs, polymeric sand shouldn't be activated with rain within 24 hours of installation. Check the forecast before you commit to a weekend project.
Waterproofing when it matters
If your patio is over a garage, basement, or any conditioned space, waterproofing is non-negotiable. A liquid-applied membrane like LATICRETE 9235 is applied in two coats with a reinforcing fabric embedded between them. At roughly 100 square feet per gallon per coat, a 6-gallon unit with fabric covers about 300 square feet of finished area. Schluter DITRA also provides waterproofing and vapor pressure equalization as part of a tile assembly, it handles both functions in one product, which is why it's popular for this type of application.
Finishing touches, maintenance, and keeping it looking good
Once the installation is complete and cured, a little maintenance goes a long way. Here's what to do after the job is done.
Right after installation
- Wait the full cure time before placing furniture or heavy planters — 24 hours for foot traffic, 72 hours for furniture for most tile and coating systems.
- For paver installs, do a final inspection of all joints and top up any that look low after the first rain.
- For tile, inspect grout lines after 30 days and touch up any areas that show shrinkage cracks with matching grout.
- Seal exterior tile grout and any natural stone tiles with a penetrating sealer rated for outdoor use.
Ongoing maintenance by material
| Material | Annual Maintenance | Watch For |
|---|---|---|
| Pavers/brick | Re-sweep polymeric sand into joints, reseal every 2–3 years if sealed | Ants undermining joints, rocking pavers, edge restraint failure |
| Tile | Clean with pH-neutral cleaner, reseal grout annually | Cracked grout or tiles, movement joint sealant degrading |
| Resurfacing coating | Reseal every 1–2 years with concrete sealer | Peeling or delamination, especially at edges |
| Wood deck tiles | Oil annually with UV-rated deck oil, store in winter in freeze-thaw zones | Warping, splitting, or mold under tiles |
| Rubber tiles | Rinse with hose, check connections | UV fading, edge tiles lifting in wind |
Mistakes worth avoiding
- Skipping the surface prep: No covering will stick well to a dirty, sealed, or dusty slab. This is the most common reason DIY patio installations fail within the first year.
- Not checking mortar coverage on tile: Pull a tile every 10–15 minutes during installation and check that at least 95% of the back is covered with thin-set. Adjust your trowel or mixing consistency if not.
- Grouting over expansion joints: Those joints need to move. Fill them with backer rod and sealant, not grout.
- Ignoring slope: Even a gorgeous tile patio will rot out your house foundation if it drains toward the wall. Check slope before and after installation.
- Installing in bad weather: Cold, heat, and rain all compromise bonding. Watch the forecast and plan accordingly.
Covering a patio floor is one of those projects that rewards patience in the prep stage. If you want a mosaic patio instead of standard tile or pavers, the key is planning your layout and grout joints so the pattern survives temperature changes Covering a patio floor. Get the surface right, pick the material that matches your actual goal, follow the installation steps carefully, and you'll have an outdoor space that looks great and holds up for years without constant repairs.
FAQ
Can I cover my patio floor without removing an existing sealer or coating?
Yes, but only if the substrate is stable and well-prepped. Tile and resurfacing coatings generally need an unsealed, properly bonded concrete surface, so you must strip or grind off any sealer. If the concrete is sealed and you can’t remove it, interlocking deck tiles or a paver overlay are usually the safer choices because they are less dependent on chemical bond to concrete.
Will snap-together deck tiles work on a slightly uneven patio slab?
Not always. Deck tiles can sit on top if the surface is truly flat, but they still need correct slope away from the house so water does not pool at seams. For tile and coatings, you typically need a nearly uniform substrate, and the allowable height variation is much tighter, so check flatness with a 6 or 10 foot straightedge before committing.
What if my patio is almost flat, but not quite sloped enough?
If water pooling is happening, fix the slope, not just the finish. A thin coating can change the appearance but may not restore the needed drainage plane, especially if you’re adding thickness unevenly. The safest move is to verify finished slope after prep and before you install, using a long level and tape measure.
Can I tile over existing expansion joints in my concrete patio?
Don’t. Interior expansion joints are movement locations, and outdoors they also need to be honored in the new surface. Instead of bridging them, you should mirror those joints through the tile assembly or paver system, typically by keeping a matching soft joint and using the correct sealant method so the concrete can move without cracking the covering.
How long should I wait before watering or letting rain hit polymeric sand paver joints?
Usually not. Polymeric jointing sand should not be activated with rain within about 24 hours of installation, because premature washout can prevent joints from locking. Plan the job around a forecast with dry weather for at least a day after you finish spreading and activating the sand.
What should I do if my patio has major cracks that keep changing?
If cracks are active or moving, you need to stop treating them as a cosmetic problem. The guide’s threshold (major structural cracking, significant heaving, or large height variation) means covering won’t hold up because the movement will telegraph and break the new layer. In those cases, reassess whether you need a new patio base or a more engineered repair approach.
Why do I need movement joints in an outdoor tile patio, and where do they go?
More than you think. For tile outdoors, movement joints (soft joints with backer rod and sealant) are required at specific spacing, and you also need to avoid forcing tile tight across movement areas. If you miss these joints, you can get cracked grout and tile even when installation materials are correct.
Can I install patio tile or resurfacing if the weather is very hot or very cold?
For tile and resurfacing, yes, weather matters. Installing when temperatures are below 50°F or above 90°F can cause poor curing behavior and weaker bond because thin-set or coating can skin over too fast. If the forecast is hot, plan work earlier in the day and keep surfaces shaded during application.
How do I choose tile that is safe when the patio is wet?
It depends on what you’re installing. Porcelain and outdoor-rated pavers often meet wet slip targets, but polished or smooth tile may not. For tile, ask for the wet DCOF rating and confirm it is above 0.42 for wet areas, then choose the tile finish accordingly.
Is it okay to use less bedding sand to reduce the cost of a paver overlay?
For most DIY overlays, yes, thickness and bedding matter. With paver overlays, bedding sand that is too thin causes rocking because the pavers cannot settle uniformly. Stick to the recommended bedding depth and compact the bedding and sand properly to prevent movement over time.
Next Article
How to Make a Cheap Patio Floor: DIY Steps, Costs
Build a budget patio floor with DIY steps, tool list, base prep, drainage, materials, costs, and maintenance tips.