Building a tile patio yourself is completely doable, but it takes more prep work than most people expect. The short version: you excavate and compact a gravel base, pour or build a mortar bed, waterproof it, set your tiles in exterior-rated thinset with a 1/4-inch-per-foot drainage slope baked in, grout with a weather-appropriate grout, and seal everything. Get those fundamentals right and you'll have a patio that holds up for decades. Skip any one of them and you'll be pulling tiles up within a few seasons.
How to Make a Tile Patio: DIY Step-by-Step Guide

Nolan Lennox
1 Jun 2026
Planning and design basics
Before you buy a single tile, spend real time on your plan. If you want to use mosaic tile instead of large-format tiles, the same planning, slope, and waterproofing principles apply, with a few extra layout steps to manage the smaller pieces how to make a mosaic patio. Map out the exact footprint of the patio. Measure twice, then measure again, because your tile count, material costs, and base prep all flow from that number. A 12x16-foot patio is a manageable first project. Anything over 300 square feet starts to feel like a real construction job, so be honest with yourself about how much you want to take on solo.
Slope is the single most important design decision for an outdoor tile surface. The TCNA (Tile Council of North America) is clear that exterior tile systems must drain water away from the assembly before it has time to soak into the layers below. The accepted minimum is 1/4 inch of drop per foot of horizontal run. That means a 12-foot-wide patio needs to drop at least 3 inches from the house to the outer edge. Build this into your plan from day one, not as an afterthought.
Think about where water goes when it reaches the edge of the patio. It should flow away from your foundation, toward a lawn, garden bed, or drain. If water has nowhere to go, you'll get pooling, and pooling is the enemy of any tile installation. Sketch a simple drainage diagram alongside your tile layout plan.
On the design side, decide on your tile pattern early. A straight grid layout wastes less tile than a diagonal or herringbone, which matters on a budget. Factor in a 10 to 15 percent overage for cuts and breakage. Also think about transitions: how does the patio edge meet the lawn, the door threshold, or a step? Those details are easier to plan for than to retrofit later.
Choosing the right tile and setting materials
Not every tile is made for the outdoors. This is where a lot of DIYers go wrong, and it's a costly mistake. The tile you choose needs to handle two things: water and, if you're in a cold climate, freeze-thaw cycles. The gold standard for outdoor tile is porcelain with a water absorption rate of 0.5% or less, tested to ASTM C373 standards. Tile at or below that threshold is classified as impervious under ANSI A137.1, meaning water can't really get in. If water can't get in, freeze-thaw cycles can't crack it from the inside. For cold-climate areas, look for tiles that have been tested to ASTM C1026-23 (the current freeze-thaw resistance standard) with no visible damage after cycling.
Slip resistance matters just as much as durability. Outdoor surfaces get wet, and a tile that looks great inside can be a skating rink outside. Look for a wet DCOF (Dynamic Coefficient of Friction) of at least 0.42, which is the ANSI A137.1 minimum for level wet surfaces. For a patio, I'd honestly push for higher. Textured or matte-finish porcelain tiles tend to perform better here than polished ones.
| Tile Type | Water Absorption | Freeze-Thaw Safe | Best For | Cost Range |
|---|---|---|---|---|
| Porcelain (impervious) | ≤0.5% | Yes (if tested to ASTM C1026) | All climates, heavy use | $2–$10/sq ft |
| Ceramic (standard) | 3–7% | No (risk in freezing climates) | Mild/warm climates only | $1–$5/sq ft |
| Natural stone (slate/granite) | Varies | Depends on density | Warm/mild climates, design focus | $5–$20/sq ft |
| Quarry tile | ~1–3% | Marginal, check specs | Warm climates, rustic look | $2–$6/sq ft |
For setting materials, you need exterior-rated thinset mortar. Standard interior thinset is not the same thing. Polymer-modified thinset handles the temperature swings and moisture exposure that outdoor installations see. If you're tiling over a concrete slab, you can use a quality medium-bed mortar or exterior-rated thinset applied with the right trowel notch size for your tile. For larger format tiles (anything 15 inches or bigger), use a larger trowel and back-butter the tiles too. The target is 95% mortar contact between the tile back and substrate for exterior applications.
You'll also need tile spacers (typically 1/8 to 3/16 inch for a patio), grout rated for exterior use, and a penetrating sealer. For joints exposed to movement or where the patio meets a wall, use a flexible sealant (silicone or urethane) rather than rigid grout. This prevents cracking when materials expand and contract with temperature changes.
Site prep and layout (base, grading, drainage)
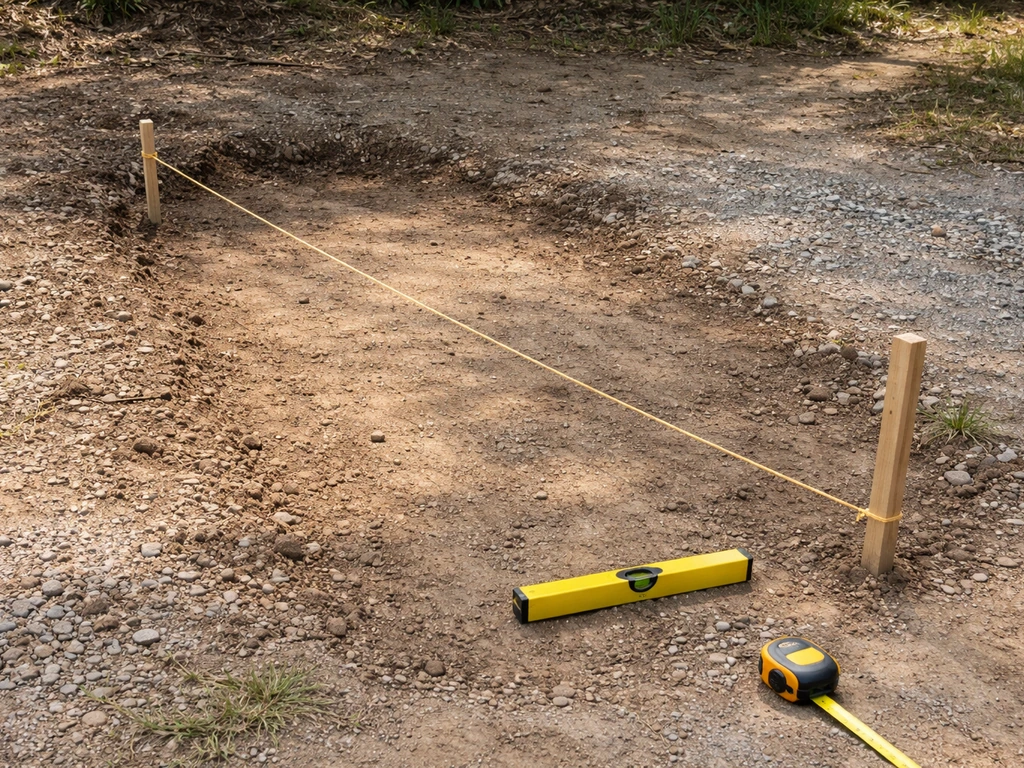
Good site prep is what separates a tile patio that lasts from one that heaves, cracks, and fails in a few years. Start by marking your patio outline with stakes and string lines. Check that it's square by measuring diagonally corner to corner: both diagonals should match.
Excavate the area to a depth that accommodates your base layers plus your tile system. For a typical ground-level tile patio, you're looking at removing about 8 to 10 inches of soil. That accounts for roughly 4 inches of compacted gravel base, a 1-inch sand layer (if used), a 3/4- to 2-inch mortar bed, and the tile itself. Mark the finished height on your stakes with string so you have a constant reference.
Set your slope into the string lines right now, before you do anything else. Run the strings at blank" rel="noopener noreferrer">1/4 inch drop per foot away from the house. Everything you build up from here should follow that slope. This is non-negotiable if you want water to drain away from your foundation.
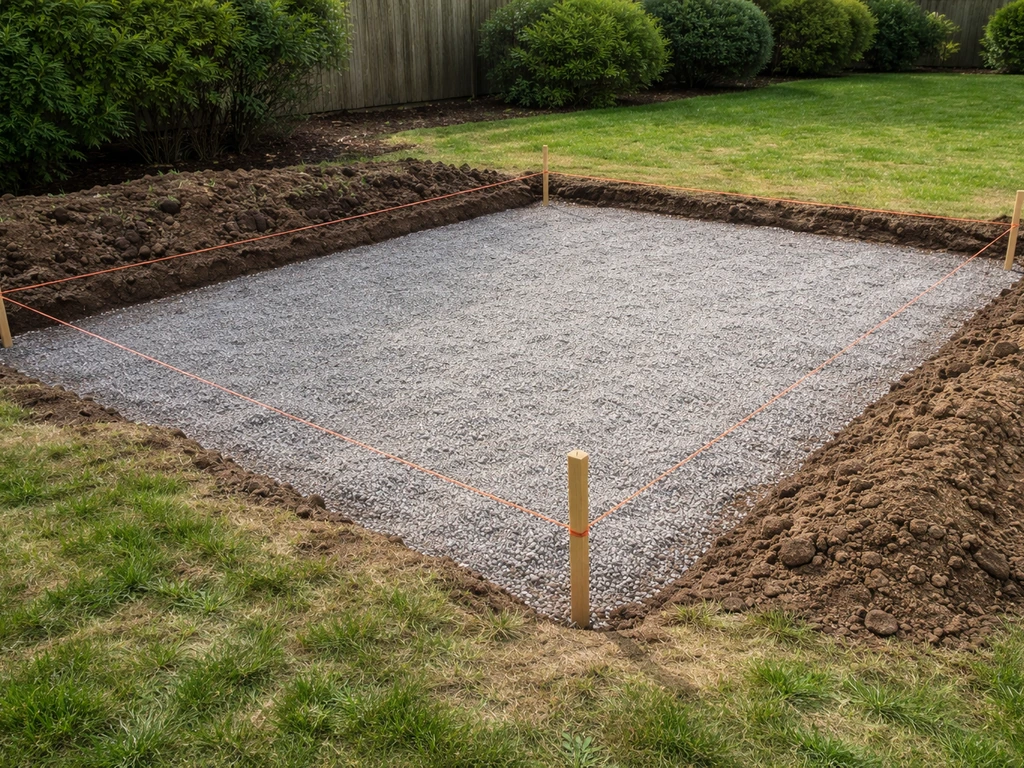
Once excavated, compact the soil subgrade. A plate compactor rental is worth every dollar here. For areas with poor or unstable soil, lay geotextile filter fabric before adding your aggregate. The fabric keeps soil from migrating up into your gravel base and helps you hit the compaction targets you need (aim for about 95% compaction density). Install-It-Direct also emphasizes that installing geotextile or filter fabric under the aggregate base helps create a stable platform when the base is compacted in lifts to about 95% Proctor density aim for about 95% compaction density. Then add your crushed stone base in 2-inch lifts, compacting each lift before adding the next. Skipping compaction lifts and just dumping all your gravel at once is one of the most common beginner mistakes, and it leads to settlement.
Installing the patio underlayment and base
Once your gravel base is compacted and graded to your slope, it's time to build the surface you'll actually set tile on. For a ground-level patio, you have two main options: a concrete slab or a mud-bed (mortar bed) system.
Concrete slab approach
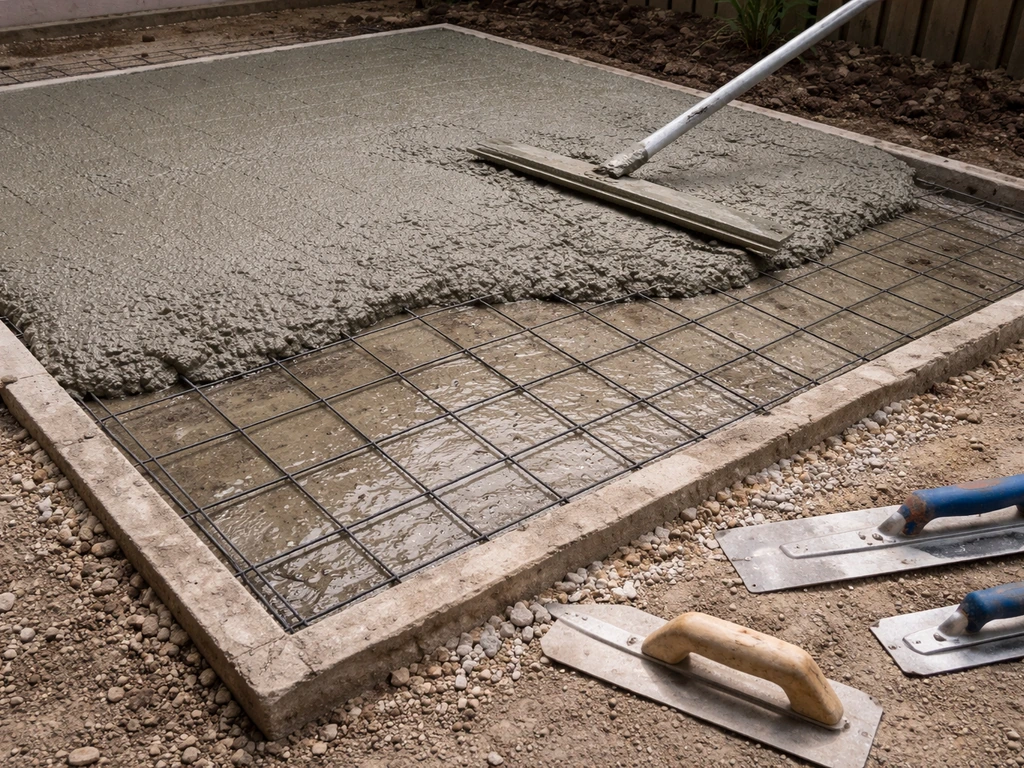
Pouring a 4-inch concrete slab over your compacted base is the most common approach for a DIY tile patio. Use 3,000 psi concrete minimum, reinforce it with wire mesh or rebar, and maintain your 1/4-inch-per-foot slope throughout the pour. Let the slab cure for at least 28 days before tiling over it. Tiling over green concrete is a mistake that causes adhesion failures.
Mortar bed (mud bed) approach
A traditional mortar bed (also called a mud bed or thick-bed method) gives you more flexibility in achieving a perfectly flat, sloped surface without depending on a perfect concrete pour. The bed is typically 3/4 inch to 2 inches thick of dry-pack mortar (a stiff mix of sand, cement, and sometimes reinforcing mesh), floated to your finished slope. This is the approach used in TCNA F103B-based systems for exterior decks and walkways. It takes a bit more skill to float flat, but it's very effective.
Waterproofing the substrate
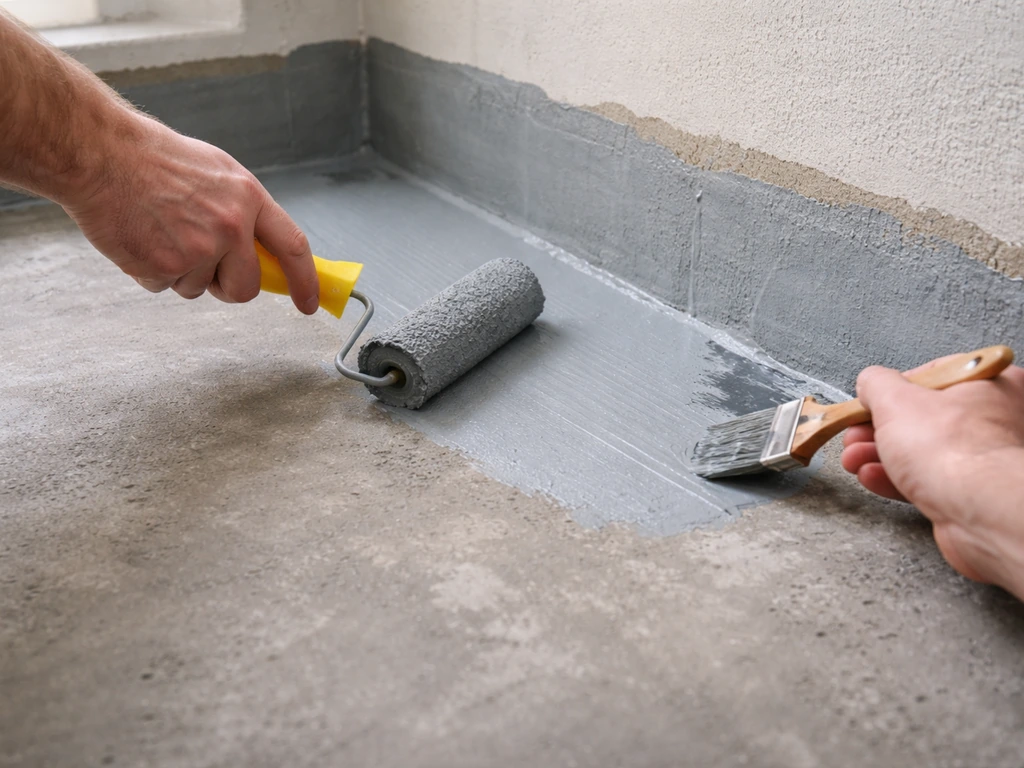
Over concrete or a mortar bed, apply a waterproofing membrane before tiling. Liquid-applied membranes like LATICRETE HYDRO BARRIER or similar products are popular for DIYers because they're relatively forgiving to apply: roll or brush on two coats, let the first coat change color and dry before the second, then wait 24 hours before flood testing or tiling. Some systems like Schluter KERDI use a sheet membrane embedded in thinset, with seams overlapped by at least 2 inches and corners reinforced with KERDI-BAND. Both work well; liquid membranes are generally easier for beginners. The key is to treat every corner and seam carefully, because that's where water finds a way through.
If you want an upgrade over a basic slab, consider an uncoupling mat (like Schluter DITRA) bonded to the concrete before tiling. The mat allows slight independent movement between the slab and the tile layer, which dramatically reduces cracking caused by thermal expansion. It also provides a drainage plane within the assembly, which aligns with TCNA's drainage guidance for exterior systems.
Setting tiles and cutting around edges
Start with a dry layout. Snap chalk lines from the center of the patio outward so your tile pattern is centered and balanced. Avoid ending up with tiny slivers of tile at the visible edges: if your layout math leaves less than half a tile at the perimeter, shift your starting point by half a tile width. This is one of those things that seems minor until the patio is done and the edge looks awkward.
Mix your exterior thinset to a peanut-butter consistency and spread it with a notched trowel sized for your tile. For most standard patio tiles (12x12 to 18x18 inches), a 1/4 x 3/8-inch V-notch or square-notch trowel works well. Spread only as much thinset as you can cover in about 10 to 15 minutes before it skins over. Press each tile firmly into the mortar with a slight twisting motion, then check that it's flat and aligned before moving to the next. Use tile spacers consistently to keep grout joints even.
For larger tiles or on hot days, back-butter each tile as well. This means spreading a thin skim coat of thinset onto the back of the tile before pressing it down. Back-buttering, combined with combing the substrate, is how you reliably hit that 95% mortar contact target that exterior installations require. Lift a tile occasionally to check coverage.
Work in sections across the patio, kneeling on a piece of plywood over already-set tiles to avoid disturbing them. Check your slope with a level periodically to make sure you haven't drifted. According to ANSI A108.02 guidelines, the finished surface should not vary more than 1/4 inch over any 10-foot span, so keep a straightedge handy.
Cutting tiles for edges and obstacles
A wet saw (angle grinder with a diamond blade works for occasional cuts) is essential for edge tiles. Measure each cut piece individually rather than assuming your perimeter is perfectly straight. For inside corners and curved cuts around posts or planters, a diamond angle grinder blade gives you more control than a wet saw. Take your time with cuts: a rushed cut tile that chips wastes both the tile and your time.
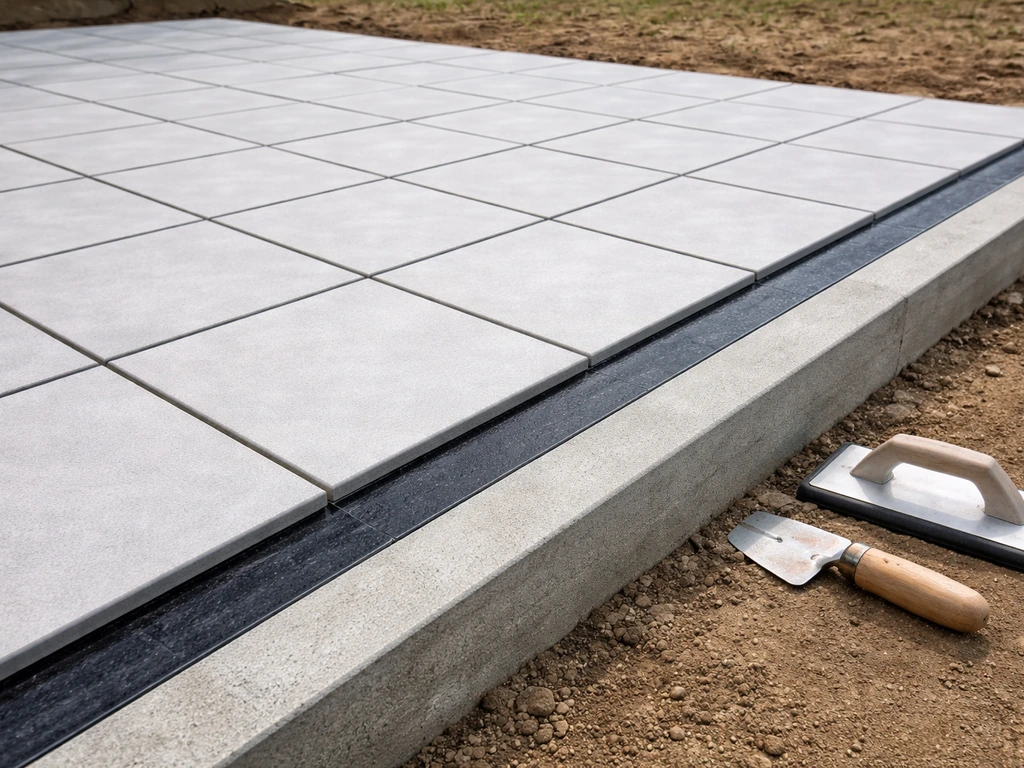
At the patio perimeter, finish edges with bullnose tiles (tiles with one pre-finished rounded edge) or edge trim pieces. Where the patio meets a door threshold or an existing structure, leave a soft joint filled with flexible sealant rather than grout. This joint allows movement without cracking.
Grouting, sealing, and finishing details

Wait at least 24 hours after setting the last tile before grouting, and longer (48 hours or more) in cold or humid conditions. The thinset needs to be fully set before you put any stress on the joints. Remove your tile spacers and vacuum out all the joints before you start.
For an outdoor patio, use a sanded grout for joints 1/8 inch and wider (which is most patio joints). Choose a grout rated for exterior use and mix it to a smooth, peanut-butter consistency. Work in sections of 20 to 30 square feet, pressing grout firmly into joints with a rubber grout float held at a 45-degree angle to the tile surface. Diagonal strokes across the joints pack them better than parallel strokes.
Clean off the grout haze with a damp sponge (not soaking wet) in a circular motion, rinsing the sponge frequently. You'll need to go over the surface two or three times. Let the grout haze fully dry to a chalky film, then buff it off with a dry cloth. Don't let grout sit on the tile surface for hours before cleaning: it gets much harder to remove.
Once the grout has cured for 72 hours minimum (some products recommend longer, so check the bag), apply a penetrating sealer to the entire surface including the grout joints. Penetrating sealers soak into the grout and tile, repelling water without forming a film that can peel. Reapplication depends on the product and traffic, but plan on every 1 to 3 years for an outdoor patio. Don't skip this step: it dramatically extends how long the grout stays looking clean and intact.
For any joints where the patio meets a wall, step, or fixed structure, rake out the grout and replace it with a color-matched silicone or urethane sealant. This is called a soft joint or movement joint, and it's required by industry standards. Rigid grout in those spots will crack within a season or two as the patio moves.
Curing, maintenance, and common DIY mistakes
Curing and setting times
Don't put furniture on the patio or subject it to heavy foot traffic for at least 72 hours after grouting. For a full-strength cure, 7 to 10 days is better before you let it take real use. If you used an epoxy grout (a great choice for durability outdoors), wait 10 days at 70 degrees F before applying any sealer. If your concrete slab was new, remember that it needs 28 days to cure before you ever start tiling over it. Rushing any of these timelines is how you end up redoing work.
Long-term maintenance
- Reapply penetrating sealer every 1 to 3 years depending on traffic and climate exposure.
- Inspect grout joints each spring for cracks or missing sections and patch with matching grout before water infiltrates.
- Check soft/movement joints at walls and structures annually and replace sealant if it's cracking, peeling, or pulling away.
- Clean the patio with a pH-neutral cleaner. Avoid vinegar, bleach, or acidic cleaners that degrade grout and sealer.
- In cold climates, use calcium magnesium acetate (CMA) ice melt rather than rock salt, which damages both tile and grout.
The mistakes that get beginners every time
- Using indoor or non-rated ceramic tile outdoors. In freezing climates this causes tile to crack from the inside out as trapped water expands. Always verify water absorption (≤0.5%) and freeze-thaw test compliance.
- Skipping or underestimating the drainage slope. A flat patio holds water against the grout and substrate until both fail. Set 1/4 inch per foot of slope from day one.
- Inadequate base compaction. Uncompacted gravel or soil settles unevenly and causes tile to crack and heave. Compact in 2-inch lifts and hit that 95% compaction target.
- Skipping waterproofing or doing it sloppily. Untreated corners and seams let water migrate under the tile and into the base. Take the time to apply membrane properly and treat every corner with fabric or band.
- Thinset mortar coverage below 95%. Low coverage leaves voids under tiles that crack under load and trap water. Back-butter large tiles and check coverage by lifting a tile periodically.
- Using rigid grout at movement joints. Where a patio meets a wall or structure, only flexible sealant belongs in that joint.
- Grouting before thinset is set. If thinset hasn't cured, the tiles shift during grouting and you'll end up with uneven joints.
- Inconsistent tile spacing. Uneven joints look amateur and make grout application harder. Use spacers every time, without exception.
Building a tile patio is one of the more technically demanding DIY patio projects, but it's genuinely satisfying when done right. If you want a step-by-step guide on how to build a patio floor using tile, follow the process for layout, base prep, setting, and sealing described here tile patio. If you're newer to working with tile and want to build confidence before committing to a full patio, practicing on a smaller outdoor surface first is smart. If you are aiming for the best results, review a full guide on how to make an outdoor patio floor so your layout and materials match the conditions outdoor surface first. And if you're weighing tile against simpler options for your outdoor floor, there are other approaches worth comparing depending on your budget and timeline. If you want to keep it straightforward, you can also look at how to cover a patio floor using an easier surface system than a full tile build simpler options for your outdoor floor. If you are planning a diy tile patio table top instead of a full patio, keep the same focus on slope, waterproofing, and exterior-rated grout so the surface drains and stays stable. If you want a DIY mosaic patio table top, use the same outdoor tile principles for waterproofing, slope, and exterior-rated materials. If your goal is an affordable patio floor, the cheapest route is usually to choose budget-friendly exterior tile, keep tile cutting efficient, and focus on solid base prep so you avoid costly rework. The key thing is to not let the complexity intimidate you out of doing the prep work properly: every hour you spend on base prep and waterproofing is an hour you won't spend redoing the project five years from now.
FAQ
Can I tile a patio directly over existing concrete or pavers?
Usually no. For a stable, drainable patio you generally need a sloped base that is either a reinforced concrete slab or a properly floated mortar (mud) bed, then a waterproofing layer and exterior-rated thinset. If your existing surface is a flat concrete slab, the more common DIY path is adding an uncoupling mat (and then waterproofing as your system requires) rather than trying to “tile over” loose or poorly sloped base material.
What should I do if I cannot achieve the 1/4-inch-per-foot slope?
If you cannot hit the 1/4 inch per foot drop across the whole patio, do not try to “fix it” after setting tile. Rebuild the substrate grade or switch to a mortar bed or adjustment system that can be floated to the correct slope. Skipping or reducing slope is a top cause of standing water, grout deterioration, and tiles loosening over time.
How do I choose materials if I live in a freeze-thaw climate?
Match products to conditions, not just marketing. For cold climates, verify the tile has tested freeze-thaw performance (ASTM C1026-23) and keep the system waterproof through the assembly, including seams and corners. For hot or freeze-thaw areas combined, prioritize exterior porcelain plus a compatible exterior thinset and grout rated for freeze-thaw, then use soft joints where movement is expected.
Which grout type should I use, sanded or unsanded, for a tile patio?
For patios, select grout based on joint width and performance. Sanded grout is appropriate for wider joints (commonly 1/8 inch and up), and it should be labeled for exterior use. If joints are narrow or you want extra durability, confirm whether the grout is also approved for exterior freeze-thaw exposure, not just “indoor/outdoor.”
Can I use an uncoupling mat instead of a thick mortar bed?
Yes, but only with a system that provides a real drainage plane and a waterproofing approach compatible with the membrane. A thin liquid membrane can work well, but you still need the correct slope, proper seam overlaps, and correct bonding of the protection and setting layers. Don’t rely on the membrane alone to manage standing water if the substrate grade is wrong.
Do I really need a wet saw for patio tile cuts?
Use a wet saw for most straight and frequent cuts, because it gives clean edges with less chipping. For occasional adjustments, curved cuts, or tight inside corners, a diamond angle grinder blade can work, but you must use a suitable guard, light passes, and measure twice. For any cut tile, dry-fit it and check that the joint size stays consistent near the edges.
How do I avoid thinset skinning over and poor tile coverage?
A good target is to keep thinset workable only until it skins over. If your thinset begins to dry on the trowel before tiles are set, discard and mix fresh. Also, if you are not lifting tiles to confirm coverage, you may miss the 95% mortar contact requirement, especially with large-format tiles or windy/hot conditions.
How do I prevent ugly slivers at the patio edges?
Do a dry layout and plan for edge conditions before mixing anything. If the math leaves a visible edge sliver smaller than about half a tile, shift the layout start point by half a tile width so the perimeter looks intentional. Also consider door thresholds and steps now, because correcting an edge after setting is usually more labor than adjusting the initial layout.
Where exactly should I use sealant instead of grout on a tile patio?
Soft joints are for interfaces where movement is likely: at the perimeter against rigid structures, around steps, and at changes in plane (like a wall-to-patio connection). Rigid grout in those locations commonly cracks because thermal expansion and soil movement shift the assembly. Use raked-out joints and color-matched silicone or urethane sealant, sized and tooled properly.
When should I seal the patio, and what if the grout still looks new but feels damp?
Sealers are not meant to “solve” a failing grout job. For best results, apply after grout has cured fully (commonly at least 72 hours, and longer if the product requires it) and the surface is clean and dry. Penetrating sealers help repel water without creating a peel-prone film, but reapplication frequency depends on traffic and weather exposure, typically every 1 to 3 years for an outdoor patio.
Next Article
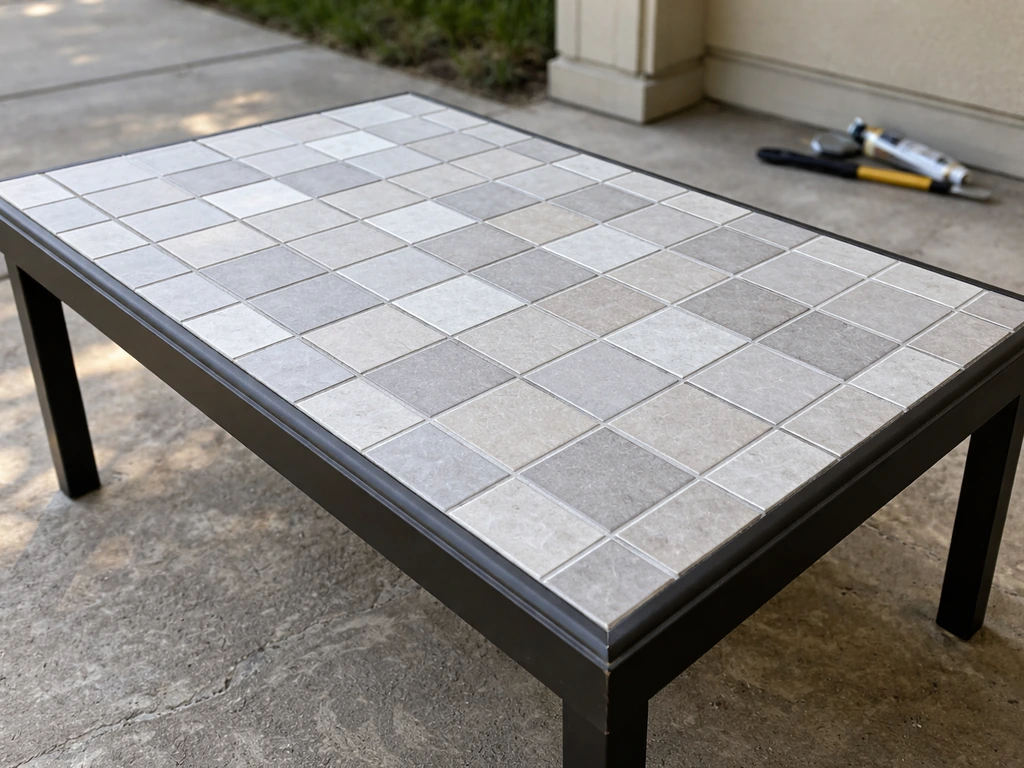
DIY Tile Patio Table Top: Build a Weatherproof Table
Build a weatherproof DIY tile patio table top with waterproof prep, tile setting, grout, sealing, and troubleshooting.