You can build a durable mosaic patio floor yourself by laying a proper compacted base, using frost-rated porcelain or stone tile with polymer-modified thinset, and finishing with sanded exterior grout that you seal once cured. The biggest reason DIY mosaic patios fail early is not bad tile choices, it's a weak base, water pooling under the surface, or the wrong adhesive for outdoor conditions. Get those three things right and your mosaic will still look great a decade from now.
How to Make a Mosaic Patio: Step-by-Step DIY Guide

Nolan Lennox
2 Jun 2026
Choosing a mosaic patio design and layout
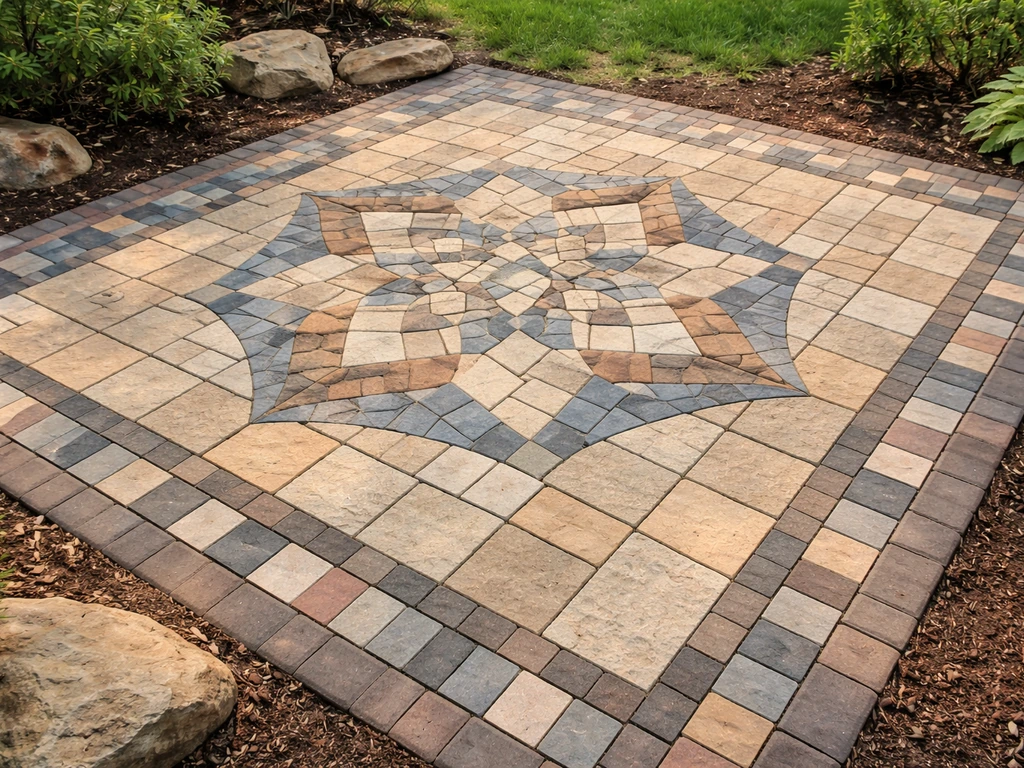
Before you buy a single tile, sketch out what you actually want. Mosaic patios can range from a simple geometric border around plain pavers to a full hand-cut picture mosaic covering the whole floor. Be honest about your skill level. A repeating grid or running-bond pattern with mesh-mounted mosaic tiles is beginner-friendly and installs in roughly the same time as a standard tile patio. A complex freehand design with individually placed tesserae takes significantly longer and requires more cutting practice. For a first mosaic patio, I'd recommend a bold two-color geometric pattern, it looks intentional, reads beautifully at ground level, and forgives minor spacing inconsistencies better than tight figurative designs.
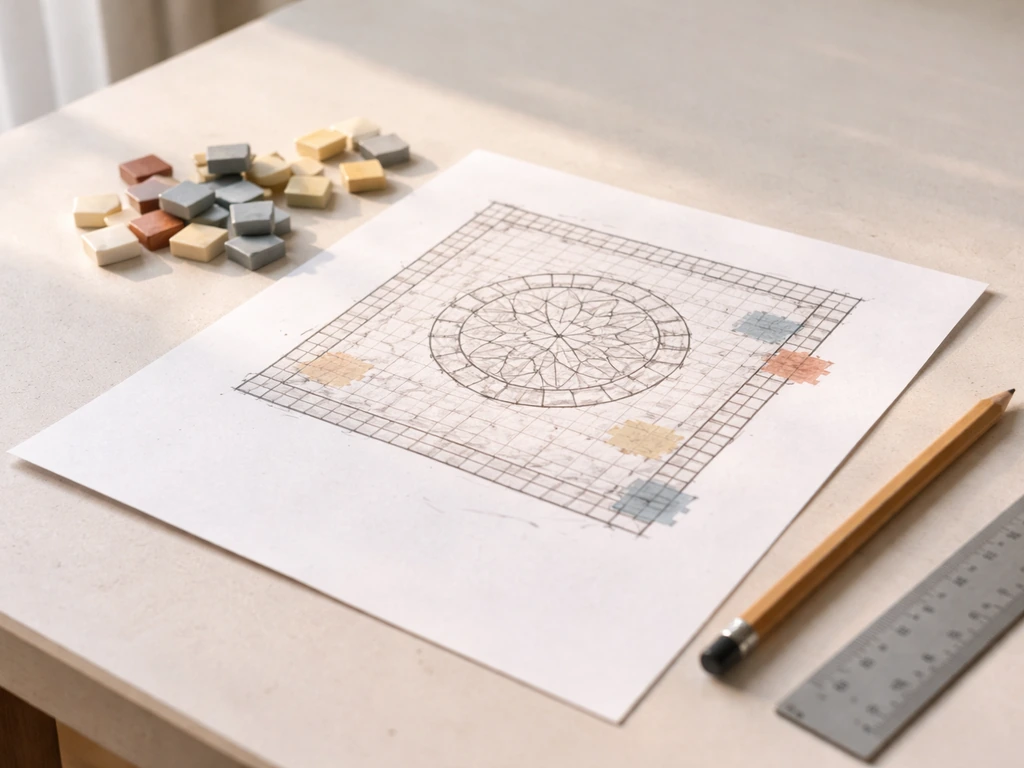
Think in zones. A central medallion surrounded by a field of single-color tile is a classic approach because most of your square footage is straightforward to install, and only the focal point demands detailed work. You can also use full mosaic sheets for the field and hand-place cut pieces for borders or accents. Sketch your layout on grid paper at a scale of 1 inch to 1 foot, then mark the patio dimensions to see how the pattern lines up with the edges. Centering the pattern on the space almost always looks better than starting at one wall and running the design to the other side.
Color choice matters more outdoors than indoors because the tile competes with sky, planters, and adjacent hardscaping. Earth tones and blue-green palettes tend to age well in outdoor settings. Bright reds and oranges can fade or look jarring against weathered wood or stone surrounds. If you're uncertain, grab a few tile samples and lay them on the ground in direct sunlight before committing.
Site assessment, measurements, and drainage basics
Walk your site after a heavy rain and look where water goes. Use these drainage and slope basics to guide how to build a patio floor so water moves away from the house and into a drain. Any spot where water pools for more than 30 minutes is a drainage problem that will destroy a tile installation over time, not in one season, but through repeated freeze-thaw cycles that slowly crack grout joints and lift tiles off the setting bed. The Tile Council of North America notes that exterior installation performance depends on water management, since installation and proper slope to drain determine how much the system saturates and affects its freeze-thaw durability blank" rel="noopener noreferrer">water pools for more than 30 minutes is a drainage problem. A basic frost-rated outdoor patio floor plan starts with the same site assessment and drainage priorities described earlier drainage problem. The Tile Council of North America is blunt about this: even frost-resistant tile fails when water sits in the joints and penetrates the setting bed. You need to solve drainage before you do anything else.
Your patio surface needs a minimum slope of 1/8 inch per foot (about 1%) away from the house or toward a drain. That's not steep enough to feel like a ramp underfoot, but it's enough to shed water reliably. Mark this slope into your base as you build so the finished tile surface inherits it automatically. For a 10-foot-deep patio, that means the far edge sits roughly 1.25 inches lower than the edge closest to your house.
Measure your patio area carefully and record the length, width, and any irregular angles or curves. Add 10% to your tile order for cuts and breakage, and bump that to 15% if your design has diagonal lines or complex curves. Check for underground utilities before you dig, call your local 811 service (in the US) at least a few days before breaking ground. Also note whether your site is in a freeze-thaw climate. If winter temps drop below 32°F regularly, every material decision from here forward needs to account for that.
Materials list for outdoor mosaic durability
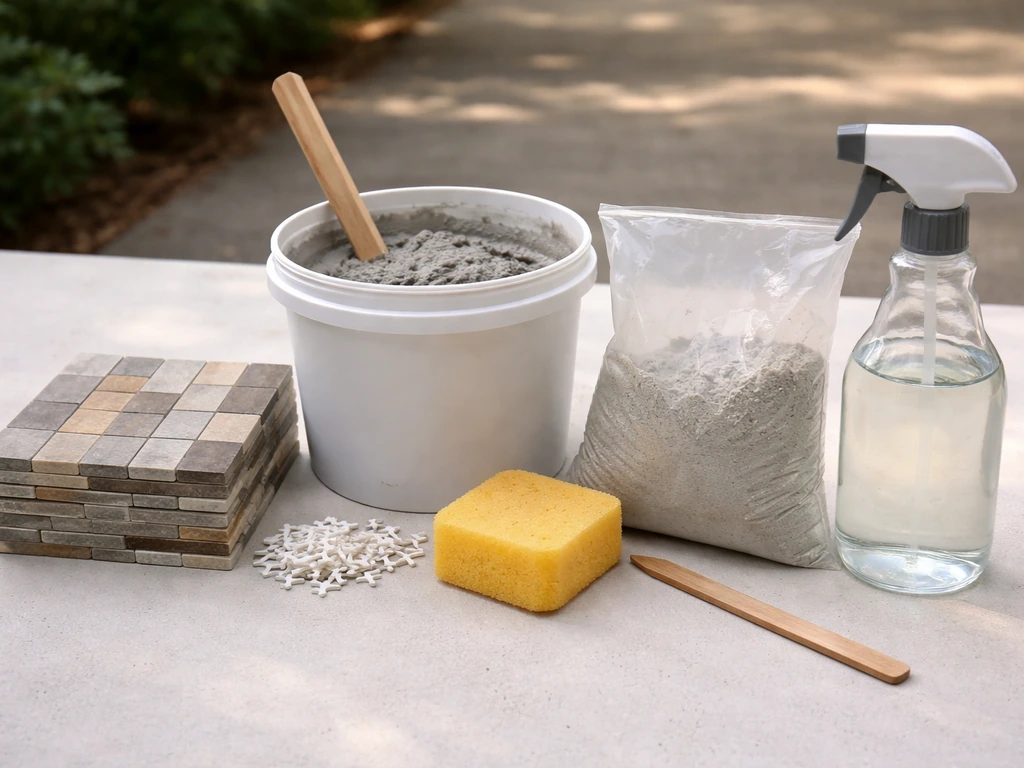
Outdoor mosaic tile work is genuinely unforgiving of shortcuts on materials. Here's what I use and why it holds up.
| Material | What to Buy | Why It Matters |
|---|---|---|
| Tile | Porcelain rated PEI 3+ or natural stone with <0.5% water absorption | Low absorption = less water infiltration during freeze-thaw cycles |
| Thinset adhesive | Polymer-modified thinset (ANSI A118.4 or higher) | Flexes with thermal movement and bonds to impervious porcelain surfaces |
| Grout | Sanded exterior-rated grout or epoxy grout for joints over 1/8 inch | Sanded grout resists cracking in wider joints; epoxy resists staining and moisture |
| Sealer | Vapor-permeable penetrating sealer (silane/siloxane blend) | Reduces moisture absorption without trapping water vapor that causes spalling |
| Movement joint material | Foam backer rod + exterior-grade polyurethane sealant | Required by ANSI A108.01; absorbs expansion without cracking the field |
| Subbase | 4 inches compacted crushed stone (3/4-inch minus), concrete slab, or both | Stable, well-draining base prevents settling and cracking |
| Membrane (optional) | Uncoupling membrane (e.g., Schluter DITRA-XL) over concrete | Isolates tile from slab movement and channels water away |
On tile choice: mesh-mounted mosaic sheets (typically 1x1 inch or 2x2 inch tesserae on a fiberglass mesh) work great for outdoor use as long as the individual tiles themselves are frost-rated porcelain or dense natural stone like slate or granite. Avoid glass mosaic on floor applications in freeze-thaw climates unless it's specifically rated for exterior floors, standard glass mosaic is slippery when wet and can shatter under thermal stress. Ceramic (as opposed to porcelain) can also be risky outdoors in cold climates because its higher water absorption makes it more vulnerable to frost damage.
Budget note: a basic frost-rated porcelain mosaic sheet runs $3 to $8 per square foot. Handmade ceramic or natural stone tesserae can push $15 to $25 per square foot before installation costs. If budget is tight, use an inexpensive frost-rated field tile and invest in a detailed mosaic border or medallion only where it'll be noticed most.
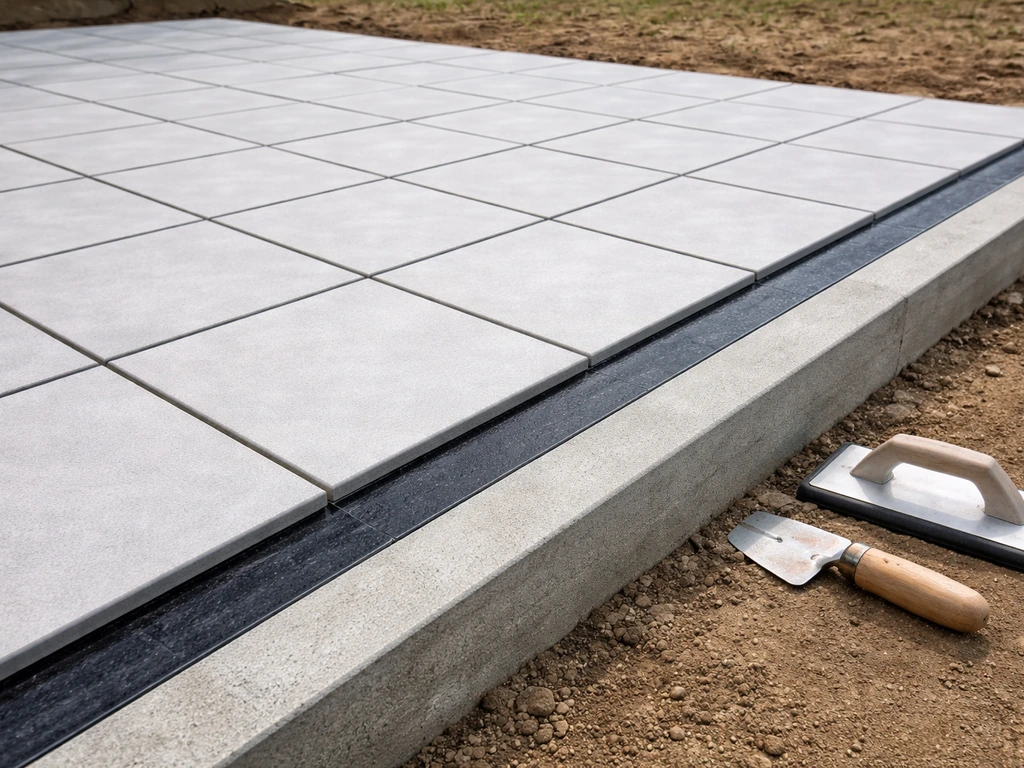
Preparing the patio base and leveling for a flat surface
A mosaic patio needs either an existing concrete slab in good condition or a new one you pour yourself. If you want the most durable patio floor setup, see how to cover a patio floor for base preparation and surface-cover options that work with mosaics concrete slab in good condition. You can technically set mosaic over a sand-set paver base, but the fine grout joints and small tile format are far less forgiving of movement than large-format pavers, any settling will crack grout lines. I strongly recommend a concrete slab for mosaic work.
Building a new slab from scratch
- Excavate to a depth of at least 8 inches below your desired finished surface height (4 inches for crushed stone base + 4-inch slab).
- Grade the excavated area with your 1/8-inch-per-foot slope built in. Use string lines and a level to check the grade as you work.
- Compact native soil with a plate compactor, then add 4 inches of 3/4-inch crushed stone and compact that layer too.
- Install your form boards at the correct height and slope.
- Lay 6-mil poly sheeting as a vapor barrier, then place wire mesh or rebar on chairs so it sits in the middle of the slab thickness.
- Pour 3,500 PSI concrete (minimum) to a 4-inch depth. For freeze-thaw climates, use air-entrained concrete.
- Screed, float, and broom-finish the surface — do not power-trowel to a smooth finish, as that reduces thinset bonding.
- Cure the slab for at least 28 days before tiling. Cover with plastic sheeting for the first 7 days to slow the cure and reduce cracking.
Using an existing slab
If you have an existing concrete patio, assess it carefully. Tap the surface systematically with a hammer, hollow sounds indicate delamination or voids beneath, and those sections need to be ground out and patched before you tile over them. Any crack wider than a hairline needs to be chased out and filled with a flexible epoxy repair compound, then allowed to cure fully. If the slab has significant heaving or is out of flat by more than 1/4 inch across a 10-foot span, use a floor-leveling compound to flatten it before you set tile.
Consider laying an uncoupling membrane like Schluter DITRA-XL over an existing slab. This 5/16-inch thick polyethylene mat bonds to the concrete with unmodified thinset, then accepts tile on top with polymer-modified thinset. The membrane isolates the tile layer from any micro-movement in the slab below and has drainage channels that direct water away from the setting bed. It adds cost (roughly $3 to $5 per square foot) but dramatically reduces cracking risk on older or questionable slabs.
Tiling workflow: layout, cutting, thinset, and spacing
Good mosaic installation is mostly about preparation before you open the thinset bucket. Spend more time on layout and dry-fitting than you think you need to. Every hour here saves two hours of correction later.
Layout and design transfer
Find the center of your patio by snapping two chalk lines connecting the midpoints of opposite sides. The intersection is your layout center. Dry-lay your mosaic sheets out from this center point toward the edges without adhesive. Check how the pattern lands at the borders, if you end up with thin slivers at the edges (less than half a tile width), shift your center point by half a tile in the relevant direction. Mark your final layout lines with a permanent marker or chalk, and measure out from these lines in all directions to confirm spacing before mixing any thinset.
For a custom mosaic design (like a medallion or freehand pattern), draw your design at full scale on kraft paper. Transfer the key outline to the concrete with chalk or a waterproof marker using a grid method: draw a scaled grid over your paper design, then reproduce each grid square directly on the slab. This sounds tedious but takes about an hour for most medallion designs and keeps proportions accurate.
Cutting mosaic tile
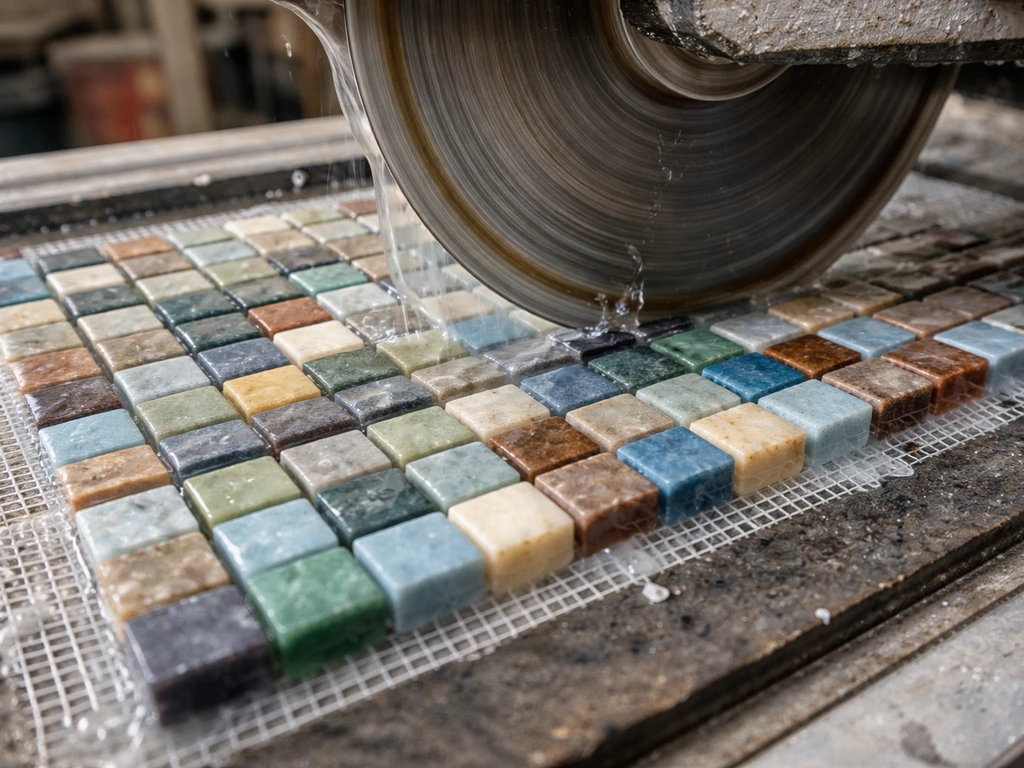
For mesh-mounted mosaic sheets, a wet saw with a fine-tooth diamond blade gives the cleanest cuts. Score-and-snap tile cutters generally don't work well on small mosaic tesserae. For small individual cuts (nibbling curves or corners), tile nippers are your best tool. Wear safety glasses, small tile fragments travel fast. For straight cuts on individual tesserae within a sheet, you can cut through the sheet with the wet saw just as you would a larger tile.
Setting tile in thinset
Mix polymer-modified thinset to a peanut-butter consistency, it should hold ridges from a notched trowel without slumping. Use a 3/16-inch V-notch or 1/4 x 3/16-inch notched trowel for mesh-mounted mosaic sheets (the small tile format needs less thinset depth than large tile). Work in sections of 8 to 10 square feet at a time so the thinset doesn't skin over before you set the tile. Comb the thinset in one direction, then back-butter the mosaic sheet lightly as well, this is called the "two-coat" method and ensures full coverage under small tiles, which is critical outdoors.
Press each sheet firmly into the thinset with a grout float or a rubber mallet over a beating block (a flat piece of plywood works). After setting a section, pull up one sheet and check the back, you want 95% or better thinset coverage on each tile face, with no voids under corners or edges. Voids trap water. If coverage is low, adjust your trowel angle or add more thinset.
Plan your movement joints as you set tile. Under ANSI A108.01, movement joints are required in exterior tile installations at a minimum of every 8 to 12 feet in each direction, at all changes in substrate material, and along the perimeter where the tile meets walls, curbs, or any fixed structure. Leave a 1/4-inch gap at these locations, do not fill them with grout. They get filled later with backer rod and polyurethane sealant.
Let the thinset cure for at least 24 hours (48 hours in cool or humid weather) before walking on the tile or grouting. Use knee pads and plywood boards to distribute weight if you need to access set areas before full cure.
Grouting, cleaning, and sealing for freeze-thaw resistance
Grouting is where a lot of DIY mosaic projects go sideways, usually from mixing grout too wet, grouting too large an area at once, or not cleaning up thoroughly before the grout hazes over. Here's how to do it right.
Grouting the joints
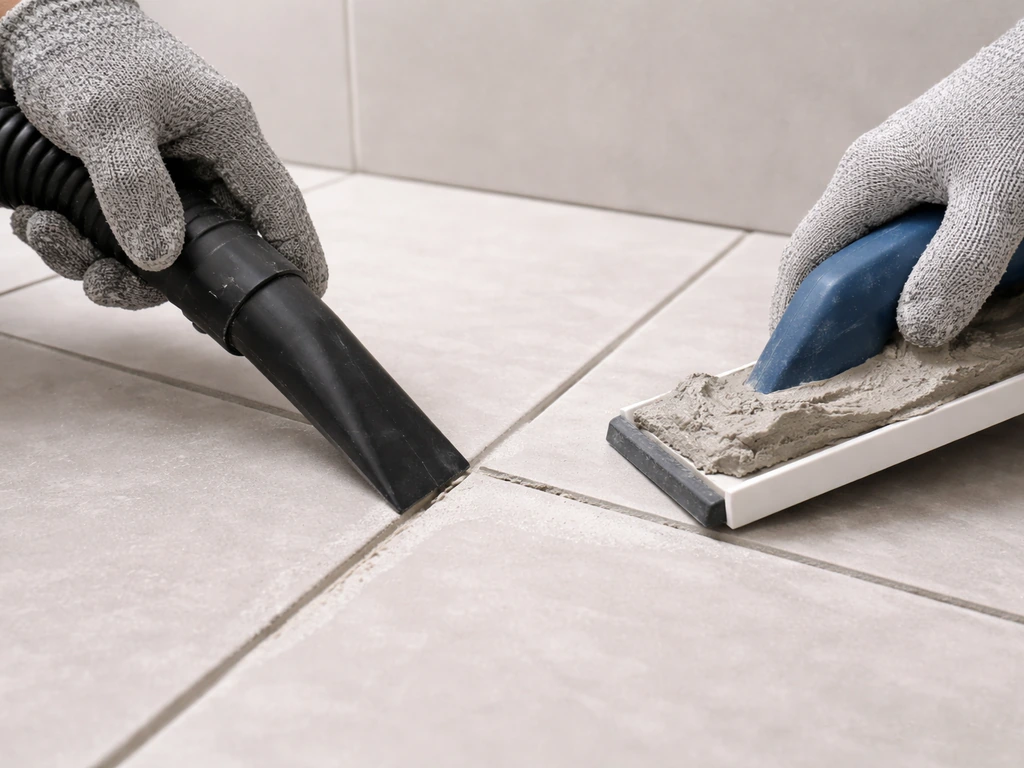
- Remove any spacers and vacuum the joints thoroughly. Use a utility knife or grout saw to clear any thinset that squeezed up above the tile plane.
- Pre-dampen the tile surface very lightly with a misting bottle — this slows grout drying slightly, giving you more working time outdoors.
- Mix sanded grout per manufacturer directions to a smooth, lump-free paste. For joints smaller than 1/8 inch, use unsanded grout to avoid cracking.
- Apply grout with a rubber grout float held at 45 degrees, forcing it into joints in a diagonal sweeping motion. Work in 4 to 6 square foot sections.
- After 15 to 20 minutes (check the manufacturer's open time for your specific product), wipe off excess grout with a damp sponge, rinsing frequently. Use circular motions first, then straight strokes to level the joints.
- Wait 30 to 60 more minutes and buff off the remaining grout haze with a clean dry cloth or cheesecloth.
- Allow grout to cure for 72 hours minimum before sealing or allowing foot traffic.
Fill your movement joints last. Pack foam backer rod into the gap (it should compress slightly so the rod sits about 1/4 inch below the tile surface), then apply a bead of exterior-grade polyurethane sealant and tool it smooth. This joint can compress and expand with temperature swings without transferring stress to the surrounding tile.
Sealing the finished surface
Once grout is fully cured (72 hours minimum, longer if weather was cool during installation), apply a penetrating vapor-permeable sealer. A silane/siloxane blend penetrates into the grout and tile body, reducing water absorption without forming a film that can peel. Apply it per the manufacturer instructions, usually two coats with the second applied while the first is still slightly tacky. Avoid film-forming topical sealers on exterior floors because they trap moisture beneath the surface and peel under UV exposure. Reapply sealer every one to two years, or when water no longer beads on the surface.
Troubleshooting common problems and quick safety tips
Most mosaic patio problems trace back to one of four root causes: inadequate base prep, wrong materials for the climate, missing movement joints, or poor drainage. Here's how to recognize and address the issues you're most likely to run into.
| Problem | Likely Cause | Fix |
|---|---|---|
| Tiles popping off after first winter | Unmodified thinset used, or coverage voids under tiles | Remove loose tiles, prep substrate, reset with polymer-modified thinset at 95%+ coverage |
| Cracked grout lines running across the field | Missing movement joints, or slab movement transferred to tile layer | Saw-cut cracked sections into movement joints; fill with backer rod and polyurethane sealant |
| White powder or staining on grout (efflorescence) | Water moving through the slab carrying mineral salts upward | Improve drainage; apply efflorescence cleaner; reseal once dry |
| Grout haze won't come off | Waited too long to clean, or cleaned with too-wet a sponge | Use a diluted phosphoric acid-based grout haze remover; rinse thoroughly and reseal |
| Tiles feel hollow when tapped after setting | Thinset bridged over voids rather than filling under tile | Remove hollow tiles, scrape clean, reset with back-buttering technique |
Safety and best practices to keep in mind
- Wear N95 or P100 respirator when mixing dry thinset or grout — silica dust is a serious inhalation hazard.
- Wet cutting tile outdoors is fine, but keep the water collection area clear and wear safety glasses for every cut.
- Portland cement in thinset and grout is caustic — wear waterproof gloves and long sleeves for any extended mixing or grouting work.
- Call 811 before any excavation, even shallow work. Underground utilities are closer to the surface than most people expect.
- Do not tile over frozen or frost-heaved ground. If temps drop below 50°F during installation or within 72 hours after, thinset and grout may not cure properly. Use cold-weather-rated products and tent the area with plastic sheeting if needed.
- Ensure your finished tile surface has a slip-resistance rating of at least COF 0.60 for outdoor wet areas (DCOF 0.42 is the current wet ANSI standard for floors).
- Never grout over movement joints — those gaps must stay flexible for the life of the installation.
If you're thinking about tackling a mosaic tabletop alongside your patio project, the techniques overlap significantly but the scale is much more forgiving, it's a great way to practice cutting and grouting before you commit to a full floor. You can use the same outdoor tile durability principles when making a diy tile patio table top, including proper thinset, grout, and sealing for weather exposure. And if this is your first outdoor tile project overall, building confidence on a simpler patio floor layout first is a smart move before going all-in on an intricate mosaic design. If you are still figuring out the overall build approach, this guide on how to make tile patio covers the big-picture steps to follow before you choose a specific mosaic layout. Once you've got the base prep and thinset workflow dialed in, the mosaic part is genuinely the most enjoyable part of the whole build.
FAQ
How can I tell if my patio has drainage issues before I tile?
Do a quick “wet check” after a normal rain by pouring a bucket of water over the patio center and corners. If you see water lingering at any spot after you stop, you need to adjust slope or drainage before tiling, because grout and thinset failures usually start where water stays wet the longest.
Can I use the same thinset and grout I’d use indoors for a mosaic patio?
For exterior mosaic floors, you generally want a frost-rated adhesive and grout system plus an exterior-grade sealant strategy, but the exact products matter by climate. If your area is freeze-thaw, avoid standard indoor grout sealers or adhesives labeled only for dry interior use, even if the tile itself is rated.
Is it safe to install a mosaic patio over an existing concrete slab?
Yes, but only if the substrate is very stable. If your existing slab is cracked but not stable, mosaics will telegraph movement faster than large-format tile. If you see hollow-sounding areas, heaving, or more than minor cracking, fix it, then consider an uncoupling membrane so micro-movement doesn’t crack grout.
Why is glass mosaic risky for exterior patio floors in cold climates?
Don’t assume all “glass mosaic” is acceptable outdoors. Many glass tesserae are thin and can be slippery when wet, and some products are not engineered for freeze-thaw. If you want glass, use a product explicitly rated for exterior floor applications and confirm coefficient-of-friction guidance for wet conditions.
What’s the correct way to handle movement joints in a mosaic patio?
Movement joints need real gaps, not grout. Keep the 1/4-inch joint open during tile setting, then fill with backer rod and polyurethane sealant after grouting. If you grout over joints, the grout is rigid and usually cracks first, pulling water into the assembly.
What should I do if I discover hollow-sounding spots under my existing concrete patio?
If you can find loose or hollow areas after tapping, grind them out to remove weak concrete and then patch with a cementitious or epoxy repair system that’s designed to bond to existing slab. After patching, verify flatness within your tolerance using a straightedge before thinset goes down.
How do I prevent grout haze and weak grout when installing a mosaic patio?
Avoid grouting more than what you can clean before the haze sets, especially with small mosaic tesserae. A common mistake is using too much water when mixing grout, which weakens it and makes haze removal harder. Mix to the manufacturer ratio, then clean with a damp sponge frequently, not once after a long delay.
When should I seal exterior mosaic grout, and how do I know it’s ready?
Use your sealer timing window and don’t rush it. Wait until grout is fully cured, then test absorbency on a small area if you are unsure, because some grout colors and admixtures change how quickly the surface will accept sealer. Reapply based on performance, for example when water stops beading.
What if my patio slab is uneven, can I fix it with thicker thinset?
Don’t try to compensate for poor flatness with extra thinset under mosaics. If the substrate is out of plane, mosaics can end up lippage-prone and can create low spots where water pools. Flatten first with a suitable leveling compound or grinding plan, then proceed with the thinset system and trowel size specified for your mosaic sheet.
My border tiles will end up as tiny slivers, how do I fix the layout?
If your pattern ends up as too-thin edge slivers, it’s almost always a layout-center problem, not a tile-cut problem. Shift your centerline by about half a tile width (in the direction that reduces slivers), then redo the dry layout and re-check that the border pieces look intentional.
What tools work best for trimming mosaic sheets, and how do I avoid broken tesserae?
For cutting mosaic sheets, a wet saw with a fine blade is usually the cleanest option, but you should still cut the mesh sheet in a way that prevents the tesserae from falling out. Dry-fit the cut pieces first, and use tile nippers for small curve corners so you can keep the visible faces uniform.
Next Article
How to Make a Tile Patio: DIY Step-by-Step Guide
Learn how to make a tile patio with step-by-step planning, prep, tile setting, waterproofing, grout, and sealing tips.