The cheapest DIY patio floor you can build that will actually last is a compacted gravel base topped with concrete pavers or a simple gravel surface, depending on how finished you want it to look. Pavers over a 4-inch compacted gravel base with 1 inch of screeded bedding sand run about $3 to $6 per square foot in materials for a 200 sq ft patio. A plain gravel surface costs even less. blank" rel="noopener noreferrer">Poured concrete is typically $4 to $8 per square foot just for materials, and pressure-treated lumber decking can hit $15 to $25 per square foot installed, so pavers or gravel almost always win on budget. The key is doing the base prep right. That is where most cheap patios fail, not in the surface material itself.
How to Make a Cheap Patio Floor: DIY Steps, Costs

Nolan Lennox
8 Jun 2026
Planning your budget patio floor (size, base, and drainage)
Before you buy a single paver or bag of gravel, work out your size, slope, and drainage plan. These three decisions determine everything else, including your material quantities, excavation depth, and whether water will sit against your house foundation or run away from it the way it should.
For size, plan your patio so you use mostly full-size pavers with minimal cutting. A 10x10 or 12x16 layout tends to work cleanly with standard 4x8 inch brick pavers or 12x12 inch concrete pavers. If you are new to this, work in manageable sections of around 100 to 150 square feet at a time. It keeps compaction and screeding accurate and makes the project feel doable rather than overwhelming.
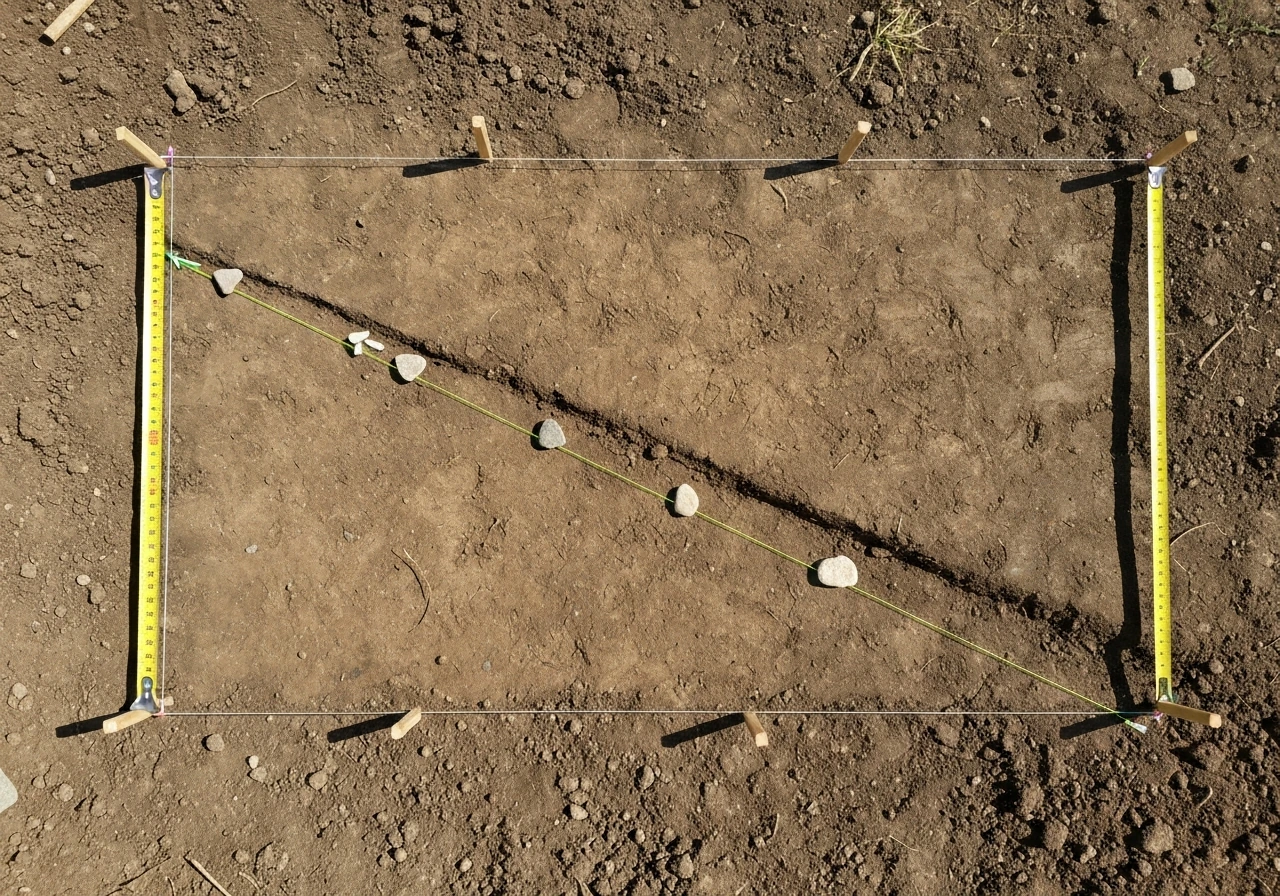
Drainage slope is non-negotiable. Your patio surface needs to slope away from your house at a minimum of 1/8 inch per foot, and 1/4 inch per foot (a 2% grade) is the sweet spot recommended by most paving industry guidance, including ICPI standards and IRC section R401.3. For a 10-foot-wide patio, that means the far edge sits about 2.5 inches lower than the edge against your house. You build this slope into your excavation and base, not as an afterthought at the end. Mark your slope with stakes and string lines before you dig.
Base thickness depends on use. For a pedestrian patio, plan for 4 inches of compacted gravel base. That is the standard ICPI recommendation for light foot traffic, and it is what you should excavate for regardless of whether you are doing pavers, a gravel surface, or even a simple stepping stone layout. If you have very soft or clay-heavy soil, go to 6 inches. You will also want to factor in 1 inch of bedding sand and the thickness of your surface material when calculating total excavation depth. A typical paver patio requires excavating at least 7 inches below your finished surface elevation.
Choosing affordable patio flooring materials
Here is an honest look at the budget options most DIYers choose and what you actually get with each one. The goal is matching the right material to your budget, your tolerance for maintenance, and how finished you want the space to look.
| Material | DIY Cost (per sq ft) | Durability | Appearance | Maintenance |
|---|---|---|---|---|
| Gravel / Crushed stone | $0.50–$2 | Good with edging | Casual/rustic | Occasional raking and top-up |
| Concrete pavers | $3–$6 (materials) | Excellent | Clean, versatile | Joint sand refresh every few years |
| Brick pavers | $4–$7 (materials) | Excellent | Classic | Same as concrete pavers |
| Poured concrete slab | $4–$8 (materials) | Very good | Clean, uniform | Seal every 1–3 years |
| Pressure-treated lumber | $15–$25 (installed) | Good | Warm/natural | Annual cleaning, periodic staining |
Gravel is the cheapest patio surface you can install, full stop. It drains on its own, requires almost no base skill, and looks intentional if you use a consistent aggregate like pea gravel or decomposed granite. The downside is it shifts, tracks into the house, and does not give you a flat surface for furniture. If you go gravel, you need solid edging to keep it contained.
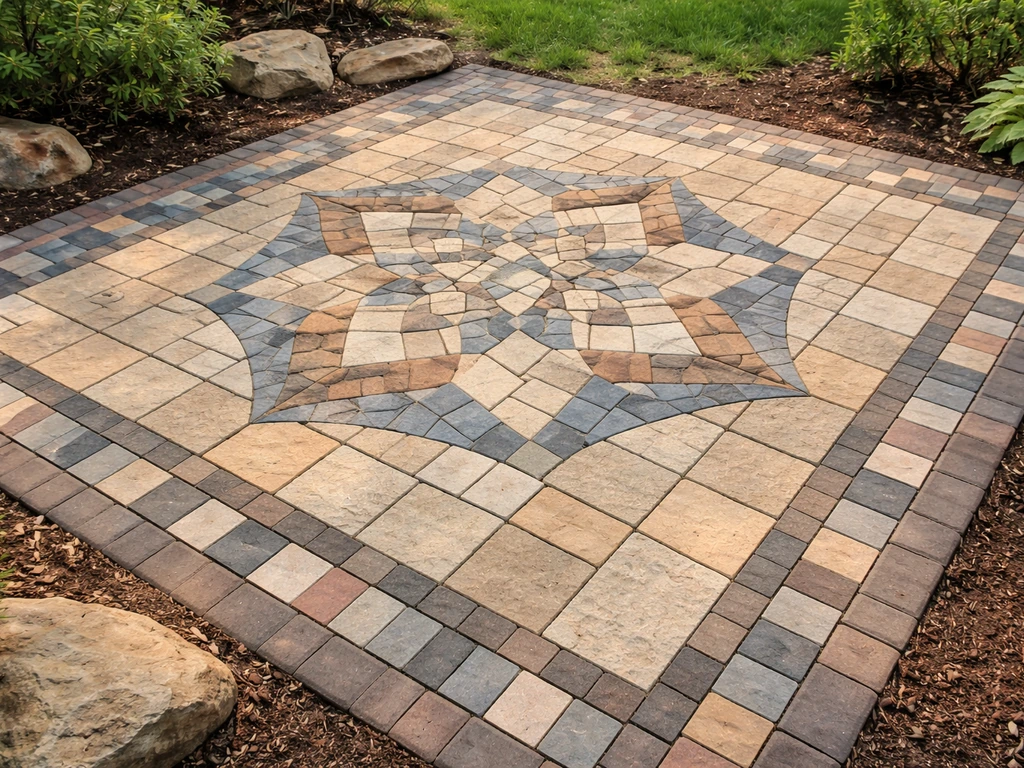
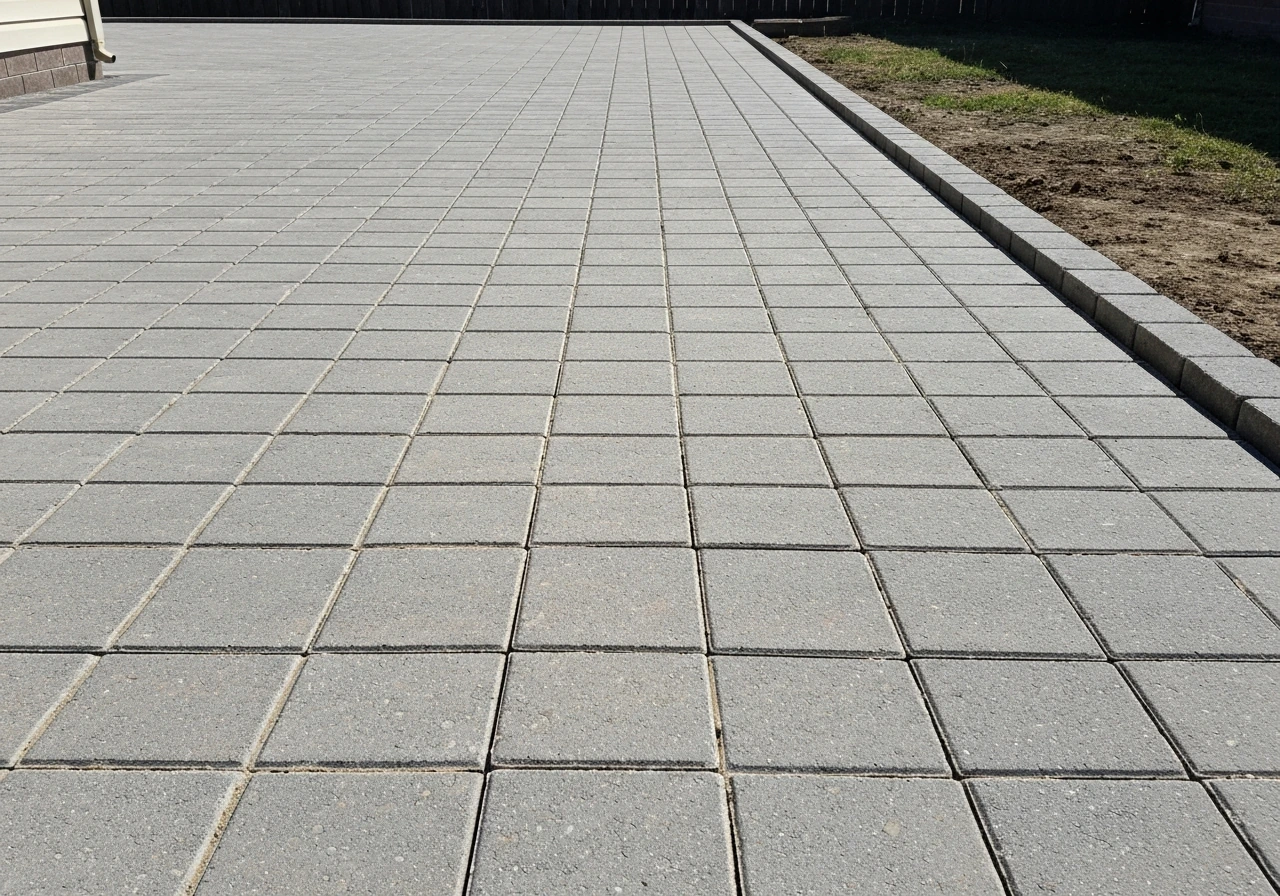
Concrete or brick pavers are the best balance of cost, durability, and DIY-friendliness for most homeowners. If you want to take the same DIY approach indoors or upgrade your outdoor seating, a diy mosaic patio table top is a great follow-on project. They are forgiving, meaning you can pull up and re-set individual pavers if something shifts or a pipe needs work later. The installation process is repetitive and learnable. For a true budget build, stick with standard 4x8 inch concrete brick pavers or basic 12x12 inch concrete stepping pavers, both of which you can find at big box stores for well under a dollar per piece in many regions.
Poured concrete is durable and looks great, but it requires either renting a mixer and doing serious physical work or ordering ready-mix, which adds cost and logistics. It also cracks over time, especially without proper expansion joints, and you need to wait a full 28 days after pouring before sealing it. If you go this route, check out resources on how to make a tile patio if you want to add a decorative surface layer later.
Tools and supplies checklist for a DIY patio build
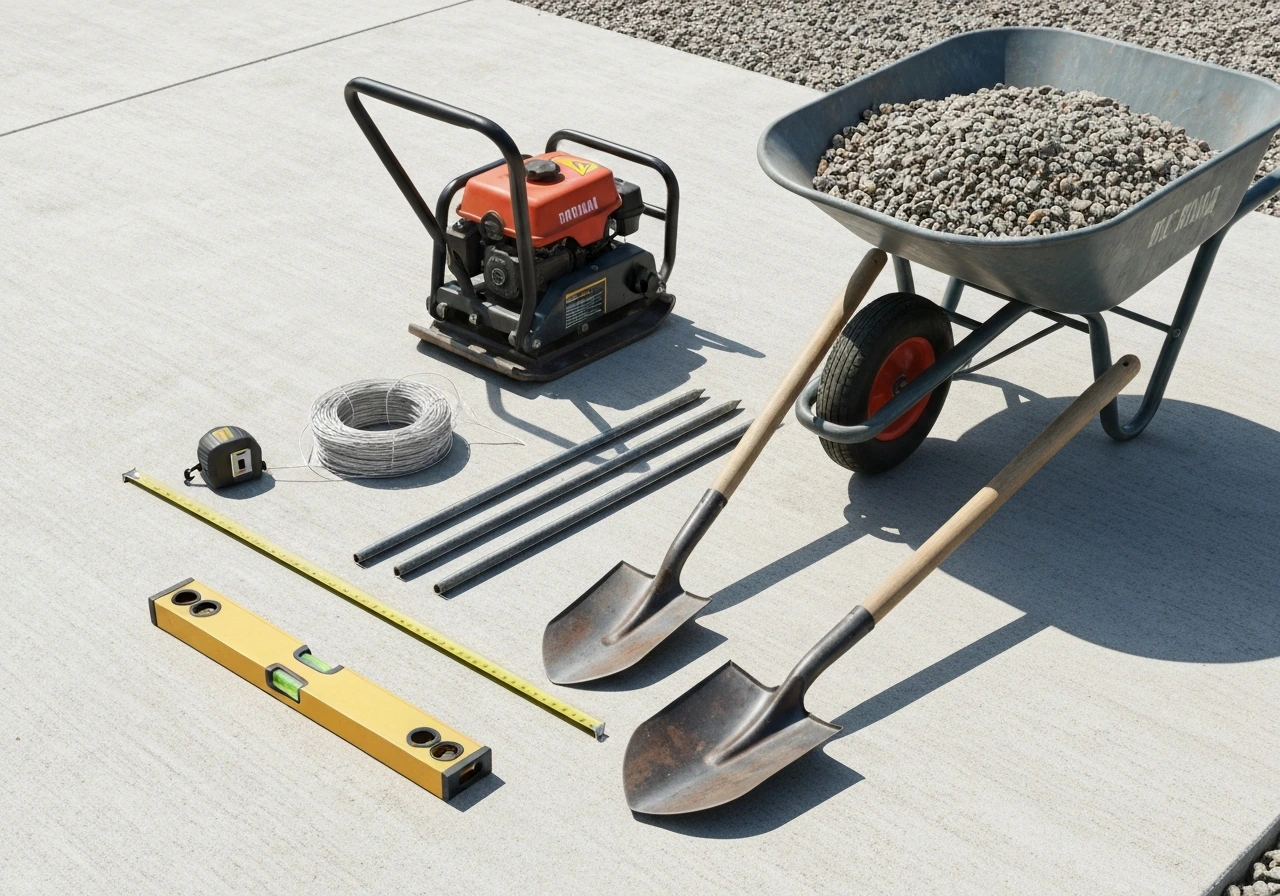
You do not need a truck full of gear. Most of what you need for a basic paver or gravel patio can be rented for a day or borrowed. Here is the full list for a standard 100 to 200 square foot paver patio:
- Tape measure, stakes, and mason's line (string) for layout and slope setting
- Flat spade shovel and square-edged spade for excavation
- Wheelbarrow for moving gravel, sand, and pavers
- Plate compactor (rent for the day, usually $50 to $80) for compacting your base
- Long screed board or 2x4 (at least 6 feet long) for leveling bedding sand
- Screed pipes or metal conduit (1-inch diameter) to set your sand depth
- Rubber mallet for setting pavers
- Level (4-foot or longer) and a line level or digital level for checking slope
- Landscape fabric or geotextile separator (optional but recommended on clay or soft soils)
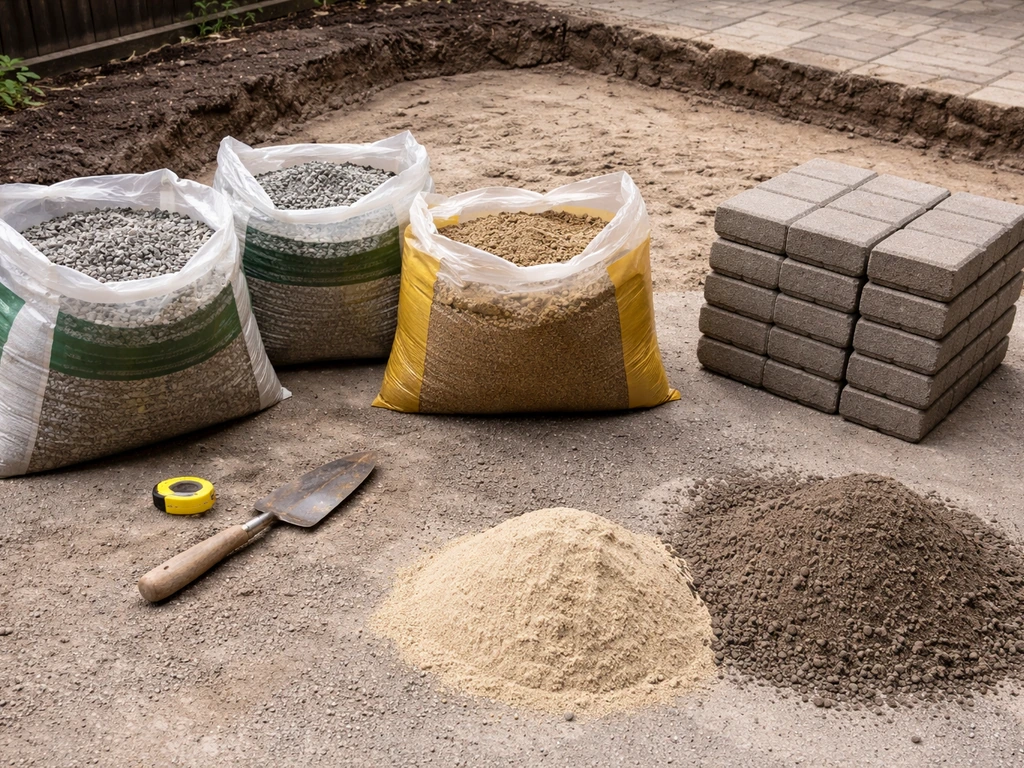
- Compactable gravel base material: Class II base rock or crushed limestone
- Coarse concrete sand for the 1-inch bedding layer
- Surface pavers, bricks, or gravel in your chosen material
- Plastic or aluminum edge restraints with spikes (at least one per foot along perimeter)
- Polymeric joint sand for paver joints (or regular coarse sand for wider joints)
- Push broom for sweeping joint sand
- Garden hose or plate compactor with pad for activating polymeric sand
- Safety gloves, eye protection, knee pads
The plate compactor is the one thing people try to skip and it is the one thing you absolutely cannot skip. Tamping by hand with a hand tamper is fine for small touch-up areas but it will not compact a 4-inch gravel base uniformly. Rent the plate compactor. It makes or breaks your base.
Step-by-step build process for a cheap patio floor
This sequence works for a concrete or brick paver patio, which is the approach I recommend for most DIYers on a budget. If you want a decorative option instead, you can use the same base prep steps and then plan the layout for how to make a mosaic patio. If you want step-by-step guidance specifically for an outdoor patio floor, follow this same sequence for planning, base prep, and installing your surface how to make an outdoor patio floor. Adjust steps 1 and 2 for gravel-only surfaces (you can skip edge restraint installation until after gravel is in) or for poured concrete (you will substitute a form and pour for steps 5 through 7).
- Mark your patio layout with stakes and string. Set your slope: drop the string 1/4 inch per foot as it moves away from your house. Double-check your layout is square using the 3-4-5 triangle method.
- Call 811 (the US dig-safe line) at least a few business days before you excavate. It is free and legally required in most states.
- Excavate to your target depth. For a standard paver patio: paver thickness (usually 2.375 inches for a standard brick paver) plus 1 inch of bedding sand plus 4 inches of compacted base equals about 7.5 inches total depth below your finished surface grade. Add a little extra if your soil is soft.
- Remove all organic material, roots, and loose soil from the excavated area. If your subgrade is soft or clay-heavy, compact it with the plate compactor before adding base material.
- Lay a geotextile fabric separator over the compacted subgrade if your soil is soft or sandy. This keeps your base gravel from migrating down into the soil over time.
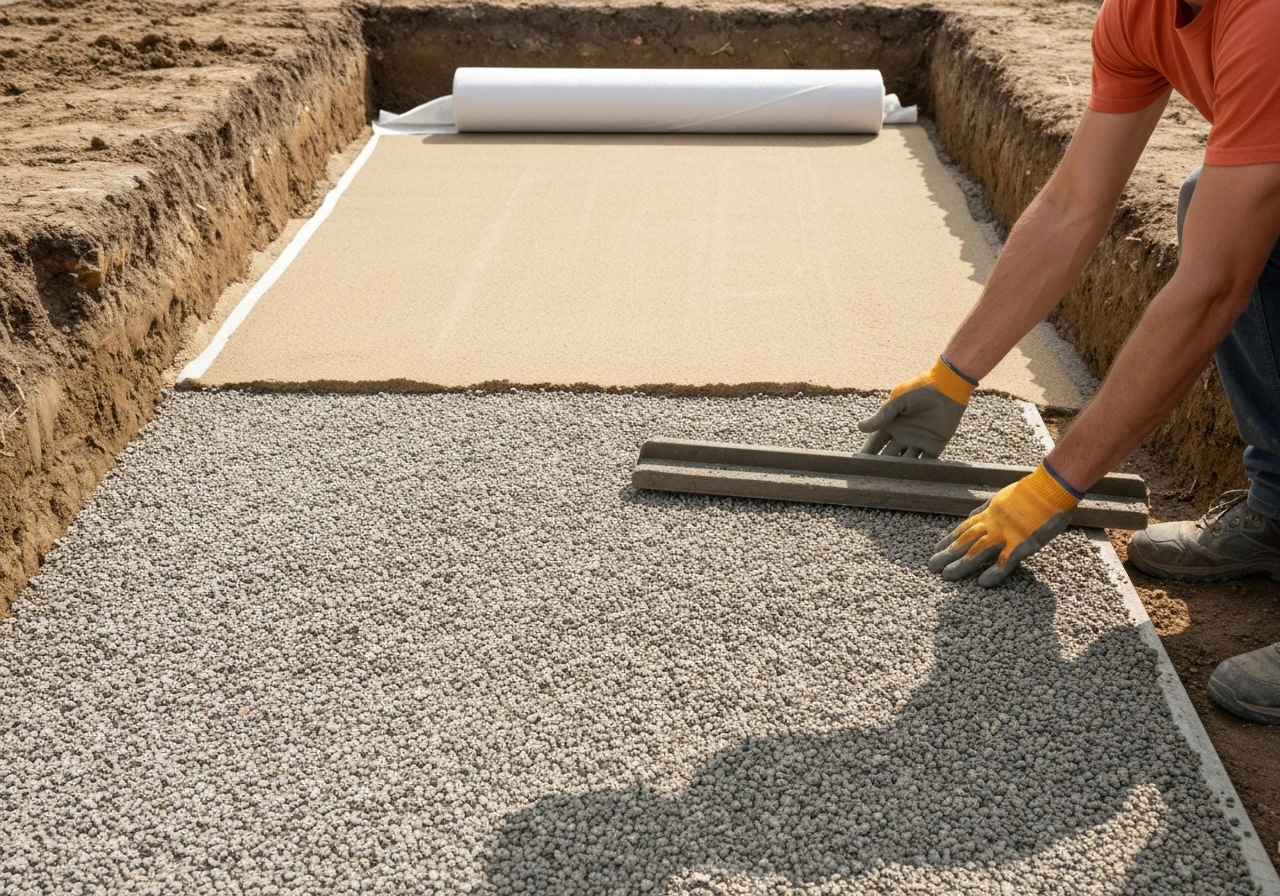
- Add your compactable gravel base in 2-inch lifts, compacting each lift with the plate compactor. Keep building until you have 4 inches of compacted base at your target slope.
- Install your edge restraints on top of the compacted base, around the full perimeter of the patio. Spike them in firmly. Do this before you screed your sand, not after.
- Place your 1-inch screed pipes (or metal conduit) on top of the compacted base, running parallel to each other across the patio. Set them at the depth that leaves exactly 1 inch of space above them for your sand.
- Pour and screed coarse sand over the base, dragging your screed board across the pipes to create a perfectly even 1-inch bedding layer. Remove the pipes and fill the channels with sand, then lightly smooth.
- Set your pavers in your chosen pattern, starting at a straight edge (a house wall or a string line). Use your rubber mallet to set each paver firmly. Check every 3 to 4 pavers with your level.
- Once all pavers are set, run the plate compactor over them (with a protective pad underneath to avoid scratching) to lock them into the bedding sand.
- Sweep joint sand across the entire surface, working it into all the gaps. If using polymeric sand, follow the manufacturer's directions for misting and activation. Sweep, compact lightly, sweep again until joints are full.
Preparing and leveling the ground and installing the base
Ground prep is where cheap patios either hold up for 20 years or start heaving and sinking within the first winter. If you want a simple, durable result, learn how to cover your patio floor step by step, starting with the base and drainage. It deserves its own focused look because the details really matter here.
After excavation, your subgrade (the native soil at the bottom of your dig) needs to be firm and consistent. Walk it. If any spots feel spongy, keep digging out soft material and replace it with compactable gravel. Never try to build over organic material like old mulch, roots, or topsoil. It will compress and your patio will sink in those spots.
Add your base gravel in two or three lifts rather than all at once. Each 2-inch lift gets a pass with the plate compactor before you add the next one. This is what creates true compaction throughout the full depth of the base, not just on top. After compacting, your base should not shift or rut when you walk on it.
Before screeding your bedding sand, confirm your slope one more time with a level and tape measure. Measure the drop at multiple points across the patio. For a 12-foot-wide patio sloping at 1/4 inch per foot, your far edge should be exactly 3 inches lower than the house-side edge. If something is off, fix it in the base layer now. You cannot fix a bad slope by adjusting the sand.
The 1-inch bedding sand layer should be coarse concrete sand, not fine play sand or mason's sand. Fine sand shifts too easily under foot traffic. Once you screed it level, do not walk on it. Every footprint is a problem. Work backward off the area you have screeded, setting pavers as you go so you never have to step on the prepared sand bed.
Finishing options, edge details, joints, sealing, and maintenance
Edge restraints
Edge restraints are an engineered component, not optional landscaping decoration. Without them, your pavers will slowly migrate outward over time and your surface will break apart at the edges. Plastic snap-together edge restraints spiked into the base with 10-inch steel spikes are the standard for DIY builds. Aluminum is more durable if you want it to last longer. Install them against the pavers on top of the base material before screeding your sand, which means you need to pre-plan and cut your edge restraint to length before you get to that stage.
Joint sand: regular vs. polymeric
Regular coarse sand is fine for joints under about 3/8 inch wide. For wider joints, or if you want better resistance to washout and weed growth, use polymeric joint sand. Polymeric sand contains additives that harden slightly when activated with water, locking the joint and reducing erosion from rain and irrigation. It works best in joints up to about 2 inches wide, but it will not work properly if your pavers are touching each other with no joint space at all. Follow the manufacturer's activation instructions carefully: you mist it, let it set, and do not walk on the patio until it cures. Get this step wrong and you will see white haze on your pavers.
Sealing
Concrete pavers and poured concrete slabs both benefit from sealing, but the timing is different. For a poured concrete slab, wait a minimum of 28 days after pouring before applying any sealer. Sealing too early traps moisture and can cause adhesion failure. For concrete pavers, let the polymeric joint sand fully cure first, typically 24 to 72 hours depending on conditions. A penetrating sealer protects against staining and freeze-thaw cycles without changing the look. A topical wet-look sealer enhances color but will need reapplication every one to three years.
Maintenance over time
- Check joint sand levels each spring and refill any low spots with matching sand
- Pull or treat weeds in joints before they root deeply and start lifting pavers
- Reseal every one to three years if you used a topical sealer, or every three to five years for penetrating sealers
- Re-check your drainage slope annually: if water is pooling near the house, the base may have settled and individual pavers can be lifted and re-set
- For gravel surfaces, rake once or twice a season and add a fresh inch of gravel every couple of years to replace what disperses
Cost breakdown and the mistakes that blow up a cheap patio budget
Realistic cost estimates for a 200 sq ft patio
| Item | Estimated Cost |
|---|---|
| Compactable gravel base (4 in depth, 200 sq ft) | $80–$150 |
| Coarse bedding sand (1 in depth, 200 sq ft) | $30–$60 |
| Concrete or brick pavers (200 sq ft) | $300–$800 depending on style |
| Edge restraints and spikes (perimeter) | $40–$80 |
| Polymeric joint sand (2–3 bags) | $40–$70 |
| Plate compactor rental (1 day) | $50–$80 |
| Geotextile fabric (optional) | $30–$60 |
| Total estimated materials + rental | $570–$1,300 |
Those numbers align with industry estimates of $600 to $1,200 for a 200 sq ft DIY paver patio in materials. Your region will affect pricing, and pavers vary significantly in cost depending on style. Stick with standard concrete brick pavers or basic 12x12 inch concrete pavers for the lowest materials cost.
Where costs actually blow up
The single most common budget killer is underestimating excavation. If you have never dug out 7 inches of soil and rock over 200 square feet by hand, it is a lot. Factor in disposal if you cannot use the excavated material elsewhere on your property. Some areas charge for soil disposal at the dump. That can add $100 to $300 you did not expect.
The second budget killer is buying the wrong materials. Fine play sand instead of coarse concrete sand for the bedding layer, the wrong gravel (river rock instead of compactable angular gravel), or pavers that are inconsistent in thickness all create problems that cost money to fix. Buy the right thing the first time.
The most common DIY mistakes to avoid
- Skipping base compaction or trying to compact by hand: this is the number one reason paver patios sink and shift
- Not setting the drainage slope before building: water pooling against your foundation is a serious long-term problem, not just an annoyance
- Building over soft, organic, or unconsolidated subgrade without excavating and replacing it first
- Using fine sand as bedding: it migrates and causes uneven settling
- Forgetting edge restraints or installing them after the pavers are set: they need to go in before your bedding sand is screeded
- Cutting too many pavers: plan your layout in advance to minimize cuts, which saves time and reduces waste
- Activating polymeric sand incorrectly and getting white haze on pavers: read the instructions, wet the pavers first, and do not apply in direct sun on a hot day
- Sealing concrete too early: wait the full 28 days or you will trap moisture and potentially damage the slab surface
If you want to explore related approaches, the full process of how to build a patio floor in other materials, or ideas like a mosaic or tiled surface, those each have their own prep and finishing requirements worth looking into. But for a truly budget-conscious build that a motivated beginner can complete in a weekend, a well-prepped paver patio over a compacted gravel base is the most practical answer going.
FAQ
Can I build a cheap patio floor directly over existing concrete or pavers to save money?
Usually no. If you place new pavers or gravel over old concrete, you can trap moisture and create uneven settling. The fix is either full removal to undisturbed soil or using a raised/base-and-drainage system designed for overlays, with careful leveling and drainage away from the house.
What’s the easiest way to keep gravel from creeping into the yard or tracking into the house?
Use continuous, properly anchored edging (not just a few landscape blocks) and keep the top layer consistent by using a single aggregate size. Also add a slight brush of fines off the surface before you spread more stone, so you reduce “mud-like” tracking when it gets wet.
How do I choose the right joint sand (polymeric vs regular) for my pavers?
For narrow joints up to about 3/8 inch, coarse concrete sand is typically fine. If you have wider joints, or you want less weed growth and better resistance to washout, polymeric joint sand helps, but only if you maintain a real joint width and follow activation timing and cure windows.
Do I need geotextile fabric under the gravel base?
It’s not a substitute for proper compaction and drainage, but geotextile can help in some soils by limiting migration of fines into the base (especially on clay or where the subgrade is silty). Use it only as a separator, not as a compressible layer, and avoid covering it in a way that blocks drainage.
How do I confirm my slope if I do not have a long level?
Use a string line with stakes and measure drop with a tape measure, checking at multiple points. Mark the target elevation at the house-side edge, then measure the required drop at the far edge based on patio width and your chosen grade.
What should I do if my patio area has trees or thick roots?
Remove organic material and cut back roots so you can reach solid, consistent subgrade. If roots are extensive, consider shifting the patio layout or using a specialist approach, because broken roots left in place can continue to push and create voids under your base.
How can I tell if my base is compacted enough before installing pavers?
After each gravel lift, compact until the surface no longer loosens when walked on and does not develop rutting. A practical test is to walk a few minutes across the base, then check for visible depressions or soft spots, and address any “give” immediately by adding and compacting more base material.
Is 4 inches of base gravel always enough for a patio?
For light foot traffic, 4 inches is a common target, but if you expect heavier loads (like frequent moving furniture, grill carts, or a plan for occasional vehicles), increase base depth, especially on soft or clay-heavy soils. When in doubt, add base depth now rather than trying to “thicken” later.
Can I install pavers over sand without screeding bedding sand?
Screeding is important for even seating. If you skip or do not level properly, you will get rocking pavers and sand voids that become movement points. The better approach is to screed coarse bedding sand to the final plane, then place pavers while you work so you do not step on the prepared sand bed.
How do I avoid haze or discoloration when using polymeric joint sand?
Only activate after pavers are fully set and joints are correctly sized, and mist carefully during activation. Do not flood, do not walk on the surface until cured, and keep pavers as clean as possible before activation to prevent slurry staining that looks like white haze.
When should I seal concrete pavers or a poured slab, and what’s the most common timing mistake?
For poured concrete, wait at least 28 days before sealing. For paver systems, polymeric joint sand needs full cure (often 24 to 72 hours depending on conditions) before sealing. The most common mistake is sealing too early, which can trap moisture and lead to poor performance or adhesion issues.
What maintenance should I plan for a budget gravel or paver patio?
Expect periodic joint replenishment for pavers if joints wash out or settle, and occasional edging checks to keep containment tight. For gravel patios, you may need top-ups and occasional re-leveling of the top layer, especially after heavy rain seasons.
How do I estimate materials without underbuying (especially gravel and excavation)?
Measure the patio area, then calculate excavation depth based on your chosen base thickness plus bedding sand plus surface thickness. Add a waste factor for cutting and uneven subgrade, and remember disposal costs can apply if you cannot reuse excavated material.
Next Article
How to Make a Mosaic Patio: Step-by-Step DIY Guide
Step-by-step DIY mosaic patio guide: planning, prep, drainage, tile setting, grouting, sealing, costs, and common mistak