You can build a DIY mosaic patio table top that survives years of freeze/thaw cycles, rain, and UV by starting with a rigid exterior-rated substrate, using a polymer-modified thinset or exterior adhesive, and finishing with sanded grout plus a penetrating sealer. The whole project runs about $40 to $120 in materials depending on your tile choice, and a weekend is enough time to get the mosaic set and grouted, with another 72 hours for curing before the table goes back into service.
DIY Mosaic Patio Table Top: Step-by-Step Outdoor Guide

Nolan Lennox
3 Jul 2026
Decide on Size, Style, and Durability Before You Buy Anything

The first decision is whether you're mosaicking an existing tabletop or building a new one from scratch. Both work, but they lead to different prep steps. If you've got an old metal or wood patio table with a sturdy frame, you may just need to resurface it. If you want to learn how to make a cheap patio floor, the same approach works well because the materials are flexible and the prep steps drive durability. If you're starting from scratch, you'll build a simple frame and substrate first.
For size, measure your table base and add a 1/2-inch to 1-inch overhang on each edge if you want a natural finished look. Most round cafe-style patio tables land between 24 and 36 inches in diameter. Rectangular tops are typically 30 x 48 inches or 36 x 60 inches. The size you pick directly affects how much tile you need, so nail this down before shopping.
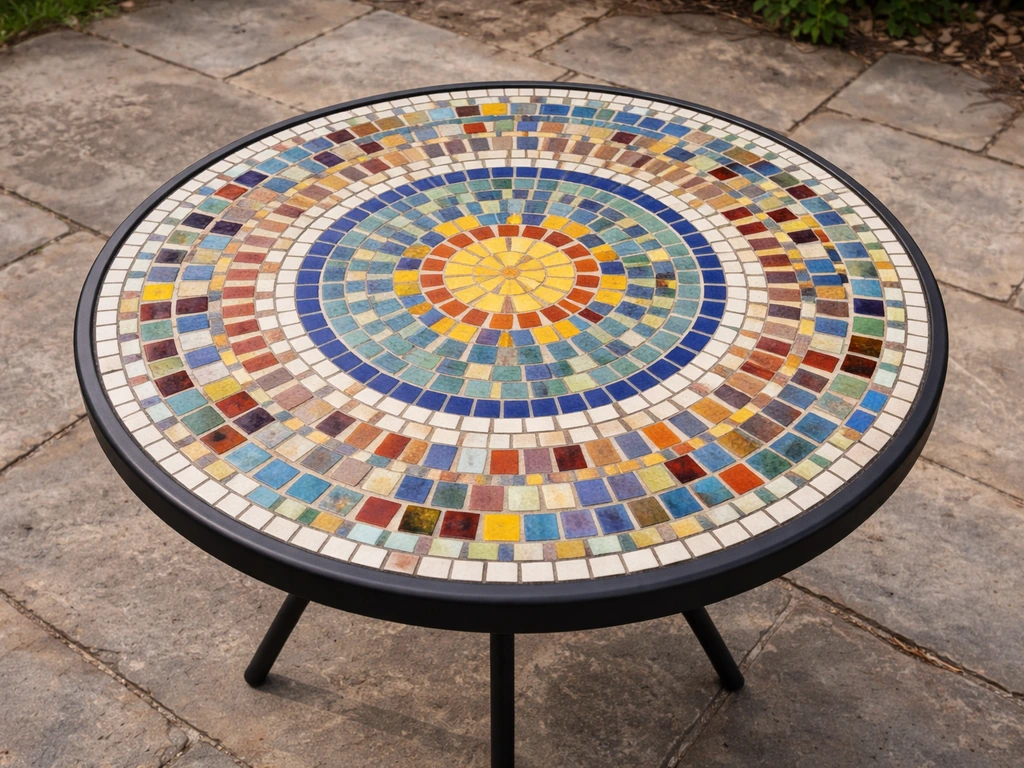
For style, think about whether you want a precise geometric pattern (easier to cut, cleaner result), a free-form broken-tile "pique assiette" style (forgiving and great for beginners), or a pictorial design like a sun, flower, or abstract pattern. Geometric and broken-tile styles are the most DIY-friendly. Pictorial designs require more planning and more precise cutting.
Durability is non-negotiable for anything staying outdoors year-round. An outdoor patio floor also needs the right substrate, waterproofing, and freeze-thaw materials so tiles or mosaics do not crack or loosen Durability is non-negotiable. If you're in a climate that freezes, you need frost-proof materials throughout: a waterproofed substrate, a freeze/thaw-rated tile, exterior-rated adhesive, and a sealant on the finished grout. Skipping any one of these is the most common reason DIY mosaic tops fail within a season or two.
Pick Your Substrate and Build the Frame
The substrate is the foundation everything else sticks to, and it has to be rigid. Tile assemblies crack when the surface underneath flexes. The industry guideline for ceramic tile is that substrate deflection should not exceed L/360 (span in inches divided by 360). For natural stone, some specs call for L/720 because stone is less forgiving. In plain terms: a 36-inch span should deflect no more than 0.1 inches under load. For a patio table top, the easiest way to hit that standard is to use 3/4-inch exterior-grade plywood or a cement backer board mounted on a solid frame.
Option 1: Cement Backer Board (Best for Durability)
Cement board (like Hardiebacker or Durock) is the most waterproof substrate you can use and it's what I'd recommend for outdoor builds. Cut it to your tabletop shape using a scoring knife or an angle grinder with a fiber cement blade. Mount it over a steel or pressure-treated wood frame using corrosion-resistant screws. A steel angle-iron frame welded or bolted to your table base is ideal, but a simple 2x4 pressure-treated frame works fine for a rectangular top. The finished top including substrate and tiles will sit roughly 1 to 1.5 inches thick total, so factor that into how the top attaches to your base.
Option 2: Exterior Plywood (Good Budget Option)
Three-quarter-inch exterior-grade plywood (ACX or better) works well if you waterproof it before tiling. An example TCNA plywood-to-tile method is F150, Tile Adhered to Wood Substrate, which supports compatible waterproof membrane layering when specified F150 (Tile Adhered to Wood Substrate). This is the route to take if you're mosaicking an existing wood tabletop that's already solid and flat. The catch is that raw plywood will absorb moisture and eventually swell or delaminate if you skip the waterproofing step. Never use interior plywood or OSB outdoors, they'll fail fast.
Mosaicking an Existing Tabletop
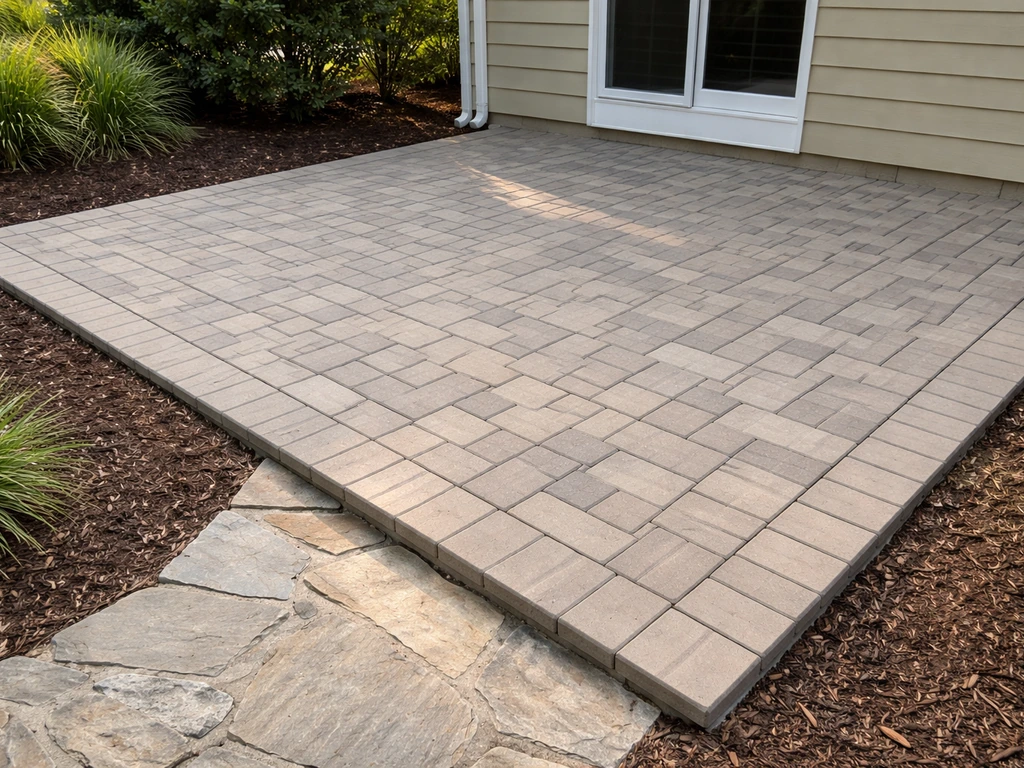
If you're working with an existing metal or wood table, check that the top is structurally solid and doesn't flex noticeably when you push down on the center. If you're planning a similar DIY patio floor project, focus on a rigid, well-prepped surface and durable exterior-rated materials so the mosaic holds up outdoors how to diy patio floor. Remove any flaking paint, rust, or loose material. Sand or grind down any high spots so the surface is flat.
Metal tops should be scuff-sanded and primed with a rust-inhibiting primer before you apply adhesive. You can mosaic directly onto a clean, flat metal surface using epoxy-based adhesive, or you can bond a sheet of cement board to the top first for a more tile-friendly base.
Choose Mosaic Materials, Grout, and Exterior-Rated Adhesives
Not all tile and adhesive is made for outdoor use, and this is where a lot of DIY projects go sideways. If you want to know how to make a tile patio table that holds up, start by choosing materials rated for freeze and moisture Not all tile and adhesive is made for outdoor use. Here's what actually works outdoors.
Tile and Mosaic Material Options
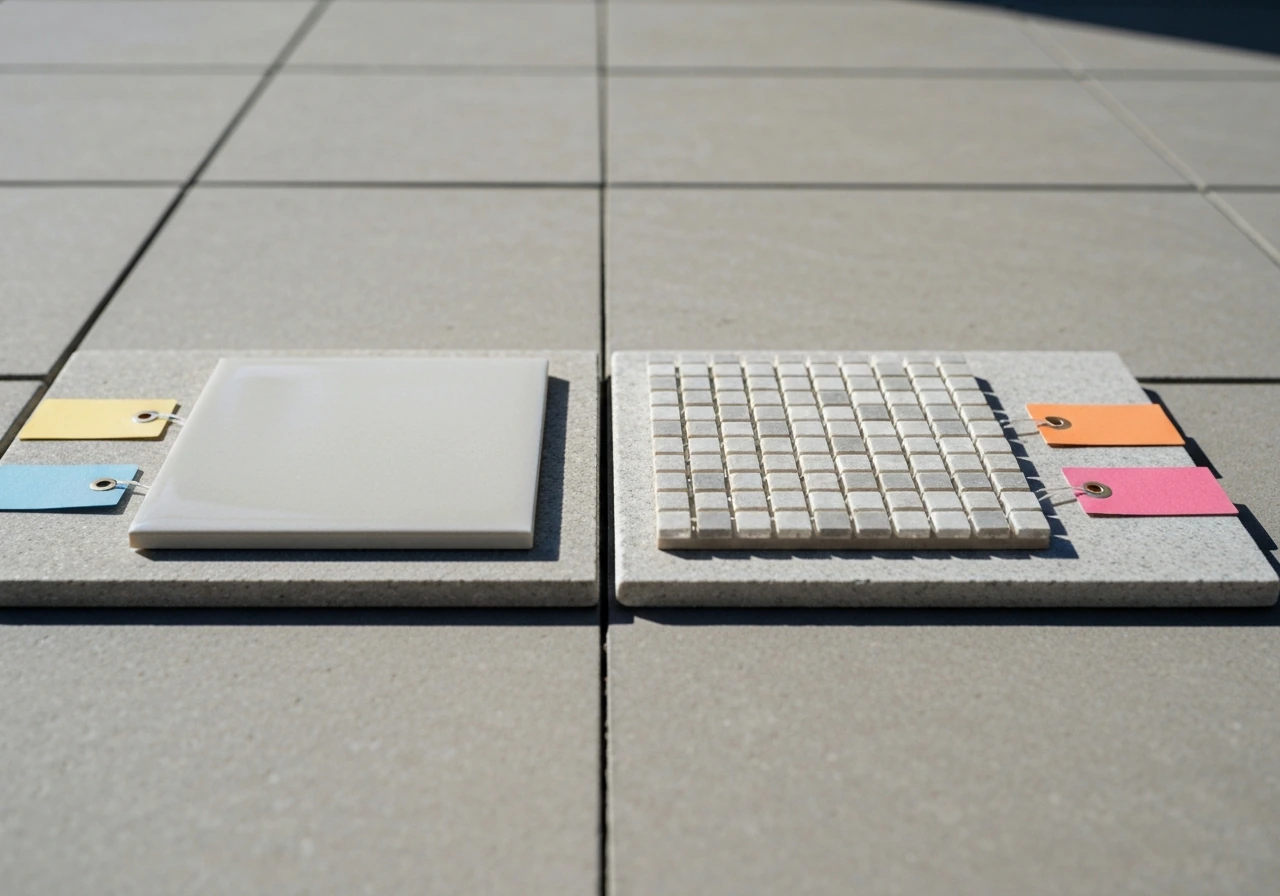
| Material | Freeze/Thaw Rating | Ease of Cutting | Cost | Best Use |
|---|---|---|---|---|
| Porcelain tile | Excellent (low absorption) | Moderate (needs wet saw or nippers) | Low-Mid | Geometric patterns, high-traffic surfaces |
| Vitreous glass mosaic tile | Good (dense, low absorption) | Easy with nippers or scorer | Mid | Color-heavy designs, accent areas |
| Ceramic tile | Fair (check absorption rating) | Easy | Low | Mild climates only — avoid in freeze/thaw zones unless rated |
| Natural stone (slate, marble) | Varies by type | Requires wet saw | Mid-High | Rustic or upscale designs — use L/720 substrate spec |
| Broken china (pique assiette) | Fair — depends on original glaze | Very easy | Free/Low | Decorative tables in protected spots, mild climates |
For freeze/thaw climates, porcelain is the safest choice because its water absorption rate is below 0.5%, meaning almost no water gets in to freeze and expand. Vitreous glass is a close second. Avoid standard ceramic tile if your winters drop below freezing, the higher absorption rate means tiles can crack or pop off after a single hard freeze.
Adhesive: What to Use Outdoors
For cement board substrates, use a polymer-modified thinset rated for exterior and freeze/thaw use. Brands like Mapei Kerabond+Keralastic, Laticrete 254 Platinum, or similar modified thinsets are widely available at tile and home improvement stores. For plywood substrates, look for an uncoupling membrane system or use an epoxy-based mosaic adhesive, both of which handle the slight movement wood introduces. Avoid basic white PVA-style mosaic glue (like Weldbond) outdoors, it's fine for indoor or craft projects but not durable enough for a table exposed to rain and temperature swings.
Grout Selection
Use a sanded grout for joints wider than 1/8 inch, which covers most mosaic work. For outdoor use, choose a grout with a built-in polymer additive or mix your grout with a latex/polymer admixture instead of plain water. This makes the cured grout more flexible and water-resistant. Epoxy grout is the most durable option and resists staining and moisture extremely well, but it's harder to work with and sets fast, so it's better suited to experienced DIYers. Unsanded grout is only for very tight joints under 1/8 inch.
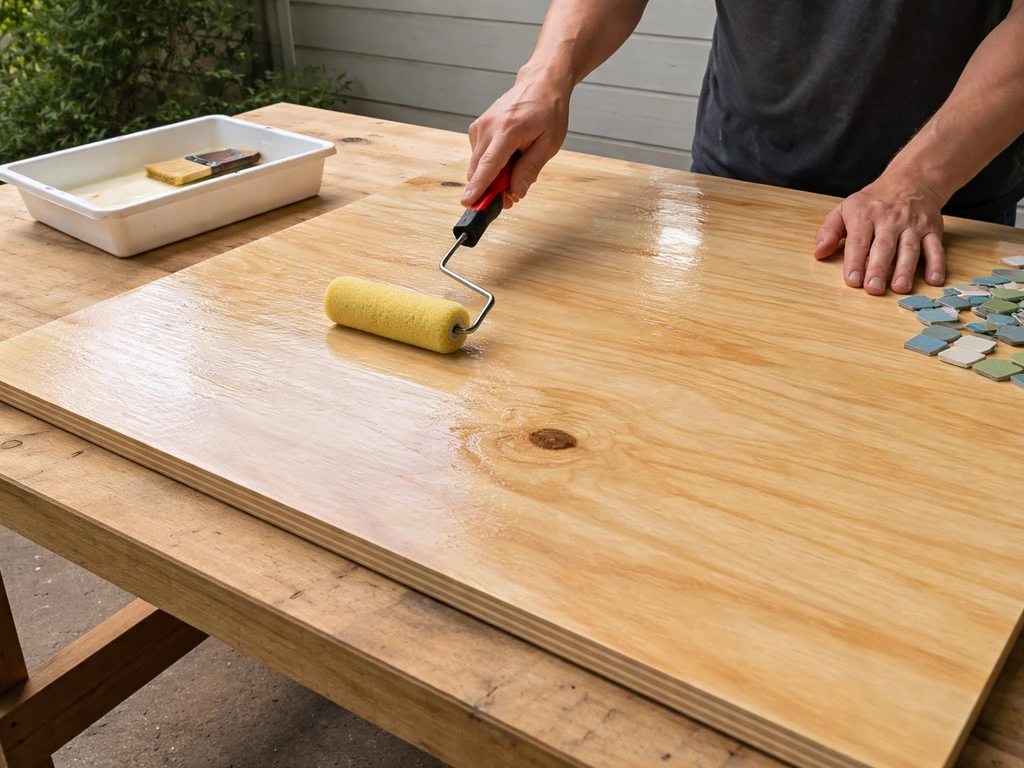
Surface Prep and Waterproofing for Outdoor Longevity
This step is what separates a mosaic top that lasts ten years from one that starts popping tiles after the first winter. If you want the step-by-step process from layout to sealing, see this guide on how to make a mosaic patio. Do not skip it, even if it feels like extra work before the fun part.
- Clean the substrate thoroughly. Remove dust, grease, paint, and any loose material. The adhesive needs to bond to a clean, porous surface.
- If using plywood, apply two coats of waterproofing membrane (RedGard, Hydro Ban, or a similar brush-on product) and let each coat dry fully. Pay extra attention to the edges.
- If using cement board, the edges are the most vulnerable spot. Tape seams with alkali-resistant mesh tape and apply a thin coat of thinset or waterproofing membrane over the tape.
- For any substrate, slope slightly matters. If your table top will sit exposed to rain, aim for 1/8 inch of pitch per foot toward one edge so water doesn't pool. A dead-flat surface sitting in standing water is much more likely to have freeze/thaw damage over time.
- Let waterproofing dry completely (usually 24 hours, check product specs) before applying adhesive.
If you're working with a metal table base, coat the metal frame itself with a rust-inhibiting primer or paint before assembly. Moisture that gets under the mosaic top and into uncoated metal will rust, expand, and eventually push tiles up from below.
Plan the Layout and Cut Mosaic Pieces Cleanly
Spend real time on layout before you mix any adhesive. A dry run saves you from cutting errors and helps you visualize the finished pattern.
Layout Planning
- Find and mark the center of your substrate. For a round top, that's the geometric center. For a rectangle, snap chalk lines from midpoint to midpoint on each pair of opposite edges.
- Start your pattern from the center and work outward. This ensures the pattern is symmetrical and that any cut pieces end up at the edges rather than dead center.
- Leave consistent grout joints. For mosaic work, 1/16 to 1/8 inch is typical. Consistent spacing makes the finished grout lines look intentional and professional.
- Dry-fit the entire design before you touch adhesive. Lay out all your pieces on the substrate and step back to evaluate spacing, color distribution, and transitions.
- Mark the substrate or take a photo so you can replicate the layout when you're setting in adhesive.
Cutting Mosaic Pieces
For glass and soft ceramic, tile nippers are the easiest tool. Nip small bites rather than trying to snap through the tile in one go. For more precise cuts on porcelain or stone, a small wet saw (a 4-inch diamond blade wet saw works great for mosaic-scale cuts) gives you clean straight edges. Wear safety glasses whenever you're nipping or sawing tile, the shards travel.
For broken-tile pique assiette style, wrap tiles in a cloth or place them in a bag and tap with a hammer. Sort the resulting pieces by size and shape before you start laying out. The most useful pieces have at least one straight edge you can use along borders.
Set the Tiles, Grout Properly, and Seal the Finished Top
Setting the Mosaic
- Mix your thinset or adhesive per the manufacturer's directions. For thinset, it should have the consistency of peanut butter — not too wet, not too stiff.
- Work in small sections (about 1 square foot at a time) so the adhesive doesn't skin over before you set your pieces. Hot or dry conditions speed up skinning significantly.
- Back-butter individual mosaic pieces for better adhesion, especially for glass tile. Press each piece firmly and give a slight twist to collapse any air pockets.
- Check your work periodically by lifting a piece and confirming the adhesive covers at least 80% of the back of the tile. If you're seeing bare spots, you need more adhesive or better contact pressure.
- Keep the surface level as you work. Use a straightedge or level to check for high spots before the adhesive sets.
- Let the adhesive cure fully before grouting — typically 24 hours minimum, longer if conditions are cool or humid.
Grouting
- Remove any spacers and check that no tile edges are proud (higher than their neighbors). Tap down any high tiles gently with a rubber mallet before grouting.
- Mix grout per instructions. It should be thick enough to hold its shape but spreadable.
- Apply grout with a rubber grout float, working it diagonally across the joints so you're pressing grout into the gaps rather than dragging it out.
- Let the grout firm up for 15 to 30 minutes (check package directions — this varies), then clean off the haze with a damp sponge. Wring the sponge almost dry and use light, circular motions.
- Rinse the sponge frequently in clean water. Repeat cleaning passes until the tile faces are clear.
- Let the grout cure for 24 to 72 hours before applying sealer or exposing the top to water.
Sealing
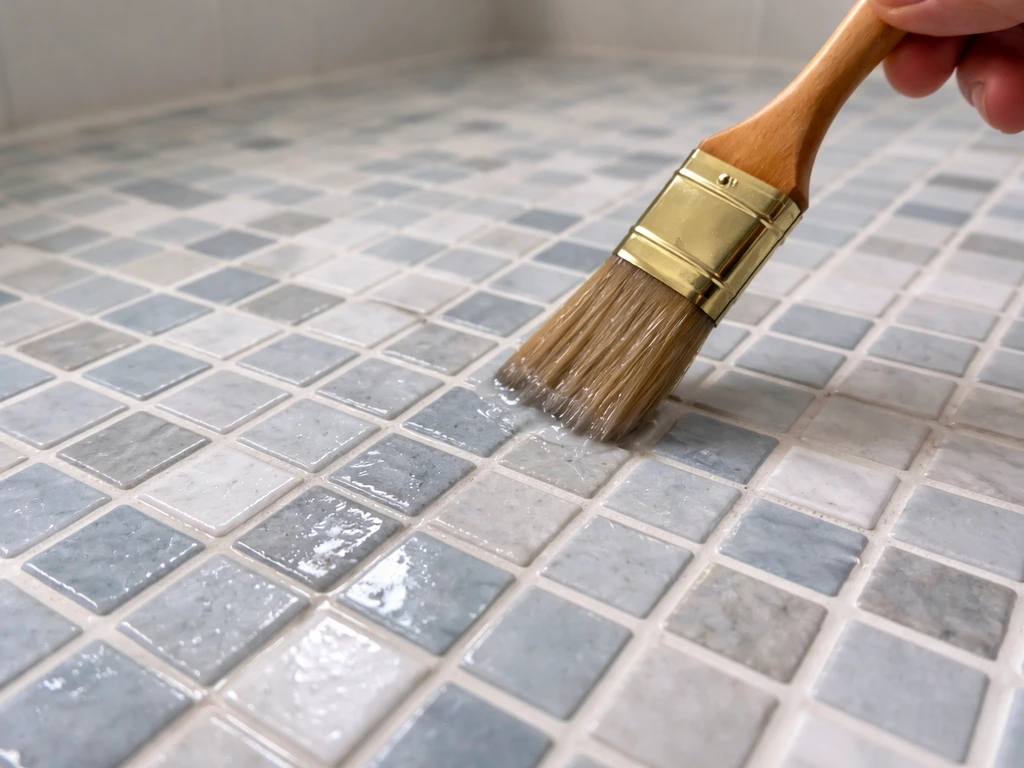
Once the grout has cured, apply a penetrating grout and tile sealer. This is the step most beginners skip and then regret. A good penetrating sealer soaks into the grout and makes it nearly impervious to water and staining. Apply it with a small brush or applicator, wipe off the excess from the tile faces before it dries, and apply a second coat after 30 minutes. For natural stone tile, use a sealer rated for stone as well as grout. Reapply sealer annually or whenever water stops beading on the surface.
Curing, Mounting, and Keeping It Looking Good for Years
Curing Times to Follow
- Thinset/adhesive: 24 hours minimum before grouting; 72 hours before putting weight on the top
- Grout: 24 to 72 hours before sealing (longer in cool or humid conditions)
- Sealer: 24 to 48 hours before exposing the top to water or use
- Full cure before placing heavy objects or exposing to hard weather: 7 days
Don't rush these windows. I know it's tempting to get the table outside the moment it looks finished, but the bond strength of thinset and grout builds over days, not hours. A table top that gets rained on or sat on too early is more likely to have adhesion or cracking issues later.
Mounting the Top to Your Base
How you attach the top depends on your base design. For a metal pedestal base, a common approach is to drill a few small holes through the substrate (before tiling) and use bolts with large washers to secure the top from below. If you can't drill through, heavy-duty construction adhesive between the base flange and the underside of the substrate works, but it's permanent. For a wood frame table, screw the substrate to the frame from below before you tile. The tile itself covers all the fasteners on top.
If the table will be stored outdoors year-round in a harsh climate, consider making the top removable so you can bring it inside during deep winter. A mosaic top handled thoughtfully will last much longer than one that sits frozen through five Minnesota winters with no protection.
Ongoing Maintenance Schedule
- Every spring: Inspect grout lines for cracks or crumbling. Regrout any problem areas before moisture works its way in.
- Once a year: Reapply penetrating sealer, especially before freeze/thaw season begins.
- As needed: Clean the surface with mild dish soap and water. Avoid harsh acids or abrasive scrubbers that can degrade grout.
- After any impact: Check for cracked or chipped tiles immediately and reset them with matching adhesive before water gets under the surrounding tiles.
Common Failures and How to Fix Them
| Problem | Likely Cause | Fix |
|---|---|---|
| Tiles popping off | Wrong adhesive, inadequate back-butter, or wet substrate during bonding | Chisel off loose tiles, clean the surface, re-bed with exterior polymer-modified thinset |
| Cracked grout lines | Substrate flex, insufficient grout depth, or skipping polymer additive | Remove cracked grout with a grout saw, regrout with polymer-modified sanded grout |
| Moisture seeping under tiles | No waterproofing layer or cracked grout left unaddressed | Reseal all grout lines; if damage is extensive, remove and rebuild the affected section |
| Uneven tile surface | Setting pieces without checking level, or adhesive bed inconsistency | Prevention is easier than repair — use a straightedge during setting; sand down high spots if caught early |
| Grout discoloration or staining | Unsealed or underpowered sealer | Apply a quality penetrating sealer; for stains, use a pH-neutral tile cleaner first |
One thing worth knowing: if you have a large section of tile failure (more than about 20% of the surface), it's usually faster and better-looking to strip the whole top and start fresh rather than patch repeatedly. A full redo with proper substrate waterproofing will outlast a patched-up version every time.
If you enjoy working with tile outdoors and want to take things further, the same skills you've built here translate directly to larger projects. Laying a full mosaic patio floor or building a tiled outdoor table from the ground up uses the same logic: rigid substrate, waterproofing, exterior-rated adhesive and grout, and a solid sealing routine. Start with this table top, get comfortable with the process, and you'll find the bigger projects much less intimidating.
FAQ
Can I mosaic directly onto an existing patio table without rebuilding the whole top?
Yes, as long as the tabletop is rock-solid and you add a rigid, waterproof layer first. For existing wood, avoid bonding directly to paint or bare varnish, instead roughen with sandpaper or a grinder and test for flex. The safer approach is to fasten a cement board or an exterior-rated uncoupling membrane to the frame, then mosaic on top of that rigid base.
Do I need waterproofing if I use cement backer board on the tabletop?
Don’t rely on thinset alone as waterproofing. Cement board still needs a waterproofing plan, especially along edges and fastener penetrations. Use your chosen waterproofing method (for example, a full surface membrane system or a compatible waterproofing layer) before tiling, and keep sealant on the underside edges to reduce moisture travel into the substrate.
What grout type should I use for small mosaic pieces outdoors?
The grout joint width changes what you should buy. For mosaic work, if joints are wider than about 1/8 inch, use sanded grout or it will be weaker and more prone to cracking. If your design uses tiny spacing below 1/8 inch, unsanded grout can work, but outdoor flexibility still matters, so choose a polymer-modified outdoor grout.
How do I verify my tile, thinset, and grout are truly freeze/thaw rated?
For freeze/thaw climates, start with materials that explicitly say exterior and freeze-thaw compatible. Porcelain with low water absorption is the safest tile choice, and the adhesive and grout must also be rated for wet service. If a product only lists indoor use, treat it as a no-go, even if it works fine on a patio floor.
What should I do if tiles start popping off or grout cracks after the first winter?
If you see hollow spots, cracked grout, or tiles lifting after a season, it usually means either the surface flexed or coverage was poor. Remove the affected pieces down to the substrate, check the substrate stiffness, and re-set with an outdoor-rated adhesive ensuring full bedding (no voids). For widespread failure across a large area, replacing the entire top is often more reliable than repeated spot repairs.
Is it okay to add a heavy waterproof coating on the mosaic table top?
Yes, but only if the top stays rigid and the design includes clean drainage. Avoid sealing in a way that traps water underneath the mosaic, because freeze cycles can create pressure. If you use a penetrating sealer, it should reduce water absorption in grout, not form a thick film that blocks moisture movement under the tile assembly.
How often should I reseal, and do I need different sealer for stone versus porcelain?
Choose sealer based on the tile type. Many sealers are grout-focused but can be incompatible with some natural stone finishes or can darken certain stones. Also, do a small test patch after grout cure, then reapply on schedule (often yearly) when water no longer beads on the surface.
How long should I wait before moving or reattaching the mosaic tabletop?
For a durable table, avoid moving the top onto the base until the assembly has cured for the full recommended time, and keep it out of rain during cure. If you must handle it early, support it evenly to prevent flex. Rushing the cure is a common cause of weak bond and later cracking, especially on edges.
Can I make the mosaic patio table top removable for winter?
Yes, and it’s a practical strategy if your climate is harsh. If the base allows it, build a removable top using bolts and washers through the rigid substrate, then store the mosaic inside during deep freezes. A removable setup also makes future repairs easier because you can replace only the top rather than the whole table frame.
What cutting tools are best for finishing mosaic borders on a patio table top?
Not always. Cut tiles on a wet saw works best for straight, porcelain-friendly edges, but for curved borders and small adjustments, a grinder with a tile blade or manual tile nippers for small bites can be more controllable. If your pattern has many tiny pieces, prioritize a clean blade that matches your tile hardness so edges don’t chip.
How should I lay out a mosaic on a table to avoid last-row cutting problems?
For a good long-term bond, plan for at least a few test layouts and a full dry fit of the border. Mark the centerlines on the substrate, then place a few key reference pieces first to lock orientation. This reduces rework when you later discover that the last row needs different cuts, which is common on round or slightly irregular table shapes.
Next Article
How to Cover a Patio Floor: DIY Step-by-Step Guide
Step-by-step DIY plan to cover a patio floor with pavers, tiles, deck tiles, or resurfacing, ensuring leveling and drain