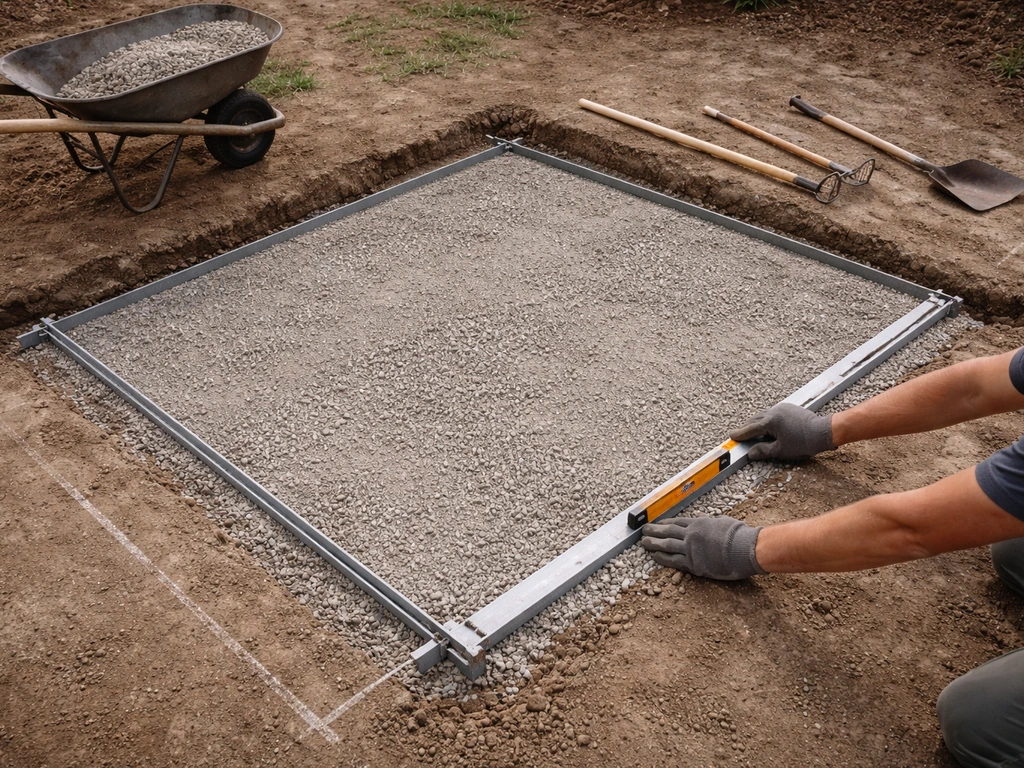
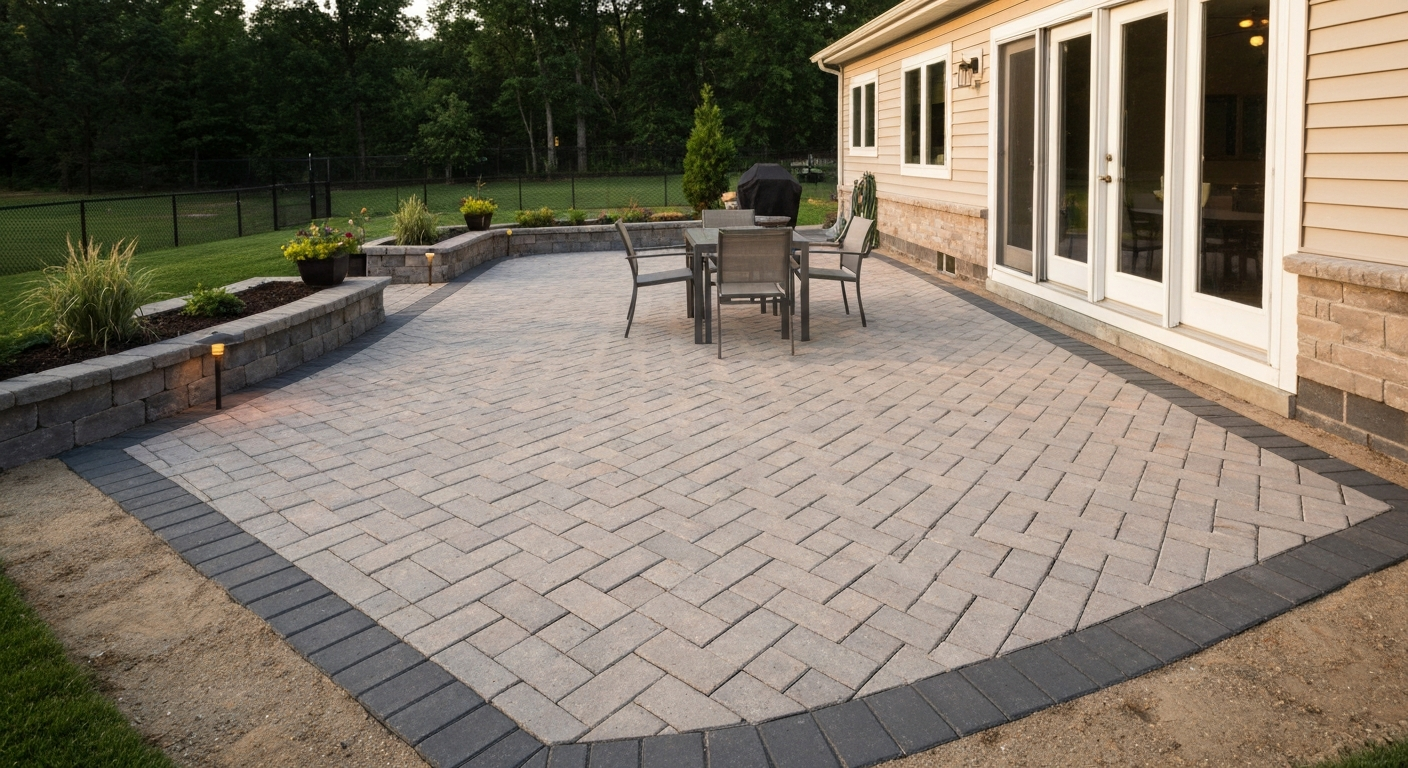
Making an outdoor patio floor comes down to four steps: pick your material, prepare the ground properly, set or pour your surface, and finish the edges. For a detailed step-by-step guide on how to build a patio floor, see how to build a patio floor. Do those four things well and you end up with a patio that lasts decades. Rush any of them, especially the ground prep, and you'll be re-doing it in three years. I've built patios from a simple gravel pad to a full stamped-concrete slab, and the biggest lesson I've learned is that the work happening underground matters more than what you see on top.
How to Make an Outdoor Patio Floor: DIY Steps, Costs & Materials

Nolan Lennox
22 Jul 2026
Quick project summary
This guide covers every mainstream DIY patio floor type: gravel, sand-set pavers and bricks, poured concrete (plain and stamped), concrete tiles, outdoor ceramic or stone tile, mosaic surfaces, wood decking, and composite decking. It also covers low-cost temporary options for renters or anyone on a tight timeline. Whether you're a first-timer building a 100 sq ft backyard pad or an experienced DIYer tackling a 400 sq ft entertaining space, the process is the same, scale changes, the principles don't.
| Skill Level | Typical Project | Realistic Timeframe | Who It's For |
|---|---|---|---|
| Beginner | Gravel pad, stepping stones, temporary pavers | 1–2 weekends | First project, rental home, tight budget |
| Intermediate | Sand-set brick or concrete pavers | 2–3 weekends | Comfortable with digging, basic leveling |
| Intermediate–Advanced | Outdoor tile or mosaic surface | 2–4 weekends | Patient with thin-set and grouting work |
| Advanced | Poured concrete slab (DIY pour) | 1 week prep + 1 pour day | Confident with formwork and concrete finishing |
| Advanced | Wood or composite deck floor | 2–4 weekends | Comfortable with framing, fasteners, and joist layout |
Planning checklist before you touch a shovel
Skipping this checklist is exactly how projects stall mid-dig. Run through every item before you order materials.
Site selection and intended use
- Decide how the patio will be used: dining, lounging, cooking, hot tub, heavy planters. Intended load drives slab thickness and material choice.
- Note sun and shade patterns across the day — certain materials (dark concrete, metal edging) absorb heat and become uncomfortable in full afternoon sun.
- Identify any tree roots within 10 feet. Roots under a slab will eventually crack it.
- Check the slope of the existing ground. A steep grade usually means terracing, retaining walls, or a raised deck — not a simple poured slab.
Utilities, drainage, HOA, and permits
- Call 811 before any digging. This is the U.S. national 'Call Before You Dig' number. Contact them a few business days before breaking ground — locators typically respond within 48–72 business hours and you must wait for utility marks before excavating. You can also submit locate requests online through your state's 811 center (TX811, Colorado811, etc.).
- Check your local frost line. Footings and base depths for any rigid surface need to account for local frost penetration depth, which is set by your local building department referencing IRC Table R403.1.4 or local amendments. Don't rely on online maps alone — call your permit office.
- Drainage is non-negotiable. Outdoor concrete flatwork requires a minimum slope of 1–2% (about 1/4 inch per foot) to shed water away from your house. Plan this before you grade, not after.
- Check HOA rules. Many associations restrict patio materials, colors, and sizes. Get written approval before purchasing materials.
- Check permit requirements. Most jurisdictions don't require a permit for a ground-level patio under a certain size (often 200 sq ft), but rules vary widely. Poured concrete slabs, raised decks, and patios attached to the house almost always need a permit. A five-minute call to your local building department saves enormous headaches.
Measuring, layout, and calculating square footage
Accurate measurements prevent expensive over-ordering and frustrating under-ordering. For a rectangular patio, multiply length by width to get square footage. For an L-shape, split it into two rectangles and add them. For a curved or irregular shape, break it into a grid of roughly 1 sq ft cells and count. Always add 10% to your final square footage for cuts, breakage, and waste, bump that to 15% for diagonal tile or herringbone paver patterns.
Marking slope and layout on the ground
- Drive batter boards and string lines around the perimeter of your planned patio area.
- Use a line level or laser level on the string lines to establish a true horizontal reference.
- From that reference, drop your finished surface at 1/4 inch per foot away from the house. For a 12-foot-deep patio that's 3 inches of drop from the house edge to the outer edge.
- Mark that slope on your batter boards with a pencil. This is your excavation and compaction target — everything below the string lines must account for your base depth plus the surface material thickness.
- For pavers: excavate 6–8 inches below finished grade (4 inches compacted gravel base + 1 inch bedding sand + paver thickness of ~2.375 inches).
- For a 4-inch concrete slab: excavate 5–6 inches below finished grade (4-inch slab + 1–2 inches of compacted gravel base).
- For wood decking on sleepers at grade: excavate 4–6 inches and replace with compacted gravel for drainage.
Sample layout templates
| Patio Shape | Formula | Example |
|---|---|---|
| Rectangle | Length × Width | 16 ft × 12 ft = 192 sq ft |
| L-shape | (L1 × W1) + (L2 × W2) | (12×10) + (8×6) = 168 sq ft |
| Circle | π × radius² | π × 7² = ~154 sq ft |
| Triangle | (Base × Height) ÷ 2 | (14 × 10) ÷ 2 = 70 sq ft |
Budget planning and a simple cost calculator
Budget planning works best when you break the project into categories and price each one separately, then add a contingency. I use a flat 15% contingency on all my patio builds, it has saved me every single time. Costs below are 2025–2026 national averages for DIY (materials only, no labor except rentals).
| Cost Category | Typical DIY Cost | Notes |
|---|---|---|
| Excavation / disposal | $0–$200 | DIY with rented mini excavator or manual labor; add dump fees if hauling soil |
| Gravel base (4" depth, 200 sq ft) | $80–$150 | Class II or crushed stone, delivered |
| Bedding sand (1", 200 sq ft) | $30–$60 | Coarse concrete sand |
| Concrete pavers (200 sq ft) | $250–$600 | Standard 6"×9" or 12"×12" pavers |
| Poured concrete (200 sq ft, 4" slab) | $400–$900 | Ready-mix delivery; more if you add fiber or color |
| Stamped concrete add-on | $200–$600 | Stamp rental + release agent + sealer |
| Outdoor porcelain tile (200 sq ft) | $500–$1,400 | Tile only; varies widely by style |
| Composite decking (200 sq ft) | $900–$2,200 | Boards only; add framing/sleeper cost |
| Pressure-treated wood decking (200 sq ft) | $400–$900 | Boards only |
| Gravel surface (200 sq ft) | $100–$250 | Pea gravel or decomposed granite, delivered |
| Edge restraints (linear ft) | $1–$3/ft | Polymeric or steel |
| Polymeric sand (joint sand, 200 sq ft) | $40–$80 | One 50-lb bag covers ~40–60 sq ft |
| Sealer | $50–$150 | Coverage varies by product |
| Tool rental (plate compactor, 1 day) | $60–$100 | See tool section below |
| Permits | $0–$250 | Varies by municipality and project type |
| Contingency (15%) | Add 15% to subtotal | Non-negotiable — always include this |
To use this as a quick calculator: total your material categories, add tool rental and permits, then multiply that subtotal by 1.15. That final number is your realistic budget. If it's too high, go back to the materials section and consider a less expensive surface, or reduce the square footage and expand later.
Materials compared side by side
Choosing the wrong material for your climate, soil type, or budget is the most common expensive mistake I see. Here's an honest side-by-side breakdown of every mainstream option. For another relevant comparison, see how to make a cheap patio floor.
| Material | DIY Cost (200 sq ft) | Lifespan | Maintenance | Freeze-Thaw OK? | DIY Difficulty |
|---|---|---|---|---|---|
| Gravel / decomposed granite | $100–$250 | Ongoing (replenish) | Rake, top-dress annually | Yes | Beginner |
| Sand-set brick or concrete pavers | $350–$800 | 25–50+ years | Re-sand joints every few years | Yes (sand-set flexes) | Intermediate |
| Poured concrete (plain) | $400–$900 | 25–40 years | Seal every 2–3 years | Only if air-entrained | Advanced |
| Stamped concrete | $600–$1,500 | 20–35 years | Seal annually; slippery when wet | Only if air-entrained | Advanced |
| Concrete pavers / large-format tiles | $500–$1,200 | 25–50 years | Re-sand, occasional re-leveling | Yes | Intermediate |
| Outdoor ceramic / porcelain tile | $600–$1,600 | 15–30 years | Grout cleaning, re-seal stone | Only if rated for freeze-thaw | Intermediate–Advanced |
| Mosaic tile surface | $300–$900 (materials) | 15–30 years | Grout sealing, occasional re-grout | With correct substrate | Advanced |
| Pressure-treated wood decking | $500–$1,100 | 10–20 years | Stain/seal every 1–2 years | Yes | Intermediate–Advanced |
| Composite decking | $1,000–$2,400 | 25–30 years | Annual wash, no sealing | Yes | Intermediate–Advanced |
| Interlocking deck tiles (low-cost) | $200–$600 | 5–10 years | Minimal | Limited | Beginner |
| Rubber pavers (temporary) | $150–$400 | 3–7 years | Wash occasionally | Yes | Beginner |
How to choose the right material for your situation
After building several patios and watching others make expensive material mistakes, I've distilled the decision into six questions. Work through them in order and the right choice usually becomes obvious.
1. What's your climate?
Freeze-thaw cycles are the great destroyer of outdoor surfaces. If you live somewhere with hard winters, poured concrete must be air-entrained (ASTM C260 admixtures; ACI guidance recommends 4–8% air content for freeze-thaw exposure). Non-air-entrained concrete will spall and pit within a few years, especially if de-icing salts are used. Sand-set pavers handle freeze-thaw better than poured concrete because the individual units can move slightly without cracking. For tile, you must use frost-rated porcelain (PEI Group IV or V, water absorption under 0.5%), regular ceramic will crack.
2. What's your soil type?
Clay soils expand when wet and contract when dry, which heaves and cracks rigid surfaces. Sandy and gravelly soils drain well and have low frost-heave risk. If you're on clay, sand-set pavers or a floating deck on sleepers over gravel are more forgiving than a poured slab. For any surface on clay, a deeper compacted gravel base (6+ inches instead of 4) gives you much better long-term stability.
3. What loads will the patio carry?
Foot traffic only: 4-inch slab or standard paver base is fine. Hot tub or spa: a 4-inch slab is not enough. A filled hot tub can weigh 4,000–6,000 lbs. You need a reinforced, engineer-designed concrete pad, this is one case I always recommend bringing in a pro or at minimum having an engineer spec the slab. Heavy planters and outdoor kitchens should also factor into your base design.
4. How much maintenance are you willing to do?
Composite decking and concrete pavers require the least ongoing effort. Wood decks look great but need staining or sealing every one to two years or they gray out and rot at the board ends. Stamped concrete looks stunning but needs annual sealing or the color fades and the surface becomes slippery. Tile grout needs periodic cleaning and re-sealing. Gravel needs annual top-dressing. Be honest with yourself about how much maintenance you'll actually do.
5. What's your budget ceiling?
If you're working with under $300 for a 200 sq ft space, gravel or rubber pavers are your realistic options. At $400–$800 you can do sand-set concrete pavers properly. Over $800 opens up tile, composite, or poured concrete. If budget is really tight, there are solid guides specifically on how to make a cheap patio floor that walk through exactly how to stretch that lower budget. For step-by-step instructions and budget-stretching tips, see the guide on how to diy patio floor (ref: a1ea249c-e51e-40f6-909d-e5bf1c94441d). For step-by-step options on covering an existing patio surface, see how to cover a patio floor.
6. What's your skill level and time available?
Gravel and interlocking pavers are genuinely beginner-friendly. Poured concrete is unforgiving, once the truck backs in, you have 60–90 minutes to finish the entire slab. If you've never worked concrete before, seriously consider hiring that part out and doing everything else yourself. Tile and mosaic work are very achievable for patient DIYers who are comfortable following TCNA installation methods, but they're not a weekend-warrior first-patio project.
Tools, materials, and quantities
Below are complete tool lists and material quantity references organized by build method. The general rule on tools: rent anything you'll use for a day or less (plate compactor, concrete mixer, tile saw), buy anything you'll use throughout the project (level, rubber mallet, screed board).
Universal tools (all methods)
- Tape measure (25 ft minimum)
- String line and batter boards
- Line level or laser level
- Marking paint or chalk
- Flat spade and round-point shovel
- Wheelbarrow
- Tamper (hand) or plate compactor (rent)
- Long straight board or aluminum screed (for leveling)
- Rubber mallet
- 4-foot level and torpedo level
- Safety glasses, work gloves, knee pads
Additional tools by method
| Method | Additional Tools Needed | Rent vs. Buy |
|---|---|---|
| Sand-set pavers / bricks | Plate compactor, brick splitter or angle grinder with diamond blade, paver tongs, screed pipes (1" conduit) | Rent compactor and splitter; buy diamond blade |
| Poured concrete | Forms (2×4 or 2×6 lumber), form stakes, float, edger, groover, bull float, concrete mixer or chute access, broom | Rent bull float and mixer if no ready-mix; buy edger/groover |
| Stamped concrete | All concrete tools plus texture mats, release agent, color hardener, pump-up sprayer, sealer roller | Rent texture mats; buy sprayer |
| Outdoor tile / mosaic | Tile saw (wet saw), notched trowel (size per tile size), grout float, grout sponge, tile spacers, level, rubber mallet, bucket | Rent wet saw; buy trowel and float |
| Wood / composite decking | Circular saw, drill/driver, impact driver, jigsaw, chalk line, speed square, decking clips (composite), joist hanger nails | Buy or already own most; rent miter saw if needed |
Material quantity calculator (sample table)
| Material | Coverage Rule | 100 sq ft | 200 sq ft | 300 sq ft | 400 sq ft |
|---|---|---|---|---|---|
| Gravel base (4" depth) | 1 cu yd covers ~80 sq ft at 4" | 1.25 cu yd | 2.5 cu yd | 3.75 cu yd | 5 cu yd |
| Bedding sand (1" depth) | 1 cu yd covers ~325 sq ft at 1" | 0.3 cu yd | 0.6 cu yd | 0.9 cu yd | 1.2 cu yd |
| Concrete pavers (standard) | Add 10% waste | 110 sq ft ordered | 220 sq ft ordered | 330 sq ft ordered | 440 sq ft ordered |
| Polymeric joint sand | 1 bag (50 lb) covers ~40–60 sq ft | 2 bags | 4 bags | 6 bags | 8 bags |
| Ready-mix concrete (4" slab) | 1 cu yd covers ~80 sq ft at 4" | 1.25 cu yd | 2.5 cu yd | 3.75 cu yd | 5 cu yd |
| Tile (add 15% for cuts) | Face value + 15% | 115 sq ft ordered | 230 sq ft ordered | 345 sq ft ordered | 460 sq ft ordered |
| Thin-set mortar | 50-lb bag covers ~40–50 sq ft | 2 bags | 4–5 bags | 6–7 bags | 9–10 bags |
| Sanded grout | 25-lb bag covers ~80–120 sq ft (varies by joint width) | 1 bag | 2 bags | 3 bags | 4 bags |
| Deck boards (composite, 5.5" width) | 1 linear ft covers ~0.46 sq ft | 218 lf | 435 lf | 653 lf | 870 lf |
Step-by-step build instructions
Method 1: Gravel base and sand-set pavers (most beginner-friendly)
This is the method I recommend to most first-time builders. It's forgiving, fixable, and if you do it right it genuinely lasts decades. ICPI/CMHA installation guidance specifies a 4-inch compacted aggregate base plus approximately 1 inch of bedding sand for residential pedestrian patios, that's your baseline.
- Mark the perimeter with string lines on batter boards. Confirm square with the 3-4-5 triangle method (measure 3 ft on one string, 4 ft on the adjacent string; diagonal should be exactly 5 ft).
- Call 811 and wait for utility marks before digging.
- Excavate to 6–8 inches below finished grade, accounting for 4 inches of compacted base, 1 inch of bedding sand, and your paver thickness (typically 2.375 inches for standard pavers). Remove all organic material and soft spots.
- Compact the subgrade with a plate compactor in overlapping passes. Target 95% Standard Proctor compaction (ASTM D698). If the soil feels spongy, you need more passes or need to add and compact a crushed stone base layer.
- Add 4 inches of Class II crushed stone (not pea gravel — it won't compact). Compact in 2–4 inch lifts. Wet the stone lightly before compacting if it's very dry.
- Set edge restraints around the perimeter before adding bedding sand. Use polymeric or steel edge restraints anchored with 10-inch spikes at 12-inch intervals. Edge restraints are not optional — without them, pavers migrate outward and joints open up.
- Screed 1 inch of coarse bedding sand (not play sand) using two 1-inch diameter conduit pipes as guides. Pull a straight board across the conduit pipes to create a flat, consistent surface. Do not compact the bedding sand after screeding.
- Set pavers in your chosen pattern, working from a corner outward. Use a string line to keep rows straight. Tap each paver down firmly with a rubber mallet — the top surface should be flush with adjacent pavers.
- Cut border pavers with an angle grinder and diamond blade or a rented brick splitter.
- Run the plate compactor over the finished paver surface (use a rubber pad or carpet piece on the plate to prevent surface scratching).
- Sweep polymeric sand into all joints. Compact again. Sweep more polymeric sand. Lightly mist with water to activate the polymer binder. Do not over-saturate — follow the product's instructions exactly.
- Let the polymeric sand cure for 24 hours before use.
Method 2: Poured concrete slab (plain or stamped)
A poured concrete patio is durable and permanent, but it demands good preparation and a realistic honest assessment of your experience with concrete work. The industry standard for a residential foot-traffic patio is a 4-inch thick plain slab. For hot tubs, heavy outdoor kitchens, or concentrated loads, increase thickness and add reinforcement, this crosses into engineering territory.
- Complete site prep as above (excavate, compact subgrade). Add a 2-inch compacted gravel base for drainage under the slab.
- Build forms from 2×4 lumber (for a 4-inch slab) staked every 2 feet. Use a level and your 1/4-inch-per-foot slope reference to set form height precisely. The forms define your finished slab surface.
- For freeze-thaw climates: specify air-entrained concrete when ordering ready-mix. Ask the plant for 4–7% air entrainment per ACI guidance. Also specify a low water-cement ratio (0.45 or below) for a durable exterior mix.
- Install a 1/2-inch isolation joint (expansion foam or pre-molded joint material) where the slab meets the house foundation or any existing structure. This is commonly required by code — consult your local flatwork specifications.
- Place concrete and screed to the top of your forms. Use a bull float to eliminate high spots and close the surface.
- Cut control joints to at least 1/4 of the slab thickness (1 inch deep for a 4-inch slab). Space joints no more than 8–10 feet apart in each direction. Control joints give the concrete a predictable place to crack if it moves — without them, random cracks appear wherever they want.
- Finish the surface with a magnesium float (smooth finish) or a stiff broom drag (textured, slip-resistant finish). For a stamped finish, apply color hardener, texture mat stamps, and release agent before final set — timing is critical and varies with temperature.
- Cure the concrete for a minimum of 7 days by keeping it moist (wet burlap, curing compound, or plastic sheeting). Do not walk on it for 24 hours; don't place furniture on it for 7 days.
- Seal after full cure (28 days) with a penetrating concrete sealer for freeze-thaw climates, or an acrylic topical sealer for stamped concrete.
Method 3: Wood or composite decking on sleepers
A ground-level deck on sleepers is a great solution for uneven terrain, high-clay soil, or anywhere a concrete slab would require a lot of excavation and forming work. The basic structure is pressure-treated 4×4 or 4×6 sleepers laid directly on a compacted gravel base, with deck boards fastened on top.
- Excavate 4 inches and fill with compacted crushed gravel. This is your drainage layer — it's essential to prevent rot and standing water under the deck.
- Lay landscape fabric over the gravel to suppress weeds without blocking drainage.
- Place pressure-treated 4×4 sleepers perpendicular to the direction your deck boards will run. Space them 16 inches on center for 5/4 decking, or 24 inches on center for 2× decking. Level each sleeper using shims or adjustable deck pads.
- For composite decking: follow the manufacturer's spacing requirements exactly — they differ by product and expansion rates vary more with composites than wood.
- Fasten deck boards with deck screws (hidden fastener clips for composite) leaving a 1/8-inch gap between boards for drainage and expansion. Composite boards need the manufacturer-specified gap at end joints.
- Cap the perimeter with a fascia board to give a finished appearance and protect the sleeper ends.
- For wood decks: apply a penetrating deck stain/sealer within 2–4 weeks of completion, before the wood weathers. Re-apply every 1–2 years.
Method 4: Installing outdoor tile
Tiling a patio rewards patience and precision. For a step-by-step walkthrough on how to make tile patio, see the detailed how to make tile patio guide. The TCNA Handbook and ANSI A108 installation standards are the industry bible here. The single most important factor for outdoor tile longevity is using the right tile (frost-rated, with a wet DCOF of at least 0.42 per ANSI A137.1, and ideally 0.50–0.60 for exterior wet surfaces per TCNA recommendations) and the right substrate.
- Start with a solid, stable substrate. Options: an existing concrete slab in good condition (no active cracks wider than 1/8 inch), a new poured slab (cured 28 days), or a cement backer board system on a structural framed deck.
- Check substrate flatness: TCNA/ANSI tolerances call for no more than 1/4 inch variation in 10 feet. High spots must be ground down; low spots filled with floor-leveling compound.
- Apply a crack-isolation membrane over concrete if you're concerned about future movement or minor cracking. This is cheap insurance.
- Mix exterior-grade (polymer-modified) thin-set mortar per manufacturer instructions. Use a notched trowel matching your tile size: small tiles (up to 8 inches) use a 3/16-inch V-notch; large-format tiles (12 inches+) use a 1/2-inch square-notch.
- Back-butter large-format tiles in addition to troweling the substrate — this ensures full coverage and eliminates voids beneath the tile.
- Set tiles with 1/8- to 3/16-inch joints (use spacers). Check with a level frequently. Tap gently with a rubber mallet and a beating block.
- Allow thin-set to cure per product directions (typically 24 hours minimum) before grouting.
- Mix sanded grout for joints wider than 1/8 inch, unsanded for narrower joints. Force grout into joints with a grout float held at a 45-degree angle. Clean haze with a damp sponge in circular motions.
- After grout cures (72 hours), apply a penetrating grout sealer. For natural stone tile, seal the stone surface as well.
- Check tile slip resistance ratings before purchasing. For outdoor wet areas, look for a wet DCOF of 0.50 or higher, or European R-ratings (R11 or R12 for wet exterior conditions).
Method 5: Creating a mosaic patio surface
A mosaic surface is essentially the tile method above with an artistic layout. You're setting broken tile, glass, stone, or small ceramic tesserae into thin-set mortar in a pattern. The substrate requirements are identical, a solid, flat, frost-appropriate concrete base is essential. For a full patio-floor mosaic, plan the design on paper first (or use chalk on the dry slab), then work section by section so your mortar doesn't skin over before you set the pieces. For a step-by-step walkthrough on constructing a full mosaic floor, see how to make a mosaic patio. For smaller mosaic projects like a patio table top, the same principles apply, and those make great starter projects if you want to practice the technique before committing to a full floor. If you want step-by-step instructions for a DIY mosaic patio table top, there's a dedicated guide that walks through materials, layout, and finishing tips. If you want a smaller starter project, try a DIY tile patio table top to practice layout, cutting, and grouting before committing to a full-floor mosaic.
- Use polymer-modified exterior thin-set for all outdoor mosaic work.
- Grout with a non-sanded grout for small tesserae joints under 1/8 inch; use sanded grout for larger gaps.
- Seal the finished mosaic surface with a penetrating sealer rated for exterior use.
- In freeze-thaw climates, use vitreous glass or frost-rated ceramic tesserae — standard glass tiles can absorb water and crack in hard freezes.
- For complex patterns, pre-assemble sections on mesh backing indoors, then set the mesh sheets into fresh thin-set on the slab.
Common mistakes and how to avoid them
| Mistake | What Happens | How to Avoid It |
|---|---|---|
| Skipping the utility locate call | Hitting a gas or electrical line during excavation | Call 811 every time, no exceptions, before any digging |
| Not sloping away from the house | Water pools at foundation, causes basement water intrusion | Set forms or string lines at 1/4" per foot drop away from house |
| Using the wrong sand for pavers | Bedding layer washes out or won't compact | Use coarse concrete sand, never play sand or fine sand |
| Skipping edge restraints on sand-set pavers | Pavers migrate over time, joints open, surface looks terrible | Install polymeric or steel edge restraints before setting pavers |
| Non-air-entrained concrete in freeze-thaw zones | Slab spalls, pits, and deteriorates within a few years | Always specify air-entrained mix for exterior concrete in cold climates |
| No control joints in concrete | Random cracking across slab surface | Cut joints at least 1" deep, spaced every 8–10 ft |
| Setting tile on cracked or soft substrate | Tiles crack or pop off within a season | Fix substrate first; use crack-isolation membrane over old concrete |
| Using indoor tile outdoors | Tile cracks in first freeze | Use only frost-rated exterior tile with wet DCOF ≥ 0.50 |
| Ordering exact square footage with no waste factor | Running short mid-project with discontinued tile or pavers | Always add 10–15% waste factor to order quantities |
Drainage, accessibility, and code notes
Drainage is where most DIY patios fail long-term, so it's worth repeating: slope everything at a minimum of 1/4 inch per foot away from any structure. If your yard has a natural low point that can't be easily redirected, consider permeable paving, pervious concrete, porous pavers, or open-joint systems with gravel infill. EPA, National Menu of Best Management Practices (Permeable Pavements BMP) notes that design and base thickness for permeable pavements depend on hydrologic design and loads, and references ASCE 68‑18 and ICPI design tables, which often call for subbase depths beyond 8–12 inches for adequate infiltration and structural support EPA — National Menu of Best Management Practices (Permeable Pavements BMP). The EPA recognizes permeable pavement as a green infrastructure best practice for reducing stormwater runoff, and many municipalities now offer fast-track permits or even rebates for permeable installations.
For accessibility, the ADA recommends outdoor surfaces be firm, stable, and slip-resistant, with slopes no greater than 2% in any direction for wheelchair access. If you're designing for aging-in-place or mobility-impaired users, concrete pavers and smooth-broomed concrete are better choices than loose gravel or wood with gaps between boards.
On permits: ground-level patios under roughly 200 sq ft often don't need a permit, but this varies significantly by municipality. Any patio attached to the house, any raised structure, and any slab supporting a structure will almost certainly need one. Also check local adoption of frost-depth requirements, IRC Table R403.1.4 is the typical reference, but your local building department has the actual adopted value for your area, and online maps are only approximations.
Maintenance and repair
Ongoing maintenance by surface type
| Surface | Annual Maintenance | Every 2–3 Years | Watch For |
|---|---|---|---|
| Concrete pavers | Wash surface, top-dress polymeric sand if joints are depleted | Re-compact sunken areas, re-sand joints | Edge creep, sunken or rocking pavers |
| Poured concrete | Wash, inspect for cracks | Apply penetrating sealer; fill hairline cracks with polyurethane caulk | Scaling (freeze-thaw damage), wide cracks, heaving |
| Stamped concrete | Wash surface | Re-apply acrylic topical sealer (annually in harsh climates) | Color fading, slippery sealer build-up |
| Outdoor tile | Wash, check grout for cracks | Re-apply grout sealer; re-grout cracked or missing sections | Cracked tiles (usually substrate movement), efflorescence |
| Wood decking | Inspect for rot, tighten fasteners | Re-apply stain/sealer | Board end rot, fastener corrosion, raised fastener heads |
| Composite decking | Wash with mild soap and water | Check hidden fasteners, re-tighten if needed | Mold/mildew (in shaded areas), board warping |
| Gravel | Rake to redistribute, remove weeds | Top-dress with fresh gravel (1–2 inches) | Bare spots, weed breakthrough, migration to lawn |
Repairing common problems
- Sunken paver: lift the affected paver(s) with a flat bar, add bedding sand to bring to grade, reset and compact.
- Cracked concrete slab (hairline): clean crack thoroughly, fill with flexible polyurethane concrete caulk, allow to cure. For cracks wider than 1/4 inch, consult a concrete professional — this may indicate a base problem.
- Popped tile: chip out the old thin-set, check the substrate for cracks or soft spots, re-set with fresh polymer-modified thin-set, re-grout after cure.
- Rotted deck board: remove the affected board, inspect the joist below for rot, replace the board (and joist if needed) with the same profile lumber or composite.
- Grout cracking or washing out: if widespread, the cause is often substrate movement. Address the cause first, then re-grout with a flexible epoxy grout or sanded grout with a latex additive.
When to hire a pro instead
I'm a strong advocate for DIY, but there are situations where hiring out part of the job is genuinely the smarter move. If you're pouring a concrete slab larger than about 400 sq ft, managing the pour solo or with one helper is very difficult, concrete waits for no one, and a botched finish can't be undone. Any slab supporting a hot tub, spa, or heavy structure needs engineering. Any patio project that triggers a permit and a required inspection in a jurisdiction you're not familiar with is worth a professional consultation at minimum. Steep slope drainage issues that could affect neighboring properties are also worth a civil engineer's eyes.
For everything else, gravel pads, sand-set pavers, ground-level decking on sleepers, outdoor tile on an existing slab, the DIY path is completely realistic. Start with a smaller area to practice your technique, do the prep work right, and the building part is genuinely satisfying.
FAQ
What local codes, permits and notifications should the article tell homeowners to check before digging or building a patio?
List local building/permit requirements (slab/foundation, setbacks, impervious surface limits), required permits for concrete or structural work, and inspection triggers. Advise calling 811 (or state 811 center) at least 48–72 business hours before any digging to have underground utilities marked. Recommend contacting the local building department for adopted frost depth, required footing depths, and any municipal flatwork joint rules or stormwater requirements.
Which authoritative standards and technical references must the guide cite for different patio materials and installations?
Cite ICPI/CMHA tech specs for interlocking pavers; EPA guidance for permeable pavements and stormwater BMPs; ACI/ASTM guidance for concrete (air entrainment, freeze–thaw); TCNA Handbook and ANSI A108/A118/A136 for tile; ANSI/TCNA wet DCOF guidance for slip resistance; local building codes/IRC or ASCE tables for frost and footing design; USDA NRCS soil guidance for soil texture/permeability. Include manufacturer installation guides for specific products.
What site measurements and layout calculations must the article explain how to make?
Teach measuring patio footprint (length × width), calculating area (sq ft), perimeter (ft) for edge restraints, and slope/run to achieve 1–2% grade (¼"/ft ≈ 2%). Show how to compute excavation depth = desired finished elevation + base depth + bedding/sand + paver thickness (or slab thickness + subbase). Provide example: for 4" concrete slab on 4" compacted base, excavate ~8" plus bedding/settlement allowance.
What soil and drainage facts should DIYers assess and how should those affect design?
Advise testing soil texture and drainage (percolation test or observing infiltration during/after rain). Note sands/gravel drain well and reduce frost risk; silts/clays have poor drainage and higher frost‑heave risk. Recommend designing permeable systems or drainage features (subsurface drains, slope away from house) and selecting subbase thickness/type based on soil permeability and frost depth; reference USDA NRCS and EPA permeable pavement guidance.
What compaction and base-prep standards and numbers are essential to include?
Give compaction targets and lift thicknesses per ICPI/CMHA: compact subgrade and aggregate base in 2–4" lifts with plate compactor; industry targets often ≥95% Standard Proctor for subgrade and ≥98% for aggregate base where specified. For sand‑set pavers use 4" compacted aggregate base + ~1" bedding sand; driveway/vehicular bases typically 8–12". Stress importance of uniform compaction and edge restraints.
What concrete design and detailing rules are crucial to prevent failures?
Include minimum slab thickness guidelines (4" for pedestrian patios; thicker or reinforced slabs for concentrated/heavy loads), air‑entrainment for freeze–thaw exposure (typical 4–8% air content per ASTM C260/ACI), minimum slope 1–2% (¼"/ft), required control and isolation joints (spacing per local code/industry practice), and specifying reinforcement or thicker sections for hot tubs or vehicular loads. Recommend consulting an engineer for nonstandard loads.
Next Article
How to DIY Patio Floor: Step-by-Step Build Guide
Step-by-step DIY patio floor plan, prep, base, materials, drainage, and finishing for level, durable surfaces.