Title: How to Finish a Patio Edge: A DIYer's Complete Guide to Every Edging Type
How to Finish a Patio Edge: DIY Guide for Durable Edging

Nolan Lennox
19 Jul 2026
Meta description: Learn how to finish a patio edge with step-by-step methods for every material, plus costs, tools, drainage tips, and a decision framework to pick the right edge.
Finishing a patio edge means installing a defined, stable border that locks your patio surface in place, sheds water properly, and gives the whole project a clean, intentional look. The right method depends on your patio material, your yard's slope, your budget, and how much work you want to take on. Most homeowners can handle paver restraints, timber boards, or a simple gravel border in a weekend. Poured concrete coping and mortared brick take a little more skill but are still well within DIY reach if you prep carefully and follow the right sequence.
What this guide covers and who it's for
This guide walks you through every practical method for finishing a patio edge, from the fastest and cheapest options to the most polished, permanent finishes. It covers paver and brick coping, poured concrete bullnose edges, steel and aluminum restraints, timber and composite boards, gravel borders, and live-edge wood finishes. You'll find a decision framework to match the right edge to your specific situation, a tools and materials checklist, cost and time estimates, drainage and code notes, and maintenance tips. Whether you're wrapping up a brand-new build or cleaning up the messy edge of an existing patio, there's a method here that fits your project. If you're still working out where your edge line goes or how to define the border itself, the related guides on how to edge a patio and how to border a patio cover that planning stage in more detail.
Why finishing the edge actually matters
I learned this one the hard way on my first paver patio. I laid everything beautifully, skipped the edge restraints to save time, and by the following spring the outside pavers had migrated about half an inch outward. The joint sand had spilled out, weeds had moved in, and the whole perimeter looked ragged. A finished edge isn't just cosmetic. It does three real jobs.
- Structural containment: edge restraints and coping units resist the lateral forces that cause pavers, gravel, and loose fill to creep outward over time. The ICPI (Interlocking Concrete Pavement Institute) requires edge restraints on all interlocking paver installations for exactly this reason.
- Drainage control: a properly finished edge directs water away from the house foundation and prevents undercutting of the base. A 1% to 2% slope (roughly 1/8 inch per foot) built into the surface needs a clear outlet at the edge.
- Curb appeal and longevity: a defined edge signals a finished project, suppresses grass and weed intrusion, and reduces long-term maintenance. It also makes mowing and trimming faster and cleaner.
There's also a safety dimension if your patio has any drop-off at the edge. The International Residential Code requires guards where there's a fall hazard, and where a guard also serves as a handrail it must sit between 34 and 38 inches above the leading edge. Even on a low-profile patio, an unmarked drop can be a trip hazard. A raised or retaining edge, if it's on a raised patio, solves both the structural and safety problem at once.
Edging vs bordering: which one do you actually need?
These terms get used interchangeably, but they describe slightly different things in practice. Edging is the structural or semi-structural treatment right at the perimeter of the patio surface itself, usually flush with or just above the patio material. Its primary job is containment and a clean transition. Bordering refers to a decorative surround that may extend into the landscape, use a contrasting material, or frame the patio visually without necessarily being structural. A border can double as edging, but edging doesn't always need to be a decorative border.
In practical terms: if you have interlocking pavers, concrete unit pavers, or a gravel patio, you need edging (a restraint) whether you want a decorative border or not. If you have a poured concrete slab, the concrete itself forms a solid edge and you're more in the territory of finishing and bordering. Timber, composite boards, or a planted border on a concrete patio is a border treatment. On a paver patio, a soldier-course brick border with a metal restraint behind it is both. If you're exploring the decorative side of this, the guide on how to build patio edging goes deeper into border construction options. See our guide on how to border a patio for step-by-step bordering techniques and material-specific recommendations.
Choosing the right edge: a decision framework
Before you buy anything, run through these four factors. They'll narrow your options fast and save you from buying material that doesn't suit the job.
Patio material
- Interlocking concrete pavers, clay brick, natural stone: require a rigid or semi-rigid edge restraint anchored to the compacted base. ICPI is explicit that restraints must bear on the compacted base layer, not the bedding sand, to resist lateral movement.
- Poured concrete slab: the slab itself is its own edge form. You finish the edge with a broom, edging tool, or bullnose trowel, and optionally add a coping unit or decorative border alongside it.
- Gravel or decomposed granite: requires a hard edge on every side to keep fill contained. Timber, metal, or concrete curb all work well here.
- Composite or wood deck surface adjacent to a patio: a composite fascia board or timber board creates a visible finished edge and hides the structural framing below.
- Flagstone (dry-laid or mortared): mortared flagstone edges can be finished with a matching mortar joint; dry-laid flagstone needs a buried restraint or a planted/gravel border to hold the outside course.
Slope and drainage
A flat or gently sloping yard is the easiest scenario. On any slope greater than about 1 foot of drop over 10 feet of run, you need to think carefully about whether your edge will act as a dam and cause water to pond behind it. Metal restraints and timber boards have small gaps at stakes that let water through. Poured concrete curbs need weep holes or gaps at low points. If your patio sits in a low area or has drainage issues, a gravel border or channel drain at the downhill edge is worth the extra effort. For raised patios with a significant drop at the edge, the approach changes substantially, and the guide on how to edge a raised patio covers that situation specifically.
Budget
Plastic or aluminum restraints are the least expensive option per linear foot and are completely functional. Decorative options like brick coping, natural stone, or poured concrete bullnose cost more in materials and time but add genuine value and visual quality. Composite and timber boards sit in the middle. Live-edge wood is on the premium end and is as much a design feature as an edge treatment.
Skill level
Plastic or aluminum restraints: beginner-friendly, no mixing or cutting required. Timber and composite boards: beginner to intermediate, requires accurate cuts and fastening. Brick or paver coping (dry-laid soldier course): intermediate, requires a good eye for level and consistent joint spacing. Mortared coping or poured concrete bullnose: intermediate to advanced, involves mixing and finishing concrete or mortar and working within a time window. Live-edge wood: intermediate to advanced depending on the installation method.
Common edge types: what they are and how they work
Paver and brick coping
A soldier course of standard pavers or purpose-made coping units set along the perimeter is one of the cleanest-looking finishes you can achieve on a paver patio. Dry-laid, the outside course is held by a buried edge restraint behind it. Mortared to a concrete footing or to the edge of a slab, it becomes a permanent cap. Brick coping on a raised patio wall typically extends about 4 inches over the face of the wall, includes a slight slope for water shedding, and is set on a waterproof mortar bed per masonry industry guidance. This approach works especially well if you're finishing a raised patio wall with a cap or coping unit.
Poured concrete bullnose or curb edge
A poured concrete edge is the most durable option for high-traffic areas or anywhere a vehicle might roll over the perimeter. For a patio slab, you use a concrete edging tool during the finishing stage to round or bevel the raw edge. For a paver or tile patio, you can form and pour a concrete curb alongside the perimeter as the restraint. The ICPI and producer guides both list poured concrete curb as the preferred heavy-duty edge restraint for vehicular-rated paver applications. Reinforce with rebar if the curb is more than about 4 inches deep, and tool or saw-cut control joints every 8 to 10 feet to manage cracking.
Metal edge restraints (aluminum and steel)
Aluminum and galvanized steel restraints are the workhorses of paver installation. They're fast to install, invisible once the patio is done (they sit at or just below grade), and hold up for decades. Per ICPI Tech Spec No. 3, they must be anchored to the compacted base (not the sand layer) with spikes at 8 to 12 inches on center for pedestrian areas. See Unilock Advanced Technical Guide, Edge restraint & installation guidance for manufacturer-specific anchoring details and recommended spike spacing Unilock Advanced Technical Guide — Edge restraint & installation guidance. Steel restraints should be specified as galvanized (ASTM A653 or hot-dip per ASTM A123) or made from weathering steel to resist corrosion in soil contact. Plain steel rusts through quickly, especially in wet climates. Aluminum is lighter and won't rust but can flex more than steel on longer runs.
Timber and composite boards
A pressure-treated 2x4 or 4x4 staked into the ground is the classic budget edge for gravel and flagstone patios. It works, it's cheap, and most DIYers can install it in an afternoon. The catch is longevity: even ground-contact rated pressure-treated lumber (AWPA UC4A or UC4B for direct soil contact) will eventually rot, typically in 10 to 15 years depending on climate and moisture. Use hot-dip galvanized or stainless fasteners, not standard zinc-plated screws, which corrode quickly in treated wood. Composite boards (Trex, TimberTech/AZEK) eliminate the rot issue, expand slightly with heat so you need to allow a 1/8-inch gap at joints, and require the fastener spacing and patterns specified in the manufacturer's installation guide to stay in warranty. For step-by-step instructions on installing timber or composite boards as an edge, see how to edge a patio with wood.
Gravel or decomposed granite border
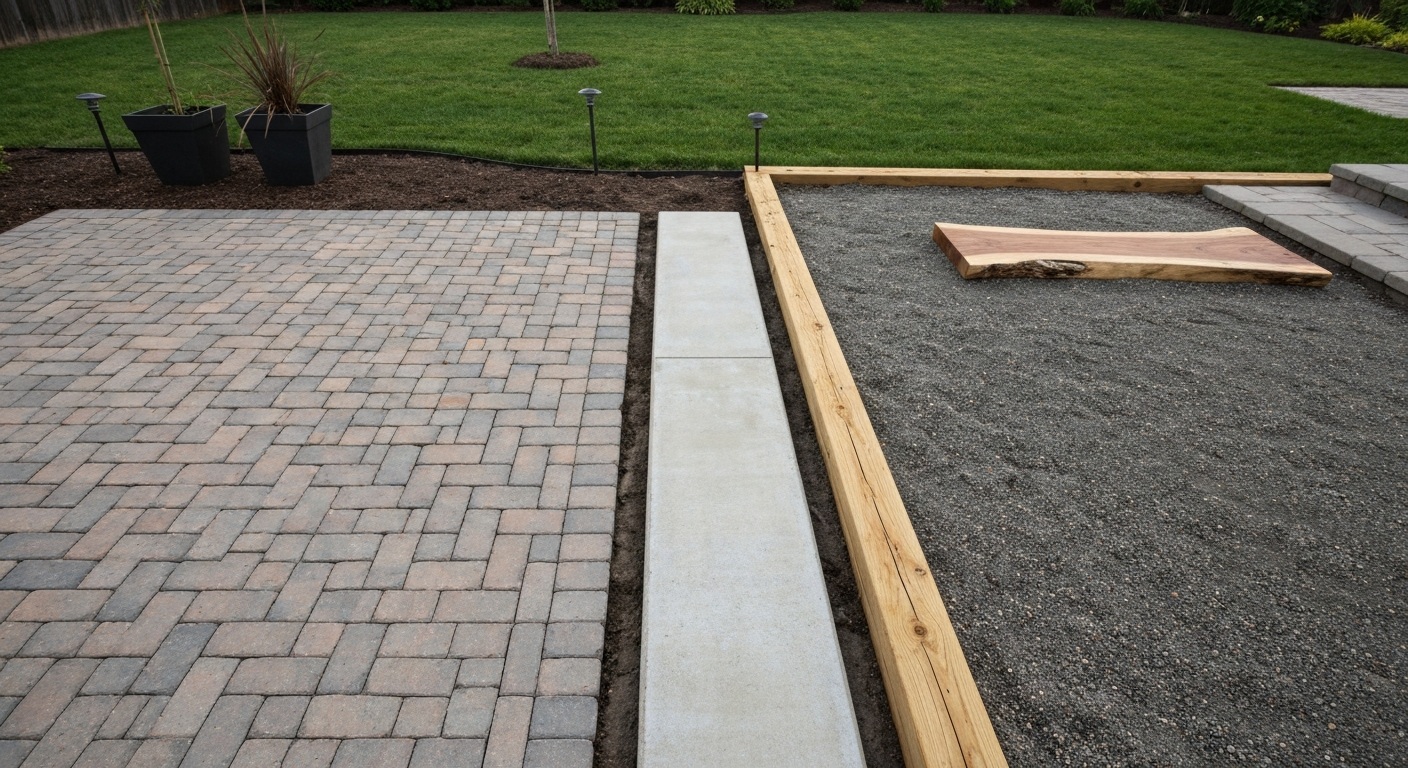
A gravel border is the easiest landscape transition you can install. Dig a trench 4 to 6 inches wide and 3 to 4 inches deep along the patio perimeter, lay landscape fabric, fill with clean pea gravel or DG, and tamp lightly. It drains freely (helpful where water collects at the edge), suppresses weeds, and needs almost no maintenance beyond occasional top-dressing. The downside is that it doesn't provide rigid containment, so use it on concrete slabs or mortared flagstone where the surface itself holds. Don't rely on a gravel border alone to contain interlocking pavers.
Live-edge wood finishes
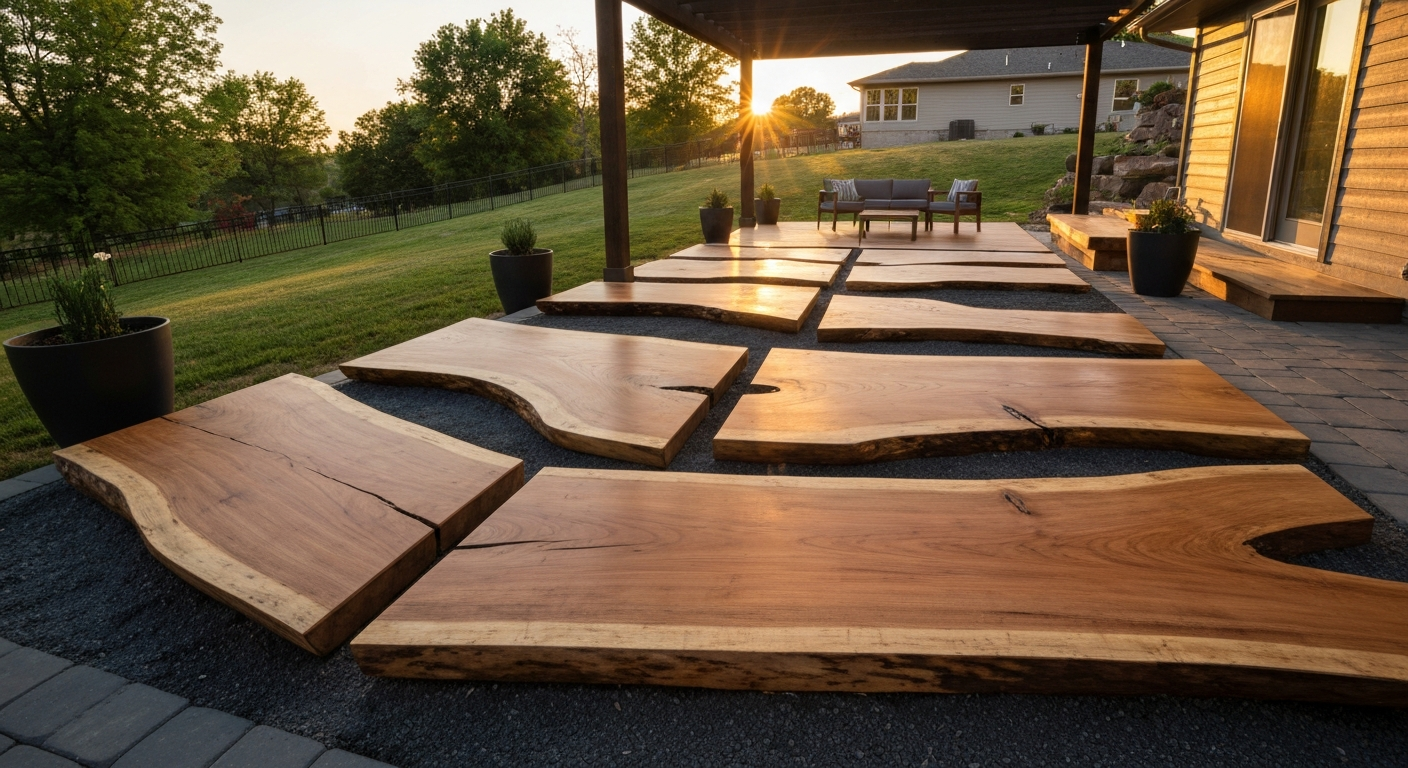
A live-edge wood edge is a statement choice, usually reserved for smaller patios or as an accent section within a larger project. It uses a natural-edge slab or thick timber with the bark or natural profile left exposed. The wood needs to be sealed and elevated off direct soil contact to resist decay, ideally on a gravel bed or set on concrete pier blocks. This is more of a design feature than a structural edge treatment. For a full walkthrough of building one, the guide on how to make a live edge wood patio covers material selection, sealing, and installation in detail.
Step-by-step installation for each edge type
Installing metal or plastic edge restraints
- Complete your base compaction first. The restraint must sit on the compacted aggregate base, not on bedding sand. If you install the restraint after screeding sand, you'll need to pull back sand along the edge to expose the compacted base.
- Set the restraint flush against the outside edge of the last paver course (or at your layout line for pre-restraint installation). The top of the restraint should sit at or just below the finished paver surface.
- Drive 10- or 12-inch galvanized spikes through the restraint tabs into the compacted base at 8 to 12 inches on center. On curves, use a flexible restraint and place spikes every 6 to 8 inches to hold the bend.
- Check for gaps between the restraint and paver edges. On straight runs, press the restraint firmly before driving spikes. On outside curves, score or notch the restraint per manufacturer instructions to allow the bend without buckling.
- Backfill soil or gravel against the outside of the restraint to add lateral support and cover the spikes.
Installing a timber or composite board edge
- Dig a trench along the patio perimeter deep enough so the top of the board aligns with the patio surface or sits 1/4 inch above grade. For a 2x4 (1.5 inches actual), the trench is typically 3 to 4 inches deep.
- Cut boards to length. For composite boards, leave an 1/8-inch expansion gap at each joint.
- Drive 2x2 or rebar stakes (12 inches minimum length for 2x4 boards) every 24 to 36 inches on the outside face of the board, flush or just below the top edge.
- Fasten the board to each stake with two hot-dip galvanized or stainless screws per stake. For composite boards, use the fastener type specified by the manufacturer.
- Check for level and alignment along the run, tap boards into adjustment with a mallet before fully tightening fasteners.
- Backfill soil firmly against the outside of the board and tamp to reduce movement.
Finishing a poured concrete slab edge
- While the concrete is still workable (typically 30 to 90 minutes after the pour depending on temperature and mix), run a concrete edging tool along the top edge, pressing down to round or bevel the corner. This step is done after the initial float but before the final trowel finish.
- Work the edging tool back and forth with light pressure to consolidate the aggregate at the edge and produce a smooth radius. The radius (typically 1/4 to 1/2 inch) reduces chipping compared to a sharp 90-degree edge.
- After edging, complete the surface finish (broom or trowel) and let the slab cure. Cover with plastic sheeting or burlap for a minimum of 7 days for adequate strength gain.
- Once cured, saw-cut control joints at roughly 8- to 10-foot intervals (or 2 to 2.5 times the slab thickness in feet, per standard flatwork guidance) to control where cracking occurs.
- Apply a penetrating concrete sealer to the edges and surface to reduce moisture absorption and surface scaling.
Installing mortared brick or coping units
- Prepare a concrete footing or confirm the existing slab or wall edge is sound and clean. Chip away loose material and dampen the surface before applying mortar.
- Mix Type S mortar (higher strength and moisture resistance than Type N, appropriate for exterior flatwork and masonry exposed to weather). Aim for a stiff but workable consistency.
- Butter the base surface and the back of the first coping unit. Set the unit with a slight downward slope away from the structure (1/8 inch per foot minimum) for water runoff.
- Use a level and spacers to maintain consistent joint width (typically 3/8 to 1/2 inch for brick coping). On a wall, let coping units overhang the face by approximately 4 inches and include a drip groove on the underside to prevent water from tracking back onto the wall face.
- Tool or strike joints after the mortar begins to set (thumbprint firm) for a consistent, weathertight finish.
- Allow mortar to cure for 24 to 48 hours before any foot traffic. Protect from rain and direct sun during the first 24 hours.
Installing a gravel border
- Mark the border width (4 to 8 inches is typical) along the patio perimeter with spray paint or a string line.
- Excavate to 3 to 4 inches deep and remove loose organic material.
- Lay overlapping strips of woven landscape fabric and fold the fabric up against the patio edge. Overlap seams by at least 6 inches.
- Fill the trench with clean pea gravel, crushed stone, or decomposed granite, keeping the top of the gravel about 1 inch below the patio surface to avoid tracking gravel onto the patio.
- Tamp lightly with a hand tamper or the end of a 2x4 to settle the gravel. Top-dress as needed over the following weeks as it settles further.
Special situations: raised patios and retaining edges
A raised patio edge is a different animal from a ground-level border. When your patio surface is elevated more than about 12 to 18 inches above the adjacent grade, the edge becomes a retaining wall or a drop-off that needs either a structural retaining edge or a guardrail. Mortared coping on a block retaining wall is the most common finish. The coping units should overhang the wall face by about 4 inches, be set in waterproof mortar, and include movement joints every 10 to 15 feet. If the drop exceeds 30 inches, check your local building code for guardrail requirements, since the IRC guardrail provisions kick in at a 30-inch drop at most jurisdictions. The guide on how to edge a raised patio covers the structural requirements and finishing options for elevated patios in much more detail.
A note on footings: if your retaining edge requires a concrete footing, that footing needs to extend below the local frost line per IRC R403.1.4. Frost depth varies widely by location. Many municipalities publish their own minimum footing depth requirements. For example, some northern Illinois municipalities require footings at 42 inches below grade. Look up your county or city's frost-depth requirement before pouring any footing, because an under-buried footing will heave and crack in the first hard winter.
Drainage and code considerations
Water is the most common reason patio edges fail. A finished edge that acts as a dam will cause water to pond behind it, saturate the base, and eventually cause heaving, settling, or undermining. A few practices prevent most problems.
- Maintain at least 1% slope (1/8 inch per foot) across the patio surface away from the house and toward a clear outlet at the downhill edge.
- On poured concrete curbs or solid edge walls, leave weep holes or gaps at the lowest point to allow water to escape rather than pond.
- On impermeable patio surfaces larger than roughly 500 to 1,000 square feet (thresholds vary by municipality), check whether your local stormwater ordinance requires you to mitigate runoff. EPA guidance directs municipalities to manage impervious surface runoff, and many cities have implemented local rules that include residential permits or impervious cover limits. Some areas require permeable paving, rain gardens, or dry wells to handle the additional runoff from a new patio.
- If you're near a property line or easement, confirm whether your edge structure (especially a retaining wall or raised edge) requires a permit. Most jurisdictions require a permit for retaining walls over 3 to 4 feet in height.
For projects on or adjacent to a public accessible route, such as a patio connected to a commercial or multi-family building, the 2010 ADA Standards for Accessible Design govern the design of accessible routes, platform dimensions, and edge transitions. For a private residential patio this is less commonly applicable, but if you're building for an older or mobility-impaired family member or adding a rental property patio, it's worth knowing what a compliant edge transition looks like.
Tools and materials checklist
General tools you'll need for almost any edge job
- Tape measure and chalk line or string line
- Spade or flat-edged shovel for trench work
- Hand tamper or plate compactor (rental) for base compaction
- Rubber mallet
- Level (4-foot and/or torpedo)
- Circular saw or miter saw for timber or composite cuts
- Safety glasses and work gloves
- Utility knife for landscape fabric
Type-specific materials and tools
| Edge Type | Key Materials | Additional Tools |
|---|---|---|
| Metal/plastic restraint | Aluminum or galvanized steel restraint, 10–12 in. galvanized spikes | Hammer or spike driver, tin snips for cuts |
| Timber board | Ground-contact PT lumber (AWPA UC4A/UC4B), 2x2 or rebar stakes, hot-dip galvanized screws | Drill/driver, miter saw, hand saw for stakes |
| Composite board | Composite fascia board (Trex/TimberTech/AZEK), manufacturer-specified fasteners | Drill/driver, miter saw, 1/8-in. spacers |
| Poured concrete curb/bullnose | Ready-mix or bagged concrete, rebar (for curbs), concrete edging tool, concrete sealer | Float, trowel, concrete edger, saw for control joints, forms/2x4 lumber |
| Mortared brick/coping | Type S mortar, coping or brick units, masonry waterproofer | Trowel, jointing tool, bucket, mixing paddle, angle grinder for cuts |
| Gravel border | Pea gravel or crushed stone, woven landscape fabric, fabric staples | Hand tamper, garden rake |
| Live-edge wood | Live-edge slab or timber, exterior wood sealer/stain, concrete pier blocks or gravel bed | Chainsaw or bandsaw, orbital sander, paintbrush |
Typical costs and time estimates
These figures are based on a typical DIY installation where you're supplying the labor. Material costs vary by region and supplier, so treat these as realistic ballpark ranges for mid-2026.
| Edge Type | Material Cost (per linear foot) | DIY Time (100 linear feet) | Skill Level |
|---|---|---|---|
| Plastic paver restraint | $0.50–$1.50 | 2–4 hours | Beginner |
| Aluminum edge restraint | $1.50–$3.00 | 2–4 hours | Beginner |
| Pressure-treated timber board | $1.50–$3.50 | 4–6 hours | Beginner–Intermediate |
| Composite board (Trex/AZEK) | $3.00–$7.00 | 4–6 hours | Intermediate |
| Gravel border (4-in. wide) | $1.00–$2.50 | 3–5 hours | Beginner |
| Mortared brick coping | $5.00–$12.00 | 8–14 hours | Intermediate |
| Poured concrete curb/bullnose | $4.00–$10.00 | 8–16 hours | Intermediate–Advanced |
| Live-edge wood | $8.00–$25.00+ | Full weekend+ | Intermediate–Advanced |
Project example: a 20x16-foot patio with 72 linear feet of perimeter. Using aluminum restraints at $2 per foot, material cost is around $145. Renting a plate compactor for the base work runs $50 to $80 for a half-day. If you upgraded to mortared brick coping at $8 per foot, the same perimeter runs $575 to $600 in materials alone, plus mortar and mixing supplies.
Budget tips for DIYers
- Buy metal restraints in 8-foot sections from a landscape supply house rather than the home center, where identical product often costs 30 to 50 percent more.
- Mix your own mortar rather than buying pre-blended masonry mix for coping jobs over 40 linear feet. A 70-lb bag of Type S Portland-lime-sand mortar mix costs about 30 to 40 percent less than pre-mixed alternatives at equivalent coverage.
- Use salvaged or reclaimed bricks for a soldier-course border. A consistent used-brick at $0.25 to $0.50 per unit looks better in most settings than cheap new concrete pavers, and the cost savings are significant.
- Rent a plate compactor for half a day rather than trying to tamp a large base area by hand. Inadequate compaction is the single biggest cause of edge failure and paver creep. The rental is usually $50 to $80 and pays for itself in avoided repairs.
- For timber edging, compare composite board cost against naturally rot-resistant alternatives like cedar heartwood (cheaper than composite in many markets but requires sealing) before defaulting to PT lumber.
Finishing, sealing, and landscape transitions
Once the edge is in, a few finishing steps make it last. Backfill soil firmly against the outside of any edge restraint or board, and tamp it in lifts to eliminate voids. Voids behind the edge lead to soil erosion and edge movement over time. For concrete edges, apply a penetrating silane-siloxane sealer after the concrete has cured for at least 28 days. This reduces water absorption and delays surface scaling. For brick coping, use a masonry waterproofer on the mortar joints after the mortar has cured for at least a week.
At the landscape transition, plant low groundcovers or ornamental grasses right up to the edge rather than leaving bare soil. Bare soil at the edge erodes with every rain event and undercuts the edge over time. If you want a clean mow line, plant your groundcover 2 to 3 inches back from the edge and let it fill in. Creeping thyme, mondo grass, and liriope all work well and require almost no maintenance once established.
Maintenance and troubleshooting
Common problems and fixes
- Pavers creeping outward: the edge restraint has failed, is missing, or was not anchored into the compacted base. Pull back the outside course, expose the base, reset or replace the restraint, spike it properly at 8 to 12 inches on center, and re-lay the pavers.
- Mortar joints cracking: thermal expansion without movement joints, or mortar was mixed too wet. Rake out cracked joints to a depth of 3/4 inch and re-point with fresh Type S mortar. For long runs of coping without joints, add a saw-cut joint every 10 to 12 feet.
- Timber edging heaving or bowing: stakes weren't deep enough or ground-contact lumber spec was insufficient. Add intermediate stakes and replace boards if rot has set in. Upgrade to composite for a permanent fix.
- Metal edge rusting and failing: under-specified product (plain steel, not galvanized) or coating damage. Replace with hot-dip galvanized or aluminum restraint. Spot-treat surface rust on intact galvanized restraints with a zinc-rich primer.
- Water pooling behind the edge: insufficient drainage outlet. Cut a gap or notch in the edge at the low point, or install a channel drain inlet at the low spot.
Annual maintenance routine
- Spring: inspect mortar joints on coping for winter crack damage. Re-point any open joints before the rainy season.
- Spring: check paver edge restraints for movement or spike pullout. Re-drive or replace any loose spikes.
- Fall: re-apply joint sand to interlocking paver fields if the edge area shows sand loss. Polymeric sand swept into joints reduces weed intrusion and stabilizes the surface near the edge.
- Every 3 to 5 years: re-seal concrete edges and mortared coping. Check timber boards for soft spots or rot and replace any compromised sections.
When to call a pro instead of going it alone
Most edge finishing work is well within DIY range. The cases where I'd say call a professional are: retaining walls over 4 feet tall (structural design and permits are typically required), poured concrete curbs on sloped sites where water management is complex, any project that involves rerouting drainage or modifying impervious surface over your local threshold (which may require an engineered stormwater plan), and any raised patio edge that triggers the IRC guardrail provisions and requires a permitted structure. On those jobs, the cost of a professional beats the cost of a failed structure or a code violation. For everything else, take your time, prep the base well, and the results will speak for themselves. For another relevant comparison, see how to build patio edging.
Quick comparison: which edge finish is right for your project?
| Edge Type | Best For | Durability | Maintenance | DIY Difficulty | Cost Range (per LF) |
|---|---|---|---|---|---|
| Metal restraint (aluminum/galvanized steel) | Interlocking pavers, hidden finish | 20+ years | Very low | Easy | $1.50–$3.00 |
| Plastic restraint | Budget paver installs, curved edges | 10–15 years | Low | Easy | $0.50–$1.50 |
| Pressure-treated timber | Gravel, flagstone, informal borders | 10–15 years | Low-medium | Easy | $1.50–$3.50 |
| Composite board | Gravel, wood-deck transitions, modern look | 25+ years | Very low | Easy–Intermediate | $3.00–$7.00 |
| Mortared brick/coping | Raised walls, decorative borders, classic look | 30+ years | Low (re-point joints) | Intermediate | $5.00–$12.00 |
| Poured concrete curb/bullnose | Driveways, vehicular areas, high-traffic patios | Lifetime | Very low | Intermediate–Advanced | $4.00–$10.00 |
| Gravel border | Drainage-sensitive areas, informal looks | Ongoing (top-dress) | Low | Easy | $1.00–$2.50 |
| Live-edge wood | Feature accent, naturalistic design | 10–20 years (with sealing) | Medium (re-seal) | Intermediate–Advanced | $8.00–$25.00+ |
FAQ
What building codes and regulatory standards must be referenced when writing a homeowner DIY article on finishing a patio edge?
Cite the applicable model codes and federal standards and tell readers to check local amendments: IBC Chapter 10 (egress/guard requirements) for guard/heights; IRC Chapter 4 for frost‑protection and footing depths; the 2010 ADA Standards for Accessible Design when patios affect accessible routes; and local municipal building department requirements (frost line, footing depth, permits). Provide links to the official code pages and note that jurisdictions adopt/modify model code values.
What stormwater, drainage and impervious-surface guidance should be included, and which authorities cover this?
Reference EPA stormwater/MS4 guidance and model municipal stormwater ordinances for impervious-surface limits and runoff mitigation. Explain that many cities require mitigation or limits on new impervious area and that homeowners must consult local stormwater/stormwater management or planning departments. Provide EPA and example state/municipal ordinance documents as sources.
What industry technical standards are necessary for paver edge restraints and compacted base requirements?
Use ICPI Tech Spec No. 3 (Edge Restraints) and manufacturer/producer installation manuals (Unilock, Techo‑Bloc, Techniseal) for: types of edge restraint (plastic, aluminum, steel, poured concrete), requirement that restraints sit on compacted base, anchor/spike spacing (typical 8–12 in. for pedestrian areas), and sequencing options (before/after bedding sand). Link to ICPI and major manufacturer tech guides.
Which references cover poured‑concrete coping, bullnose, finishing and curing practices?
Refer to NRMCA flatwork finishing guides and ready‑mix specifications for finishing tolerances, curing, joint placement, and quality control; and to Unilock/ICPI tech guides for concrete curb/coping used as heavy‑duty edge restraints. Include NRMCA and manufacturer documents for specific finishing procedures and recommended joint details.
What authoritative masonry/coping practices and details should be used for capstones and mortar work?
Cite NCMA TEK notes and masonry association technical details for coping/cap units: recommended overhang (≈4 in.), slope and drip details, waterproof bedding, expansion/movement joint requirements, and mortar best practices. Use NCMA TEK documents as the primary source for coping specs.
What manufacturer and product data are required for timber, composite and metal edge systems?
Include manufacturers’ installation guides and technical data sheets: Trex/TimberTech/AZEK for composite fascia/board fastening patterns, expansion gaps, and warranty conditions; Techniseal/Techo‑Bloc/Unilock for plastic/aluminum paver edging specs and anchor requirements; and galvanizing/steel standards (A653/A123) plus American Galvanizers Association guidance for metal edging corrosion protection and coating selection (hot‑dip galvanized, COR‑TEN, duplex systems). Link to product TDS and ASTM/AGA guidance.
Next Article
How to Make a Live-Edge Wood Patio: DIY Plans, Costs & Care
DIY guide to plan, build and finish a live-edge wood patio: materials, foundations, step-by-step, sealing & maintenance.