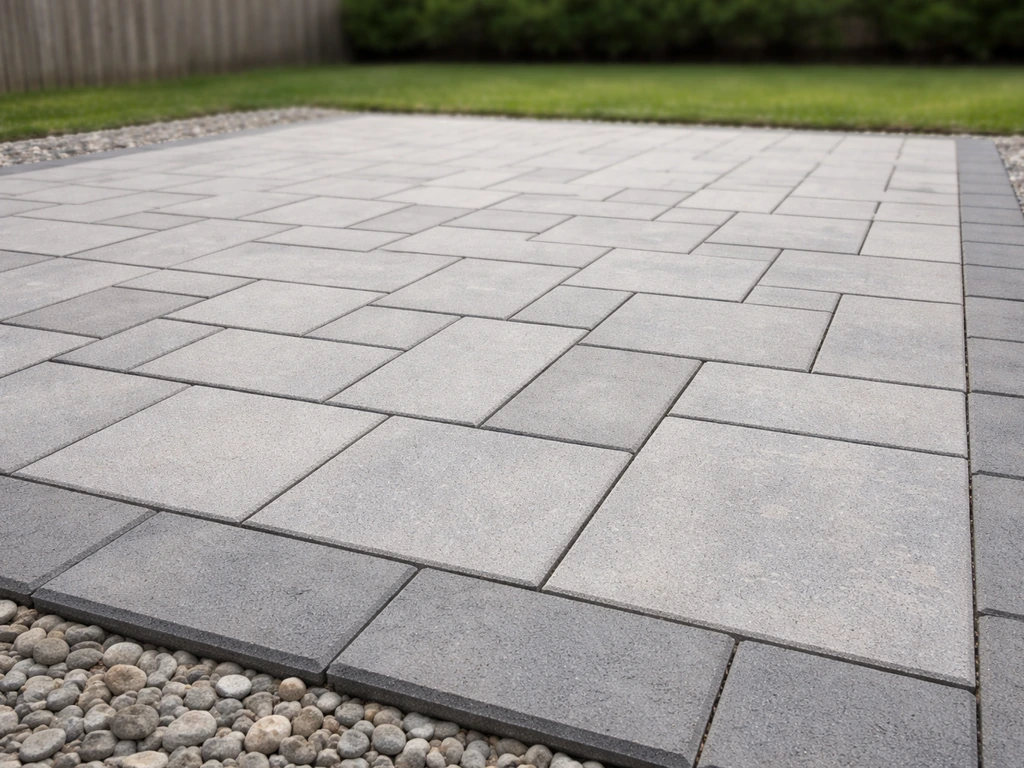
You can build a solid patio walkway yourself in a weekend or two, depending on the material you choose. Gravel and decomposed granite are the easiest entry points and cost as little as $1–$3 per square foot in materials. Pavers and brick sit in the $5–$15 per square foot range and give you a clean, long-lasting result with no special equipment beyond a plate compactor rental. Poured concrete runs $6–$12 per square foot in materials, requires more prep and finishing skill, but produces the most durable surface. Flagstone feels the most natural and costs $8–$20 per square foot. Wood or composite is best when you need a raised walkway over uneven ground and will run $10–$25 per square foot. Every method needs a properly compacted base and good drainage, get those two things right and the rest is straightforward.
How to Make a Patio Walkway: DIY Plan, Build, Steps & Costs

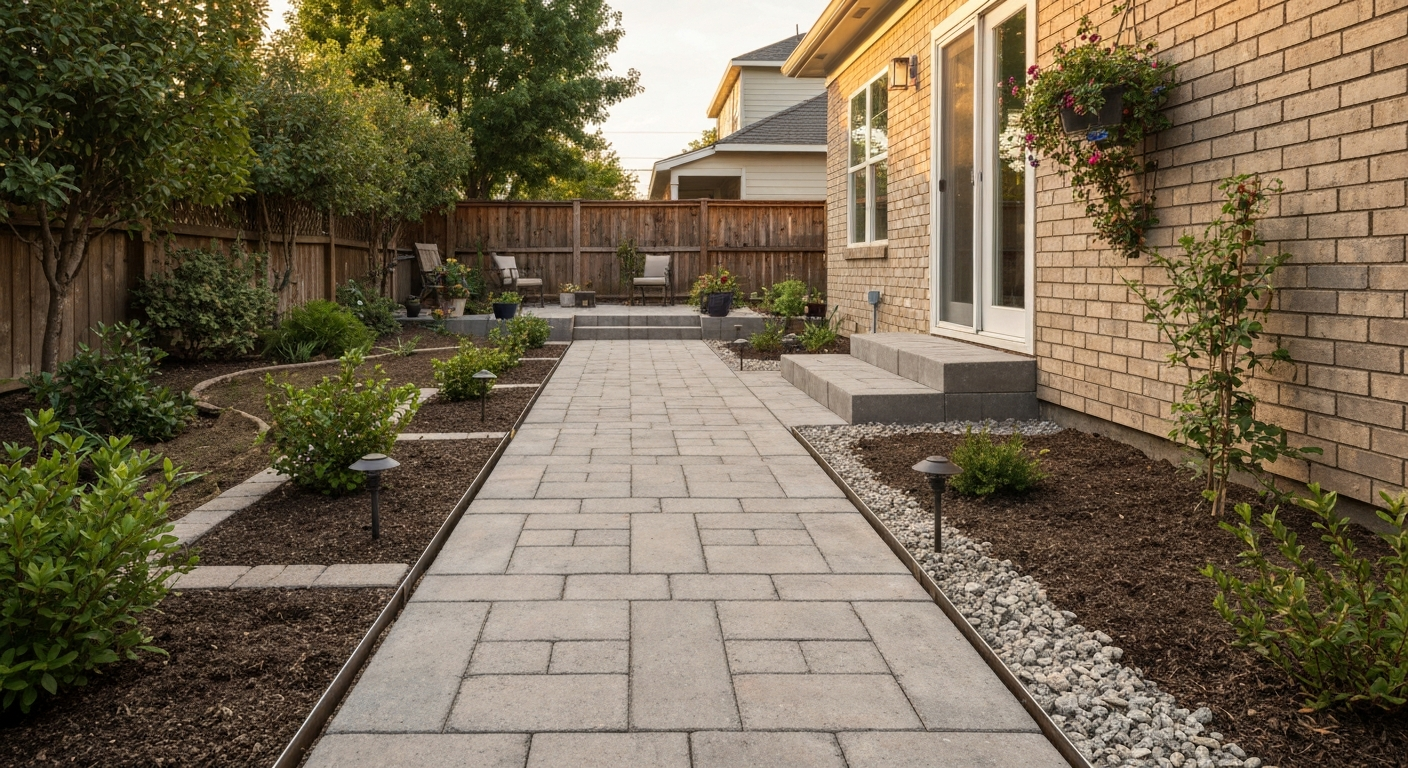
Who this guide is for and how to use it
This guide is written for homeowners who want to build a patio walkway from scratch, whether you are a complete beginner laying gravel for the first time or someone who has already built a patio and now needs to connect it to the house, garage, or garden. I have built walkways with all five of the main materials covered here, and I will walk you through each one honestly, including the mistakes I made along the way.
Here is how to use this article efficiently. Read the decision guide and the planning and site assessment sections first, they apply to every method. Then jump to the material-specific build section that matches your project. The base preparation, edging, and jointing sections apply to pavers, concrete, and flagstone especially, so bookmark those. If your walkway connects to a patio with a grade change or you need to add steps, the grade transition and step-building sections near the end cover riser and tread calculations, landing requirements, and the three most common step-building methods. For a full step-by-step patio walkthrough with photos and detailed procedures, see patio how to step by step. For a step-by-step walkthrough on how to put a step in a patio, see our guide on how to put a step in a patio.
Choose the right walkway approach for your site, budget and skill level
The single biggest mistake I see DIYers make is choosing a material before they understand their site. Flat, well-draining ground opens up every option. A sloped yard, poor drainage, or a location within 10 feet of your foundation narrows things quickly. Here is how to match material to situation.
| Material | Best site conditions | Skill level | Material cost (per sq ft) | Weekend DIY? | Durability |
|---|---|---|---|---|---|
| Gravel / DG | Flat or gently sloped, good drainage, informal paths | Beginner | $1–$3 | Yes (1 day) | Moderate — resettles over time |
| Pavers / Brick | Flat to moderate slope, most soils | Beginner–Intermediate | $5–$15 | Yes (1–2 days) | Excellent with proper base |
| Poured concrete | Flat, stable subgrade, no major tree roots | Intermediate | $6–$12 | Possible, but tight | Excellent (28-day cure) |
| Flagstone | Any stable slope, garden or naturalistic settings | Intermediate | $8–$20 | Yes (2 days) | Excellent if bedded correctly |
| Wood / Composite | Uneven or sloped ground, raised applications | Intermediate–Advanced | $10–$25 | Yes (2–3 days) | Good–Excellent (composite best) |
My recommendation for first-timers: start with pavers. The margin for error is higher than poured concrete, the results look professional, and if a section ever sinks or cracks you can relay individual pieces. Gravel is even easier but requires maintenance every year or two as it migrates. Concrete is unforgiving, if you have not poured and screeded before, practice on something small first or plan to hire a finisher for the pour day.
Project planning and site assessment
Spend an hour on planning before you touch a shovel. Measure the full length and width of the walkway, including any landings or connections to the patio. A standard pedestrian walkway is 36 to 48 inches wide, 36 inches is the code minimum for stairways and works for single-file traffic, but 48 inches lets two people walk side-by-side comfortably. Note the elevation change from one end to the other. If the grade drops more than 1 inch per running foot, you will need steps somewhere along the path.
Check your drainage. The IRC (R401.3) requires that the grade falls at least 6 inches within the first 10 horizontal feet away from your foundation. Any walkway surface within 10 feet of the house needs a finished slope of at least 2 percent (about 1/4 inch per foot) directed away from the structure. I always shoot for 1.5 to 2 percent across the entire walkway surface regardless of proximity to the house, that is the range ICPI recommends as well, and it drains well without feeling tilted underfoot.
Before you dig anything, call 811 (the national Dig Safe line in the US) at least three business days before your planned start date. They will mark buried utilities for free. This is not optional, hitting a gas or electrical line is a genuine emergency.
- Measure and stake the full walkway footprint, including any landings or step locations
- Record the total elevation change from start to finish with a line level, water level, or laser level
- Identify any drainage flow paths that cross your planned route — you may need to bridge or channel them
- Note existing tree roots, utilities, irrigation lines, and overhead obstructions
- Calculate your material quantities with 10 percent overage built in for cuts and waste
- Call 811 at least three days before you break ground
Codes, permits and safety before you dig
Most at-grade patio walkways do not require a permit, but the rules vary by municipality and by what you are connecting to. If your walkway includes steps up to a deck or porch, or if it is attached to a new structure, a permit is likely required. When in doubt, a five-minute call to your local building department saves you from a stop-work order or a forced teardown.
When steps are involved, the 2024 IRC is specific. Maximum riser height is 7.75 inches. Minimum tread depth is 10 inches. Variation within a single flight is critical: no riser in a flight can differ from the smallest riser by more than 3/8 inch, this is the rule that trips up most DIYers who eyeball their heights. Handrails are required when you have four or more risers, and they must sit 34 to 38 inches above the tread nosing. Headroom must be at least 6 feet 8 inches. A landing is required at the top and bottom of every stair flight, and exterior stairs serving a deck or patio with three or fewer risers must have a bottom landing at least 36 inches wide.
Safety during construction deserves a quick checklist too. Excavation in unstable soil can collapse. Never work in a trench deeper than 5 feet without shoring. Wear eye protection when cutting pavers or stone. Wet concrete is caustic, wear nitrile gloves and avoid skin contact. Plate compactors vibrate intensely; wear steel-toed boots and keep hands clear of the plate edge.
- Call 811 before any digging — buried utility strikes are a life-safety hazard
- Check local codes for permit requirements, especially if steps, walls, or new structures are involved
- Follow IRC stair specs: 7.75 in max riser, 10 in min tread, 3/8 in max variation within one flight
- Install handrails when four or more risers are present (34–38 in above nosing)
- Wear PPE: eye protection for cutting, nitrile gloves for wet concrete, steel-toed boots near plate compactors
- Never enter a trench deeper than 5 ft without proper shoring
Tools and materials checklist
Universal tools for every walkway build
- Tape measure and marking stakes
- Mason's line and line level (or laser level)
- Flat-head shovel and spade
- Wheelbarrow
- Plate compactor (rent — typically $75–$100/day)
- Hand tamper (for tight spots the plate compactor cannot reach)
- Long straightedge or screed board (2x4 works)
- Rubber mallet
- Safety glasses, work gloves, steel-toed boots
- Knee pads
Material-specific add-ons
| Material | Additional tools | Additional materials |
|---|---|---|
| Gravel / DG | Garden rake, hand tamper | Geotextile fabric, edging stakes, gravel or DG, landscape pins |
| Pavers / Brick | Paver splitter or angle grinder with diamond blade, broom, dead-blow mallet | Crushed stone base (ASTM 57 or 21-A), ASTM C33 bedding sand, edge restraints, paver sand or polymeric sand |
| Poured concrete | Concrete forms (2x4 lumber), wire mesh or rebar, bull float, edger, groover/jointing tool, trowel, finishing brush | Concrete mix (3,500 psi min, air-entrained for freeze-thaw climates), wire mesh or rebar, curing compound or plastic sheeting, expansion joint material |
| Flagstone | Angle grinder or chisel and hammer for shaping, wide putty knife for setting | Crushed stone base, bedding sand or mortar, polymeric sand or mortar for joints, sealer (optional) |
| Wood / Composite | Circular saw, drill/driver, speed square, post-hole digger or impact driver for ground screws | Pressure-treated lumber or composite boards, joist hangers, structural screws, ground contact posts or helical anchors, hidden fastener clips (composite) |
Base, drainage and subgrade preparation
I cannot stress this enough: the base is everything. ICPI data consistently shows that the vast majority of paver and hardscape failures, some estimates put it at 90 percent or more, trace back to inadequate base depth, poor compaction, or drainage problems. Getting this part right is where your project either succeeds long-term or starts heaving and sinking within two seasons.
Excavation depth
Excavate to the depth of your base material plus your surface material, plus about 1 inch for bedding sand if you are setting pavers or flagstone. For a standard pedestrian walkway, ICPI recommends a minimum 4-inch compacted aggregate base. See ICPI / Manufacturer installation summary, paver bedding, sand and edge restraint (installation instructions) for guidance on using a 1‑inch nominal ASTM C33 bedding sand, the requirement for edge restraints on sand‑set pavers, and compacted aggregate base compaction practices blank" rel="noopener noreferrer">ICPI / Manufacturer installation summary — paver bedding, sand and edge restraint (installation instructions). Add your 1-inch bedding sand layer and the paver thickness (typically 2.375 to 3.125 inches), and you are excavating roughly 7 to 8 inches below finished grade. For gravel or DG, you need 4 to 6 inches of total depth. For a 4-inch concrete slab, plan on 4 inches of compacted base beneath it, so excavate 8 inches. Project specification references citing ACI 302.1R (Guide for Concrete Slab Construction) recommend 4-inch residential patio slabs, control-joint spacing based on 24–36 times slab thickness, and curing (wet curing or curing compound) for several days Project specification references citing ACI 302.1R (Guide for Concrete Slab Construction) recommend 4-inch residential patio slabs, control-joint spacing based on 24–36 times slab thickness, and curing (wet curing or curing compound) for several days..
Compaction and base layers
Use crushed angular stone (ASTM 57 stone or equivalent regional material) rather than pea gravel or rounded stone, angular aggregate locks together and compacts properly. Compact in lifts no thicker than 4 inches. Make two to three passes with a plate compactor in overlapping rows, then a pass perpendicular to those. The surface should not visibly deflect when you walk on it. If you are working in cold climates, dig below your local frost depth for concrete walkways and any mortared applications, this prevents frost heave from cracking the slab. For sand-set pavers, frost heave is less catastrophic because you can relay, but a deeper base still helps.
Drainage solutions
If your site is flat or has areas where water pools, install a perforated drain pipe (4-inch corrugated or rigid PVC) along the low edge of the walkway before you add base material. Wrap it in geotextile sock to prevent clogging. Tie it into a dry well, a swale, or a daylight outlet at a lower elevation. For gravel paths, a non-woven geotextile fabric under the stone acts as a separation layer, it keeps the gravel from mixing into the native soil and extends the life of the path noticeably. Skip the woven landscape fabric for structural applications; it clogs faster and does not perform as well under load.
Step-by-step builds by material
Gravel or decomposed granite walkway
- Stake and excavate the walkway footprint to a depth of 5–6 inches
- Roll out non-woven geotextile fabric, overlapping seams by 12 inches and folding up the edges
- Install edging on both sides (metal, timber, or concrete) to contain the gravel
- Add 2–3 inches of compacted crushed stone base and plate-compact it
- Add 2–3 inches of DG or gravel surface layer and compact again
- Rake to a 1.5–2% cross-slope for drainage
- Top-dress with fine-grade DG or pea gravel if desired for appearance
Paver or brick walkway
- Excavate 7–8 inches below finished grade; remove all organic material and soft spots
- Install geotextile fabric as a separation layer
- Add crushed stone base in 4-inch maximum lifts, compacting each lift thoroughly with a plate compactor
- Screed a 1-inch nominal layer of ASTM C33 coarse concrete sand over the compacted base
- Lay pavers from a corner or straight edge, maintaining consistent joint gaps (typically 3/16 to 1/4 inch)
- Cut border and edge pieces with a paver splitter or diamond blade saw
- Install edge restraints on all unrestrained sides, securing them with 12-inch spikes
- Compact the paved surface with a plate compactor fitted with a rubber pad to avoid cracking pavers
- Spread and brush polymeric sand into the joints; compact again, sweep, and lightly wet to activate the binder
Poured concrete walkway
- Excavate to 8 inches below finished grade; grade the subbase to the intended slope
- Compact 4 inches of crushed stone base
- Build your forms with 2x4 or 2x6 lumber staked firmly every 2–3 feet; double-check the slope with a level
- Place wire mesh or rebar (typically 3/8-inch rebar on 18-inch grid for a residential walkway) at mid-depth
- Order or mix at minimum 3,500 psi concrete; specify air entrainment (4–7%) if you are in a freeze-thaw climate
- Pour, screed, and bull-float the surface; edge the perimeter and cut control joints every 4–6 feet (or every 24–36 times the slab thickness in inches per ACI guidance)
- Finish with a broom texture for slip resistance
- Apply curing compound immediately or cover with plastic sheeting for at least 7 days
- Wait 24–48 hours before walking on it; 7 days before any light loads; full 28-day cure before heavy use
Flagstone walkway
- Excavate 6–8 inches below finished grade (depth depends on stone thickness — budget 1.5–2 inches of stone plus base plus sand)
- Compact a 4-inch crushed stone base
- Dry-lay all stones in the desired pattern without mortar, fitting pieces together and trimming with an angle grinder or chisel
- For dry-set: screed 1–2 inches of coarse sand and set stones, adjusting with a rubber mallet to a consistent finished height
- For mortar-set (more stable on slopes or high-traffic areas): spread a 1-inch mortar bed and set stones with at least 90% underside contact
- Check each stone for level and stability; no rocking is acceptable
- Fill joints with polymeric sand (dry-set) or mortar (mortar-set), keeping joint thickness consistent at 1–2 inches for a natural look
- Seal if desired — especially important for porous limestone or sandstone in wet climates
Wood or composite walkway
- Lay out post or beam locations along the walkway every 6–8 feet — use helical anchors or concrete piers to keep posts out of ground contact in wet climates
- Install pressure-treated 2x6 or 2x8 joists on the beam/post structure; spacing determines your decking choice (16 in o.c. for perpendicular composite installation, 12 in o.c. for diagonal per most manufacturer specs)
- Maintain manufacturer-specified clearance between the framing and ground (typically 6–12 inches) for ventilation
- Install composite decking using manufacturer-approved hidden fastener clips, leaving the specified end and side gaps for expansion
- For pressure-treated wood, use hot-dipped galvanized or stainless fasteners — never standard zinc or electroplated
- Cut ends cleanly; seal cut ends of composite boards per manufacturer guidance
- Apply a final check that the surface drains: a 1/8-inch gap between boards handles drainage for elevated structures
Adding steps and managing grade transitions
Where your walkway changes elevation, you have three main step-building options: unit paver steps, framed wood or composite steps, and poured concrete steps. For a step-by-step walkthrough on how to make a patio step, consult the dedicated guide that shows detailed riser and tread layout, framing, and finishing techniques. The calculations are the same for all three. Divide the total rise (the vertical height change in inches) by 7 to get the approximate number of risers needed. Then confirm each riser height is 7.75 inches or less and that your tread depth is at least 10 inches. Check that no riser in the flight varies from the others by more than 3/8 inch, measure each one after construction and correct any offsets before you call the job done.
For a landing at the top and bottom of any stair flight, the IRC requires the landing to be at least as wide as the stair, minimum 36 inches for a residential exterior stair. If you are building steps that connect a walkway to a deck or patio, those transitions also benefit from a broader landing (48 inches works well) to give people room to pause and change direction naturally. The steps topic is worth its own deep-dive, and the process for building box steps and multi-riser framed steps is covered in detail elsewhere on this site. See a step-by-step guide on how to build box steps for a patio for detailed plans, materials, and riser/tread calculations how to build box steps for patio. See our how to build a step on a patio guide for step-by-step instructions on box steps and multi-riser framed steps. For a full diy patio step by step walkthrough covering riser and tread layouts, framing and finish details, see our detailed step-by-step guide.
Riser and tread quick-reference
| Total rise (inches) | Number of risers | Riser height (inches) | Min. tread depth (inches) | Nosing required? |
|---|---|---|---|---|
| 7 | 1 | 7 | 10 | No (tread ≥11 in not needed with nosing) |
| 14 | 2 | 7 | 10 | No |
| 21 | 3 | 7 | 10 | No |
| 28 | 4 | 7 | 10 | No |
| 35 | 5 | 7 | 10 | No |
| 42 | 6 | 7 | 10 | No |
If your tread depth is less than 11 inches, the IRC requires a nosing projection of 3/4 inch to 1.25 inches. Most paver step treads and concrete steps exceed 11 inches so nosing is often optional, but it adds a nice visual finish and improves foot placement in low-light conditions.
Edging and restraint options
Edge restraints are mandatory for sand-set paver installations, without them, pavers will creep outward over time, gaps will widen, and the whole surface will gradually fall apart. Even for gravel and flagstone, edging keeps material in place, defines the path, and gives the build a finished look. Here is how the main options compare.
| Edging type | Best use | Cost (per linear foot) | DIY install? | Notes |
|---|---|---|---|---|
| Plastic paver restraint | Concrete pavers, brick, some flagstone | $0.50–$1.50 | Yes | Spike into compacted base; invisible at surface; easiest and most common |
| Metal (aluminum or steel) | Pavers, concrete slabs, gravel, curved paths | $2–$5 | Yes | More rigid and durable than plastic; holds curves well with snap connectors |
| Timber (landscape timber or sleeper) | Gravel paths, DG, informal flagstone | $1–$4 | Yes | Staked into ground; rots over time unless pressure treated; warm aesthetic |
| Concrete (poured edge or curb) | High-traffic walkways, formal designs | $5–$15 | Advanced | Most permanent; requires forming and curing; almost immovable once set |
| Belgian block / soldier course | Formal paver or concrete walkway borders | $6–$20 | Intermediate | Set in concrete or compacted base; excellent curb appeal; time-intensive |
For most DIY paver projects, the plastic snap-together restraint spiked every 12 inches is the right call. It is invisible, costs almost nothing compared to the rest of the project, and does exactly what it needs to do. I use metal edging when a path curves tightly or when I want something that will last 20-plus years without me thinking about it again. Timber edging suits informal gravel or DG paths well, but plan to replace it every 8 to 15 years even with treated lumber.
Jointing methods and finishes
Sand and polymeric sand
Regular jointing sand is cheap and easy but lets water in and allows weeds to establish. Polymeric sand costs more (typically $25–$40 per 50-pound bag) but contains a binder that hardens with moisture, locks joints against ant activity and weed germination, and resists washout from rain. For any paver or flagstone project, polymeric sand is worth the upgrade. The application process is the same as regular sand: sweep it in dry, compact the surface, sweep again, then activate the binder by lightly wetting the surface with a mist, never a heavy stream that can displace the sand.
Mortar joints
Mortar-set flagstone and mortared brick joints are more rigid and longer-lasting than sand-set, but they crack if the base moves even slightly. On frost-prone sites, mortar joints will crack unless the slab or base beneath is truly stable and below frost depth. Use a Type S mortar mix for exterior applications. Keep joint depth consistent, 3/4 to 1 inch for flagstone joints is a common target. Tooling the joint (running a jointing tool along it before the mortar fully cures) compresses it and improves water resistance.
Flexible sealants and expansion joints
For concrete walkways, cut control joints every 4 to 6 feet to control where cracking occurs. Where the walkway meets the house foundation or an existing patio, use a flexible backer rod and exterior-grade polyurethane or silicone caulk rather than mortar or rigid material. This allows independent movement and prevents the joint from telegraphing cracks into your slab. Check and re-caulk these isolation joints every three to five years.
Weed control
Polymeric sand in joints is the most effective long-term weed deterrent for paver and flagstone surfaces, provided you do not wash it out during application. For gravel and DG paths, the geotextile fabric under the stone reduces weed pressure significantly, but seeds blow in and germinate on top, expect to pull weeds from the surface periodically. Avoid black plastic sheeting under gravel: it blocks drainage, degrades and shreds into fragments, and performs worse than non-woven geotextile.
Common mistakes and how to fix them
- Shallow or uncompacted base: pavers sink and rock, gravel shifts. Fix: excavate and rebuild from the bottom up — there is no shortcut
- Wrong slope direction: water pools against the house. Fix: re-grade during construction; after the fact requires either re-setting pavers or adding surface drains
- Skipping edge restraints on sand-set pavers: pavers creep, joints blow out. Fix: add restraints and re-sand immediately, before further spreading occurs
- Inconsistent riser heights on steps: a tripping hazard and a code violation. Fix: measure each riser before mortaring or backfilling, and shim or add material to equalize
- Wetting polymeric sand too heavily: the binder washes into joints unevenly or runs onto paver faces. Fix: use a mist setting only; keep a dry brush ready to clean faces before wetting
- Curing concrete too fast in hot weather: surface crazes and weakens. Fix: cover with wet burlap and plastic sheeting immediately after finishing, especially in summer
- Forgetting expansion joints in concrete: random cracking. Fix: cut control joints at 24–36x the slab thickness (in inches) — a 4-inch slab needs joints every 8–12 feet
Maintenance by material
| Material | Annual tasks | Every 3–5 years | Lifespan (well-maintained) |
|---|---|---|---|
| Gravel / DG | Rake and level, add top-dress material where low | Replace fabric edges if damaged; add fresh DG layer | Indefinite with top-dressing |
| Pavers / Brick | Sweep, blow debris from joints, pull weeds | Re-apply polymeric sand in joints; re-level any sunken sections | 25–50+ years |
| Poured concrete | Sweep, check for cracks, clear organic debris | Seal surface; re-caulk expansion joints | 25–50 years (depends on climate) |
| Flagstone | Sweep, remove weeds, check for rocking stones | Re-mortar or re-sand loose joints; re-level sunken stones | 50+ years with good base |
| Wood (PT) | Clear debris, check for rot and fastener corrosion | Apply deck stain/sealer | 15–25 years |
| Composite | Sweep, clean with mild soap | Inspect fasteners and framing for corrosion | 25–30+ years (boards) |
When to call a pro instead
I am a firm believer in DIY, but there are a few scenarios where hiring a professional is the smarter financial and safety decision. If your walkway crosses a slope steeper than 1 vertical foot per 4 horizontal feet, managing drainage and structural stability requires engineering-level thinking. If your project requires cutting through an existing concrete slab, extensive rebar work, or forming complex curves in poured concrete, the skill gap between a good finish and a bad one is steep. If you discover that your soil is expansive clay, unstable fill, or has high organic content, a geotechnical assessment before you build saves you from rebuilding in three years.
Similarly, if your grade change requires more than five or six risers, or if the steps connect a living space to grade in a way that requires a handrail and your municipality does a final inspection, having a contractor handle at least the structural framing and rough-in gives you something inspectors will sign off on. You can do the finish work yourself after.
Time and cost estimates at a glance
| Material | Typical project time (100 sq ft) | Material cost (100 sq ft) | Equipment rental | Pro install cost (100 sq ft) |
|---|---|---|---|---|
| Gravel / DG | 4–6 hours | $100–$300 | $75 plate compactor | $400–$800 |
| Pavers / Brick | 1–2 full days | $500–$1,500 | $75–$100 plate compactor | $1,200–$3,000 |
| Poured concrete | 1 day pour + 7-day cure | $600–$1,200 | $50–$100 form lumber | $1,500–$3,500 |
| Flagstone | 1–2 days | $800–$2,000 | $75 plate compactor | $1,800–$4,000 |
| Composite / Wood | 2–3 days | $1,000–$2,500 | $50–$100 misc hardware | $2,500–$5,000 |
These estimates assume a straightforward at-grade installation with no major drainage work or steps. Add roughly $200–$500 per step for materials and a few hours of labor per riser when building a stair section into the walkway. If you are also building out a full patio and connecting the walkway to it, many of the base prep steps overlap, which saves both time and material cost.
FAQ
What pre‑build site assessment and planning checks must the article include?
Site assessment checklist: measure length/width and calculate square footage; record existing grade, high/low points and distance to foundation; note utilities (call 811) and overhead/underground obstacles; check soil type and drainage (percolation/standing water); verify local zoning setbacks, easements and HOA rules; confirm required permits and building‑department stair/handrail/landing rules; decide finished slope and outlet for surface drainage. Include simple measuring templates (string line, level/laser, slope per foot), and permit/inspection steps.
Which building codes and authoritative specs should be referenced for stairs, landings and handrails?
Reference IRC stair/landing provisions (R311 series): minimum clear stair width 36 in, maximum allowable riser variation within a flight 3/8 in, headroom ≥6 ft‑8 in, and landings required at top/bottom of flights. Handrail height typically 34–38 in above tread nosing; maximum riser commonly 7.75 in and minimum tread 10 in unless nosing used. State that local building departments may have amendments and readers must verify with their jurisdiction.
What riser, tread and landing calculations and formulas must be included?
Provide riser/tread calculation guidance: ideal riser 6–7.75 in (max per IRC) and tread 10–11 in min; use 2R + T = 24–25 in for comfortable stairs (R = riser height, T = tread depth). Show how to compute number of risers = total rise ÷ desired riser (round to nearest whole); adjust riser to fit evenly. Landing depth should be at least stair width or minimum 36 in per code; show sample calculations and checks.
What material‑specific base, bedding and thickness specifications are required?
Include authoritative minimums: unit pavers — compacted aggregate base 4 in for pedestrian patios (6 in for driveways), 1 in nominal bedding sand (ASTM C33), mandatory edge restraints per ICPI; concrete slab patios — minimum 4 in thick slab for pedestrian use, control joints spacing ~24–36× thickness (in inches), air‑entrained mix and ~3,500 psi recommended in freeze‑thaw areas; flagstone — typical thickness 1.25–1.5 in min for pedestrian use (1.5–2 in where load/steps occur) and full bed/mortar or well‑compacted base per Natural Stone Institute; gravel/DG — compacted crushed‑stone base 2–4 in plus 3–4 in compacted surface DG/gravel; wood/composite — follow manufacturer joist spacing, ventilation and fastening instructions (e.g., 16 in o.c. typical). Note soil, load and climate may necessitate deeper base or subgrade treatment.
What drainage and slope requirements must be covered?
Include code and best practices: slope away from building minimum 6 in fall in first 10 ft for lot grading (IRC R401.3); finished patio/walkway slope generally 1–2% for pedestrian areas (≈1/8–1/4 in/ft), and at least 2% within 10 ft of foundation; design positive drainage to storm drains, swales, or grade outlets; show how to calculate slope and grade using rise/run and simple examples; include French drain/trench drain options for low spots.
What step‑by‑step build sequences must the article provide for each material?
Provide compact, photo‑friendly sequences for: gravel/DG — mark layout, excavate to depth, lay geotextile, install/compact crushed stone base in lifts, screed and compact DG surface, edge restraint; pavers/brick — excavate, install geotextile if needed, compact base in lifts, screed bedding sand, lay pavers, compact with plate compactor, fill joints with polymeric sand, install edge restraints; poured concrete — formwork and subgrade prep, install base, place reinforcement (wire mesh/rebar where required), pour and screed, place control joints and finish (broom, trowel), cure and seal; flagstone — compact base, set in full mortar bed or dry‑set on compacted aggregate with jointing material, level and tighten contact, grout or poly sand as specified; wood/composite — build framed joist substructure on concrete/footings or pedestals, install boards per manufacturer, fasten per spec, provide ventilation and flashing at building transitions. Each method should list required tools, lift sizes, compaction specs and typical timing steps.
Patio How to Step by Step: DIY Build Guide from Plan
Step-by-step DIY patio build: planning, drainage grading, base layers, pavers or brick setup, finishing, curing and upke