You can absolutely build a raised garden bed on a patio, whether it's pavers or concrete, and it works really well once you sort out a few key things: drainage, weight distribution, and soil depth. Pick a spot that gets 6 to 8 hours of direct sun, build or buy a frame in cedar, composite, or untreated pine, line the bottom with hardware cloth and landscape fabric, fill it with a 60/30/10 soil mix, and you're growing. This guide walks you through every step, including how to scale up to multiple beds if you've got the space.
How to Make a Raised Garden Bed on a Patio

Nolan Lennox
30 Jun 2026
Where to put it and how to measure your space
Before you buy a single board, spend a day watching how the sun moves across your patio. Most vegetables, herbs, and fruiting plants need 6 to 8 hours of direct sunlight daily, ideally from mid-morning onward. Shade from walls, fences, overhanging trees, or even a pergola can quietly steal that light. If your patio only gets 4 hours, stick to leafy greens and herbs, which are much more forgiving. Also pay attention to wind: a spot that's constantly hammered by afternoon gusts will stress plants and dry out soil fast.
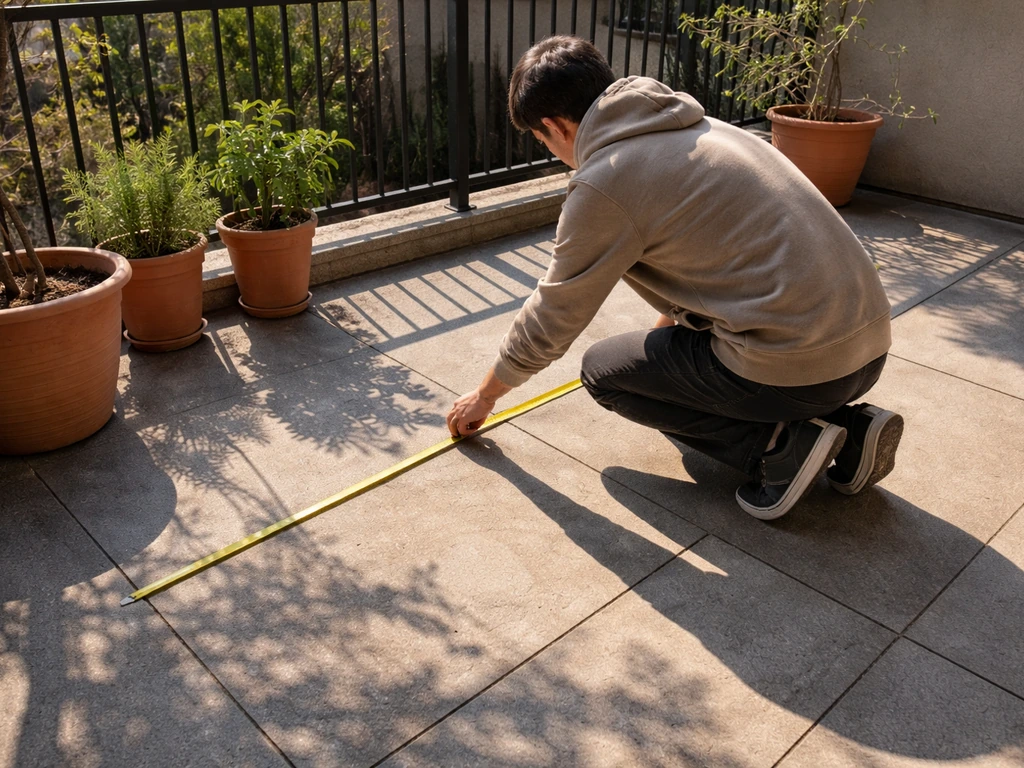
For sizing, the most important rule is reachability. You should never have to stretch more than 24 inches from the edge of the bed to reach the center, so you can weed and harvest without stepping in and compacting the soil. That gives you a maximum bed width of 48 inches if you can access both sides, or 24 inches if one side is against a wall or railing. For length, go as long as your space allows, but 4 feet by 8 feet is the classic starting point because it's manageable and efficient with standard lumber lengths. For multiple beds, leave at least 24 to 30 inches between them for comfortable walking, and ideally 36 inches or more if you plan to roll a wheelbarrow through.
Measure your patio carefully before you sketch anything. Mark out the footprint of each planned bed with tape or chalk so you can walk around it and make sure the layout actually works. It sounds obvious, but seeing the space blocked out on the ground will immediately show you if a bed is too close to a door, blocks a path, or crowds a seating area.
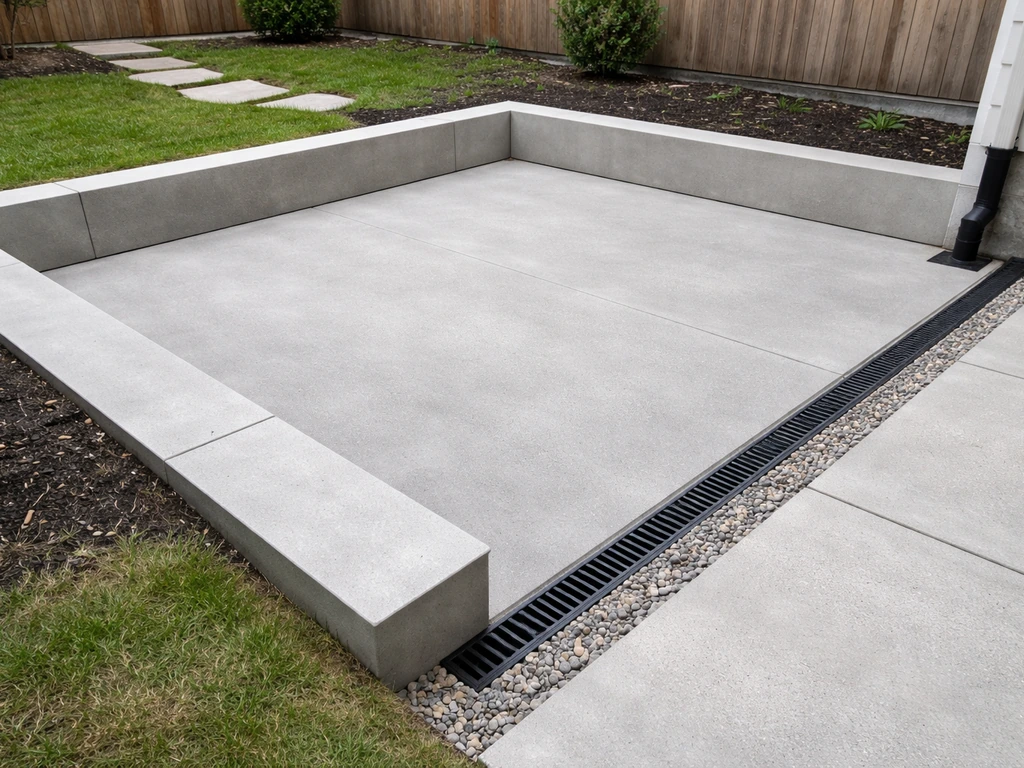
Leveling, drainage, and what your patio surface actually does
Here's something a lot of first-timers miss: your patio surface already has a drainage slope built in. If you want a taller, more dramatic setup, the same raised bed planning and drainage tips apply when you build a raised patio with sleepers. Most patios are graded to shed water away from the house, typically a quarter-inch drop per foot. That's not enough to cause problems for a raised bed, but it does mean the base of your frame might not sit perfectly flat. Check it with a level before you build. If you've got a slight slope, you can shim the low side of the frame with composite shims or rubber pads. Don't ignore it, because a tilted bed will pool water on one side and stress plants unevenly.
On a paver patio, the load from a filled raised bed is spread laterally across adjacent pavers, which helps distribute the weight rather than concentrating it on one spot. A standard 4x8 bed filled to 12 inches deep with soil mix can weigh 600 to 900 pounds when fully watered, so it's worth confirming your patio is structurally sound, especially if it's elevated or built on a deck frame. Concrete patios are generally less of a concern, but older cracked slabs deserve a closer look before you add significant weight.
Drainage is where patio raised beds differ most from in-ground beds. Water has nowhere to go except through the bed itself or around the frame, so you need to manage it intentionally. Avoid laying a full gravel layer across the entire bottom of the bed, since gravel can actually trap water above it rather than move it along. Instead, use hardware cloth and landscape fabric at the base (more on that in the liner section), and make sure your soil mix drains freely. When constructing raised garden beds on hard surfaces, use barrier fabric between the soil and the bed to help manage the soil layer during build-out use hardware cloth and landscape fabric at the base. If you're building a fully enclosed solid-bottom box, you'll need drainage holes in the base panels.
Choosing your materials and deciding on bed size

The three materials most DIYers end up choosing between are cedar, composite lumber, and untreated pine or Douglas fir. Each has real trade-offs worth knowing before you shop.
| Material | Lifespan | Cost (approx.) | Weight | Food-Safe | Best For |
|---|---|---|---|---|---|
| Western Red Cedar | 15-20+ years | $$-$$$ | Moderate | Yes (naturally rot-resistant) | Long-term beds, best all-around |
| Composite Lumber (e.g., Trex) | 25+ years | $$$ | Light-moderate | Yes (inert) | Low-maintenance, modern look |
| Untreated Pine/Douglas Fir | 3-7 years | $ | Moderate | Yes | Budget builds, first-time projects |
| Modern Pressure-Treated (ACQ/CA) | 15-20+ years | $$ | Moderate | Generally considered safe* | Durability on a budget |
A quick note on pressure-treated lumber: the old CCA-treated wood (which contained chromium, copper, and arsenic) was banned by the EPA for residential use years ago. Modern pressure-treated lumber uses ACQ or copper azole treatments, and university research suggests any copper migration into soil is minimal, typically staying within about an inch of the board edge. If you're still uneasy about it, line the inside of the frame with heavy plastic sheeting before adding soil. That said, cedar or composite are the easier mental choice if you want to skip the worry entirely.
For bed size, the 4x8 foot footprint is the standard recommendation for good reason: it fits a standard patio door opening if you need to move it, works with 8-foot lumber cuts with no waste, and gives you enough growing area to be productive. For multiple beds, I'd suggest starting with two 4x4 beds rather than one 4x8 if your patio is narrow or oddly shaped. They're easier to maneuver, and you can keep different crops or soil mixes in each one.
How deep should the bed be?
Depth matters more than most people realize, especially on a hard surface where roots have zero chance of going deeper. If you want something even more integrated with your yard, a sunken patio follows similar site and drainage planning, just with the bed built lower into the ground. For lettuce, spinach, herbs, and onions, 6 inches of soil is the functional minimum but 8 inches is more forgiving on hot days. For beans, cucumbers, and most brassicas, aim for at least 8 to 10 inches. For tomatoes, peppers, squash, and deep-rooted herbs like rosemary, you want 12 to 24 inches. The University of Maryland Extension specifically recommends 12 to 24 inches for peppers and tomatoes on hard surfaces. If you're building a bed that needs to do everything, 12 inches deep is the sweet spot that covers most edible crops.
Tools, materials list, and the build sequence
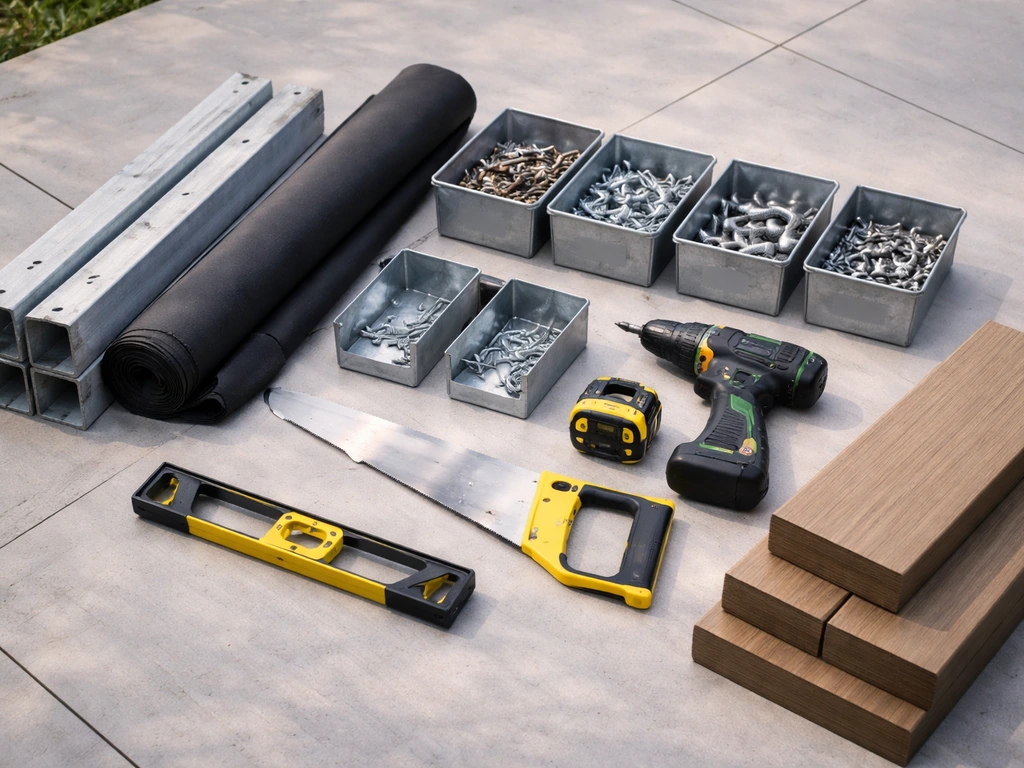
What you'll need
- Lumber or composite boards cut to your chosen dimensions (e.g., 2x10 or 2x12 for a 12-inch-deep bed)
- 4x4 corner posts or heavy-duty corner brackets (galvanized or stainless steel)
- Galvanized deck screws (3-inch minimum, exterior rated)
- Galvanized hardware cloth (1/4-inch mesh, enough to cover the bed footprint)
- Landscape fabric (breathable, not woven plastic sheeting)
- Staple gun with heavy staples or construction staples
- Drill and drill bits
- Circular saw or miter saw (or have the lumber yard cut it for you)
- Tape measure, pencil, and carpenter's square
- Level (2-foot minimum)
- Rubber mallet
- Composite shims or rubber furniture pads (for leveling on pavers)
- Work gloves and eye protection
Step-by-step build sequence
- Cut your boards to length. For a 4x8 bed, you'll need two boards at 8 feet (long sides) and two boards at 45 inches if using 2x lumber (short sides, accounting for the corner overlap). Double up the boards if you want a 12-inch depth from two 2x6s, or use a single 2x12.
- Assemble the frame on a flat surface first. Stand two short-side boards between the two long-side boards and screw through the long sides into the ends of the short sides. Use a carpenter's square to confirm 90-degree corners. Pre-drill to avoid splitting.
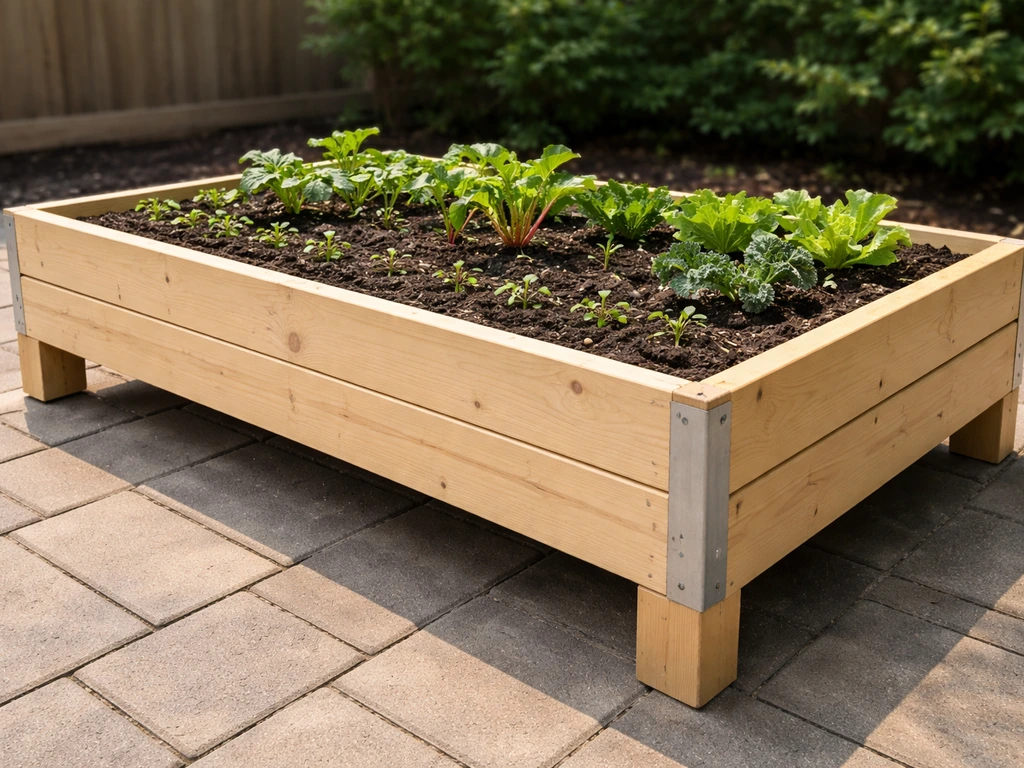
- Add corner posts or brackets. Secure 4x4 corner posts inside each corner, flush with the top and extending below the frame if you want extra stability, or use heavy galvanized corner brackets. This is what keeps the frame square under soil pressure.
- Position the frame on your patio. Set it in its final spot and check for level in both directions. Shim the low side as needed using composite shims or stacked rubber pads under the frame corners.
- Cut hardware cloth to fit the interior footprint and lay it inside the bottom of the frame. This keeps burrowing animals out and holds soil in. Secure the edges by stapling or bending them up the inside walls of the frame a few inches.
- Lay landscape fabric over the hardware cloth, stapling it to the inside walls. This prevents fine soil from sifting through the mesh and helps manage drainage without blocking it the way a solid plastic liner would.
- If building multiple beds, repeat the process for each frame before moving on to filling, so you can adjust positions and spacing while everything is still empty and easy to move.
Soil mix and liner setup for healthy roots
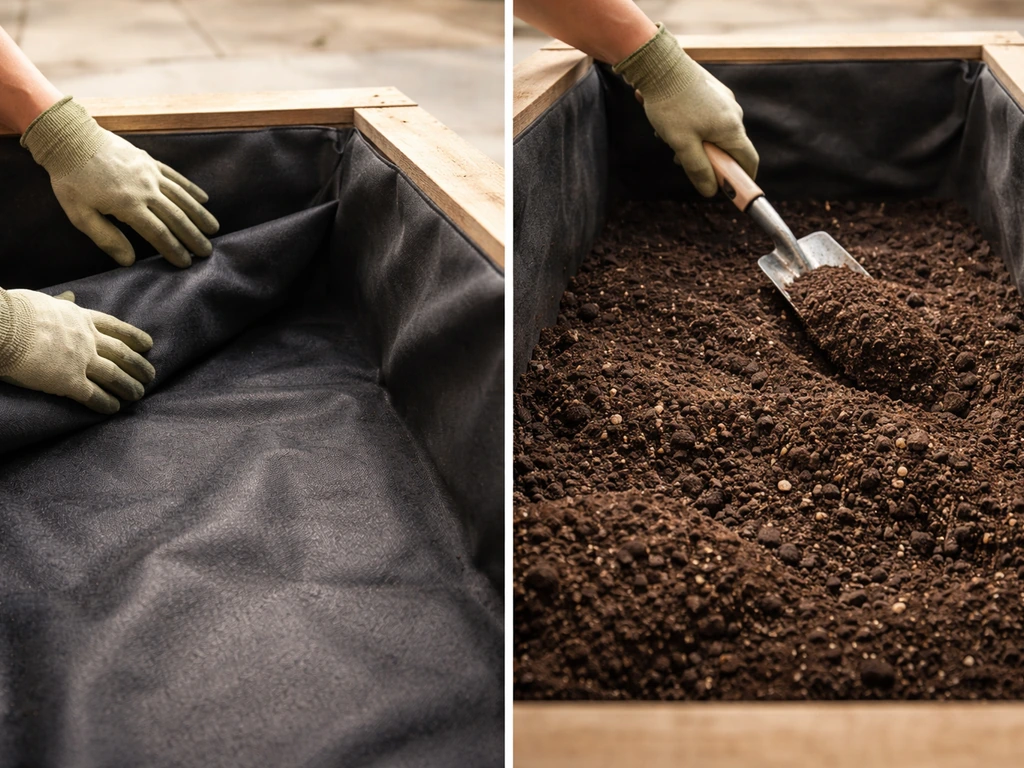
Don't fill a patio raised bed with straight topsoil from bags. It compacts quickly, drains poorly, and will have your plants looking rough by midsummer. The go-to formula that actually works is a 60/30/10 mix: 60% quality topsoil, 30% compost, and 10% either potting mix or a coarse drainage amendment like perlite. The compost does a lot of the heavy lifting in year one. If it's high-quality compost making up 30% of your mix, you typically won't need supplemental fertilizer for the first season.
To calculate how much soil you need, measure the interior length, width, and planned depth of your bed. A 4x8 bed at 12 inches deep holds about 32 cubic feet of soil, which is roughly 24 to 25 standard 1.5-cubic-foot bags. Buying in bulk from a landscape supply yard is significantly cheaper once you're filling more than one bed. Note that soil settles after the first watering and again after the first few weeks, so overfill by about an inch and top it off after it settles.
The liner setup matters beyond just the bottom. If your frame has gaps between boards (intentional for drainage in some designs), those gaps need fabric backing on the inside to keep soil from washing out onto your patio. A slatted bottom cedar design works beautifully for drainage but only if the gaps are lined with fabric. Completely solid-sided and solid-bottomed frames need at least four to six drainage holes drilled through the base panels, roughly one per square foot.
Securing the bed, keeping it solid, and first-season care
One issue that surprises people is how much a filled raised bed can shift over time, especially on a patio where it can't be staked into the ground. If you're also figuring out how to build a floating patio, plan for movement and reinforcement so the structure stays stable over time. Heavy rain, frost cycles, and the outward pressure of wet soil pushing against the frame walls will all try to rack the corners and push boards apart. The fix is good corner reinforcement from day one: use 4x4 posts or heavy metal corner brackets rather than relying on screws alone through end grain. If your bed is against a wall or fence, you can add a bracket or two to anchor it to that surface for extra stability.
For first-season care, water more frequently than you would for an in-ground garden. Patio raised beds are exposed on all sides and heat up faster, which means soil dries out more quickly. Check moisture by pushing a finger 2 inches into the soil; if it's dry at that depth, water thoroughly. Mulching the top surface with 2 to 3 inches of straw or wood chips helps retain moisture, moderate soil temperature, and reduce the watering load significantly.
At the end of the first season, top-dress the bed with 2 to 3 inches of fresh compost. Soil settles and organic matter breaks down over the growing season, so you'll need to replenish it annually to keep the soil level and fertility where they need to be. This is also the time to reassess the soil structure: if it's compacting quickly or draining too fast, adjust the mix before spring planting. UMD Extension notes that evaluating and re-amending after the first full year gives you a much clearer picture of how your specific soil mix is performing. When planning soil for a raised bed, allow time for the soil components to react and mix before judging final conditions, and re-evaluate after about a year allow time for the components to react and mix before judging final conditions, and re-evaluate after about a year.
One more thing worth mentioning: if your patio is exposed and you're in a climate with hard freezes, the soil in a raised bed will freeze more thoroughly than in-ground soil because it's insulated on zero sides. That's usually fine for annuals you're replanting each spring, but perennial herbs and plants can be more vulnerable. Either wrap the outside of the bed with burlap or insulating foam board over winter, or treat those plants as annuals and replant. OSU Extension specifically flags that higher raised beds may need extra frost protection in year-round growing scenarios.
If you're looking to go bigger or more structural with your outdoor space, the principles here connect closely to what goes into building a raised patio or working with sleepers, since you're dealing with similar load, leveling, and drainage decisions. If you want to build a raised patio itself, the same basics like leveling, drainage, and load planning apply building a raised patio. But for a raised garden bed on your existing patio, the approach above is genuinely straightforward, even for a first-time builder. Get your sun exposure right, build a solid frame, line it properly, use a real soil mix, and you'll have something that produces well for years.
FAQ
Can I build a raised garden bed on patio pavers without worrying about damaging them?
You still need to consider the extra load, especially if your patio is elevated or the paver base is soft. A quick check is to look for settlement or cracked mortar lines before building, and keep the bed length limited so weight is spread evenly. If the patio is on a deck or over a weak slab, add a wider, more laterally distributing footprint (for example, two smaller beds) or consult a structural load rating.
How do I prevent water from running off my raised bed and pooling near the frame on a sloped patio?
Use the existing patio slope to your advantage by leveling the frame, not the surface. Check the frame with a level and shim the low side so the interior stays level, then keep drainage paths clear around the bed so runoff does not back up against one wall.
Should I use landscape fabric at the bottom to stop weeds, or will it harm drainage?
Use landscape fabric only as part of a liner system, not as the sole drainage layer. The key is to keep the bottom breathable with hardware cloth and appropriate fabric so water can move through, while soil particles are held back. Avoid thick, non-permeable layers that can slow drainage and create a perched-water zone.
What’s the safest way to handle drainage holes if my frame is solid-bottomed?
Drill multiple holes through the bottom panels, then confirm they are not getting blocked by the patio surface or liner. If you have a solid box with a contained bottom, you need holes distributed across the base, not just one or two, so water can drain after heavy rain.
Can I put a raised bed directly on patio furniture, furniture bases, or near doorways without moving it?
Yes, but you must plan for access and soil stability. Leave clearance for opening doors fully, allow at least a foot of walkway space around the bed so you do not step into it, and avoid placing the bed where the frame will be bumped, since patio beds can shift slightly over time under frost and wet soil pressure.
Do I need to add fertilizer if I’m using the 60/30/10 soil mix?
Often you can skip added fertilizer in year one if your compost is truly high quality and you are growing moderate-feeding crops. Still, watch plant performance, if leaves are pale or growth stalls, use a light supplemental feeding rather than heavy nitrogen, since patio heat and frequent watering can amplify nutrient swings.
How often should I water a patio raised bed, and how do I avoid overwatering?
Water based on soil moisture, not the calendar. A reliable method is to push a finger about 2 inches down, if it feels dry at that depth, water thoroughly until it drains out the bottom. In hot weather you may water more frequently, but in cool or rainy spells, reduce to prevent soggy conditions.
Is mulching required on a patio raised bed, and what mulch type works best?
Mulching is strongly recommended because patio beds heat up and dry out faster on all sides. Use 2 to 3 inches of straw or wood chips, keep mulch a little back from stems, and refresh it after it breaks down to keep moisture retention consistent.
Can I use straight compost or topsoil instead of a 60/30/10 mix?
It usually leads to compaction and poor drainage because straight materials do not provide the same balance of structure and airflow. Compost-only or topsoil-only mixes can turn heavy, especially in a confined patio bed, which reduces root oxygen and can cause nutrient issues later in the season.
How do I calculate soil quantity if my bed is not exactly 12 inches deep?
Use interior dimensions and the planned depth, then convert cubic feet to bag volume based on your bag size. For example, volume in cubic feet equals (length in feet) x (width in feet) x (depth in feet). Remember the mix settles, so plan to overfill slightly and top up after the first watering and again after a couple of weeks.
Will a patio-raised bed freeze more than my in-ground beds, and can I protect perennials?
Yes, patio beds can freeze more thoroughly because they are insulated on zero sides by surrounding soil. Annual vegetables are usually fine, but perennials can suffer. For freeze protection, wrap the outside with burlap or insulating foam board during winter, and consider treating marginal plants as annuals if you get severe cold.
My raised bed seems to shift or loosen after rain, what causes this and what should I do?
Common causes are insufficient corner reinforcement and movement against a non-staked base. Reinforce corners with posts or heavy metal brackets, and avoid relying only on screws into end grain. If it is against a wall or fence, add a couple of anchoring points for extra stability.
Do I need to line the sides with fabric, or is the bottom only?
If your frame has gaps between boards or panels, you need fabric backing on the inside to stop soil from washing out onto the patio. For fully solid, no-gap designs with a truly solid bottom, you may not need side fabric, but you still need proper base drainage holes if the bottom is not fully permeable.
What crops do best on a patio raised bed that gets less sun, like 4 hours?
Leafy greens, herbs, onions, and other shorter-season crops usually perform best with reduced sun. Fruiting vegetables often struggle under 4 hours, so prioritize greens and choose varieties labeled for partial shade, then consider relocating pots for additional light if possible.
Next Article
How to Build a Sunken Patio: DIY Steps, Drainage, Base
DIY sunken patio guide with grading and drainage steps, base prep, material choices, and common mistakes to avoid.