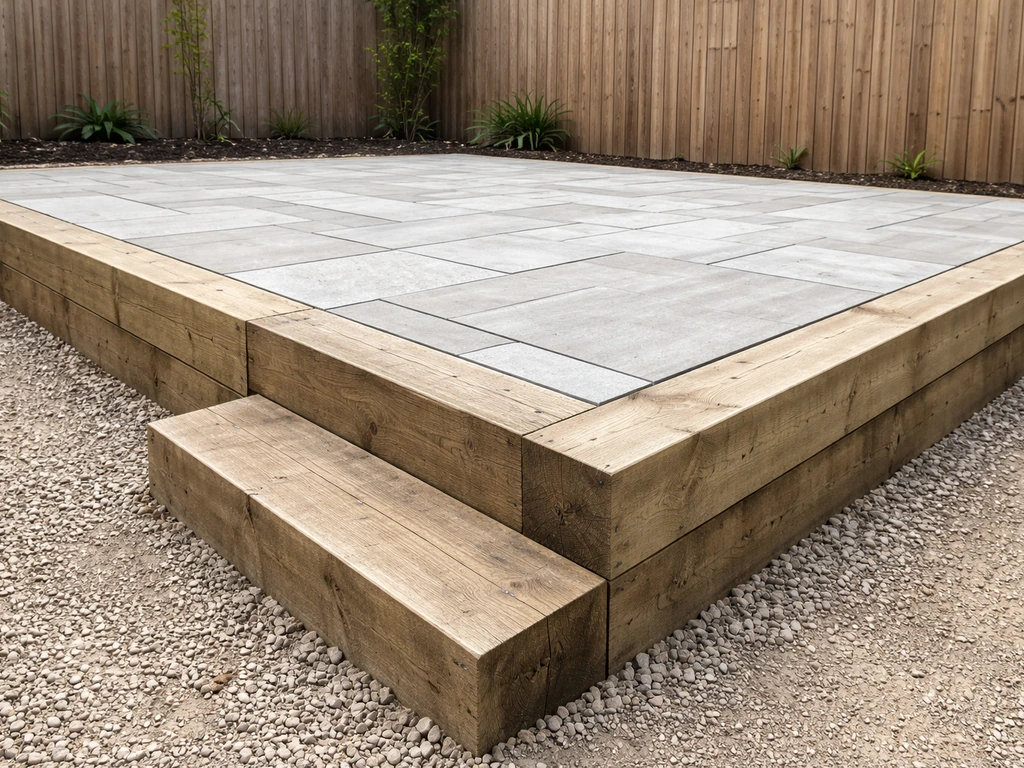
You can build a solid raised patio with sleepers over a weekend or two if you plan it properly. The basic method is: set out your frame using treated timber sleepers stacked to your desired height, compact a gravel sub-base inside the frame, lay a weed membrane, then finish with your chosen surface, whether that is paving slabs, compacted gravel, or another material. You can use the same raised-sleeper approach to learn how to build a floating patio that keeps the structure stable and drains well behind it set out your frame using treated timber sleepers. The sleepers act as a retaining wall holding back the raised ground, so getting the drainage and compaction right behind them is what separates a patio that lasts 15+ years from one that shifts, rots, or floods within a couple of seasons.
How to Build a Raised Patio With Sleepers Step by Step

Step 1: Nail down your design and check your ground
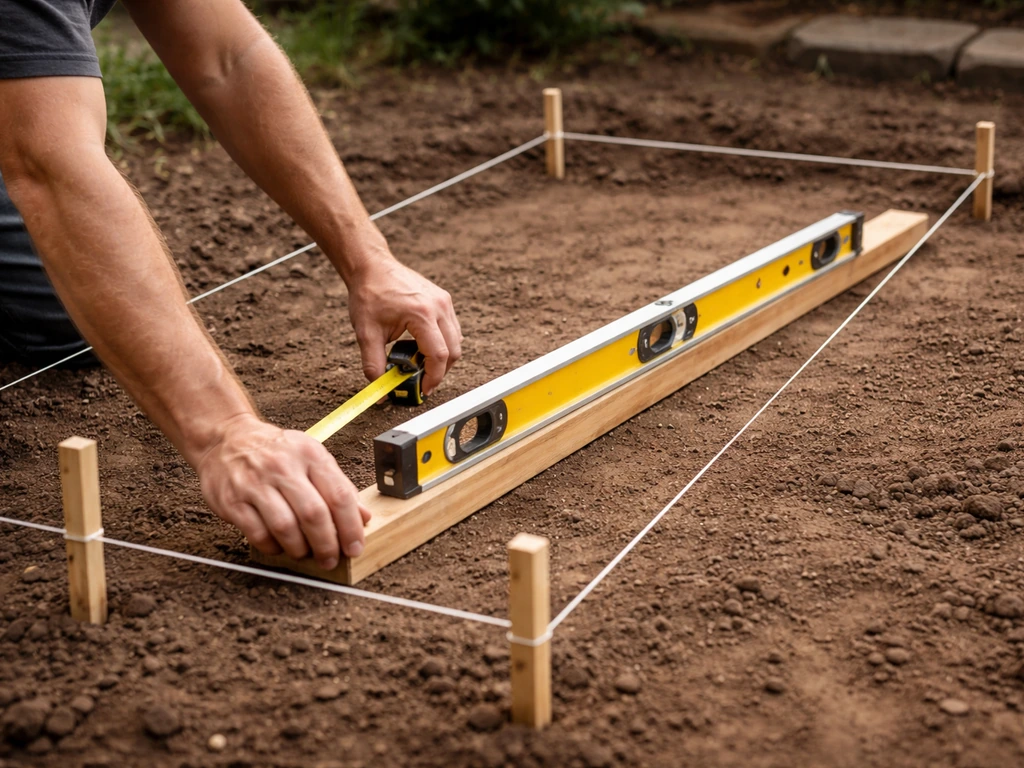
Before you order a single sleeper, spend time on site with a tape measure and a long spirit level. Sketch out the patio footprint to scale, mark your corners with pegs and string, and measure the slope of the existing ground. You need to know how high the finished surface will sit at every edge, because that tells you how many sleeper courses you need to stack on each side and how much fill material you will need to order.
Check what the ground is actually doing underneath. On clay-heavy soil, water sits rather than drains, which puts enormous pressure on a retaining frame over winter. Sandy or free-draining soil is much more forgiving. If you are building on a slope, the uphill side of your sleeper frame is going to hold the most retained material and carry the highest load, so it needs to be sturdier than the downhill side. Dig a test hole 300-400 mm deep and see what you are dealing with before you commit to a design.
Drainage fall is non-negotiable. Your finished patio surface must slope away from the house at a minimum gradient of 1:60 (roughly 17 mm for every metre of run). Mark this into your string lines from the start rather than trying to correct it later. If your garden naturally slopes towards the house, you will need a channel drain at the base of the patio wall or a redirect drain before you build.
Step 2: Choose your sleepers and other materials
Which sleepers to buy
For a raised patio, always buy new treated softwood sleepers rather than reclaimed railway sleepers. Old reclaimed sleepers were traditionally treated with creosote, which is classified as a hazardous substance, and their actual remaining preservative protection is unknown. New softwood landscaping sleepers come in a common size of 200 x 100 mm in 2. 4 m lengths, which is widely available from timber merchants and building suppliers.
Look specifically for UC4-rated treatment (the European use class for timber in contact with ground or damp conditions). EN 335:2013 defines wood “use classes” as exposure categories, including UC 4 for timber in contact with ground or damp conditions UC4-rated treatment.
A good UC4 green-treated sleeper carries a marketed lifespan of around 15 years in ground-contact conditions, which is a reasonable benchmark for a permanent garden structure.
Some suppliers now offer sleepers treated with copper naphthenate rather than older creosote-based products, which is a cleaner option with a similar performance profile. SNCF Group states that since September 2025, its Bretenoux-Biars plant has treated wooden railway sleepers with copper naphthenate oil rather than traditional creosote Some suppliers now offer sleepers treated with copper naphthenate rather than older creosote-based products. Whatever you buy, check the treatment documentation and make sure it is rated for ground contact, not just above-ground use.
The other materials you will need
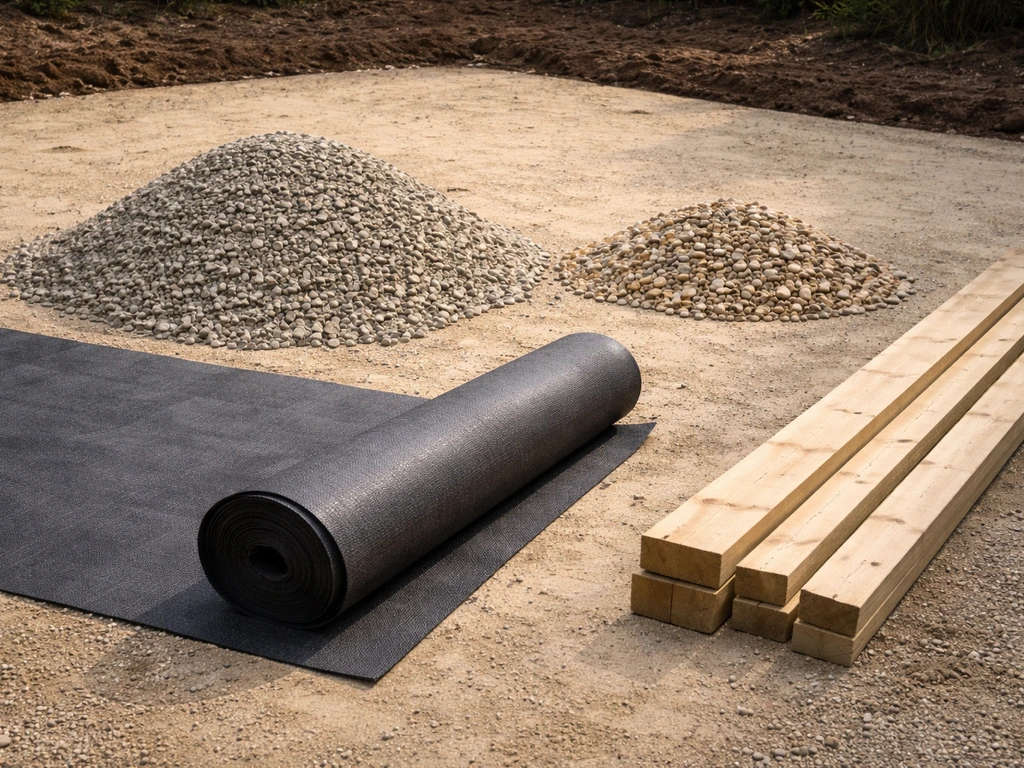
- MOT Type 1 crushed aggregate (hardcore): this is the standard sub-base material for garden paving projects in the UK. You will need it both inside the frame as the main structural fill and as a compacted base layer under your sleepers.
- Weed control membrane: a proper woven geotextile, not the thin stuff from the garden centre. It sits between your fill and the final surface layer.
- Sharp sand or grit sand: used as a bedding layer if you are laying slabs or block paving on top of the compacted sub-base.
- Mortar (if laying slabs): a standard 5:1 sharp sand to cement mix for the slab bed.
- Perforated drainage pipe (land drain): 60-80 mm diameter pipe to run along the base of the retained side of the sleeper frame.
- Drainage gravel or clean angular aggregate: to wrap the land drain and fill the drainage zone behind the sleepers.
- Geotextile filter fabric: to wrap the drainage aggregate layer and stop fine soil migrating into it.
- Rebar or timber stakes: for anchoring the sleeper frame to resist outward pressure.
- Structural screws or timber bolts: for jointing sleeper layers together.
- Pea gravel or paving slabs/block paving: for the finished surface, depending on your preference.
Sleepers vs. other edging materials
| Material | Cost (approx. per linear metre) | Durability | DIY difficulty | Best for |
|---|---|---|---|---|
| UC4 treated softwood sleepers (200x100mm) | £8-£14 | 15+ years with ground-contact treatment | Low to medium | Most raised patio builds, clean natural look |
| Hardwood sleepers (oak, etc.) | £20-£35 | 25+ years | Medium (heavy) | Premium finish, longer lifespan, higher budget |
| Concrete sleepers | £15-£25 | 40+ years, no rot risk | High (very heavy) | Maximum longevity, industrial or modern look |
| Reclaimed railway sleepers | Variable (£5-£20) | Unknown remaining life, creosote hazard | Medium | Not recommended for new builds |
Step 3: Tools, permits, and your shopping list
Permits: check before you build
In England, raised garden structures that function more like decking platforms are generally limited to 0. 3 m height under Permitted Development rights. A raised patio built up with fill material and retaining sleepers occupies a slightly different category, but if your finished surface sits noticeably above ground level and you are close to a boundary, it is worth checking with your local planning authority before starting.
Permitted Development does not override building regulations or the Party Wall Act, so if your retaining frame is near a shared boundary, talk to your neighbour and consider a Party Wall Agreement. In the US, many jurisdictions require a building permit for retaining walls above 3 to 4 feet in retained height, and some have front-yard setback restrictions on top of that. Always check your local rules before you dig.
Tools you will need
- Tape measure, string lines, and timber pegs for setting out
- Long spirit level (1.2-1.8 m) and a laser level if you have one
- Spade, mattock, and a wheelbarrow
- Plate compactor (hire one, do not try to tamp by hand for anything larger than a small patch)
- Circular saw or chainsaw for cutting sleepers to length
- Drill and impact driver with long auger bits for rebar holes
- Lump hammer or SDS drill for driving stakes
- Rubber mallet for seating slabs
- Bolster chisel and club hammer for splitting slabs if needed
- Safety gear: gloves, safety glasses, steel-capped boots, dust mask when cutting
Rough cost and timeline guide
For a 4 x 3 m raised patio with two sleeper courses and a paving slab surface, budget roughly £600-£1,000 for materials in the UK depending on finish quality. The timeline for a competent DIYer working weekends is typically two to three days of physical work: half a day for marking out and ordering, a full day for excavation and sub-base, a full day for the sleeper frame, and another day for fill, compaction, and surfacing.
Step 4: Prepare the site properly

Set up your string lines to define the exact perimeter of the patio at the finished surface height. Run a second set of lines at the base level, accounting for your sub-base depth. Mark the finished surface height clearly on a peg or batten at each corner so you have a constant reference throughout the build.
Excavate the entire patio footprint to a depth that accommodates: the sleeper thickness at the base (100 mm if using 200x100mm sleepers laid flat), plus 150 mm of compacted MOT Type 1 sub-base below that, plus your mortar bed and slab thickness if paving. On a flat site this is typically 350-450 mm of total excavation. On a sloped site, the depth varies across the area. Remove all topsoil, roots, and organic material. A plate compactor run over the exposed subsoil before you add any fill is a good habit.
Once excavated, lay your first lift of MOT Type 1 at no more than 150 mm depth per pass, then compact it thoroughly with the plate compactor. Repeat for each 150 mm layer. Do not dump a 300 mm layer and run the compactor once over it and hope for the best. Under-compacted sub-base is one of the main reasons patios sink and slabs crack within a couple of years.
Step 5: Build the sleeper retaining frame
Start at the corners. Cut your sleepers to length using a circular saw or chainsaw. A 200x100 mm sleeper in a 2.4 m length is manageable solo, but get a helper for positioning the bottom course because you want it seated accurately first time. Lay the first course directly onto your compacted sub-base, checking that each sleeper is level both along its length and across the frame. Use your string lines as a constant guide and pack a little extra compacted aggregate under any low spots rather than adding loose material.
For corners, butt-join the sleepers and alternate which timber overlaps on each course, like a brick-bond pattern. This interlocking prevents the corners from opening up over time. Use 200-250 mm structural timber screws or M10 bolts at each joint to lock the courses together vertically. For anything above two courses (200 mm total retained height), drive lengths of rebar vertically through the stacked sleepers into the ground below at 1.0-1.2 m intervals. A 600-900 mm length of 16 mm rebar hammered down through a pre-drilled hole into the sub-base and subsoil below gives the frame real lateral resistance.
Keep checking levels as each course goes on. A small error on course one becomes a visible problem on course three. Also check your overall wall is plumb (vertical) or has a very slight backward lean into the retained material, not a forward lean. A forward-leaning sleeper wall that carries any significant retained load will eventually push outward.
Step 6: Sort the drainage behind the sleepers

This step is skipped more often than any other and it is what causes the most failures. Water that builds up behind a timber retaining frame creates hydrostatic pressure, accelerates rot, and eventually pushes the frame outward or forward. You need to give that water somewhere to go.
At the base of the retained side (the back of the sleeper frame where it meets the ground), lay a 60-80 mm perforated land drain pipe wrapped in geotextile filter fabric. Surround the pipe with a 150-200 mm zone of clean angular drainage gravel. Wrap the entire drainage gravel zone in geotextile filter fabric to stop fine soil washing into it and clogging the system over time. This pipe should drain out to a lower point in the garden, or into a soakaway if the ground conditions allow.
In the sleeper frame itself, drill weep holes through the lowest course of sleepers at roughly 1.5 m intervals, using a 25-30 mm spade bit. These weep holes provide a secondary pressure-relief route if water ever backs up behind the frame. They are a simple insurance policy that takes five minutes to add.
Once your drainage layer is in place, backfill the area behind the sleepers with compacted MOT Type 1. Work in 150 mm compacted layers, the same approach as the main patio fill. Do not use excavated topsoil or clay as backfill behind the sleepers, as these hold water and create the exact problem you are trying to prevent.
Step 7: Lay the patio surface
Getting the surface ready
Once your frame is complete and backfilled, lay a weed control geotextile membrane over the entire compacted fill surface inside the frame. Overlap joins by at least 150 mm and run the membrane up the inside of the sleeper frame slightly, trimming it flush once the surface material is in. This membrane stops weed growth pushing through and keeps your surface layer separate from the fill below.
Paving slabs (most popular finish)
For paving slabs, lay a 30-40 mm sharp sand bedding layer over the membrane and screed it flat using a straight-edged board between two guide rails set to your finished surface height. Remember to build in that 1:60 fall away from the house as you set your rails. Lay slabs on five mortar dabs (one at each corner, one in the centre) or on a full mortar bed for heavier foot traffic. Tap each slab level with a rubber mallet, checking constantly against your string lines. Point the joints with a dry mortar mix brushed into the gaps and lightly wetted, or use a proprietary jointing compound.
Compacted gravel (quickest option)
If you want a lower-cost, quicker finish, a 50-75 mm layer of 20 mm angular gravel or pea gravel over the membrane works well and drains naturally. It needs no wet trades and you can walk on it the same day. The downside is it shifts underfoot over time and needs occasional raking and topping up. It is a great option for a more relaxed, informal space.
Block paving
Block paving on a sand bed is another solid DIY option that gives a more formal look and allows individual blocks to be lifted if anything needs adjusting underneath. Lay 50-60 mm blocks on a 30-40 mm sharp sand bed, compact with a plate compactor, and brush kiln-dried sand into the joints to lock them.
Maintenance and mistakes to avoid
Keeping your raised patio in good shape
UC4-treated softwood sleepers need minimal attention in the first few years, but treating the exposed timber surfaces with a penetrating wood preservative oil every two to three years extends their life noticeably. Pay particular attention to cut ends where any sawing has exposed untreated wood. Seal cut ends immediately with end-grain preservative when you make each cut on site.
Check your weep holes and drainage layer outlet every spring. Clear any debris from the weep holes with a thin rod if they look blocked. If you notice the frame starting to lean or a section of sleeper looking soft or discoloured, tackle it early. A single soft sleeper in the lower course is far easier to replace before the frame shifts than after.
The most common mistakes (and how to avoid them)
- Skipping or skimping on drainage behind the sleepers: this is the single biggest cause of sleeper wall failure. Always install the perforated pipe, drainage gravel, geotextile, and weep holes.
- Using reclaimed creosote sleepers: the hazardous material risk and unknown remaining lifespan make them a poor choice for a permanent structure in a garden you use regularly.
- Under-compacting the sub-base: slab cracking, slab sinking, and sleeper settlement almost always trace back to inadequate compaction. Hire a plate compactor and use it in maximum 150 mm passes.
- No fall on the surface: water pooling on the patio surface leads to slippery surfaces, joint degradation, and damp at the base of the house wall. Build the 1:60 fall in from the start.
- Not treating cut ends of sleepers: the end grain is where moisture enters fastest and rot starts earliest. Treat every cut surface immediately.
- No rebar or anchoring on taller frames: two or more courses of sleeper holding retained material will eventually push outward without vertical rebar stakes locking the frame to the ground.
- Using topsoil or clay as backfill: these materials retain water and cause the exact drainage problems you are designing against. Use compacted MOT Type 1 aggregate only.
- Ignoring boundary proximity: if your raised patio butts up to a boundary, you could be creating a structure that affects drainage or structural loads on the neighbouring property. Check the Party Wall Act applies and talk to your neighbour first.
Where to go from here
The practical next step is to get outside with a tape measure and peg out your patio footprint. Measure the slope, dig that test hole to check your soil, and sketch out your sleeper courses with real dimensions. That five-minute planning exercise tells you exactly how much material to order and stops you from making expensive guesses.
If you are dealing with a more complex sloped site, it is worth looking at how a sunken patio approach might work alongside a raised section, since combining the two can reduce the amount of material you need to import or remove.
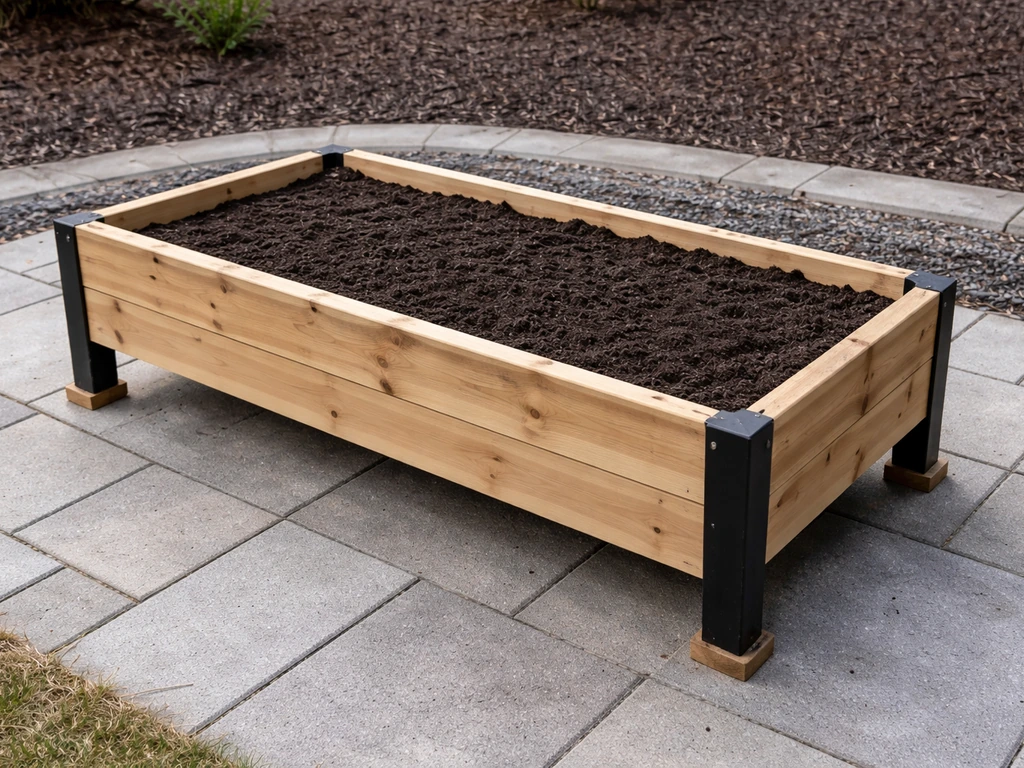
And if you are already thinking about what to do with the space inside the frame before the patio surface goes down, a raised bed section can coexist beautifully with a paved area if you plan both together from the start. If you want to add planting, a raised bed section can be built inside your patio frame using the same sleeper and drainage principles a raised bed section can coexist beautifully with a paved area.
If you want to add a raised bed on a patio, plan the bed height and drainage so it does not interfere with the patio's slope and sub-base. If you want to include planting, use the same sleeper frame approach and learn how to make a patio bed so it sits level and drains properly a raised bed section.
FAQ
Do I need a concrete foundation under the sleepers, or is compacted MOT Type 1 enough?
For a typical raised patio sleeper wall, a separate concrete foundation is usually not required. The key is excavating to the right depth and compacting MOT Type 1 in 150 mm lifts. If you are building on very unstable ground (made ground, heavy clay with standing water, or near drains), you may need engineer input or an improved sub-base design before stacking sleepers.
How do I stop the sleepers from moving when I backfill behind them?
Backfill and compact in lifts behind the frame, do not dump and compact everything in one go. As you place each 150 mm lift, keep the wall plumb and avoid over-pressuring one side. It also helps to ensure the first course is seated level on the compacted base, because backfill cannot correct course-one mistakes.
What spacing should I leave for movement if the patio is near a building or wall?
Leave a small gap between the patio edge and the house or any rigid vertical surfaces, then finish it with a flexible exterior joint (or suitable edging system). Rigid contact can create heaving and cracking because the sleeper wall and paving settle differently during wet and dry cycles.
Can I use sleepers as edging only, instead of a full retaining frame?
If the sleepers will not retain any significant height of soil, treat them as an edging border rather than a retaining wall. The moment you are holding back retained ground, you need the same drainage and compaction approach described, plus locking at joints and (for taller builds) reinforcement.
How high can I build a raised patio with sleepers using DIY methods?
A common DIY target is one to two sleeper courses for a modest platform, using rebar only when you exceed about two courses. Once the retained height increases, lateral forces become more significant, and you may need structural detailing, more reinforcement, or professional guidance depending on your soil and site conditions.
What should I use to drain water away, a soakaway or a gravity outlet?
Choose the outlet based on soil permeability and available fall. Perforated drain pipe can discharge to a lower garden point or to a soakaway if ground conditions allow. If the area is clay-heavy and water struggles to soak, a soakaway may fail and you may need a routed outlet to daylight or a deeper, engineered drainage solution.
Do weep holes and the perforated drain solve drainage on their own, or do I still need geotextile and gravel?
They work as part of a system. The gravel zone provides a clean flow path, geotextile prevents fine soil from clogging it, the perforated pipe collects water, and weep holes act as a backup release. Skipping the filter fabric or using the wrong fill behind the wall is a common reason drainage underperform.
Why is my patio slope not perfect even though I planned 1:60 fall?
Small errors usually come from measuring rails at the wrong reference height or from shifting string lines while excavating. A practical fix is to re-check rail positions against your marked finished level before bedding slabs, and adjust bedding thickness within reason rather than trying to force slabs to sit with uneven sand or mortar.
How thick should the bedding and mortar be for paving slabs over a membrane?
For paving over a membrane, keep bedding in the stated range, around 30 to 40 mm sharp sand plus a flat screeded base. If you use mortar dabs, aim for consistent contact at corners and centre, and ensure the sand underneath does not create rocking points. Uneven bedding is a major cause of slab rocking and cracking.
Will the weed membrane trap moisture and cause rot at the base?
The membrane you lay is inside the frame over the compacted fill surface, it is not a substitute for the drainage system behind the sleepers. Proper drainage at the back of the frame reduces trapped water, and wrapping the drainage gravel zone and using the perforated land drain prevents water from saturating the retained soil.
How often should I maintain or clean the drainage parts after installation?
A simple routine is at least once in spring, remove debris from weep holes, and check that the drain outlet is not blocked. If you live in an area with heavy leaf fall, it may be worth inspecting again in autumn to prevent gradual clogging before winter wet weather.
Can I seal or paint the exposed sleeper ends to protect them better?
Use a penetrating wood preservative oil and focus on cut ends, seal them immediately after each cut on site. Sealants or surface coatings can crack or peel on outdoor timber and may not penetrate deeply, so they are less reliable than a product designed for ground-contact timber.
What are the most common mistakes that lead to a failing sleeper patio?
The biggest causes are poor compaction (dumping thick lifts and only compacting once), incorrect drainage fall, using the wrong backfill (topsoil or clay), missing or underperforming filtration around the drain, and not locking courses at joints or adding reinforcement for taller builds. Catching these early is much cheaper than replacing shifted sleepers later.
Can You Put a Raised Bed on a Patio? Setup Tips
See if you can place a raised bed on concrete or pavers, plus leveling, drainage, and base tips to prevent waterlogging