A floating patio is a ground-level or slightly elevated outdoor surface that rests on a flexible support system instead of being poured and locked into place like a concrete slab. You build it on deck blocks, gravel pads, adjustable pedestals, or shallow footings, and the whole thing is designed to move slightly with frost and soil shifts rather than crack under them. Done right, a floating patio can outlast a slab in cold climates, costs less to build, and is something most DIYers can complete over a couple of weekends.
How to Build a Floating Patio DIY Guide and Steps

Nolan Lennox
9 Jul 2026
What a floating patio actually is (and why it's not just a slab)
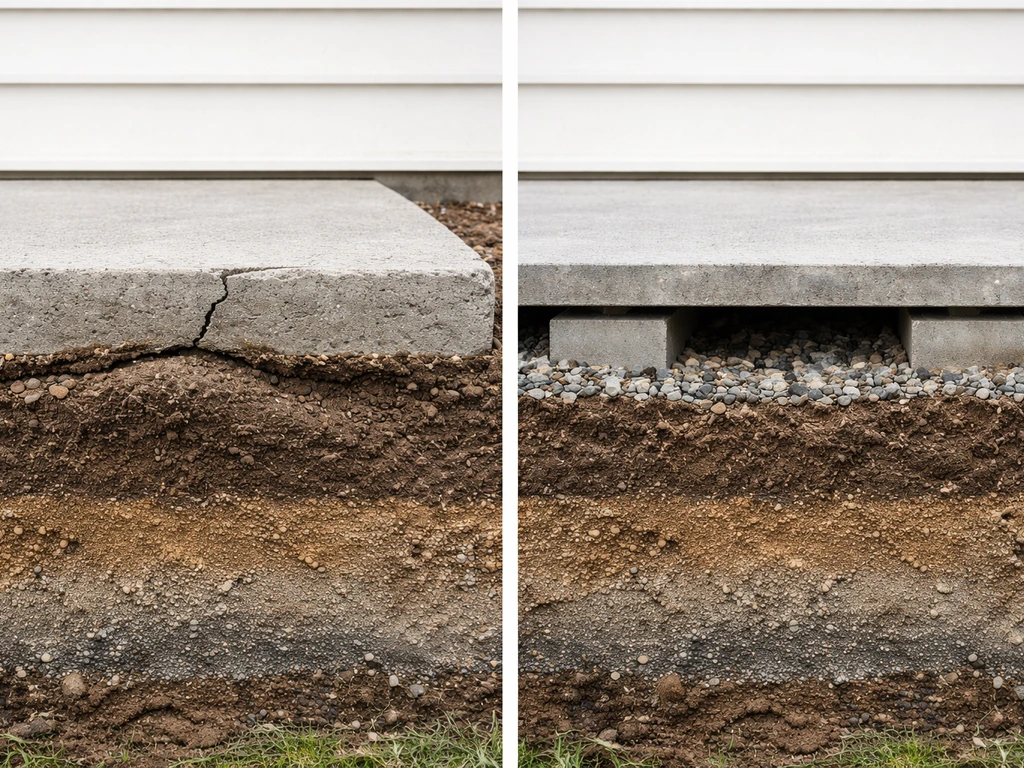
A traditional poured concrete slab is monolithic and rigidly attached to the ground. If frost heaves underneath it or the soil settles unevenly, the slab cracks. A floating patio works differently: the surface sits on independent supports that can shift slightly without breaking the whole structure. That flexibility is the point. In many communities, floating or freestanding patios are even treated as personal property rather than permanent structures, which can simplify or eliminate permit requirements depending on your local rules.
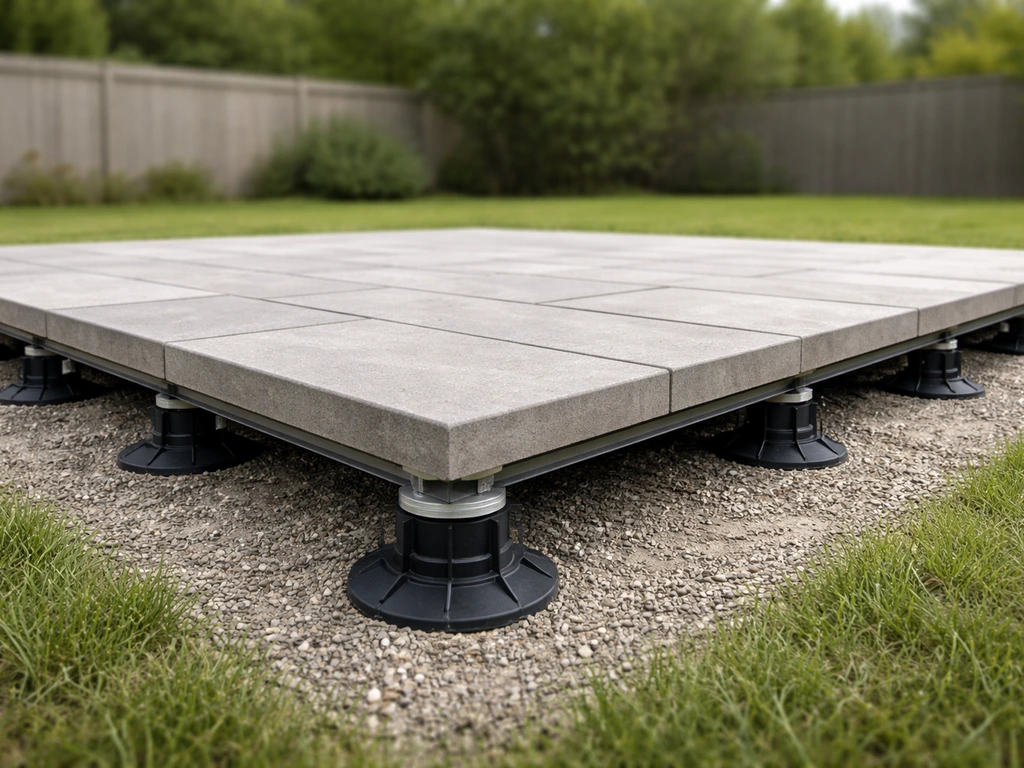
The term 'floating' covers a few different builds. You might lay pavers over a compacted gravel-and-sand base with no rigid perimeter anchor. You might build a freestanding wood or composite deck on precast deck blocks. Or you might use an adjustable pedestal system to elevate pavers or tiles above a rooftop or existing surface. All of these are floating systems. What they share is that nothing is poured into a continuous fixed foundation, and movement joints or gaps are built in from the start. That's the key difference from a raised patio with poured footings or a concrete slab, which are much more rigidly fixed. A raised patio built with sleepers is usually treated as a separate framed system, so the same idea applies: don’t create a rigid, fixed connection to the ground where movement could crack things raised patio with poured footings or a concrete slab.
Plan before you dig: layout, size, load, and permits
Before buying a single bag of gravel, spend real time on layout. Sketch your patio footprint to scale and think about how you'll use it: a dining set with an umbrella and a gas grill loads the surface very differently than a couple of lounge chairs. Standard residential deck design is based on a 40 PSF live load, which is enough for typical furniture, a full grill, and a small group of people. Stay in that range and standard framing spans will work fine. If you're planning something heavier, like a hot tub or a large outdoor kitchen, you need to recalculate support spacing and footing size before you start.
On size: most people underestimate what they need. A 10x10 foot patio feels tight once you add a table for four and pull the chairs out. A 12x16 or 14x20 is much more livable. Lay it out with stakes and string before you commit, and sit in it mentally with your furniture. That five minutes of imagination saves a lot of regret.
For permits, the honest answer is: check with your local building department. In many jurisdictions, a freestanding floating patio under a certain size (often 200 square feet) that is not attached to the house and sits at or near grade doesn't require a permit. But codes vary enormously. Some areas require permits for any structure over 30 inches above grade, and guards or railings trigger additional requirements like a minimum 36-inch guard height under IRC R312. Don't skip this step. A quick call to your local building department takes 10 minutes and could save you from tearing out work later.
Site prep and base layers: the part most people rush and regret
I'll be direct: the base is where most DIY floating patios succeed or fail. A beautiful surface on a bad base will rock, sink, and heave within a few years. Spend your time and money here first. If you want step-by-step guidance on how to make a patio bed, start by choosing the right base depth and support system for your patio type.
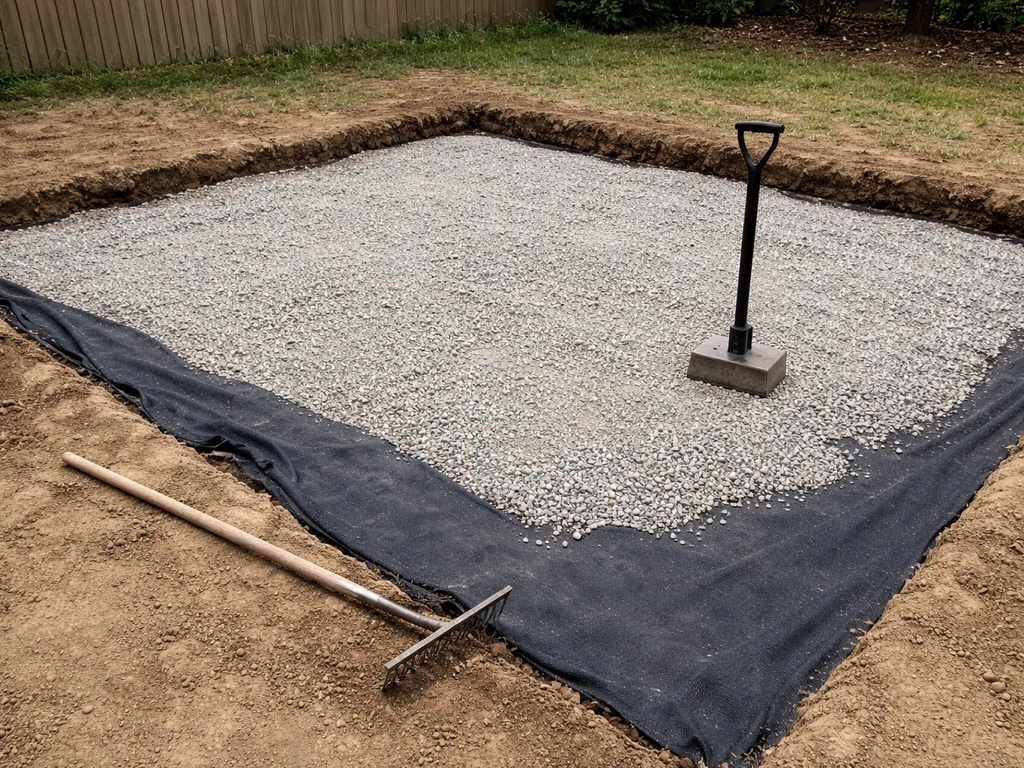
Start by stripping all organic material, topsoil, grass, and roots from the footprint. You're trying to get down to stable, undisturbed or well-compacted mineral soil. How deep depends on your climate and surface choice, but a typical paver patio on a gravel base needs roughly 6 to 8 inches of excavation below finished grade: about 4 to 6 inches for compacted gravel base, 1 inch of screeded bedding sand, plus the paver thickness. Because a sunken patio is built below grade, the same subbase, drainage, and frost-heave considerations apply, just with more excavation and careful elevation control gravel base. For a deck-block floating frame, you need at least enough depth to set the blocks on compacted gravel and still end up near grade.
After excavating, compact the subgrade with a plate compactor, not just your feet. Then lay your base layers. For most floating patios, that means a layer of compacted crushed stone aggregate (sometimes called road base or crusher run) in 2 to 3 inch lifts, compacted after each lift. This is what gives you long-term stability. An optional but useful step is placing a geotextile fabric below the gravel to separate it from the soil and prevent fines from migrating up and softening your base over time. On clay soils especially, this fabric makes a real difference in how well your base holds up.
One thing worth noting about frost heave: even a perfectly prepared gravel base can lift deck blocks in cold climates with deep frost or heavy clay soil. The floating design accommodates this by allowing slight movement, but you want to minimize it. A well-draining granular base draws water away from under your supports, which is the main weapon against heave.
Building the floating subframe: blocks, pedestals, and spacing
For a wood or composite board surface, you'll build a framed substructure sitting on your support system. The most common DIY approach uses precast concrete deck blocks set on compacted gravel. These are inexpensive, easy to position, and purpose-built for exactly this application. Set them on a bed of compacted sand (a couple of inches is enough) and use a long level and string lines to get every block top co-planar before you frame. This step takes patience but it's the difference between a flat patio and one that wobbles.
Joist spacing follows standard span tables. For typical 2x6 pressure-treated lumber, 16-inch on-center spacing handles the 40 PSF live load over reasonable spans. For 2x8s, you can push to 24-inch spacing or longer spans depending on species. Use the IRC joist span tables as your reference and size conservatively. Under the floating framing, you want beams sitting in the saddles of your deck blocks, with joists running perpendicular at the right spacing.
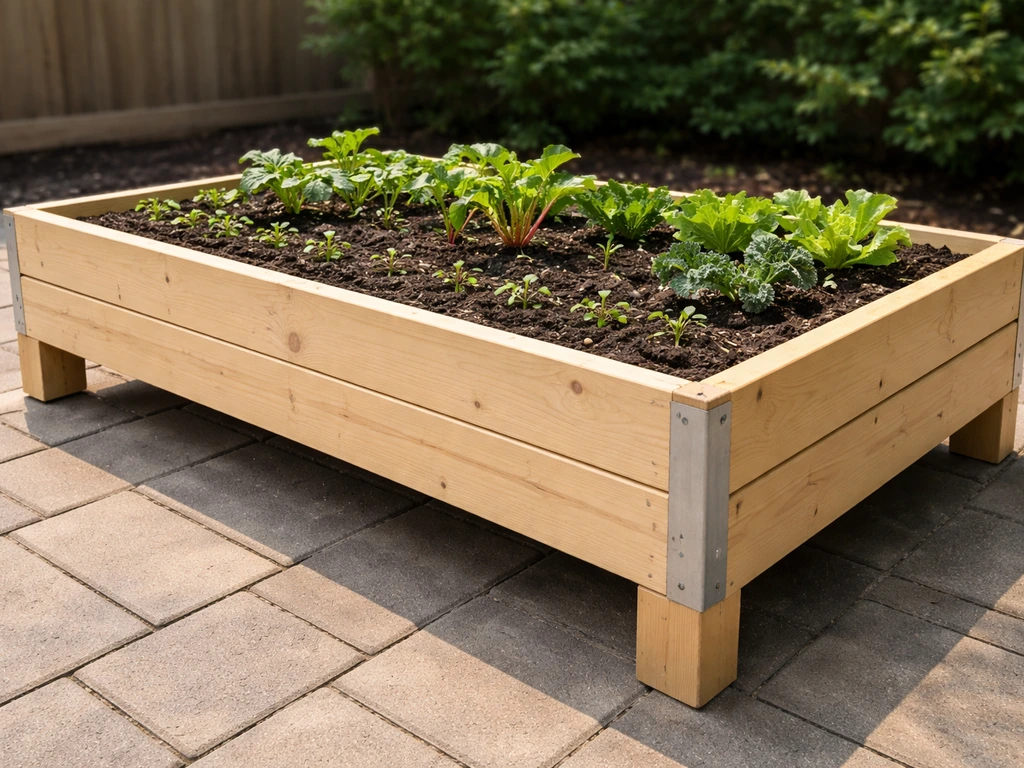
Because a floating system isn't anchored to a foundation the way an attached deck is, you do need to think about lateral stability and anti-wobble without defeating the system's ability to move. Cross-blocking between joists at mid-span and at the ends stiffens the frame. Some builders add diagonal blocking in the corners. What you don't want to do is bolt or anchor the frame rigidly into the ground with poured concrete footings on all sides, because then you've just made a poorly-done raised deck, not a floating one. If you are aiming for more of a raised planting area than a floating patio, you can still adapt the layout and support thinking for a raised bed on a patio can you put a raised bed on a patio. The idea is that the weight of the structure keeps it stable, not anchors fighting the ground.
For pavers on a pedestal system, the subframe works differently. You're placing individual adjustable pedestals in a grid pattern across your base, setting their height to compensate for minor slope, and then resting the pavers on the pedestal heads. These systems allow for drainage underneath, easy access to utilities if needed, and precise leveling even on imperfect substrates. They're more expensive than a gravel-and-sand base, but they shine on rooftop terraces, over waterproof membranes, or anywhere you need to avoid disturbing the substrate.
Surface options: pavers, wood, composite, and how to choose
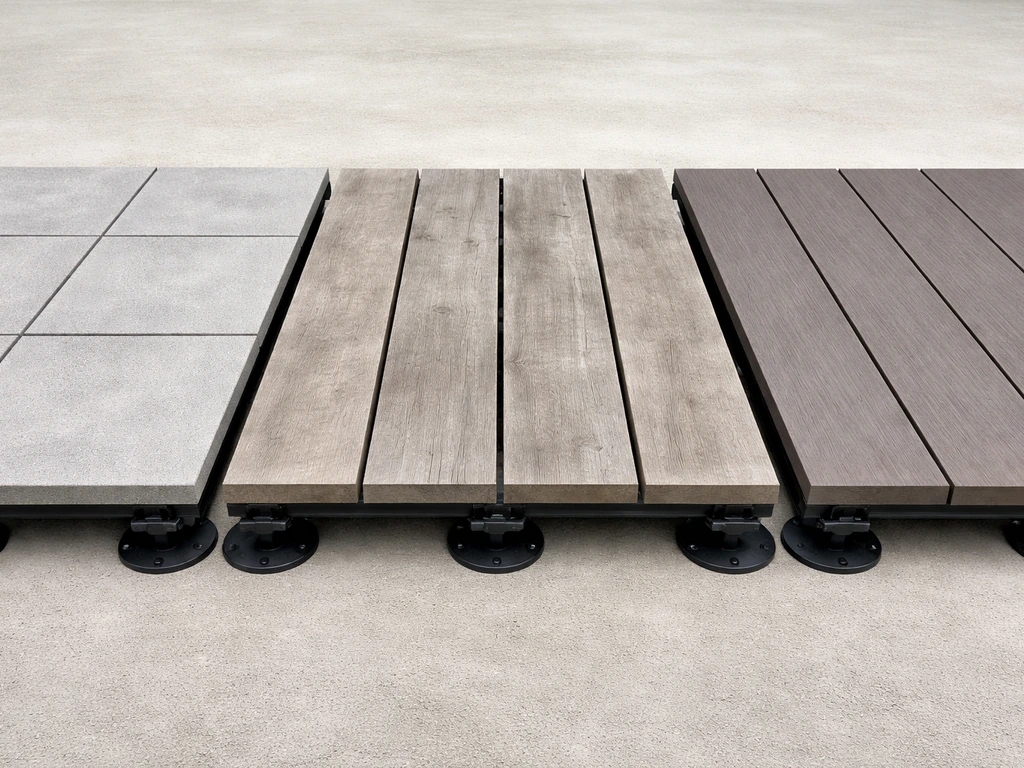
Your surface choice affects both installation method and long-term maintenance. Here's a practical comparison of the most common floating patio surfaces:
| Surface Type | Best Base System | Typical Cost (Materials) | Durability | Maintenance |
|---|---|---|---|---|
| Concrete pavers | Compacted gravel + bedding sand | Low to moderate | Very high (30+ years) | Low (re-sand joints occasionally) |
| Natural stone pavers | Compacted gravel + bedding sand | Moderate to high | Very high | Low to moderate (sealing optional) |
| Pressure-treated wood | Deck blocks on gravel | Low to moderate | Good (15-25 years) | Moderate (annual sealing/staining) |
| Composite decking | Deck blocks or pedestal system | Moderate to high | High (25+ years) | Low (occasional cleaning) |
| Porcelain/tile pavers | Pedestal system or mortar bed | High | Very high | Low (easy to clean) |
Pavers on gravel and sand
This is the classic floating patio setup and one of the most forgiving for DIYers. If you want to add planting without taking up yard space, you can build a raised garden bed on patio next using similar leveling and support ideas. After your gravel base is compacted, screed a 1-inch layer of coarse bedding sand (not mason sand, not play sand) using pipes or screed rails as guides. Lay the pavers in your chosen pattern, keeping joints tight and consistent. Once the field is laid, install edge restraints along the perimeter to lock everything in, then sweep polymeric sand into the joints and compact with a plate compactor to drive the sand in fully. Polymeric sand is worth the extra cost over regular joint sand because it sets firm and resists washing out.
Wood decking on a floating frame
Pressure-treated lumber is the budget choice and it works well when kept off direct soil contact and able to dry out between rain events. Use 5/4x6 deck boards or 2x6 boards, leave a gap of about 1/8 inch between boards for drainage, and stagger your end joints across the joists. Orient boards so that growth rings curve downward (bark side down) to minimize cupping. Seal or stain within the first year and renew every 2 to 3 years.
Composite decking
Composite is the upgrade choice for people who want minimal maintenance. The installation rules are stricter: most manufacturers specify maximum joist spacing (often 16 inches on center for standard boards, sometimes 12 inches for diagonal installations), required end gaps of at least 1/8 inch at butt joints, and side gaps between boards that vary by temperature at installation. For composite decking, follow the manufacturer’s installation guidance on required butt-joint end gaps, including how spacing should account for temperature differences during installation blank" rel="noopener noreferrer">required end gaps of at least 1/8 inch at butt joints. Follow the manufacturer's specs closely here. Celuplast's composite decking installation guidance also emphasizes following the specific system constraints, including joist spacing limits, required board-to-board gaps, and drainage or expansion rules such as gaps around butt joints blank" rel="noopener noreferrer">required end gaps of at least 1/8 inch at butt joints. Composite expands and contracts more than wood, and undersizing your gaps will cause boards to buckle in summer heat. The better composite products also require specific fastener systems and have warranty implications if you deviate.
Drainage, frost heave, and keeping things level for the long haul
Every floating patio needs to drain water away from the house and away from the base. Grade the entire excavated area and the finished surface at a minimum 1/8 to 1/4 inch per foot slope away from any structure. For a paver system, that slope is set at the gravel base stage and maintained through the screeded sand. For a framed deck, you can build a slight slope into the joist layout or rely on the gaps between boards. Either way, standing water under or on your patio accelerates every failure mode: rot, heave, sand loss, and wood degradation.
Frost heave is worth thinking through honestly. The floating design helps because the system can rise and settle as a unit rather than cracking under differential pressure. But you can reduce movement significantly by using a well-draining granular base that doesn't hold water. Saturated soil freezes harder and heaves more than dry, well-drained soil. That gravel base isn't just for compaction, it's your frost protection strategy. In climates with deep frost lines, the IRC does give freestanding decks an exception from having to extend footings below the frost line, which is why deck blocks work legally in most places, but be aware that very deep frost or heavy clay can still move things around.
For framed systems, keep a gap of at least 1 inch (preferably more) between the bottom of your frame and the ground. This airspace lets moisture escape and prevents the lumber from sitting in wet conditions. For pavers, the gravel base itself provides the drainage layer. Around the perimeter of any floating patio, avoid burying the edge restraint or frame in soil that will hold water against it.
Movement gaps also apply at the house. Never let a floating patio press directly against a foundation wall or house siding with zero clearance. Leave at least 1/4 to 1/2 inch between the patio edge and any fixed structure. This lets both move independently and prevents moisture from getting trapped between them.
Step-by-step build workflow
- Mark the footprint with stakes and string. Check for square using the 3-4-5 triangle method. Confirm dimensions a second time before you start digging.
- Call 811 (in the US) to have underground utilities located. This takes a couple of days to schedule, so do it early.
- Excavate to your target depth. For a paver patio this is typically 6 to 8 inches below finished grade. For a deck-block frame, enough to set blocks on gravel with finished decking near grade.
- Compact the subgrade with a plate compactor. If your soil is soft or clay-heavy, add more compaction effort here.
- Lay optional geotextile fabric over the subgrade and up the sides of the excavation. This is most valuable on clay soils.
- Add and compact your gravel base in 2 to 3 inch lifts. Total compacted depth should be 4 to 6 inches for pavers, or at least 3 to 4 inches for deck blocks.
- Set edge restraints (for pavers) or position deck blocks (for frames) using string lines and a 4-foot level. Every support point must be co-planar before you proceed.
- For paver patios: screed a 1-inch bedding sand layer, lay pavers in your pattern, install perimeter restraints, sweep and compact polymeric sand into joints.
- For framed decks: set beams in deck block saddles, install joists at proper spacing, add cross-blocking, then install decking boards with appropriate gaps.
- Check the finished surface with a level in multiple directions. Confirm slope away from the house.
- Clean up edges, add any perimeter landscaping or borders, and apply finish treatments (sealant, stain) if using natural materials.
Mistakes that cause rocking, unevenness, and early failure
- Skipping subgrade compaction and laying gravel directly on loose or organic soil. The base will settle unevenly within the first year.
- Using the wrong sand for bedding. Coarse concrete sand or stone dust works. Fine play sand or mason sand shifts too easily under load.
- Setting deck blocks on just a few inches of uncompacted sand without gravel beneath. Blocks will tilt when the sand shifts.
- Forgetting edge restraints on a paver patio. Without them, the perimeter rows creep outward over time and your whole field loosens.
- Installing composite decking without enough expansion gap. Boards buckle in summer heat when joints are too tight.
- Building the frame too close to grade with no airspace underneath. The lumber stays wet and rots faster than expected.
- Not grading for drainage before you build. Water finds the lowest point, and if that's under your patio, you'll fight heave and rot from day one.
- Skipping the permit check on the assumption that a floating patio never needs one. Rules vary, and getting caught after the build is expensive.
Tools, materials, and a realistic budget
Floating patios are genuinely one of the more budget-friendly outdoor projects. The biggest variables are surface material and whether you already own tools. Here's what you need:
Tools checklist
- Plate compactor (rent, don't buy, for a one-time project — typically $60 to $100/day)
- 4-foot level and string line with line level
- Tape measure and speed square
- Rubber mallet (for pavers)
- Circular saw or miter saw (for framing lumber and decking)
- Drill/driver with appropriate bits
- Screed pipes or rails (2 pieces of 1-inch conduit work great)
- Wheelbarrow and tamper
- Safety glasses, gloves, knee pads
Materials checklist
- Crushed gravel or road base aggregate (calculate cubic yards based on area x depth)
- Coarse bedding sand or stone dust (for paver builds)
- Geotextile landscape fabric (optional but recommended on clay)
- Precast deck blocks or adjustable pedestals (for framed or pedestal builds)
- Pressure-treated 2x8 or 2x6 framing lumber and 4x4 or 4x6 beams (for framed builds)
- Decking boards (pressure-treated, composite, or hardwood)
- Concrete pavers, natural stone, or porcelain tile (for paver builds)
- Polymeric sand and edge restraints (for paver builds)
- Deck screws or hidden fastener system (for decking boards)
- Joist hanger hardware and structural screws
Rough cost ranges
For a 12x16 foot floating patio (192 square feet), here are ballpark DIY material costs as of mid-2026. Labor is your sweat equity.
| Build Type | Estimated Material Cost | Notes |
|---|---|---|
| Concrete paver patio (gravel/sand base) | $800 – $1,800 | Paver cost varies widely by style/thickness |
| Pressure-treated wood floating deck | $700 – $1,400 | Lower end with basic deck blocks and standard PT lumber |
| Composite decking floating deck | $1,500 – $3,500 | Wide range based on composite brand and grade |
| Porcelain tile on pedestal system | $2,000 – $5,000+ | Pedestal systems add significant cost but enable rooftop use |
The biggest money-saving move on any of these builds is doing your own excavation and base prep. That labor is where contractors charge heavily, and it's totally manageable DIY work with rented equipment. Spend on good materials for the base layer and be flexible on the surface finish if budget is tight. Concrete pavers from a local masonry supplier are almost always cheaper than boxed paver kits from home centers.
If you're also considering a more formal raised patio with poured footings and walls, or a sunken patio recessed into grade, the planning and drainage considerations overlap but the construction methods differ significantly. If your goal is a true raised patio with poured footings, the planning process starts similarly but the structural and drainage details need extra attention. A floating patio is generally the most approachable starting point for first-time builders, and once you have the base prep skills down, tackling more complex patio structures becomes a lot less intimidating.
FAQ
Do I need to pour a concrete footing for a floating patio?
Usually no. Floating patios are designed to avoid a continuous rigid foundation, so you typically use deck blocks on compacted granular base, pedestals on a prepared layer, or pavers on gravel and sand. The one exception is when a local code or site condition forces a more permanent subbase, such as certain retaining or drainage tie-ins, so check requirements before building.
Can I build a floating patio directly over existing concrete or pavers?
Sometimes, but only if the existing surface is stable, well-drained, and can support the added structure without trapping water. For deck-block frames, most builders still excavate to build a proper granular base, because debris and shallow voids under old surfaces can lead to localized rocking. For pedestal systems, many setups can work over a membrane or hard substrate if manufacturers approve the application and you still maintain drainage and clean bearing points.
What is the minimum clearance I should keep from the house or fence?
Keep a real movement gap from any fixed structure. A practical starting point is 1/4 to 1/2 inch between the patio edge and the house or siding, and ensure the edge restraint or frame is not buried in soil that can hold moisture. If you have a nearby gate or fence post, leave space so seasonal shifting does not bind or stress the adjacent components.
How do I handle a slope in my yard if the patio is supposed to float?
You can step the height using leveling of supports, for example adjustable pedestals, or vary deck block heights and then frame to a consistent plane. The key is to prevent water concentration, so build the base and slope so runoff moves away from the house. Avoid trying to “cheat” drainage with uneven sand or loose fill, because it compresses unevenly over time.
Should I use geotextile fabric under the gravel base for every floating patio?
It is especially helpful on clay and on sites where soil fines migrate upward. On uniformly clean, free-draining soil, some builders skip it, but on most residential yards it adds value by reducing pumping and base softening. If you do use fabric, overlap seams and keep it taut so you do not create wrinkles that can become voids.
How flat does a floating patio need to be, and how do I check it?
Aim for near co-planarity, not just “close enough.” For deck-block frames, take levels across multiple directions using string lines, then adjust block heights before you frame. For pavers, verify the screeded sand thickness is consistent before you set units, because lippage and rocking usually come from uneven bedding, not the paver layout.
Will a floating patio move too much in freeze-thaw cycles?
It can move slightly by design, but excessive movement usually means the base is saturated or poorly drained. Use a well-draining granular base, maintain slope away from the house, and avoid low spots where water lingers. Also consider local frost depth, heavy clay sites, and the risk of deep frost, because some areas can still lift supports even with a good floating system.
What causes deck blocks to wobble or settle later?
Most common causes are under-compacted base, using the wrong granular material, and setting blocks on loose sand or irregular spots. Confirm you compact in lifts and create a consistent bearing layer. Also make sure every block top is brought to the same elevation plane before framing, since small discrepancies multiply into bigger wobble across long spans.
Is polymeric sand always the best choice between pavers?
It is often preferred for a cleaner, firmer joint, but it is not a universal solution. Follow product directions carefully regarding watering and joint width, because improper activation can cause haze or weak joint fill. If you live in a freeze-thaw zone or expect heavy wash-off, polymeric sand can reduce joint loss, but you still must maintain the overall slope and base drainage.
How should I treat edges, so the patio does not shift outward?
Install perimeter edge restraints after the paver field is set, and ensure they contact stable base materials. For framed decks, stabilize the perimeter with proper blocking so the frame does not rack. Avoid burying edges in soil that can hold water, and do not rely on pavers or boards alone to resist lateral pressure.
Can I build a floating patio over utility lines or pipes?
Be cautious. If utilities run through the footprint, you need access and you must avoid creating conditions where water can pool over buried lines. For framed systems, ensure pedestals or deck blocks do not concentrate load on unsupported sections and confirm local rules for setbacks and cover depth. In many cases, you should coordinate with your utility provider or homeowner’s records before excavation.
What should I do if the patio crosses tree roots or stumps?
Remove exposed roots in the footprint and excavate down to stable soil where possible. If you cannot remove a large root, treat it as a design constraint, because trimming and leaving active roots can cause uplift and uneven movement under supports. Plan for a buffer zone around roots, or reconfigure the patio layout to keep the base on undisturbed mineral soil.
How do I keep a wood or composite floating deck from trapping moisture?
Keep an air gap under the frame, do not place lumber in direct contact with wet soil, and respect the required drainage and board gaps. For wood, seal or stain on schedule and leave recommended expansion gaps to reduce cupping and warping. For composite, follow manufacturer spacing and gap rules closely, because composites can buckle if gaps are too small.
What is the fastest way to decide which floating method to use?
Start with your surface goal and site constraints. If you want lowest DIY complexity and forgiving construction, pavers on gravel and sand is a common path. If you need adjustability over an imperfect or membrane-protected substrate, pedestals are often better. If you want an easy-to-maintain walking surface and do not want sand joints, a framed board deck on deck blocks can work well, but you must nail base flatness and lateral stability.
Next Article
How to Make a Raised Garden Bed on a Patio
Step-by-step DIY for building a patio raised garden bed: placement, drainage, safe materials, frame build, and soil setu