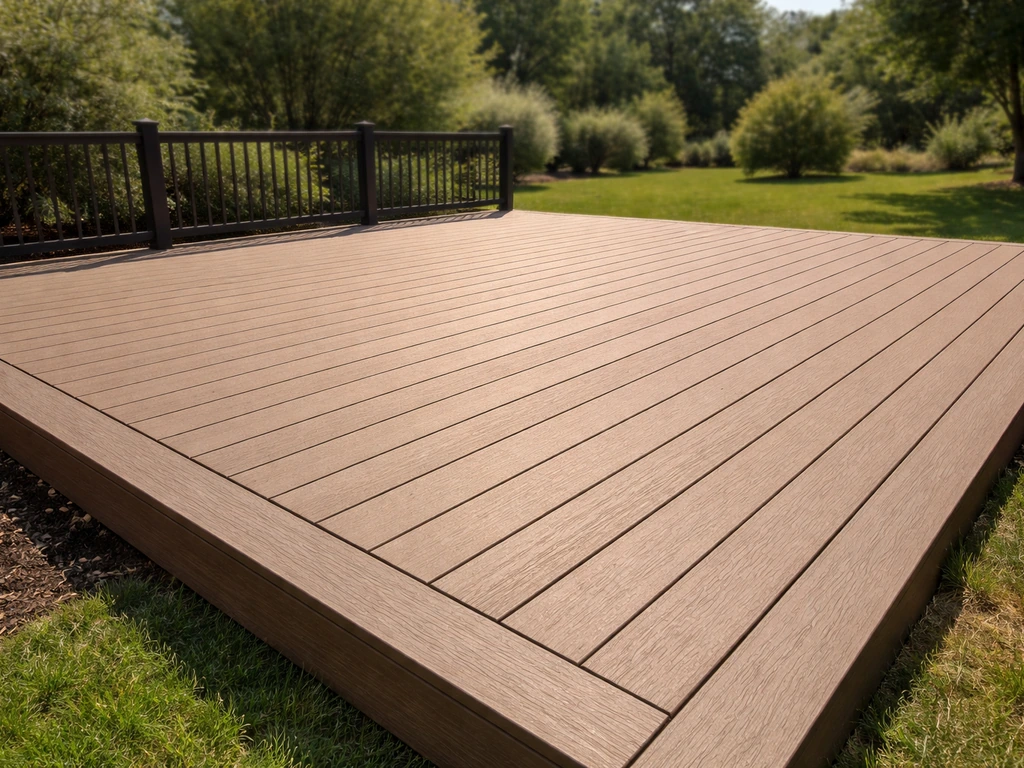
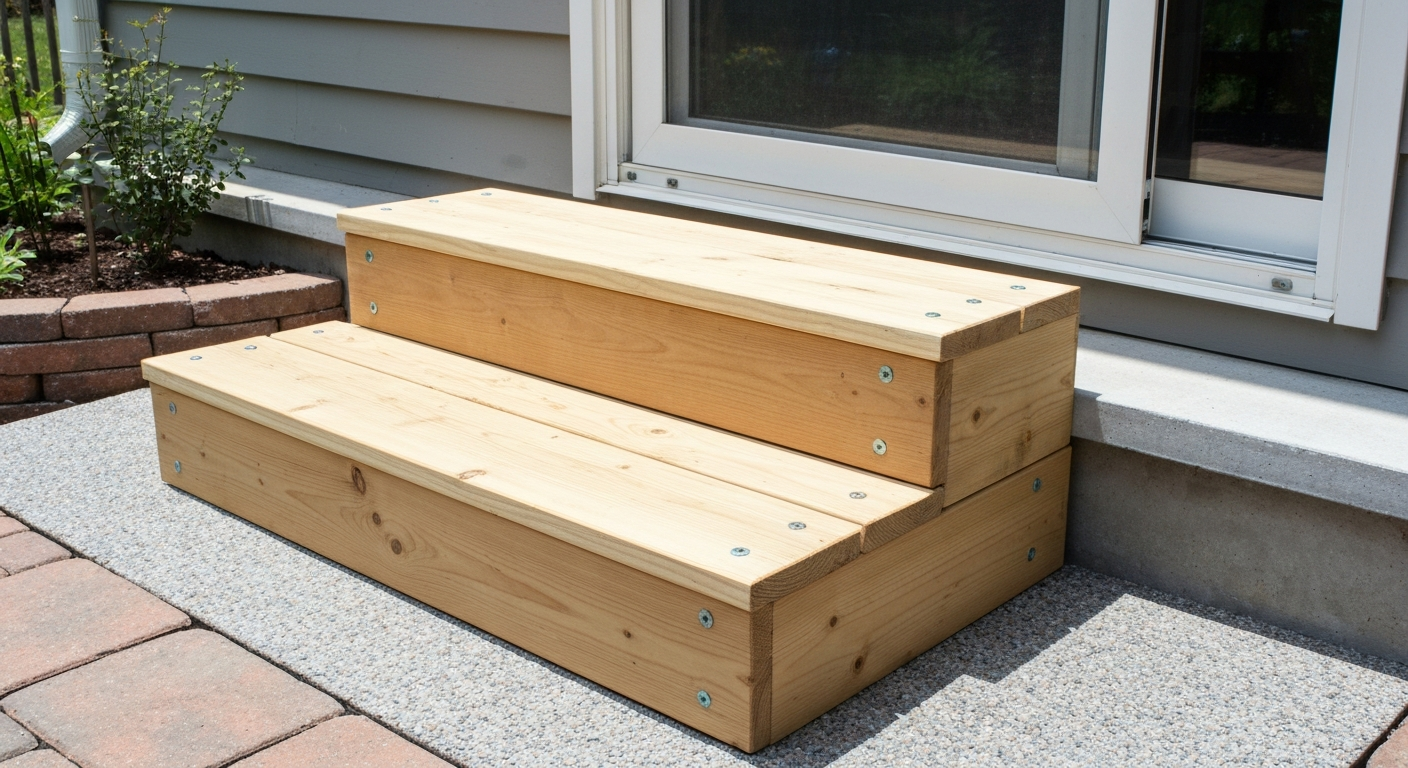
Temporary patio steps can be as simple as a pair of stacked concrete blocks or as clean as a premade modular unit you bolt together in an afternoon. For most one- or two-step situations, pressure-treated 2x lumber and a gravel pad will get you safe, code-conscious access in a few hours for under $100. The key is choosing the right approach for your specific drop height, how long you need the steps, and what comes next permanently.
Temporary Steps for Patio: DIY, Options, Safety & Costs

Nolan Lennox
19 Jul 2026
Why you'd want temporary steps in the first place
I've built temporary steps in more situations than I can count: during a patio pour while the concrete cured, after demo when the old steps were gone and the new ones weren't ready, and for a client who needed safe access before a permit was even approved for permanent construction. These aren't edge cases. Temporary steps show up constantly in real DIY patio projects.
- Patio is finished but permanent steps aren't built yet — you need safe daily access now
- You're renovating or demoing existing steps and need a bridge solution
- A new patio raises the door threshold and leaves a dangerous drop
- You're renting and can't do permanent construction, but the grade change is real
- You want to test a step layout or height before committing to masonry or concrete
- Budget is tight this season and permanent steps come later
In all of these scenarios, 'temporary' doesn't mean unsafe or sloppy. It means the installation isn't meant to be permanent, but it still needs to hold an adult at full load, stay put in rain, and not create a trip hazard. That distinction matters a lot when you're shopping materials and deciding how much effort to put into the base.
Safety first: the checklist you actually need
Before you cut a single board or stack a single block, run through this. The IRC (International Residential Code, Section R311.7) sets the geometry limits that most local codes follow, and they're worth knowing even for a temporary setup. Inspectors rarely show up for two-step temporary installs, but the geometry rules exist because people get hurt on stairs that don't meet them.
- Maximum riser height: 7 3/4 inches (7.75") — taller risers cause trips on the way up
- Minimum tread depth: 10 inches measured nosing-to-nosing (11" without a nosing) — shallower treads cause slips on the way down
- Riser uniformity: no single riser in a flight can vary from the others by more than 3/8" — this one catches a lot of DIYers off guard
- Minimum clear stair width: 36 inches
- Headroom: 6 ft 8 in (80") minimum — rarely an issue for outdoor patio steps
- Handrails required on at least one side when a flight has four or more risers; handrail height 34–38" from tread nosing
- Guards required when any walking surface (including landings and stair sides) is more than 30" above grade; minimum guard height 36"
- Load capacity: residential stairs are designed for 40 psf uniform live load and treads must handle a concentrated 300-lb load over a 2"x2" area
- Anti-slip surfaces on treads — especially critical for wet outdoor conditions
- Steps must not rock, shift laterally, or settle unevenly under load
Two points that consistently trip up DIYers: the 3/8" uniformity rule and tread depth on standard lumber. A standard 2x10 board has an actual face width of about 9.25", which is under the 10" minimum. If you're cutting stringers and laying single-board treads, use 2x12s or purpose-made stair treads. A practical carpentry note in Stairway Basics, Fine Homebuilding (practical note on lumber sizes vs. code tread depth) warns that a finished 2×10 tread is typically under the IRC 10" minimum, so builders use 2×12s or purpose-made treads Stairway Basics — Fine Homebuilding (practical note on lumber sizes vs. code tread depth). I've had to tear apart two sets of steps because I ignored this the first time.
Rise and run: how to measure and calculate your steps
Get this right before you buy any materials. The total rise is the vertical distance from the ground (or landing surface) to the top of your patio deck or door threshold. Measure it in inches. From there, divide by your target riser height to get the number of steps, then verify the tread depth fits your available horizontal space.
- Measure total rise in inches from grade to top of patio surface (example: 14")
- Divide by your target riser height — try 7" first: 14 ÷ 7 = 2 risers (2 steps)
- Check that riser height is at or under 7.75" — if it's over, add a step and recalculate
- Set tread depth at 10–11" minimum; multiply by number of treads to find total horizontal run needed (example: 2 treads x 11" = 22" run)
- Confirm all risers in the flight are within 3/8" of each other — if your grade isn't perfectly flat, this requires careful shimming at the base
- For a single-step drop under 7.75", one riser and one tread is code-acceptable geometry
A common formula builders use is: rise + run = 17 to 18 inches for comfortable walking. A 7" rise and 11" tread gives you 18", which feels natural. Go steeper and shorter and it feels like a ladder. Keep this formula in mind when you're adjusting for odd total-rise heights.
Temporary vs. permanent: how to decide
The honest answer is that 'temporary' has a wide range. A set of stacked pavers you'll remove in a month is genuinely temporary. A pressure-treated wood stair you build in spring and plan to replace when you pour a concrete walkway next fall is also temporary, just on a longer timeline. The decision criteria below help you figure out which approach fits your situation.
| Factor | Lean Temporary | Lean Permanent |
|---|---|---|
| Budget right now | Under $150 available | $500+ available or financing planned |
| Duration of use | Weeks to one season | Multiple years or indefinite |
| Frequency of use | Occasional access | Daily primary entry |
| Permit required | Often not (1-2 steps, low height) | Usually yes (4+ risers, guards, handrails) |
| Site permanence | Renting, phased project, or testing layout | Owned, finished landscape, stable grade |
| Code scrutiny | Low (transitional use) | Full IRC compliance expected at inspection |
| Resale or curb appeal | Not a current concern | Matters — visible, finished look required |
One trigger that forces the permanent conversation: if your total rise needs four or more risers, you're now in handrail territory under the IRC. That makes 'temporary' installations much more complicated and less practical. At that point it's usually worth building the permanent version correctly from the start, or at minimum installing a proper temporary handrail on any multi-riser setup.
Material comparison: pressure-treated wood, composite, concrete, and premade
Each material has a legitimate use case for temporary steps. Here's how they stack up across the factors that actually matter for a short-term or transitional install.
| Material | Upfront Cost (1-2 steps) | Setup Time | Durability (Temp Use) | Reusable | Best For |
|---|---|---|---|---|---|
| Pressure-treated wood (2x lumber) | $40–$90 | 2–4 hours | Good (1–3 seasons outdoors) | Yes, if stored dry | DIY build, any height, most common |
| Composite / Trex | $120–$250+ | 3–5 hours | Excellent (won't rot) | Yes | Longer temp use, cleaner look, wet climates |
| Concrete blocks / CMU / pavers | $20–$60 | 30–60 min | Excellent outdoors | Yes (heavy) | Fast install, very low drop, stable soil |
| Premade / modular step units | $80–$300 | 30–90 min | Good to excellent (varies by brand) | Yes (designed for it) | Renters, seasonal use, speed priority |
Pressure-treated wood is the most flexible option for DIY builds because you can cut it to any rise-and-run combination and it handles ground contact with the right treatment level (look for UC4B or UC4A rating for ground contact). Composite and Trex treads perform better in wet climates and won't rot if stored outdoors, but they cost more and require the right fastening approach per ASTM D7032-rated product specs. Concrete blocks and pavers are fast but limited to situations where the geometry lines up with standard block heights (usually 7.5" or 8" CMU, or layered paver combinations). Premade units are the fastest path when budget allows.
Premade and adjustable step units: what's out there
The premade step market has grown significantly. You'll find three broad categories at home centers and online: fixed-height precast concrete steps, adjustable-leg plastic or aluminum modular steps, and bolt-together wood or composite step kits. For temporary use, the adjustable modular types are the most practical because they can be reconfigured for different heights and disassembled for storage or relocation. For a fast, reliable option that bolts together or sets in place with minimal site work, consider premade patio steps that are designed for quick installation and reuse.
- Precast concrete steps: extremely durable, typically one-piece 48" or 60" wide units, arrive finished; heavy (300–600 lbs for a two-step unit), require equipment to place, very difficult to move — borderline permanent for most DIYers
- Adjustable-leg plastic/aluminum modular steps: legs telescope to accommodate 6"–24" of total rise; most units handle 36"–48" width; anti-slip treads usually included; easy to disassemble; good for seasonal or phased-project use
- Bolt-together composite or wood step kits: arrive as cut components you assemble; often sold as deck stair kits; Trex and similar brands offer these; cleaner look than site-built; reusable if carefully disassembled
- Landscape timber step units: heavy timbers (6x6 or 4x6) sold in pre-cut kits; assembled with hardware and rebar pins; semi-permanent but removable with effort
If you're thinking about premade options, it's worth comparing them alongside purpose-built DIY composite steps or a simple wood build. For an option that balances low maintenance and durability, consider composite patio steps as a purpose-built DIY alternative. Premade units win on speed and consistency; site-built wins on fit for unusual dimensions or tight budgets. For a deeper look at what's on the market in this category, premade patio steps is a topic covered in its own right on this site.
Quick DIY build: a simple two-step temporary wood stair
This is the build I come back to most often for temporary access. It covers a 12"–14" total rise (two 6"–7" risers), uses off-the-shelf pressure-treated lumber, and takes about three hours including base prep. Materials run roughly $60–$85 depending on your local lumber prices.
What you need
- Two 2x12x8 pressure-treated boards (UC4A/UC4B ground contact rated) — for stringers and risers
- One or two 2x12x4 (or 2x6x4 paired) pressure-treated boards — for treads (two treads total)
- One bag of pea gravel or crushed stone (about 0.5 cu ft) — for the drainage pad
- 1.5" deck screws (stainless steel or hot-dip galvanized, compatible with treated lumber)
- Construction adhesive rated for exterior/pressure-treated wood
- Speed square, tape measure, circular saw or jigsaw
- Pencil, framing square
- Level (2-ft minimum)
- Shovel or trowel for base prep
- Optional: post base hardware (Simpson or equivalent) and concrete anchors if attaching to a slab
Cut list and dimensions (14" total rise example)
| Part | Qty | Material | Cut Dimensions | Notes |
|---|---|---|---|---|
| Stringers | 2 | 2x12 PT | Approx. 24" long, notched for 2 risers at 7", treads at 11" | Notch depth max 3.5" per IRC stringer rules |
| Treads | 2 | 2x12 PT (actual 11.25") | 36" wide (or your stair width) | Single 2x12 gives code-compliant 10"+ tread depth with 1" nosing |
| Riser boards | 2 | 2x6 PT | Cut to width between stringers (approx. 33") | Optional — closed risers add rigidity and safety |
| Gravel pad | 1 | Crushed stone/pea gravel | Approx. 24" x 40" x 3" deep | Extends 6" beyond front and sides of stair footprint |
Build steps
- Measure your total rise precisely from grade to top of patio surface; for 14", plan two risers at 7" each
- Lay out the stringer notches with a framing square set to 7" rise and 11" run; mark and cut both stringers identically — check that they match before cutting the second
- Excavate 3–4" of soil where the base of the steps will sit; fill with crushed stone and tamp firm with a scrap board; check level in both directions
- Position stringers on the gravel pad; verify they're plumb with a level and that the top of the upper tread notch lands flush with the patio surface
- Fasten riser boards between stringers first using 1.5" deck screws (two screws per end, pilot-drill to prevent splitting); this squares the frame before you add treads
- Lay treads across stringer notches; fasten with two screws per stringer per tread; leave a 1/8" gap between boards if using two-board treads for drainage
- Check all treads with a level; any variation greater than 3/8" between risers requires shimming at the base or recutting
- Apply a bead of exterior construction adhesive under the tread-to-stringer contact if you want added rigidity without permanent anchoring
- Test by standing on each tread and shifting your weight side to side; any rocking means the gravel pad needs adjustment or lateral bracing is needed
Total time: 2.5–4 hours including base prep. Estimated cost: $60–$90 in materials for a 36" wide, two-step unit. For fasteners in contact with pressure-treated lumber, use stainless steel or hot-dip galvanized hardware. Simpson Strong-Tie's technical guidance recommends Type 300-series stainless in ground-contact or high-retention treated-wood conditions. Using standard zinc screws will corrode quickly and weaken the connection.
Anchoring, leveling, and stabilization for temporary steps
This is the part most people skip, and it's where temporary steps become dangerous. A step that moves under foot, even slightly, is a fall risk. You have several options depending on your surface and how removable you need the installation to be.
Base options by surface type
- Gravel pad (3–4" compacted crushed stone): the most common temporary base; allows drainage, prevents frost heave better than packed soil, adjustable; level carefully with a 2-ft level before placing the stair frame
- Compacted paver base with sand: use 4–6" of compacted aggregate sub-base and a 1" screeded sand layer (ASTM C33 sand) for any paver-based step assembly; ICPI guidance targets 98% Standard Proctor compaction for pedestrian loads
- Concrete slab surface: use non-penetrating rubber pads under the stringer feet for light use; for anything used daily, install adjustable post bases (Simpson ABA or similar) with sleeve anchors — these are removable with the right tools and leave only small anchor holes
- Soil-only surfaces: avoid if possible; compact a gravel pad regardless; soil settles unevenly and creates the riser-height variation problem
- Anti-tip straps or rebar pins: for landscape timber steps, drive 1/2" rebar pins through pre-drilled holes into the gravel/soil base; for framed wood steps, diagonal metal straps screwed to the patio rim joist provide lateral stability without permanent attachment
Removal and storage
The advantage of a properly built temporary step is that it can be disassembled and reused. When removing: unscrew treads first, then riser boards, then pull the stringers. Label the components with a marker if you plan to reassemble the same unit. Store pressure-treated lumber flat and off the ground (on 4x4 stickers with air circulation) to prevent warping. If you used construction adhesive, score the joints with an oscillating tool before prying, it separates cleaner and doesn't split the wood.
Fast-install alternatives: stacked blocks, paver steps, and modular kits
Not every situation calls for a built stair. Sometimes you need access in an hour, not an afternoon. These three approaches work well for low drops (under 15") and situations where you'll replace the steps within a season.
Stacked concrete blocks (CMU)
Standard 8"x8"x16" CMU blocks stacked flat give you an 8" rise per course. Two courses stacked with the second course set back 8" creates a two-step configuration without any cutting or fastening. The catch: the geometry only works if your total rise is close to a 8" or 16" multiple. On uneven ground, place blocks on a 2" sand bed and check level in both directions. Add a grippy rubber mat on top for slip resistance. This is a genuine 30-minute solution for a temporary emergency access situation.
Paver step stacks
Stacking 2" or 3" thick concrete pavers in a stepped configuration works well for rises under 10". Lay them on a screeded sand and gravel base; each layer steps back to create the tread. Pavers interlock by weight and gravity, no adhesive needed for temporary use. The mass makes them very stable, and disassembly is just a matter of lifting them apart. This approach works well as a preview for a planned permanent brick or paver step design. If you're planning permanent brick patio steps, consider using a temporary paver stack as a test layout to verify rise, run, and appearance before committing to the final build.
Modular step kits
Bolt-together composite or aluminum modular step kits are the cleanest-looking fast option. Most come with hardware, anti-slip treads, and adjustable legs. Assembly is usually 45–90 minutes with basic hand tools. They're designed to be disassembled and reused, and many fit standard 36" or 48" openings. Cost runs $100–$300 depending on configuration and material.
Costs and tools by solution
| Solution | Estimated Material Cost | Tools Required | Time to Install |
|---|---|---|---|
| DIY 2-step PT wood stair | $60–$90 | Circular saw, drill, framing square, level, tape measure | 2.5–4 hours |
| Stacked CMU blocks | $20–$45 | Level, rubber mallet, trowel (for sand bed) | 30–60 minutes |
| Paver step stack | $30–$70 | Level, rubber mallet, tamper, sand | 45–90 minutes |
| Premade modular step unit | $100–$300 | Drill or wrench, level | 45–90 minutes |
| Composite / Trex step kit | $150–$300+ | Circular saw, drill, level, square | 3–5 hours |
| Landscape timber steps (2-step) | $50–$100 | Circular saw or chainsaw, drill, hammer, rebar | 3–5 hours |
You don't need specialized tools for any of these options. A circular saw, drill/driver, 4-ft level, tape measure, and framing square cover almost every scenario. If you're doing a paver or block base, a hand tamper (about $20 at any home center) is worth having. For the wood builds, a speed square speeds up the stringer layout significantly.
Keeping temporary steps safe over time
Temporary doesn't mean set-and-forget. Outdoor steps deteriorate faster than anything inside, and a step that was solid in spring may have shifted, split, or rotted by fall. Run through this inspection once a month, or after any significant weather event.
- Rock test: stand on each tread and shift weight side to side and front to back — any movement means the base has settled or fasteners have loosened
- Riser check: re-measure riser heights with a tape measure; if any riser has changed by more than 3/8" from the others, repack the gravel base or re-shim
- Surface inspection: look for splitting, splintering, or softening on tread surfaces — soft spots on PT lumber indicate ground-contact rot even in 'temporary' treated wood
- Anti-slip check: replace rubber mats, adhesive grip tape, or grit strips when they start peeling or smoothing out; outdoor tread surfaces should target verified slip resistance for wet conditions (ASTM E303 dynamic COF testing is the industry-preferred method for outdoor surfaces)
- Fastener inspection: look for rust bleeding from screw holes; corroded fasteners in PT lumber lose holding strength fast — replace with stainless or hot-dip galvanized if original screws were substandard
- Load awareness: residential stairs are designed for 40 psf uniform load and 300 lbs concentrated on a tread over a 2"x2" area; don't use temporary steps as a platform for moving heavy equipment or multiple people simultaneously if the base isn't solid
Weatherproofing wood steps extends their usable life significantly. Apply an exterior wood sealer or deck stain after the initial build and annually after that. For steps used beyond one season, a penetrating oil-based finish (not a film-forming finish that peels) holds up better in freeze-thaw cycles.
When to stop patching and build permanent steps
There's a point where continuing to maintain a temporary solution costs more in time and materials than just building the real thing. Here are the signals I watch for.
- You've shimmed or re-leveled the base more than twice in one season
- The steps have become a primary entry point used multiple times daily
- Your total rise now requires four or more risers (handrail requirement kicks in, making a code-compliant 'temporary' install much more involved)
- Any walking surface has risen above 30" grade difference (guard requirement under IRC R312)
- You're planning to sell the property — inspectors and buyers notice improvised steps
- The landscape has been graded, concrete poured, or the final design is locked in and won't change
When these triggers hit, the transition doesn't have to be overwhelming. Remove the temporary steps, evaluate the base condition, and use what you've learned from the temporary layout (rise, run, width, traffic patterns) to inform the permanent design. Many homeowners discover that their temporary step dimensions were actually right, and they just need to rebuild with more durable materials and a proper footing.
Planning your permanent replacement
When you're ready to go permanent, your main choices are framed wood, composite, poured concrete, and masonry. If you're leaning toward composite for a durable finish, check our step-by-step guide on how to build a Trex patio (330c8a09-099d-426f-8c6d-bc2b9c2bc834). Each has a different cost, skill requirement, and permit profile.
| Permanent Option | Estimated Cost (1-2 steps) | DIY-Friendly? | Permit Likely? | Best Match For |
|---|---|---|---|---|
| Framed pressure-treated wood | $150–$400 | Yes | Sometimes (4+ risers) | Most DIYers, wood deck connections |
| Composite (Trex/similar) | $300–$700 | Yes, moderate skill | Sometimes | Low maintenance, wood deck match |
| Poured concrete | $300–$800+ | Moderate–difficult | Usually yes | Attached to concrete patio, long-term |
| Brick or natural stone masonry | $400–$1,200+ | Moderate–difficult | Usually yes | Masonry patios, high curb appeal goals |
Permit triggers for permanent steps under most local IRC adoptions include: flights with four or more risers (triggering handrail requirements), surfaces more than 30" above grade (triggering guard requirements), and substantial structural alterations. Example municipal adoption/amendment of IRC stair provisions (Tulsa city code via Municode library), demonstrates local amendment/permitting context shows how a local code can modify permit and inspection triggers for stairs.} blank" rel="noopener noreferrer">Example municipal adoption/amendment of IRC stair provisions (Tulsa city code via Municode library) — demonstrates local amendment/permitting context. Local amendments vary, so call your building department before you start, a quick phone call often saves a costly re-do. If your project is heading toward composite or Trex materials, there's a lot more detail on both the composite patio steps and wooden steps for patio approaches on this site.
Troubleshooting the most common problems
| Problem | Likely Cause | Quick Fix |
|---|---|---|
| Steps settle or tilt forward | Gravel base not compacted; front edge unsupported | Excavate base, add 1" more compacted stone, re-level |
| Treads feel wobbly or bounce | Loose fasteners or stringers not bearing fully on base | Re-drive or replace screws; check stringer contact with base |
| Riser heights uneven (>3/8" difference) | Ground slope or base compression is uneven | Shim under low stringer or rebuild gravel pad to level |
| Tread surface slippery when wet | Smooth wood or worn anti-slip surface | Apply adhesive grip tape (3M Safety-Walk or similar) or replace treads with grooved profile boards |
| PT wood splitting or checking | Moisture cycling; normal in outdoor lumber | Seal end cuts with exterior wood end-grain sealer; apply penetrating finish to surfaces |
| Wood showing soft spots or decay | Ground contact without adequate treatment level, or standing water | Replace affected boards; ensure UC4B rating for ground-contact components; improve drainage at base |
| Steps shifted laterally | No lateral restraint at top or bottom | Add diagonal metal strap to patio rim joist at top; drive rebar pins at front corners of base |
Match your situation to the right solution
Run through these scenarios and see which one fits your project right now.
- Drop under 8", need access today, no tools available: stack two courses of CMU blocks on a leveled sand bed with a rubber mat on top — 30 minutes, under $40
- Drop 12"–15", have basic tools, need it to last a season: build the two-step PT wood stair from the plan above — 3 hours, $60–$90
- Drop 12"–24", want clean appearance, renting or need to move it later: buy an adjustable modular step unit — 1 hour, $150–$250
- Drop 14"–21", want longer-term use and low maintenance: build with composite treads on PT stringers, or buy a Trex-style step kit — half day, $150–$300
- Drop requires 4+ risers: stop and plan the permanent version; the code requirements for handrails make a real temporary solution complicated enough that it's worth doing it right
- Permanent steps coming within 60 days, just need safe bridge access: fastest/cheapest option for your height (CMU stack or simple PT build); don't over-invest
- Finished patio, budget tight, permanent steps next year: build the PT wood stair with a solid gravel base and plan to harvest the lumber for the permanent build's formwork or blocking
The right temporary step is the one that's safe on day one, stays safe for however long you need it, and doesn't cost you more than the situation warrants. Every situation in this list is something I've personally run into or helped someone through. Get the geometry right, get the base solid, and use hardware rated for outdoor treated lumber, those three things cover the majority of what goes wrong with temporary patio steps.
FAQ
What are the authoritative measurement and uniformity rules I must follow for safe temporary patio steps?
Follow residential stair geometry in the IRC as guidance even for temporary steps: maximum riser height 7 3/4" (7.75"), minimum tread depth 10" (measured nosing-to-nosing), maximum variation between largest and smallest riser or tread in a flight 3/8" (0.375"). Maintain at least 36" clear stair width where practicable. Keep 80" headroom if the step area has overhead obstructions. These limits reduce trip risk; match riser heights across steps to within 3/8".
When are handrails and guards required for temporary steps?
Building codes generally require a handrail on a flight with four or more risers; handrail height is 34–38" measured vertically from the tread nosing. Guards are required where the walking surface is more than 30" above grade; guard height is typically 36" (34" permitted on open stairs). For temporary installations, follow these triggers—if your steps meet those thresholds consider adding a handrail/guard even temporarily.
What structural loads and slip-resistance considerations apply to temporary outdoor treads?
Design treads to meet typical residential loads: 40 psf uniformly and resist a 300‑lb concentrated load over a 2"×2" area. For safety in wet conditions, choose materials with proven dynamic slip resistance (pendulum test/DCOF data) or textured finishes. Avoid smooth painted surfaces on exterior treads that get wet.
How do I decide between pressure-treated wood, composite, concrete blocks/pavers, and premade/modular temporary steps?
Decision criteria: budget, duration, skill level, permanence, exposure to moisture, and expected load. Quick guide: - Pressure-treated wood: low cost, easy to cut/fasten, good short-term solution; needs corrosion-resistant fasteners outdoors. - Composite/Trex: more slip-resistant, low maintenance, longer life, costlier; often prefab treads available. - Concrete blocks/pavers: inexpensive, heavy, very stable without fasteners, good for single- or two-step setups on compacted base; less attractive and harder to adjust precisely. - Premade/modular steps (plastic, aluminum, metal): fastest install, adjustable risers, often engineered and rated; more costly upfront but quickest and safest for renters or temporary use. Choose wood or pavers for tight budgets, premade or composite when safety/durability are priorities.
What fasteners and corrosion protection should I use outdoors with treated lumber?
Use hot-dip galvanized or 300-series stainless steel fasteners and connectors for pressure-treated lumber in exterior or ground-contact situations. Stainless is preferred when in doubt (higher corrosion resistance). Follow manufacturer guidance for any brackets or post bases used.
What anchoring and leveling options work for temporary steps on a patio or concrete landing?
Anchoring options: - On concrete: mechanical wedge/sleeve anchors or epoxy/adhesive anchors installed per manufacturer instructions; use post bases or angle brackets to secure stringers. - On compacted soil or gravel: set base pads on compacted aggregate, use landscape timbers pinned with rebar or spikes, and add gravel backfill for lateral stability. - For modular steps: use integrated adjustable feet, screw leveling pads, or surface anchors supplied by the manufacturer. Ensure you do not overdrill near edges and follow embedment/torque instructions to avoid pullout.
Next Article
How to Build a Trex Patio: Step-by-Step DIY Guide
Step-by-step DIY Trex patio build, from planning and leveling to framing, bases, drainage, spacing, and maintenance chec