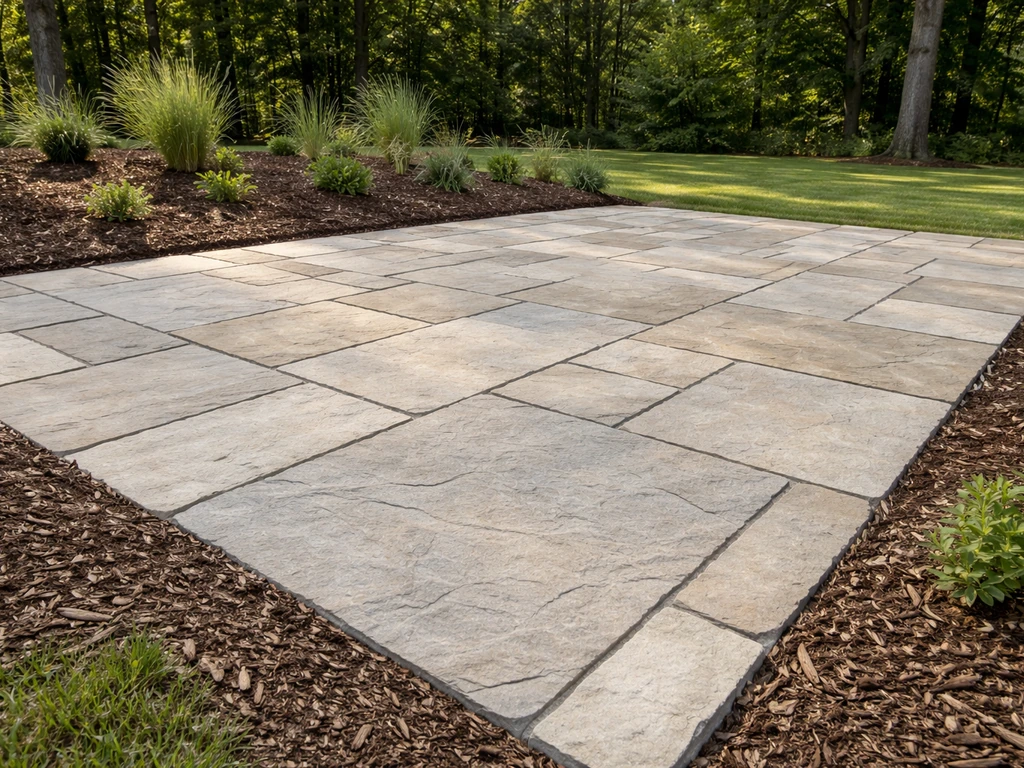
A sand-set patio is one of the most beginner-friendly hardscape projects you can tackle yourself. You excavate, compact a gravel base, screed a 1-inch layer of coarse sand, lay your surface material (pavers, flagstone, flat rock, or even pea gravel), and lock everything together with joint sand and edge restraints. If you plan to use flat rock specifically, see our guide on how to build a flat rock patio for material selection and laying techniques (destination ID 300f1a89-e40a-4d35-95f1-ec60e8e90e7b). No concrete mixing, no forms, no waiting for a cure. Done right, it's stable, attractive, and repairable, if a paver settles or cracks, you pull it up and relay it in an afternoon.
How to Make a Sand Patio: DIY Plan, Build & Maintain Guide

Nolan Lennox
18 Jul 2026
What a sand patio actually is (and when it makes sense)
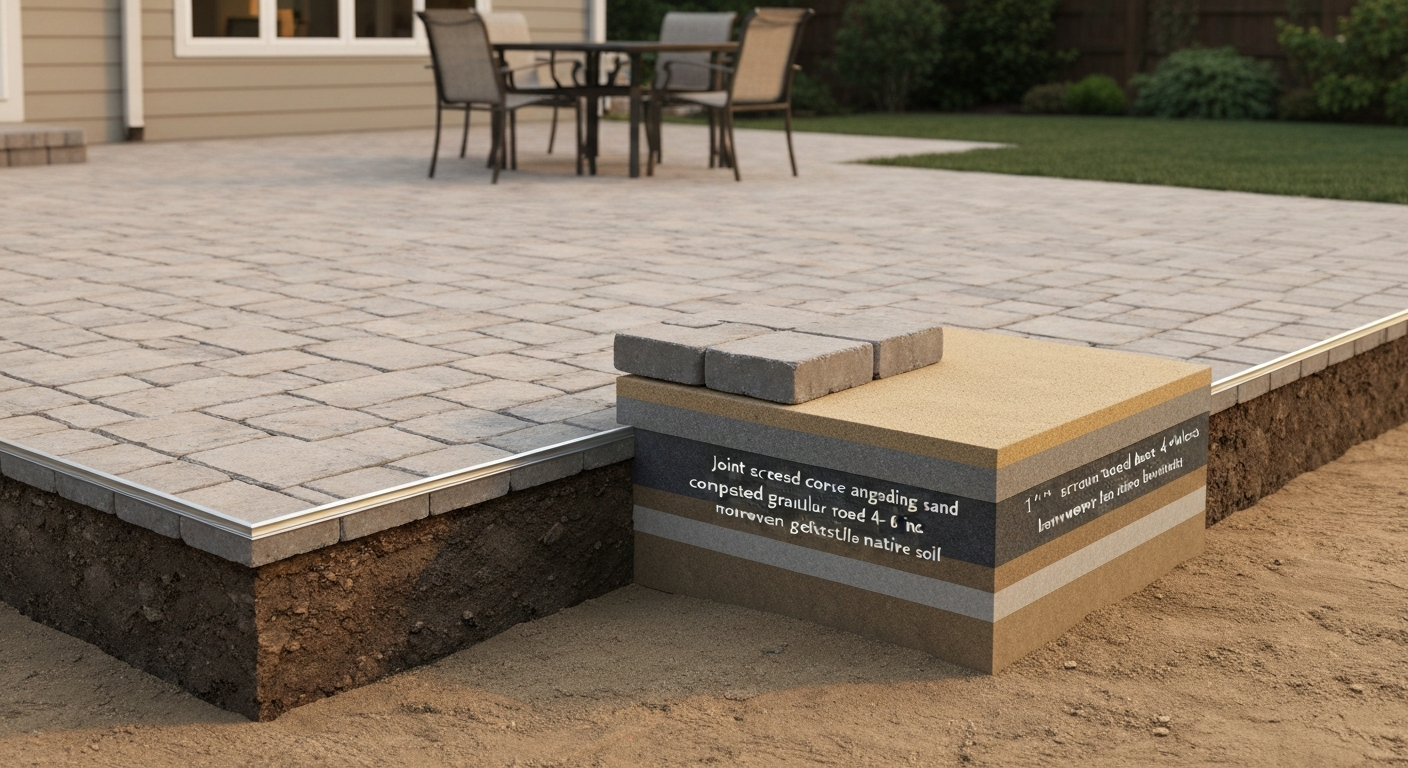
A sand-set patio uses compacted granular base material topped with a screeded bedding layer of coarse sand to support the surface. The sand bed distributes load evenly and lets you fine-tune the elevation of individual units before you lock joints. It's a dry-laid system, meaning nothing is bonded permanently to a concrete slab, the patio stays flexible, which actually works in its favor in climates with freeze-thaw cycles where rigid slabs crack.
This approach is the right call when you want a DIY-friendly, repairable patio surface for foot traffic, patio furniture, and moderate entertaining. It's ideal for level or gently sloped lots, for homeowners who don't want to deal with concrete, and for anyone working on a budget who needs a good-looking result without hiring a crew. It is not a good fit for heavy vehicle loads (the driveway apron where the car parks), for extremely steep grades where erosion will undermine the base, or for situations where a hard, sealed, impermeable surface is specifically required by code.
Sand patio vs. gravel, rock, pea gravel, pebble, and flat rock: which should you build?
Every one of these options uses some form of compacted aggregate base and often a sand bed, but the surface material changes the look, the feel underfoot, the drainage behavior, and the maintenance load. Here's how they compare honestly:
| Surface Type | Best For | Drainage | Stability | Maintenance | Relative Cost |
|---|---|---|---|---|---|
| Sand-set pavers (concrete/brick) | Formal patios, high-use areas | Moderate (joints drain) | Excellent with edge restraint | Low — resand joints as needed | Medium |
| Flagstone on sand bed | Natural, rustic look; irregular shapes | Good (open joints) | Good — spot shim thick pieces | Low-medium — top up joints seasonally | Medium-high (stone cost) |
| Flat rock / dry-laid stone | Stepping paths, casual seating areas | Excellent (open gaps) | Moderate — rocks shift without restraint | Medium — reset shifted pieces | Medium (varies by stone type) |
| Pea gravel surface | Budget builds, informal areas, drainage-first sites | Excellent (fully permeable) | Low — gravel migrates without edging or geocell | Medium-high — rake, top up, weed | Low |
| Pebble surface (decorative) | Accent areas, garden patios, low traffic | Excellent (fully permeable) | Low — needs containment | Medium — top up, rake | Low-medium |
| Gravel (crushed angular) | Utility areas, fast builds, permeable pads | Excellent | Medium — compacts but migrates at edges | Low-medium — grade, top up | Low |
My honest recommendation: if you want a patio that looks intentional and holds up to years of use with minimal fuss, sand-set concrete pavers are the best value. Flagstone on a sand bed comes in second for people who want a natural look and don't mind a bit more prep work on irregular pieces. Pea gravel is the fastest and cheapest build but requires edge restraint and periodic raking, it's covered in more depth in its own guide on this site, as are gravel and rock-specific builds, since each has its own base and jointing nuances. For detailed, step-by-step instructions on installing a gravel or pea-gravel surface, see the guide on how to build gravel patio (ID: 0bf2d25e-4238-4e20-ad9f-7315bdeb142c). For step-by-step instructions on building a durable rock or gravel patio, see how to rock patio. For step-by-step instructions, see our guide on how to build a pebble patio. For step-by-step instructions on building a pea gravel patio, see our guide 'pea gravel patio how to'. For step-by-step instructions on installing a rock or flagstone surface, see our guide on how to build rock patio.
Planning your patio: size, shape, layout and style
Start with function before you touch a shovel. A patio for a bistro table and two chairs can work at 8x8 feet (64 sq ft). A dining table for six needs at least 12x14 (168 sq ft) to pull chairs out comfortably. An outdoor lounge with a sectional sofa will want 16x20 or more. Sketch it on graph paper with your furniture to scale, I can't count how many patios I've seen that looked big enough on paper and felt cramped the first time someone set up a grill.
Shape affects material waste and complexity. Rectangles and squares are the most efficient to build and minimize cuts, especially with pavers. Curves look beautiful but require a flexible edge restraint and mean cutting a lot of pavers or using smaller units. Irregular flagstone and flat rock are naturally suited to organic, free-form shapes because the stones themselves vary, so you're fitting a puzzle rather than cutting a grid.
For load requirements, a sand-set patio rated for pedestrian use handles furniture, grills, planters, and normal foot traffic without issue. If you're planning a hot tub (which can run 100 lbs per sq ft fully loaded), you need a concrete slab or a significantly reinforced base, this is one case where a sand-set system is not appropriate. For everything else in the residential outdoor living category, a properly compacted base handles the load.
Paver, flagstone, pea gravel, pebble and flat rock: picking your surface
- Concrete pavers: most uniform, easiest to lay in patterns, widest size range, readily available at big-box and landscape suppliers. Great for formal or contemporary aesthetics.
- Flagstone (bluestone, limestone, travertine, slate): irregular shapes and natural variation. Requires fitting and occasional shimming under thick pieces. Needs a slightly thicker sand bed where pieces vary in thickness.
- Flat rock (fieldstone, sandstone slabs): similar to flagstone but usually thicker and heavier. Excellent for rustic or naturalistic patios — pairs well with the same build process covered in a flat rock patio guide.
- Pea gravel: rounded, smooth, 3/8-inch stone. Permeable, soft underfoot, fast to install. Needs a geocell or rigid edge containment to stay put.
- Pebbles: decorative river pebbles, typically 1/2- to 1-inch smooth stone. Similar to pea gravel in behavior but coarser. Suited for accent zones and low-traffic areas.
- Brick: classic and durable. Requires accurate leveling since all units are identical and gaps show unevenness more than irregular stone.
Site assessment and permits: what to check before you dig
The single biggest mistake DIYers make on patio projects is skipping the site assessment. I've done it too, early on, and paid for it with a patio that settled unevenly in the first winter because I didn't account for a clay lens in the subgrade. Take a day to assess your site properly and you'll save yourself a week of remediation later.
Soil type and infiltration
Your soil's drainage behavior determines how much base material you need and whether you need to address drainage before you build. Sandy or loamy soils drain well and are forgiving. Clay soils hold water, stay soft when wet, and can undermine a base if drainage isn't handled. The USDA NRCS Web Soil Survey gives you a free, site-specific soil map and engineering interpretation, look up your address before you finalize your base design. See NRCS guidance and tools (Web Soil Survey and soil test procedures), USDA NRCS for free site-specific soil maps and recommended field soil/infiltration check procedures NRCS guidance and tools (Web Soil Survey and soil test procedures) — USDA NRCS. For a quick field check, dig a 12-inch hole, fill it with water, let it drain, fill it again, and time how fast the water drops. Sandy soil drains inches per hour; clay may take 12 hours or more to drain a few inches, which tells you to add drainage features to the design.
Slope and grade
Check your yard's natural slope relative to your house. You want the patio to drain away from the foundation. A slope of 2% (that's 1/4 inch per foot) is the practical target recommended for exterior hardscape, enough to shed water without feeling like a ramp. The ADA cross-slope limit for accessible routes is 2% (1:50), which happens to align perfectly with good drainage practice. If your yard slopes toward the house, you'll need to regrade, add a swale, or plan a French drain before the patio goes in.
Call 811 before you dig
Always call 811 (or your country's equivalent utility locate service) at least 3 business days before any excavation. Buried utilities, gas, electric, water, fiber, are everywhere, and hitting one is dangerous and expensive. This is non-negotiable, even for a shallow patio excavation.
Permits: when you need one
Many jurisdictions treat a new patio as a structure change and require a building or site permit, especially if the patio surface is impermeable (pavers, flagstone) and adds to your lot's impervious surface coverage. Some municipalities cap total impervious coverage at a percentage of lot area. A few jurisdictions also care about frost depth, the International Residential Code Table R301.2(1) specifies design frost depths by region, and your local authority may require that edging or structural elements extend below frost line. Call your municipal permit office with the patio size and surface material before you build. The permit process is usually straightforward for a patio and often costs under $100, don't skip it and risk a stop-work order or a problem at resale.
Slope, drainage, and water management
Getting water off and away from your patio is more important than any single material choice. A beautiful flagstone patio that sits in a puddle after every rain will heave, settle, grow moss, and frustrate you constantly. Build drainage into the design from day one.
Surface slope
Target 1/4 inch per foot (2%) of fall away from the house across the entire patio surface. This is your minimum practical slope, less than 1% and you'll get standing water. Set this slope in your base compaction, not just in the sand bed, so the whole system pitches correctly. Establish it with your stringlines during layout before you move any soil.
When natural drainage isn't enough
If your site has poor-draining clay soil, a low spot that can't be sloped away, or is adjacent to a downspout, you need active drainage. A French drain (a trench filled with gravel and a perforated pipe) running along the downslope edge of the patio and routing to daylight or a dry well is the standard fix. Size the pipe based on your drainage area, for most residential patios, a 4-inch perforated pipe in a 12-inch wide gravel trench is adequate. Wrap the trench in nonwoven geotextile (filtration grade) to prevent fines from migrating into and clogging the gravel over time.
If a downspout terminates near the patio, extend it past the patio edge with a solid pipe and a pop-up emitter at least 6 feet from the house before it can saturate your base. This is one of the most overlooked steps I see DIYers skip, and it causes more patio failures than almost anything else.
Permeable surfaces as a drainage strategy
Pea gravel, pebble, and open-jointed flagstone patios have a natural drainage advantage because water infiltrates through the surface. See Geocell product / application notes (cellular confinement for gravel paving), industry supplier resource for manufacturer guidance on using cellular confinement systems to stabilize permeable gravel patios, increase bearing capacity, and reduce required infill thickness Geocell product / application notes (cellular confinement for gravel paving) — industry supplier resource. If your soil percolation rate supports it, this can eliminate the need for a French drain entirely. On clay soils, however, the water still won't go anywhere useful, it'll just pool in the base. In those cases, you still need a drainage outlet even with a permeable surface.
Complete materials checklist
Getting the right materials matters more than most people realize. Using the wrong type of sand under pavers is one of the most common DIY mistakes I encounter, and it leads to uneven settling within a season.
Sand types and what each one does
| Sand Type | Use | Notes |
|---|---|---|
| Bedding / concrete sand (coarse, angular) | 1-inch screeded layer under pavers or flagstone | Must conform to ASTM C33. Angular particles interlock and resist shifting. Do NOT use play sand or round masonry sand here. |
| Mason's sand (fine) | Mortar work, thin fills | Too fine and smooth for paver bedding — grains compact unevenly and don't provide stable support. |
| Jointing sand (dry) | Filling joints between pavers/flagstone after installation | Swept in dry and allowed to settle. Needs periodic replenishment. Affordable but weeds can establish. |
| Polymeric sand | Filling joints with a binder that hardens when wetted | Inhibits weeds and ants better than dry sand. Follow the product's temperature and humidity cure guidelines exactly. Leaves a harder, more stable joint. |
| Pea gravel / pebbles | Surface material (not a sand product but often paired) | Used loose or in a geocell system. No jointing sand needed — the surface is the material itself. |
Base rock and gravel options
- #57 crushed stone (3/4-inch clean): coarse, angular, drains well, commonly used as a drainage layer or in French drains. Does not compact tightly — not ideal as the sole base material for pavers.
- #8 crushed stone (3/8-inch clean): smaller, still drains well, sometimes used as a transition layer. Compacts better than #57 but still not ideal as a standalone base.
- Road base / Class II base / 3/4-inch minus / Granular A: this is your primary compacted base material. It's a crusher-run blend of graded fines and coarse aggregate that, when compacted, locks together into a nearly rigid layer. Conforms to ASTM D2940 or local DOT specs. This is what the ICPI recommends under sand-set pavers. Use 4 inches for pedestrian-use patios on good-draining soil, 6 inches as a standard residential recommendation, and 8-12 inches on clay or weak subgrades.
- Pea gravel (sub-base): sometimes used under pea gravel surfaces or as a drainage layer, but not as a compacted base under pavers.
Geotextile fabric
Use a nonwoven geotextile (filtration/separation grade) between the native subgrade and your aggregate base. It prevents base fines from migrating down into soft soil and soil from migrating up into your base over time, which is exactly the kind of slow failure that causes uneven settling years after the build. Woven geotextile is used when you need separation and reinforcement over a very weak, wet subgrade, in those cases it adds tensile strength to the system. For most residential sand patios, nonwoven 4-oz or 6-oz fabric does the job.
Edging and edge restraints
Edge restraints are not optional on a sand-set patio. Without them, the pavers or stones at the perimeter slowly migrate outward over time, joints open, and the whole system unravels from the edges inward. Your options are: spiked plastic edging (most common for residential DIY, cost-effective, flexible for curves), aluminum or steel edging (cleaner look, more rigid, good for straight runs), concrete haunching or poured concrete curb (most permanent, used where vehicles could contact the edge or for formal installations), or natural stone soldier-course borders (aesthetically integrated, requires mortaring or tight fitting). Install all edge restraints on the compacted base, not on the bedding sand layer, they need to bear on the firm base to resist lateral pressure.
Surface materials at a glance
- Concrete pavers: 2.375-inch to 3.125-inch thickness typical for residential. Available in brick, square, tumbled, and large-format styles.
- Natural flagstone: 1- to 2.5-inch thickness typically. Bluestone, limestone, travertine, slate — each has different hardness and porosity.
- Flat rock / fieldstone: irregular, often 2-4 inches thick. Heavier than flagstone, requires more bedding adjustment.
- Pea gravel: 3/8-inch rounded stone. Order in tons (1 ton covers roughly 80-100 sq ft at 2 inches deep).
- Decorative pebbles: 1/2- to 1-inch smooth river stone. Similar coverage to pea gravel.
Complete tools checklist
You don't need to own all of this, plate compactors and laser levels are easy weekend rentals at most equipment rental shops and many big-box stores. Budget roughly $100-200 for a weekend rental of the major power tools.
- Plate compactor (rental): essential for compacting road base in 2-4 inch lifts. A hand tamper works for small patches and awkward corners but is not adequate for full patio compaction.
- 4-foot level and 2-foot level: check slope and levelness across the base and finished surface.
- Line level and stringlines: establish grade and slope reference across the entire patio footprint before any material goes in.
- Laser level (rental or owned): faster than stringlines for large patios — worth the rental cost on anything over 200 sq ft.
- Screed boards (1x4 or 2x4 lumber): drag across pipe or angle-iron screed guides to level the sand bed to exactly 1 inch depth.
- Screed guides (1-inch conduit or angle iron): set at finished bedding-sand elevation and pulled out after screeding.
- Rubber mallet: set pavers without chipping edges. A dead-blow mallet also works.
- Plate compactor with rubber pad attachment: used after pavers are laid to vibrate sand into joints without cracking paver surface.
- Masonry saw / angle grinder with diamond blade (rental): for cutting pavers and flagstone to fit edges and curves.
- Brick splitter / guillotine (rental): faster and cleaner than a saw for straight cuts on concrete pavers.
- Wheelbarrow: moving base material, sand, and pavers around the site.
- Round-point shovel and flat spade: excavation and base spreading.
- Landscape rake: spreading base material and sand.
- Push broom: sweeping joint sand across the paver surface.
- Tape measure and marking chalk/spray paint: layout and marking cuts.
- Knee pads: your knees will thank you after day one.
- Safety glasses, gloves, hearing protection (for saw and compactor): non-negotiable.
Estimating quantities and budgeting your build
Getting your quantities right before you order saves the frustration of a second material run mid-project. Here's how to work through the math systematically.
How to calculate volumes
The formula is straightforward: Length (ft) x Width (ft) x Depth (ft) = cubic feet. Divide by 27 to convert to cubic yards. Add 10-15% for compaction loss in the base layer (compacted road base takes up less volume than loose material) and another 5-10% waste factor for pavers and stone.
- Measure your patio footprint in square feet (length x width for a rectangle; approximate irregular shapes by breaking them into rectangles).
- Aggregate base: multiply sq ft by base depth in feet (e.g., 0.5 ft for 6 inches). Divide by 27 for cubic yards. Add 15% for compaction. Road base is sold by the ton — one cubic yard of compacted road base weighs roughly 1.4-1.5 tons.
- Bedding sand: 1-inch depth = 0.0833 ft. Multiply sq ft by 0.0833 and divide by 27. Sand is sold by the ton or cubic yard — one cubic yard of coarse sand weighs approximately 1.3 tons.
- Pavers: use the square footage plus 5-8% for cuts and breakage. Supplier coverage charts show how many pavers per square foot by size.
- Flagstone / flat rock: typically sold by the ton. Coverage varies by thickness — 1-inch-thick flagstone covers roughly 70-80 sq ft per ton; 1.5-inch covers roughly 50-60 sq ft per ton. Ask your supplier for their specific coverage rate.
- Pea gravel: at 2-inch depth, plan on roughly 0.6 cubic feet per square foot. One cubic yard covers about 162 sq ft at 2 inches.
- Polymeric or jointing sand: typically, one 50-lb bag covers 30-50 sq ft of 4x8 brick pavers depending on joint width. Wider joints in flagstone will require significantly more — estimate high.
- Geotextile fabric: buy to match your square footage plus 10% for overlaps (overlap seams by at least 12 inches).
- Edge restraint: measure the perimeter in linear feet and add 10% for corners and cuts.
What drives costs up (and how to keep them reasonable)
Material costs vary significantly by region and supplier type. Buying base gravel from a landscape supply yard or quarry by the truckload is almost always cheaper than bags from a big-box store, sometimes by half. Flagstone prices swing wildly depending on whether it's local material or quarried and shipped from across the country. Always get two supplier quotes for stone.
The biggest cost variables beyond materials are excavation (if you need to haul off soil, disposal fees add up fast), equipment rental (budget $150-250 for a full weekend of compactor and saw rental), and complexity. Curves, multiple levels, or tight access all add time, which matters when you're hiring any portion of the work. A basic 200 sq ft paver patio done entirely DIY can land well under the cost of hiring a contractor for the same job, but budget with contingency, I always add 15% to my initial material estimate for surprises. Factor in delivery fees, which for heavy stone and gravel can be $50-150 per load depending on distance.
To keep costs realistic: stick to local stone and aggregate whenever possible, keep the shape rectangular to minimize cuts, choose a mid-range concrete paver over premium natural stone if budget is a constraint, and do as much excavation by hand as the project allows before renting equipment. A well-planned 12x14 patio with a 6-inch compacted base, 1-inch sand bed, and standard concrete pavers is a very achievable DIY weekend project that rewards preparation and patience.
FAQ
When is a sand-set patio an appropriate DIY choice versus a concrete or fully mortared patio?
Choose sand-set patios when you want a low-cost, permeable, repairable surface for primarily pedestrian use (patios, walkways, seating areas). Sand-set works well for pavers, flagstone, pea gravel and flat-rock layouts on reasonably stable sites. Avoid sand-set for heavy vehicle loads, poor drainage without corrective work, or where permanently level, fully sealed surfaces are required. Mortared or poured concrete is better for driveways, vehicular traffic, or where a rigid, sealed surface is needed.
What site factors should I assess before designing a sand patio?
Assess (1) slope and drainage — ensure finished surface will slope away from structures ~1–2% (1/8"–1/4"/ft); (2) soil type and permeability — use NRCS Web Soil Survey and simple infiltration tests to find clay vs sandy soils; (3) frost depth — check local code for freeze/thaw effects on support; (4) utilities and grading/permit requirements — confirm with local permitting/zoning office; (5) expected use/loads and access for materials/tools.
Do I need a permit to build a patio?
Permit rules vary by jurisdiction. Some cities require permits or count new patios toward impervious-surface caps. Always check your municipal building and zoning office before starting—especially if the patio changes drainage, connects to structures, or exceeds local thresholds.
What materials and tools are required for common sand patio types?
Common materials: compactible aggregate base (3/4" minus or 'Granular A' / Class 2), coarse concrete (ASTM C33) bedding sand (~1"), jointing sand or polymeric sand, edge restraints (aluminum/steel/plastic/ concrete haunch), geotextile (woven/nonwoven depending on separation vs filtration), pavers/flagstone/pea gravel/pebbles, landscape fabric (where appropriate), and optional geocell for weak subgrades. Tools: plate compactor, hand tamper, screed rails and board, shovel, rake, level, string line and stakes, measuring tools, circular saw or stone saw (for cuts), rubber mallet, broom, wheelbarrow, compaction plate or vibrating tamper, gloves and safety gear.
How deep should the aggregate base and bedding layer be?
Base depth depends on soil strength and load: ~4" compacted base for good subgrade and light pedestrian use, 6" is common for residential patios/walkways, and 8–12" for weak soils or heavier loads. Compact the base in 2–4" lifts to recommended density. Bedding sand for pavers/flagstone is typically a nominal 1" screeded layer of coarse concrete sand (ASTM C33), maintained within ±1/4".
What edge restraint options should I use and where are they installed?
Edge restraints prevent lateral spread. Options: spiked plastic edging (budget), metal/aluminum/steel edging (durable), poured concrete haunching or a concrete curb (permanent). Install restraints on the compacted aggregate base, not on the bedding sand, and secure per manufacturer recommendations (spike spacing, embed depth).
Next Article
How to Build a Flat Rock Patio Step by Step DIY Guide
Step-by-step DIY plan to build a flat rock patio with site prep, drainage, compacted base, level stone setting, and main