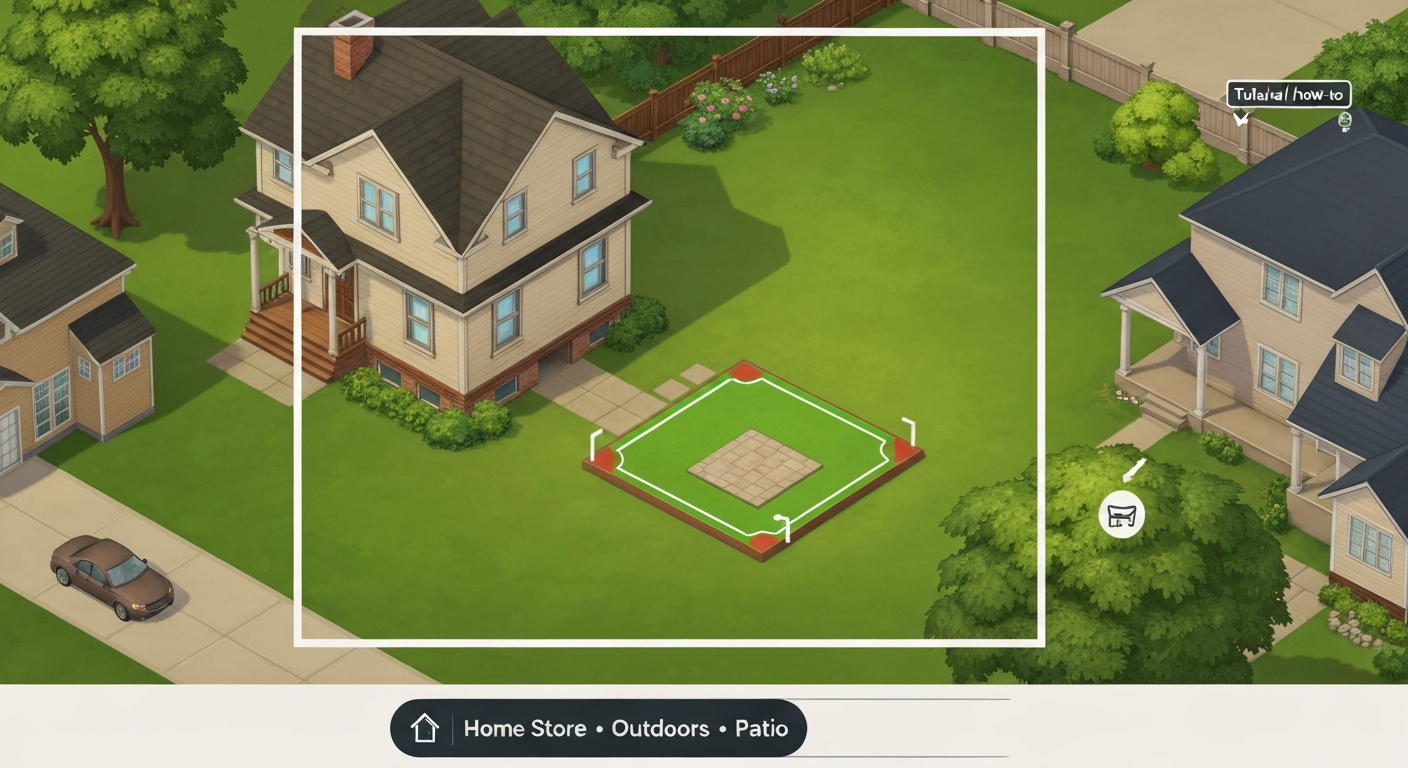
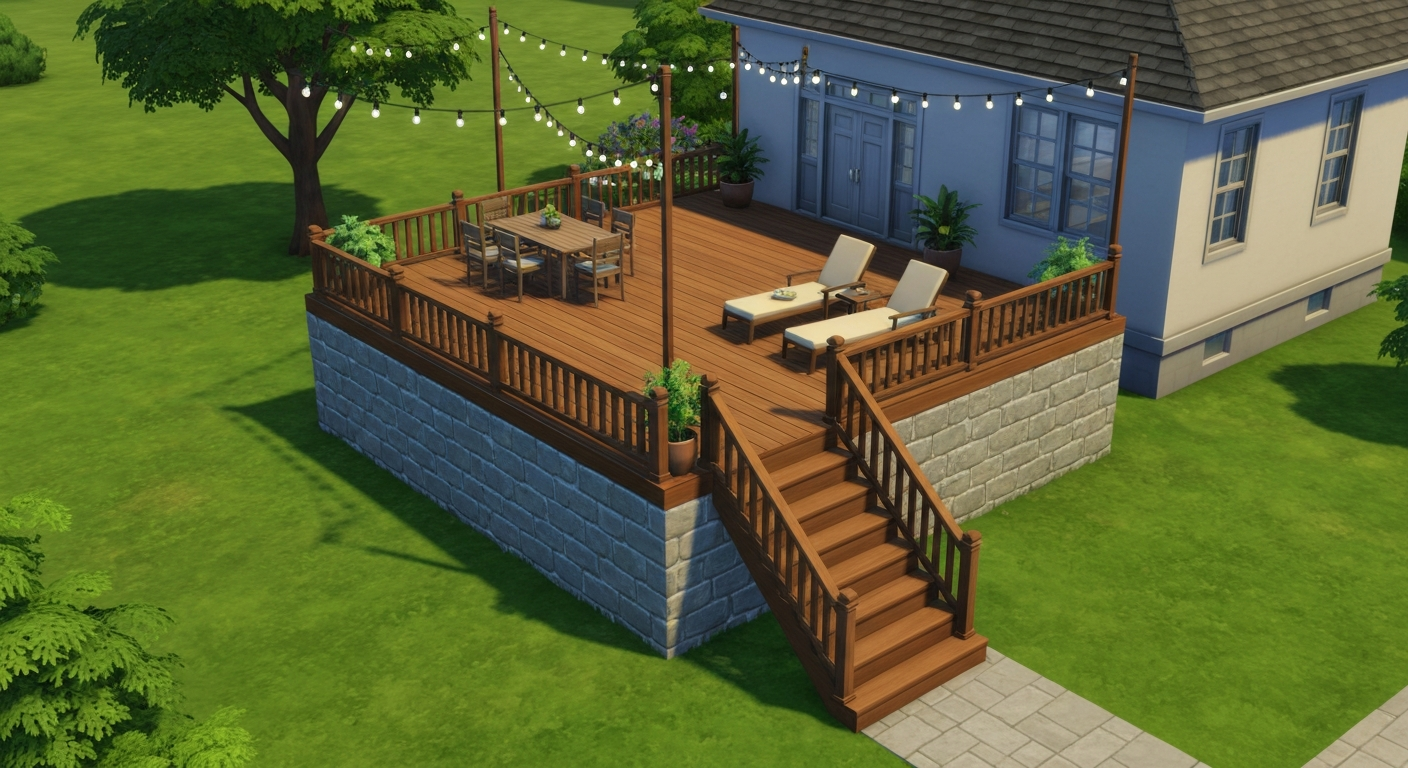
To make patio stairs in The Sims 4, raise a platform to your desired height using the Platform Tool in Build Mode, then open Build Mode's Stairs & Ladders catalog, pick a stair style, and click the edge of the platform where you want access. The game auto-extends the stairs to match the platform height. That is the core workflow, and once you have done it a couple of times it takes about thirty seconds. The rest of this guide walks you through every detail, cheats, platform setup, stair customization, railings, and what to do when something inevitably glitches.
How to Make Patio Stairs Sims 4: Step-by-Step Build Guide

Nolan Lennox
17 Jul 2026
What this guide teaches you
I put this together because patio stairs in The Sims 4 trip up a lot of builders who are comfortable with basic room layouts but have not yet dug into platforms and stair editing. By the end you will know how to plan a patio footprint, raise a platform, connect stairs properly, control railings and trims, and troubleshoot the handful of errors that show up most often. If you are a homeowner who has been thinking about a real-world deck or raised patio project and you landed here while experimenting in-game first, the same spatial instincts you build in Sims 4 translate surprisingly well to actual planning.
Who this is for and what you will walk away with
This guide is aimed at Sims 4 players who know their way around Build Mode at a basic level but have not fully explored platforms and the stair edit widget. You do not need any expansion packs to follow the core steps, everything described in the main workflow uses base-game tools updated in the November 2020 patch. If you are also the kind of person who watches deck-build videos on a Saturday morning before switching to Sims 4 to sketch out ideas, you are exactly the reader I had in mind. By the end, you will be able to build a clean raised patio with access stairs, add railings and half-wall edging, and fix placement errors without starting over.
Game settings, build tools, and the cheats worth enabling
Before you place a single tile, there are a few cheats and settings that make patio builds much less frustrating. Open the cheat console with Ctrl+Shift+C on PC or Mac, or hold all four shoulder buttons on console. Type each cheat and hit Enter, then close the console and repeat for the next one.
| Cheat | What it does | When you need it |
|---|---|---|
| testingcheats true | Unlocks shift-click debug options and is required before some other cheats work | Enable this first, every session |
| bb.moveobjects on | Lets you place objects freely without collision errors | Placing railings, decor, or trims near platform edges |
| bb.enablefreebuild | Lets you build on locked lots like community lots or apartments | If your patio lot is restricted |
| bb.showhiddenobjects | Reveals debug/hidden items in the catalog | Finding extra stair or trim pieces |
| bb.ignoregameplayunlocksentitlement | Unlocks career reward objects without earning them | Optional, for extra decor items |
| motherlode | Adds §50,000 to your household funds | Avoid running out mid-build |
| money X | Sets funds to any exact amount (replace X with a number) | Precise budget control |
The one I almost always leave running is bb.moveobjects on. Stair and platform edge placement produces 'Can't intersect obstructing objects' errors constantly, and that cheat kills most of them. A February 2025 patch did fix several object-placement issues specifically next to raised platforms, so the game is better than it used to be, but bb.moveobjects is still your safety net. When you use it, hold Alt after clicking an object to move it off the grid for fine placement, and use Ctrl+9 or Ctrl+0 to nudge object heights up or down in small increments.
Packs and custom content: do you actually need them?
The honest answer is no, not for a functional patio with stairs. The Platform Tool, stair tool, and a solid set of railings and half-walls are all base-game features since the November 10, 2020 update. That said, certain expansion and stuff packs do add noticeably better outdoor materials and architectural details.
- Outdoor Retreat Game Pack: adds rustic wood railings and outdoor furniture that suits a natural patio aesthetic
- Discover University: includes some industrial-style stair and railing options useful for modern patios
- Dream Home Decorator Game Pack: expands color swatches and trim options for walls and platforms
- Paranormal Stuff Pack: oddly useful for certain decorative columns and fencing pieces
- Custom Content (CC): free CC from creators like Peacemaker IC and Harrie adds stone wall trims, wrought-iron railings, and extra platform edge tiles that no pack currently covers
If you are going pack-free or budget-conscious in-game, stick to the Craftsman and Transitional stair styles in the base catalog, pair them with the simple square wooden or stone railings, and use Platform Trims (under Walls and Empty Rooms) to give the platform edge a finished look. You can build something that looks genuinely polished without spending a cent on packs.
Platforms, foundations, and patios, what the game actually calls these things
This is the concept section a lot of tutorials skip, and it causes confusion. In The Sims 4, a 'patio' is not an official game object, it is a design outcome you create using a combination of platforms, floors, walls, and outdoor objects. The Platform Tool, added in the base-game patch on November 10, 2020, is your main building block. It lives in Build Mode under Walls and Empty Rooms. You draw a platform the same way you draw a room, and then use the small up/down arrow widget on the platform to raise or lower its height in step increments.
Foundations are different from platforms. A foundation raises the entire building at once and cannot be mixed at different heights across a single connected building without some workarounds. Platforms are more flexible: you can have a ground-level patio, a platform one step up acting as a raised deck area, and a second-floor platform all on the same lot without the rigidity of foundation mode. For most patio stairs builds, platforms are the right tool. Foundations are better suited for elevating the whole house.
One rule you need to internalize: if a platform is exactly one step higher than the adjacent floor, Sims can step up onto it automatically with no stairs needed. The moment it is two or more steps higher, you must connect a staircase or ladder, otherwise Sims simply cannot reach the surface. This single rule governs all the routing decisions you will make.
Planning your patio: size, elevation, and access points
Before you draw anything, think through three things: how large the patio needs to be, how high you want to raise it, and where the stairs will connect. I usually sketch this out roughly on paper first, the same habit I use for real patio projects. A patio that is too shallow (fewer than three tiles deep) tends to feel cramped once furniture is added, and stairs that are placed on the wrong side of the platform will force Sims to walk around the house to reach them.
- Minimum comfortable patio size: 4 tiles wide by 3 tiles deep for a seating area with a small grill
- Standard raised patio height: 2 to 3 steps (roughly matches a real deck at 24 to 36 inches above grade)
- Access points: plan for at least one stair run facing the yard and one door opening from the house directly onto the patio surface
- Stair footprint: a standard straight stair run takes about 2 tiles of horizontal space—account for this when sizing the patio relative to the lot
- Leave one tile of clearance around the base of stairs so Sims can route cleanly onto and off the stairs without getting stuck
When you are placing the platform, think about the house door height too. If the house sits on a foundation, your patio platform needs to match that same elevation or connect to it with an intermediate step. Getting this right before you start saves a lot of rebuilding. It is exactly like planning deck height in relation to an existing door threshold on a real house, the door height is fixed, and everything else has to meet it.
Step-by-step: building a raised patio base
- Enter Build Mode and navigate to Walls and Empty Rooms in the left-hand catalog panel. Look for the Platform Tool—it is the icon that shows a raised tile section. Click it.
- Draw your patio footprint the same way you would draw a room: click and drag from one corner to the opposite corner. Release the mouse button when the shape looks right.
- Click the platform to select it. A small widget with up and down arrows will appear. Click the up arrow to raise the platform. Each click raises it one step. For a standard raised patio, three to four clicks is a good starting height.
- Go to Walls and Empty Rooms and find Platform Trims. Browse the options and click one to apply it around the edge of your platform. This gives the platform sides a finished look—stone, wood, brick, or concrete depending on your style.
- Apply a floor texture to the top of the platform by switching to the Floor Patterns catalog (the paint bucket icon at the top of Build Mode). Click the platform surface and choose a decking, stone, or tile pattern.
- If the patio platform sits next to the house, delete the wall section between the house and the platform so a door can open directly onto the patio surface. Place an exterior door in that opening.
- At this point you have a raised patio base with no stairs. The next section covers attaching the stairs.
Placing and configuring your patio stairs
This is the part most builders get wrong the first time, usually because they try to place stairs before the platform is fully set up or they click in the wrong spot. Here is the workflow that works consistently.
- Open Build Mode and go to Stairs and Ladders in the left-hand catalog. Browse the stair styles. For an outdoor patio, the modular wooden stairs or the stone block stairs tend to look the most natural.
- Click the stair style you want to use. Your cursor changes to the stair placement tool.
- Move your cursor to the edge of the platform where you want the stairs to begin. You will see a preview of the stair run appear. The game auto-calculates the number of steps needed to bridge the height between the platform and the ground.
- Click to place. The stairs snap into position and connect to the platform edge. If the placement preview showed an error (red tint), try clicking one tile closer to or further from the platform edge.
- To rotate stairs, press the comma or period keys before clicking to place, just like rotating any other object.
- After placing, click the stairs to open the stair edit widget. This widget has handles for adjusting the width of the stair run, flaring the bottom (adding wider steps at the base), splitting the run into an L-shape or U-shape, and controlling which sides have railings.
- To flare the bottom ends outward, click the flare arrow on the edit widget. Hold Shift while clicking the flare arrow to flare only one side. Flared ends can extend up to about one full tile wide and give stairs a grand, professional appearance.
- To control railings, use the railing toggle buttons on the stair edit widget. You can show railings on the left side only, right side only, both sides, or neither. You can also shorten railings so they do not extend all the way to the top or bottom of the run.
One practical note: stairs need at least one clear floor tile at both the top and bottom of the run. If you get a placement error saying the stair cannot be placed, check whether something is occupying those tiles, a planted column, a decorative item placed with bb.moveobjects, or even a trim piece can block stair routing. Delete or move the blocking object, place the stairs, then put the object back.
Shaping stairs: L, U, and Z configurations
Straight stairs are not your only option. The stair edit widget lets you bend the run into L-shapes, U-shapes, and Z-shapes (a stepped switchback), which is useful when your patio footprint is tight or when you want stairs that wrap around a corner. To create an L-shaped run, place the initial straight run, click the stair to select it, and then drag the corner handle sideways. The game will reconfigure the run to make a right-angle turn. U-shapes work similarly, drag both side handles inward to create a landing in the middle. These configurations require more floor space but look impressive on large raised patios, and they are exactly the kind of design detail that makes a Sims build feel architectural rather than generic.
Adding railings, half-walls, and columns around the patio
Stairs have their own built-in railing controls, but the rest of the patio perimeter needs separate treatment. Go to Build Mode's Fences and Railings catalog and choose a railing style that matches your stair railings. Click along the platform edge to place railing segments. Railings snap to tile edges automatically.
For a more substantial border, something that reads as a low wall rather than just a railing, use half-walls instead. Half-walls are found in Walls and Empty Rooms. They come in multiple heights (the November 2020 patch added additional half-wall heights specifically to complement platforms), and you can apply the same wall texture to a half-wall that you use on your house exterior for a cohesive look. See Update 11/10/2020, The Sims™ 4 (EA) for EA's patch notes adding platform trims and additional half-wall heights to complement platforms Update 11/10/2020 — The Sims™ 4 (EA). Columns placed at the corners of the patio, where railings meet, add an architectural finish that ties everything together. Place columns using Build Mode's Columns category, and use bb.moveobjects if they conflict with railing endpoints.
Budget-conscious material choices for patio floors and trims
Just like in a real patio build, the materials you choose in-game affect both the visual result and (if you are playing with limited funds) your build cost. The Sims 4 prices floor tiles and wall trims at different rates, and when you are building a large patio platform with 20 or 30 floor tiles, the per-tile cost adds up fast. Here is a rough breakdown of the in-game cost tiers and what each looks like.
| Material type | In-game cost tier | Best visual use | Real-world equivalent |
|---|---|---|---|
| Basic concrete/stone tile | Low (§1–§5 per tile) | Simple modern patios, industrial look | Poured concrete slab |
| Wooden decking planks | Mid (§6–§12 per tile) | Warm, natural raised deck look | Pressure-treated wood deck |
| Stone or slate patterns | Mid-high (§10–§18 per tile) | Traditional or cottage-style patios | Natural stone patio |
| Terracotta or tile patterns | Mid (§8–§14 per tile) | Mediterranean or Southwestern aesthetic | Ceramic or quarry tile |
| Platform Trims (edge pieces) | Flat cost per segment | Foundation edging, finished platform sides | Deck fascia or skirt boards |
If funds are tight, use a lower-cost floor tile for the majority of the patio surface and save a more expensive material for a border row or the stair landing only. The visual contrast of a frame color against a field color also tends to look more intentional and designed than a single uniform tile across the whole surface, same principle as adding a soldier-course border to a real brick patio.
Building a patio on a second floor or upper level
Upper-level patios, essentially a deck off a second-floor bedroom or a rooftop terrace, follow the same logic as ground-level patios but with one extra step. You need to first build the upper floor of the house, then delete the roof or ceiling over the area you want as an open patio, and then treat that open surface as your patio floor. Alternatively, you can extend the second-floor room footprint outward beyond the walls of the first floor, which creates a cantilever-style deck area. If you're working in Sims FreePlay rather than The Sims 4, see a short guide on how to make patio on second floor Sims FreePlay for the platform-specific steps. Stairs or ladders connecting the ground to this elevated platform follow the same placement steps described above, just starting from a higher base elevation. If you are playing Sims FreePlay and want to compare that workflow, the logic for upper-level patios is handled slightly differently in that game, it is worth exploring on its own.
Editing and deleting patios or platform floors
To edit an existing patio, changing the floor texture, trimming the platform, or adjusting its height, click the platform surface to select it and use the same widget arrows you used initially. Changing floor textures works by entering the floor paint mode and clicking the surface; the new texture replaces the old one instantly. To delete a platform entirely, select it and press Delete or the bulldoze icon. The game will ask you to confirm if there are objects sitting on it. Remove furniture and stairs first to avoid routing issues after deletion. If you want to delete just the floor texture and go back to bare platform surface, use the 'remove floor' tool (it looks like an eraser or empty tile in the floor catalog) and click the surface. For instructions on removing patios in the mobile game, see how to delete a patio in Sims FreePlay.
Decorating and lighting your patio
Once the structure is in place, the decorating pass is the fun part. For outdoor lighting, wall-mounted lanterns on any half-walls or house exterior walls bordering the patio, plus a few placed floor lights near the stairs, cover the functional needs. String lights placed overhead (available in several base-game and pack catalogs) add atmosphere. For furniture, keep in mind that outdoor furniture is rated for outdoor use in the game, indoor furniture placed outside will deteriorate faster if weather is enabled by the Seasons expansion. A practical patio layout for a medium-size platform includes: one outdoor dining set, one lounge seating group or chaise, a grill or outdoor bar if your Sim uses them, and at least one trash can near the grill to avoid autonomy issues. Do not crowd the stair exit, leave one clear tile path from the stair top to the main seating area.
Troubleshooting common stair and platform problems
I have run into pretty much every stair and platform error the game can throw, and most of them have straightforward fixes. Here are the ones that come up most often. Community bug reports and stepwise player workarounds (rebuilding small platform sections, toggling bb.moveobjects, re-placing stairs, re-applying half‑walls) are documented in the EA Forums thread “Staircases Glitching with Extra Platforms, EA Forums (community bug reports/workarounds).” Staircases Glitching with Extra Platforms — EA Forums (community bug reports/workarounds).
| Problem | Likely cause | Fix |
|---|---|---|
| Stairs will not place (red preview) | Blocking object on the tile at the top or base of the stair run | Remove any objects, trims, or railings on the adjacent tiles, place stairs, then replace objects |
| Sims cannot route onto the patio | Platform is more than one step above adjacent floor with no stairs | Confirm stairs connect fully from ground to platform surface; check for floating tiles blocking the path |
| Extra phantom platform tile appears next to stairs | Known glitch—community-documented bug | Enable bb.moveobjects, delete the extra tile, re-place the stairs; the Feb 2025 patch reduced this but did not eliminate it |
| 'Can't intersect obstructing objects' error when placing railings | Collision between railing and platform trim or stair handle | Enable bb.moveobjects on, place the railing, then disable the cheat |
| Stair flare extends into a wall or object | Not enough clear tile space beside the stair run | Delete or move the adjacent object; or remove the flare and use a straight run instead |
| Floor texture appears on platform walls/sides instead of just the top | Floor paint tool accidentally applied to the wrong face | Use the remove floor eraser on the side face, then reapply trim via Platform Trims |
If Sims are routing strangely, walking around the outside of a patio instead of using the stairs, use testingcheats true, shift-click a Sim, and choose Reset Object to clear any stuck routing state. Then check whether the stair top tile has a door, gate, or half-wall blocking the exit path. This catches about 80 percent of stubborn routing bugs in my experience.
Where to go next in Sims 4 and beyond
If you want to go deeper on the broader patio build in Sims 4, choosing lot types, handling the full outdoor living space, and landscaping, the guide covering how to make a patio in Sims 4 more generally is the natural next stop. If you are curious how similar builds work in other sandbox games, the how to make a patio in Minecraft and how to make a patio in Bloxburg guides cover those platforms with the same step-by-step approach. For a step-by-step guide on building an outdoor patio in another sandbox, see the how to make a patio in Minecraft guide. For a Bloxburg-specific walkthrough, see my guide on how to make a patio in Bloxburg which follows the same step-by-step approach adapted to that game's tools. And if you are on mobile and using Sims FreePlay instead, there are dedicated guides on building a patio in Sims FreePlay, changing the patio floor in Sims FreePlay, and handling upper-level patios in that game, all of which have their own quirks compared to the PC and console version.
If you are a homeowner who is using Sims 4 to visualize a real outdoor project, which honestly is one of the smarter low-cost ways to plan before committing to materials, the same foundational decisions you are making in the game (height, access points, stair width, railing style) map directly onto real patio planning. Working through the design digitally before you buy a single board or paver is exactly the kind of DIY thinking that saves money and catches mistakes early.
FAQ
What do I need before building patio stairs in The Sims 4 (packs, cheats, tools)?
Required: base game (platform tool added Nov 10, 2020). Helpful: any packs with extra stair, railing, or floor swatches for more style options. Recommended cheats: open console (Ctrl+Shift+C on PC/Mac; hold four shoulder buttons on consoles) then use testingcheats true (extra build options), bb.moveobjects on (free placement), bb.enablefreebuild (edit locked lots), bb.showhiddenobjects (hidden items). Money cheats (kaching/rosebud/motherlode) are optional for budget testing. Build Mode locations you’ll use: Walls & Empty Rooms (Platform Tool, Platform Trims, half‑walls), Stairs & Ladders (stair tool), and Fences & Railings (railings, columns).
How do platforms work for raised patios?
Use Walls & Empty Rooms → Platform Tool to place a platform or preset platform piece. Select it and use the up/down arrows on the platform widget to raise/lower in single-step increments. Sims can step onto a platform that is exactly one step higher than an adjacent floor automatically; any height greater than one step requires stairs or a ladder for Sims to reach it.
Step-by-step workflow to build a basic raised patio and add stairs
1) Enter Build Mode and place a platform (Walls & Empty Rooms → Platform Tool). 2) Raise it to the desired height with the platform arrows. 3) Add Platform Trims or half‑walls to finish edges. 4) Go to Stairs & Ladders → select a stair style and click where the stair should start; stairs auto-extend to meet the platform/floor height. 5) Use the stair edit widget to adjust length/shape, add flares, and choose which sides have railings. 6) Test with a Sim; adjust until routing works.
How do I edit stair shape, length, and railings?
Select the stairs and use the stair edit widget: drag the handles to lengthen or shorten segments, bend into L/Z/U shapes, and use the arrows to add flared ends. The widget lets you toggle or edit railing placement on each side; flaring while holding SHIFT affects only one side. Railings can also be changed from the Fences & Railings category if you need different styles.
Tips for connecting multi-level patios and second-floor patios
For second-floor patios or multi-level builds, place platforms on the desired upper floor or create a room and convert part to a platform. Stairs must have at least one clear tile at top and bottom; ensure landings are present. Use split stair segments to create intermediate landings. For elevated patios accessed from an upper floor, place stairs from the ground to the platform or connect to interior floor openings as needed.
How can I customize patio floors, trims, railings and keep materials budget‑conscious?
Use Build Mode floor/catalog swatches to apply decking, stone, or tile to the platform surface. Platform Trims and half‑walls let you change edge visuals without extra objects. To save money, choose base-game swatches or low-cost buy mode floor items, avoid expensive decorative clutter, and use single swatch variations across the patio. Railings from base game often cost less than custom decorative fences; balance aesthetics by mixing inexpensive railings with a few accent columns.
Next Article
How to Build a Patio in Sims FreePlay: In-Game Guide + DIY
Step-by-step guide: build a patio in The Sims FreePlay and turn designs into real DIY patio plans with tips & costs.