You can absolutely build a patio over grass, but you can't just lay pavers or slabs directly on top of it and call it done. The grass will die, decompose, and leave voids underneath your patio, causing settling, cracking, and a surface that rocks underfoot within a season or two. The right approach is either to remove the turf before building your base, or to kill and suppress it properly before burying it under enough compacted material that it can't cause problems. Which path you take depends on your budget, what material you're using, and how permanent you need the result to be.
How to Patio Over Grass: DIY Steps, Base, and Weed Control

Nolan Lennox
5 Jul 2026
Start here: assess your site and pick the right patio type
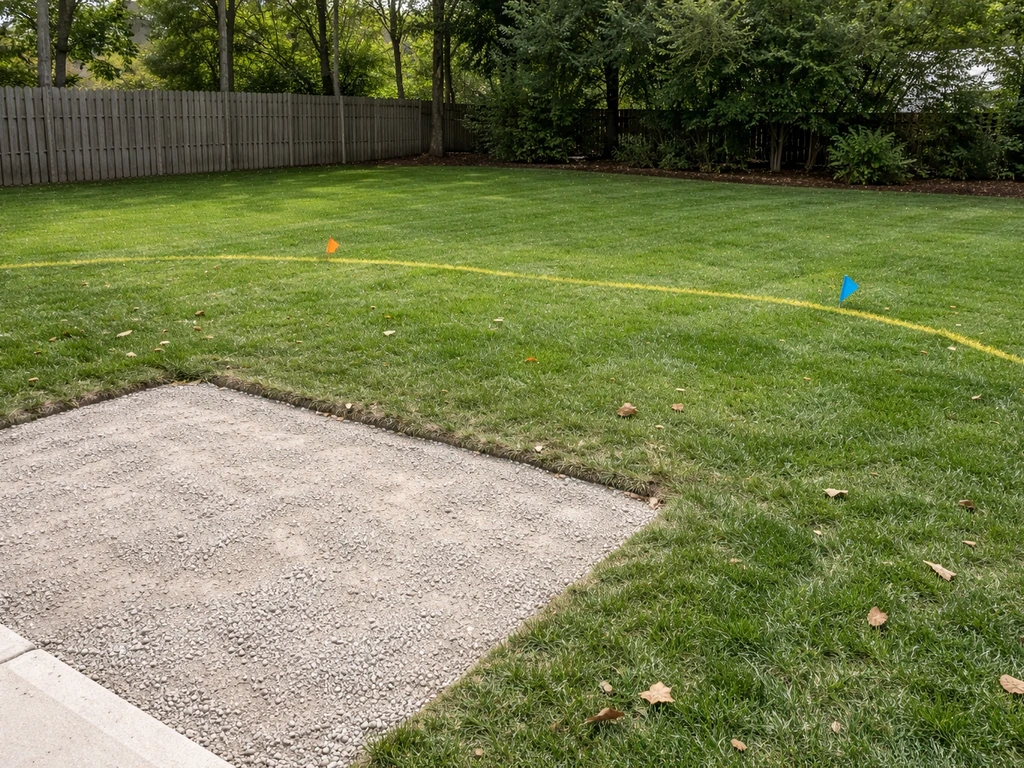
Before you dig a single shovelful, spend 20 minutes walking your site and answering a few questions. These answers will shape every decision that follows.
First, check your slope. Your finished patio needs to drain away from your house at a minimum of 1/4 inch per foot (about 2%). That's enough to keep water moving without looking like a ramp. If your yard already pitches away from the foundation, great. If it slopes toward the house or is completely flat, you'll need to factor drainage correction into your base build, not something you bolt on at the end.
Next, press a screwdriver or a stick into the ground in a few spots. If it sinks in easily more than 3 or 4 inches, you've got soft or waterlogged soil underneath. That's important because soft subgrade is the number one reason patios sink and heave. You'll need a deeper compacted base to compensate, and you should think hard about drainage improvements before you start. Also note how thick and established the grass is, a thin lawn over firm soil is much easier to deal with than thick, rooted sod over clay.
Finally, think about what kind of patio fits your goals. A permanent paver or slab patio demands real base preparation and turf removal or deep suppression. A gravel patio is more forgiving and faster to install. A wood or composite deck built on sleepers or footings over the grass is an option if you want to avoid major digging, though that's really a different build with its own requirements. If you're leaning toward something quick and inexpensive, it's worth reading up on cheap patio options on grass, and if you might want to reverse the project someday, a temporary patio approach could be a better fit.
Remove the grass or suppress it? Here's how to decide
This is the fork in the road, and getting it wrong costs you time and money later. Here's the honest breakdown.
Remove it for permanent, hard surface patios
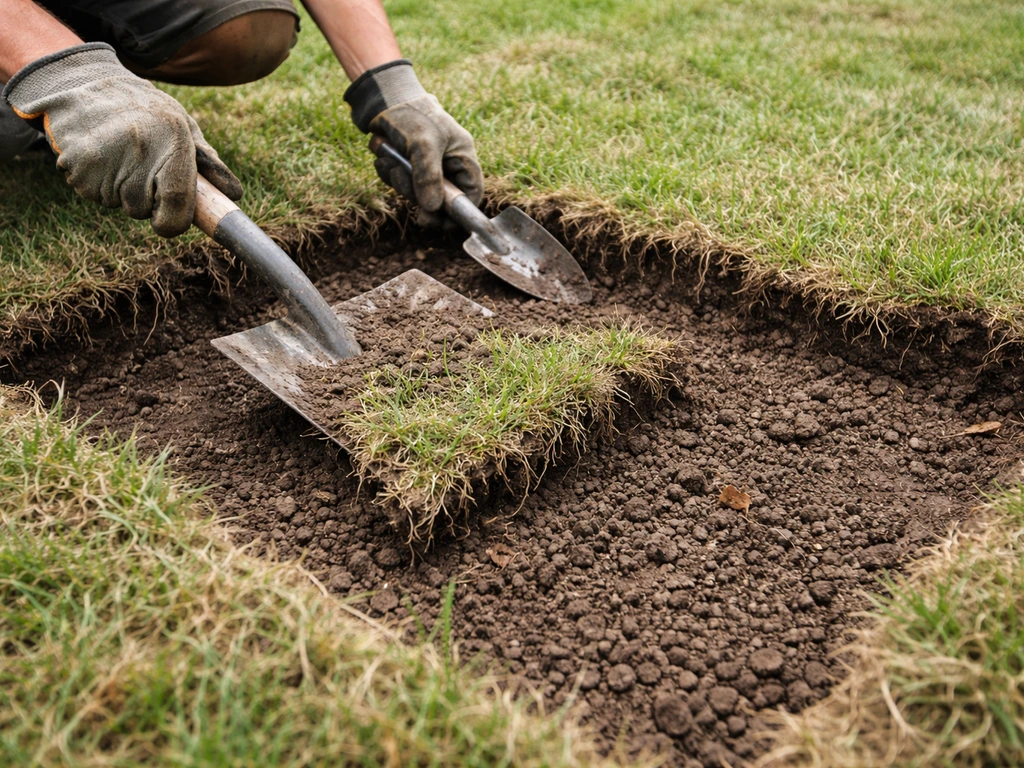
If you're laying concrete pavers, large slabs, or poured concrete, remove the grass and topsoil. Organic material compresses and rots over time, creating voids under your base, that's what causes pavers to sink and slabs to crack. If you want to build a patio on top of grass, you still need to remove or suppress the turf so the base can stay stable and drain properly patios sink and slabs crack. For most paver patios, you're excavating 6 to 8 inches below finished grade anyway (more on that in the base section), so stripping the turf is just the first step of that dig. You can rent a sod cutter for around $75 to $100 per day, or use a flat spade for smaller areas. Cut the sod into manageable strips, roll them up, and relocate or compost them.
Suppress it for gravel patios or low-profile builds
For a gravel patio, a stepping-stone path, or a situation where you really want to avoid excavation, killing and suppressing the grass can work. The most reliable method is sheet mulching: mow the grass as short as possible, then lay overlapping sheets of plain brown corrugated cardboard (no tape, no shiny prints) directly on top. The cardboard smothers the grass, and it breaks down over several months into the soil. Overlap the edges by at least 6 inches so grass doesn't sneak through the seams. Wet the cardboard down to hold it in place and speed decomposition, then immediately cover it with your base material so it doesn't blow away or dry out.
Landscape fabric is another option, but go in with realistic expectations. It works as a physical barrier early on, but it doesn't stop weed seeds that land on top of the surface, and weeds can eventually grow through or around it. It can also interfere with water movement through the profile over time. If you use it, treat it as one layer of a system, not a magic fix. For the most weed-resistant result, combine it with cardboard underneath and enough depth of compacted material on top to starve any seedlings of light.
Managing invasive roots near your patio
If you're building near established trees, especially ones with aggressive surface roots like willows, silver maples, or bamboo, roots can lift and destroy a patio surface within a few years. For serious cases, blank" rel="noopener noreferrer">rigid HDPE vertical root barriers installed in a trench along the patio edge are worth the extra cost. They physically block root growth from crossing into your patio footprint. This is especially important if you're building a raised patio on grass near mature trees, where roots will actively seek out the disturbed, moist soil under your base. If you’re building a raised patio on grass, the base and drainage details matter even more than they do on a flat, prepared site.
Building the right base over turf: leveling, drainage, and weed control
This is where most DIY patios succeed or fail. A weak, thin, or poorly drained base will move, and everything on top of it will move with it. Here's what you actually need.
Excavation depth
For a standard paver patio, plan to dig down about 7 to 9 inches from finished grade. That accounts for 6 inches of compacted crushed stone base, 1 inch of bedding sand, and the paver thickness (usually about 2 to 2.5 inches for standard concrete pavers). For flagstone or thick slabs, adjust accordingly. If you're in a freeze-thaw climate, a deeper base, up to 8 to 12 inches of compacted aggregate, provides more insurance against frost heave. Frost heave happens when water in the soil freezes and expands, pushing your patio surface up and out of level; the deeper and denser your aggregate base, the less moisture is available in the subgrade to freeze.
Geotextile fabric as a separation layer
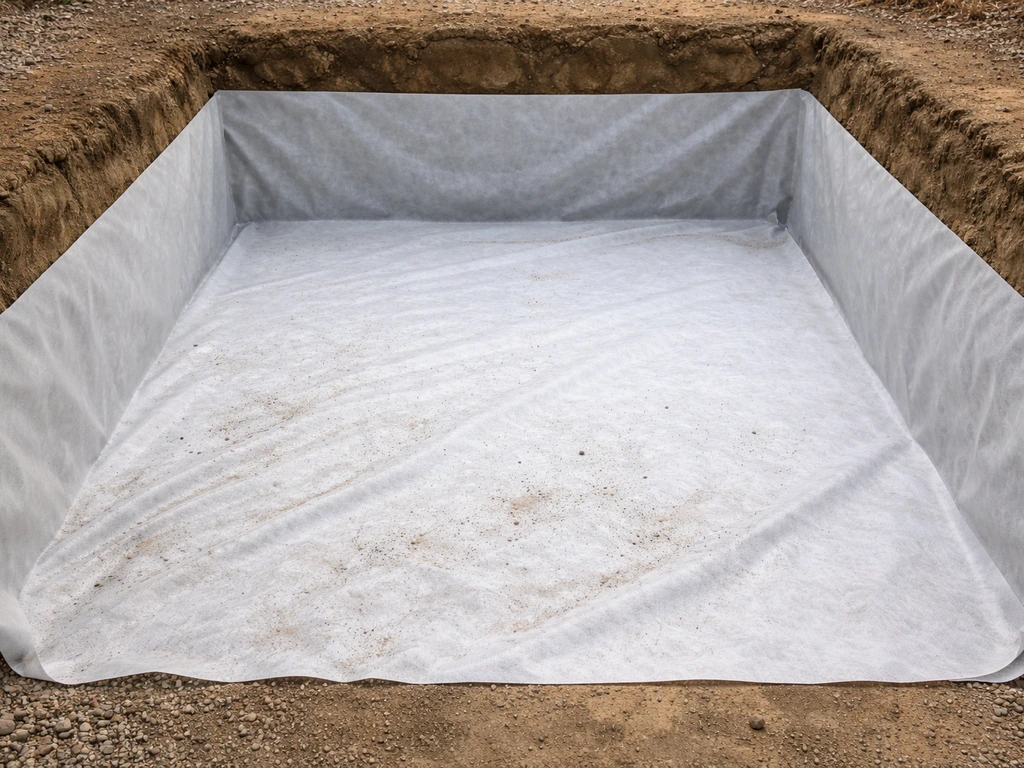
After excavating and before adding any aggregate, lay a non-woven geotextile fabric across the entire excavated area and up the sides. This isn't landscape fabric from the garden center, it's a heavier, engineered material. Its job is to prevent your crushed stone base from mixing with the soft soil beneath it over time. Without it, clay and silt will migrate up into your aggregate layer, reducing drainage and causing gradual settling. This step is especially important if you're building on clay-heavy soil or anywhere with poor natural drainage.
Compacted aggregate base
Fill the excavation with crushed stone (commonly called road base, crusher run, or compactable gravel, not round pea gravel, which doesn't compact). Add it in 3-inch lifts, compacting each layer with a plate compactor before adding the next. Don't try to compact 6 inches all at once; it won't compact properly through the full depth. You're aiming for a dense, stable base that doesn't shift or flex when you walk on it. Rent a plate compactor for this, a hand tamper won't get you anywhere near the density you need for a durable result.
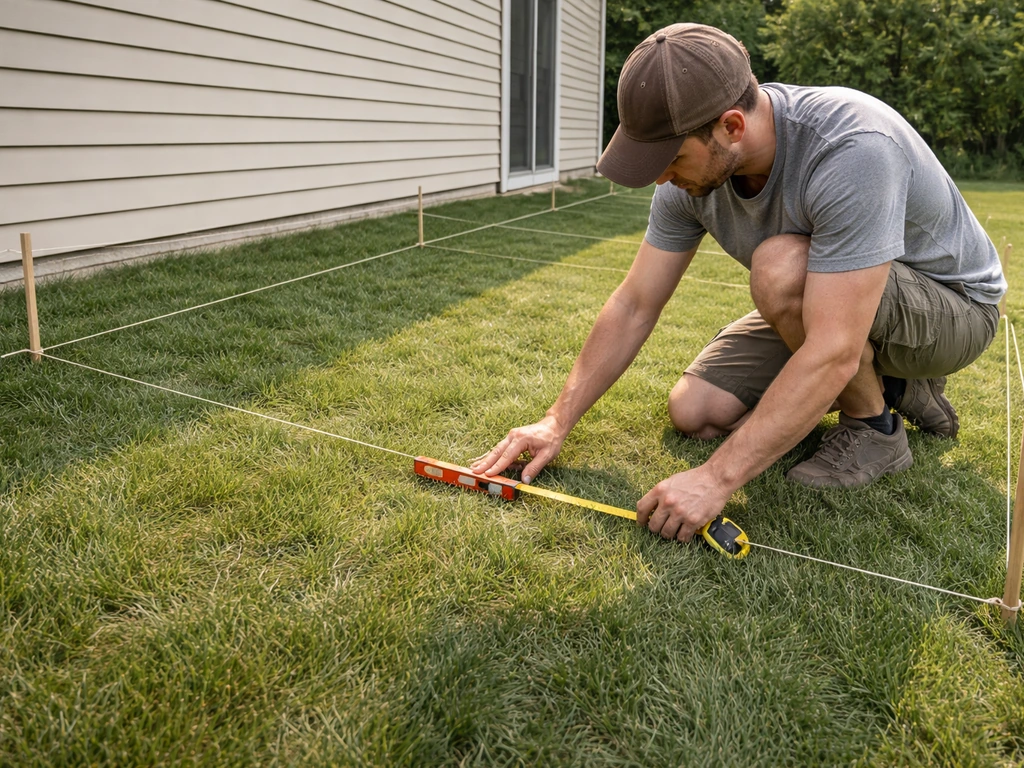
Establishing and checking your slope
Set up a string line before you start filling so you can check your slope as you compact. You want at least 1/4 inch of drop per foot running away from the house. Use a line level or a 4-foot level with a known shim to verify this as you build up each layer. Getting slope right in the base is much easier than trying to fix it at the surface level, and it's the difference between a patio that drains cleanly after rain and one that puddles in the middle every time.
Laying your patio surface: pavers, slabs, gravel, and wood
Concrete pavers on a compacted base
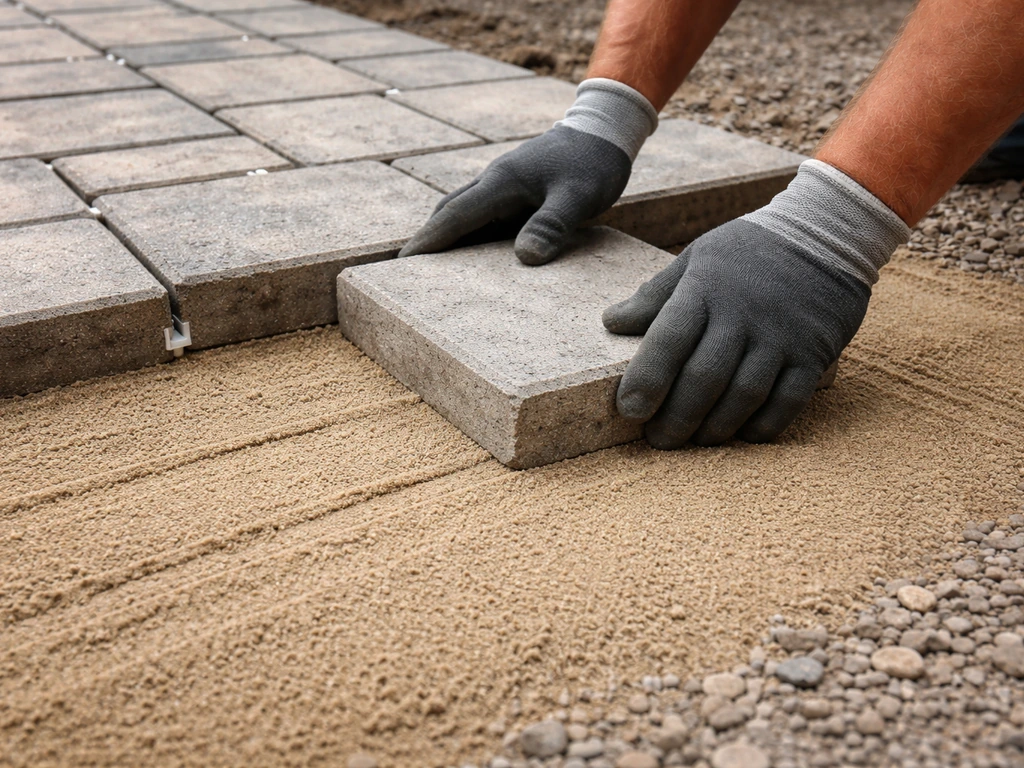
Once your compacted aggregate base is done, spread a 1-inch layer of coarse bedding sand (ASTM C33 grade washed concrete sand works well) over the surface. Screed it flat using two parallel pipes or rails as guides. Do not compact the bedding sand, it needs to stay loose so the pavers can seat into it. Start laying pavers from a straight edge (usually the house side or a chalk-line reference) and work outward. Use a rubber mallet to tap each paver into place, and check frequently with a level across several pavers to keep the surface even. Cut pavers along edges with an angle grinder with a diamond blade or a rented paver saw. Once all pavers are laid, run the plate compactor over the surface (use a rubber pad attachment to avoid scratching) to seat them firmly into the sand. Then sweep polymeric sand into the joints, compact again, and mist with water to activate the binder.
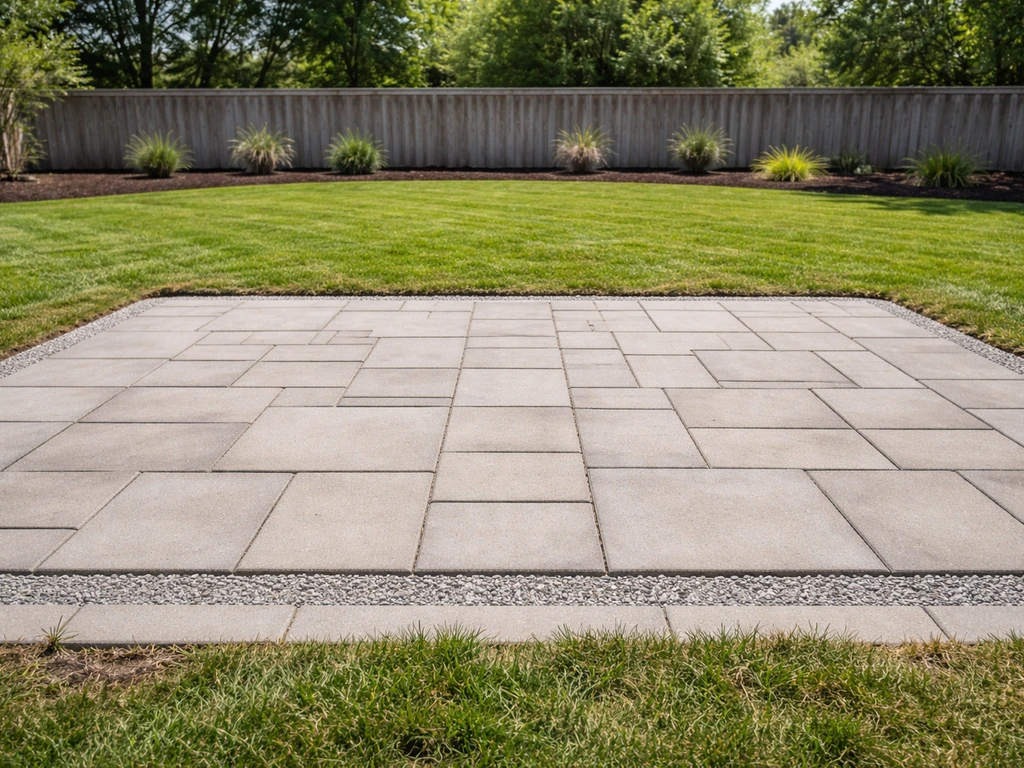
Concrete or stone slabs
Large format slabs, whether precast concrete stepping stones, natural flagstone, or bluestone, can be set on the same compacted aggregate base. The difference is the setting method: smaller pieces can be set directly on bedding sand like pavers, but large slabs (anything over about 24x24 inches) are better set on a full mortar bed or on 5 blobs of mortar (one at each corner and one in the center) to prevent rocking. Check each slab with a level individually and in relation to the surrounding pieces. For a natural flagstone look, you can also dry-lay irregular pieces with gaps filled with decomposed granite or polymeric sand.
Gravel patios
A gravel patio is the most beginner-friendly and budget-conscious option. After killing or removing the grass and laying geotextile fabric, add a 4-inch layer of compactable base gravel, compact it, then top with 2 inches of your decorative gravel (pea gravel, decomposed granite, or crushed stone). Edge restraints are essential here to keep gravel from migrating into the lawn. The tradeoff is ongoing maintenance, you'll likely need to rake, replenish, and pull occasional weeds over time, particularly if seeds blow onto the surface.
Wood or composite decking over grass on sleepers
If you want a wood or composite surface but want to avoid major excavation, building a low-profile deck on concrete footings or compactable gravel pads is an alternative. You set treated lumber sleepers (or composite sleeper boards) on concrete deck blocks or poured footings, then attach decking boards across them. This approach works best when the grade is relatively flat and you can get adequate clearance underneath for ventilation. Without ventilation, moisture builds up under the boards and accelerates rot. This is technically more of a ground-level deck than a traditional patio, so factor that in when planning. It's worth looking into the specific build process for patio decks over grass if this is the direction you're leaning.
Edge restraints, finishing details, and cleanup
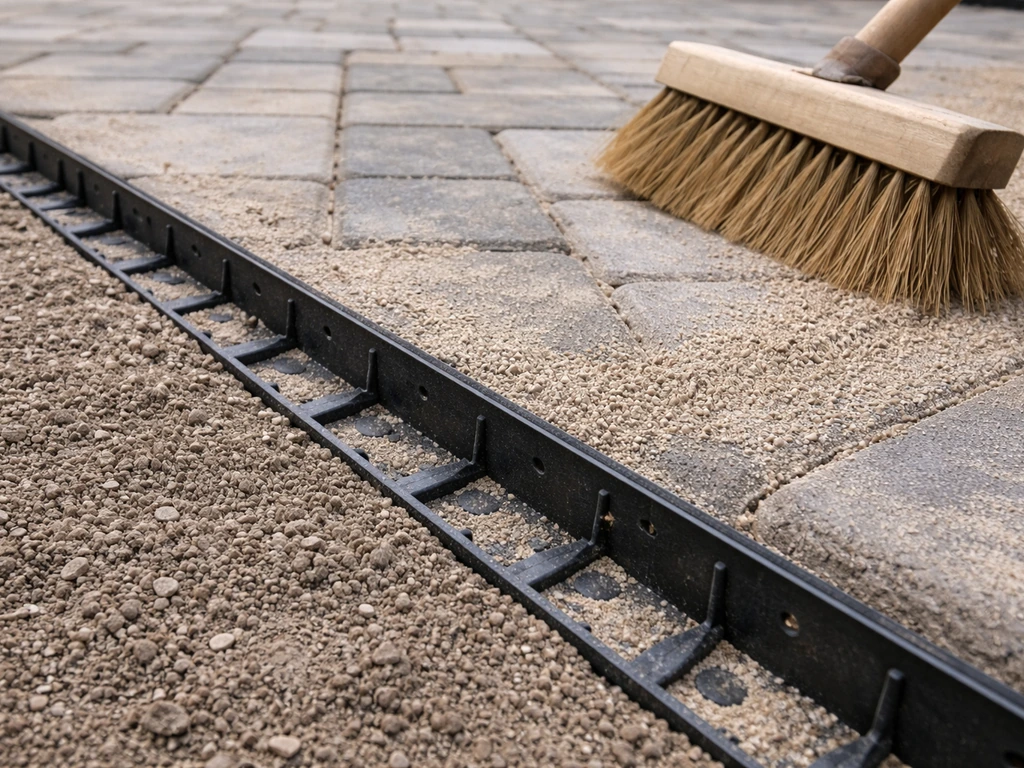
Edge restraints are not optional for pavers or gravel, they're what keeps the whole surface from spreading outward over time. Without them, your outermost pavers will gradually tip and migrate, pulling the joint sand out with them and eventually destabilizing the field of the patio. Use aluminum or rigid plastic paver edging along all exposed edges. Spike it through the edging and into the compacted base with 10-inch steel spikes every 12 inches (or per manufacturer spacing). The edging needs at least 1 inch of contact against the side of the paver to hold it effectively. Bury the edging flange so it's hidden below finish grade on the lawn side.
For pavers, the final step after compaction is joint sand. Polymeric sand is worth the extra few dollars over regular sand, it locks in place when activated with water and resists washout, ants, and weed germination far better. Sweep it in, compact, sweep again to refill any joints that settled, then mist evenly with water. Don't soak it, just enough to activate the binding agents. Keep foot traffic off it for 24 hours.
Clean up any excess sand or gravel off the paver surface before it dries, especially with polymeric sand, which can leave a haze if left on the surface. Check your slope one final time by running a hose over the surface and watching where the water goes. Any spot that puddles needs to be investigated, either a paver needs to be reset, or you've got a low point in your base that should be addressed before it causes a bigger problem down the road. Grade the surrounding soil back up to the edge restraint to close any gap, and reseed or re-sod any disturbed lawn areas.
Realistic costs, timelines, tools, and DIY difficulty
Here's a side-by-side look at what each common patio type actually costs and demands from a DIYer working on a typical 200 square foot patio.
| Patio Type | Approx. Material Cost (200 sq ft) | DIY Timeline | Difficulty | Key Tools Needed |
|---|---|---|---|---|
| Concrete pavers | $600–$1,400 | 3–5 days | Moderate | Plate compactor, paver saw, screed rails, rubber mallet, level |
| Natural flagstone/stone slabs | $800–$2,000+ | 2–4 days | Moderate–Hard | Plate compactor, angle grinder, mortar, level |
| Precast concrete slabs | $300–$700 | 1–2 days | Easy–Moderate | Plate compactor or hand tamper, level, sand |
| Pea gravel/decomposed granite | $150–$400 | 1 day | Easy | Hand tamper or plate compactor, rake, edging stakes |
| Wood/composite on sleepers | $700–$2,000+ | 2–3 days | Moderate | Drill, saw, level, concrete blocks or tube forms |
On top of materials, budget for equipment rental. A plate compactor typically rents for $60 to $100 per day, a sod cutter for $75 to $100 per day, and a paver saw for $60 to $80 per day. If you're doing a paver patio over a weekend, plan to rent the plate compactor for two days, one for base prep and one for seating the pavers after laying.
A note on DIY difficulty: the physical labor of a paver patio is significant. Excavating 200 square feet to 8 inches deep and removing that material is roughly 5 to 6 cubic yards of soil, heavy work. The technical parts (screeding sand flat, keeping pavers level and aligned) have a learning curve but aren't complicated once you've done a few square feet. Gravel patios are genuinely accessible to almost any DIYer willing to do the digging. If you want a temporary patio, you can scale down the excavation depth and use easier-to-remove materials like gravel or interlocking panels. Flagstone requires more judgment in fitting and setting, but it's forgiving of imperfections in a way that a grid of concrete pavers isn't.
Why drainage and weed control aren't optional
Every major patio failure I've seen comes down to one of three root causes: inadequate base depth, poor drainage, or skipped edge restraints. Water is the enemy of a patio base. When it pools under the surface, it softens the subgrade and the aggregate begins to shift. In freezing climates, that water forms ice lenses that physically lift sections of the patio surface, that's frost heave, and once it starts, it compounds every winter. The fix is always the same: re-excavate, improve drainage, rebuild the base. That's expensive and demoralizing after you've just finished the project.
Weed control under a hard surface matters for a different reason. Grass left under a patio will decompose over the first couple of seasons, leaving voids in the soil that your aggregate slowly settles into. That settlement shows up as dips, rocking pavers, and cracked slabs. Killing the grass first, whether by removal, solarization, or sheet mulching with cardboard, removes that variable. It doesn't have to be complicated: strip the turf, or sheet mulch and give it at least 4 to 6 weeks before building, and you've eliminated most of the risk. This guidance is exactly what you need when planning how to make a temporary patio on grass for events or short-term use.
The same logic applies to joint sand and surface weeds after the patio is done. Polymeric joint sand and adequate paver spacing (typically 1/16 to 1/8 inch for most concrete pavers) gives weeds fewer places to take hold. No barrier is perfect forever, seeds will eventually blow in, but a well-built base with tight joints needs far less maintenance than one with loose sand and open gaps. Get the foundation right, and the patio will reward you with years of use before it needs more than a quick weeding and a fresh top-up of joint sand. However, if you are considering building over a leach field, you should coordinate with your local permitting authority because the rules and structural requirements are different from a standard patio base build over a leach field.
FAQ
Can I just lay pavers over grass and add base material afterward later?
It usually fails because turf decomposes and leaves voids, so you end up with rocking sections and cracked slabs. If you want to minimize excavation, the better path is to remove the sod now or sheet-mulch and wait a few weeks before adding the base so there is less organic material left to settle.
How long should I wait after sheet mulching (cardboard) before building?
Plan on at least 4 to 6 weeks before installing the base, especially if the lawn is thick. Wet the cardboard initially so it breaks down faster, and if you still see recognizable grass blades when you start, give it more time or spot-mow and re-cover with additional cardboard.
What should I do if my site is flat or slopes toward the house?
You need to rebuild drainage into the base by adjusting excavation depth and/or grading the base layers to achieve the finished slope away from the house. If you cannot create that 1/4 inch per foot drop, consider drainage corrections like adding a discreet swale or revising the patio footprint instead of relying on “fixing it” at the surface.
How can I tell if my soil is soft enough that I need a deeper base or drainage work?
When a screwdriver or stick sinks more than about 3 to 4 inches easily, assume the subgrade is soft or wet. In that situation, go deeper with compacted aggregate, and consider improving drainage (for example, correcting slope first) because a shallow base over soft soil will still move even with strong pavers.
Do I need geotextile fabric under all patio types?
For paver and slab patios, yes, use non-woven engineered geotextile to keep crushed stone from mixing with soft soil. For gravel patios, it can still help with separation and migration, but the bigger factor is adequate edge restraints so gravel does not migrate into the lawn.
Is landscape fabric instead of geotextile okay?
Usually not for the long-term performance you want under pavers. Landscape fabric can clog, allow poor drainage behavior over time, and it is not as effective at separation. If you use fabric at all, choose the heavier non-woven style intended for subgrade separation.
What if the grass comes back later under the patio edges?
Most comeback happens at exposed seams and weak edge restraint areas. Backfill and bury the edging flange below grade on the lawn side, then keep joint sand properly filled (polymeric sand helps). For existing edge gaps, remove the affected pieces, correct the base low spots, reinstall edging, and refill joints.
How do I prevent weeds through the joint sand after polymeric sand is installed?
The main prevention is tight joints (often about 1/16 to 1/8 inch for many concrete pavers) and using polymeric sand correctly. Mist evenly to activate binder (do not soak), keep foot traffic off for 24 hours, and remove any sand haze from the surface before it cures to avoid weak areas.
Can I use pea gravel as the compacted base?
No, pea gravel does not compact into a stable, dense layer like crusher run or compactable road base. Use a material designed for compaction, compact in 3-inch lifts, and rent a plate compactor if you need consistent density across the whole area.
Should I compact the bedding sand?
No. Keep the bedding sand loose so pavers can seat and self-level slightly when tapped. Compacting bedding sand makes it harder to get proper contact and increases the chance of rocking later.
Do I need to use a plate compactor after laying pavers?
Yes for most paver patios. After you install the pavers on bedding sand, a plate compactor (with a rubber pad attachment) helps seat them into the sand uniformly. Avoid excessive passes that could disturb edge alignment, and check levels while you go.
What’s different about building on top of grass near trees?
Root intrusion can be the dominant failure mode, especially with willows, silver maples, and bamboo. If the patio footprint is near mature trees, install rigid HDPE vertical root barriers in a trench along the patio edge rather than relying on base depth alone, and expect more grade re-checking if you are building raised sections.
When do you choose mortar or mortar blobs for large slabs?
For large slabs (roughly above 24 by 24 inches), mortar placement matters to prevent rocking. Use a full mortar bed or a pattern of mortar blobs (corner plus center) and set each slab carefully with a level, because slabs that sit on only bedding sand can shift over freeze-thaw cycles.
What slope should I check for after the patio is finished?
Do a final water test with a hose and confirm water does not pool. If you see puddling, fix it before the joints and sand fully cure, because persistent low points usually indicate a base problem or an uneven subgrade that will worsen.
Is a patio over grass allowed if it’s near a leach field?
Often the rules are different from a standard patio build because the leach field has specific structural and depth requirements. Coordinate with your local permitting authority before digging or adding heavy structural base layers, since non-compliant builds can interfere with wastewater treatment.
Next Article
Can You Build a Patio Over a Leach Field? Rules and Options
Learn when you can build a patio over a leach field, why it’s risky, and safer alternatives with permitting steps.