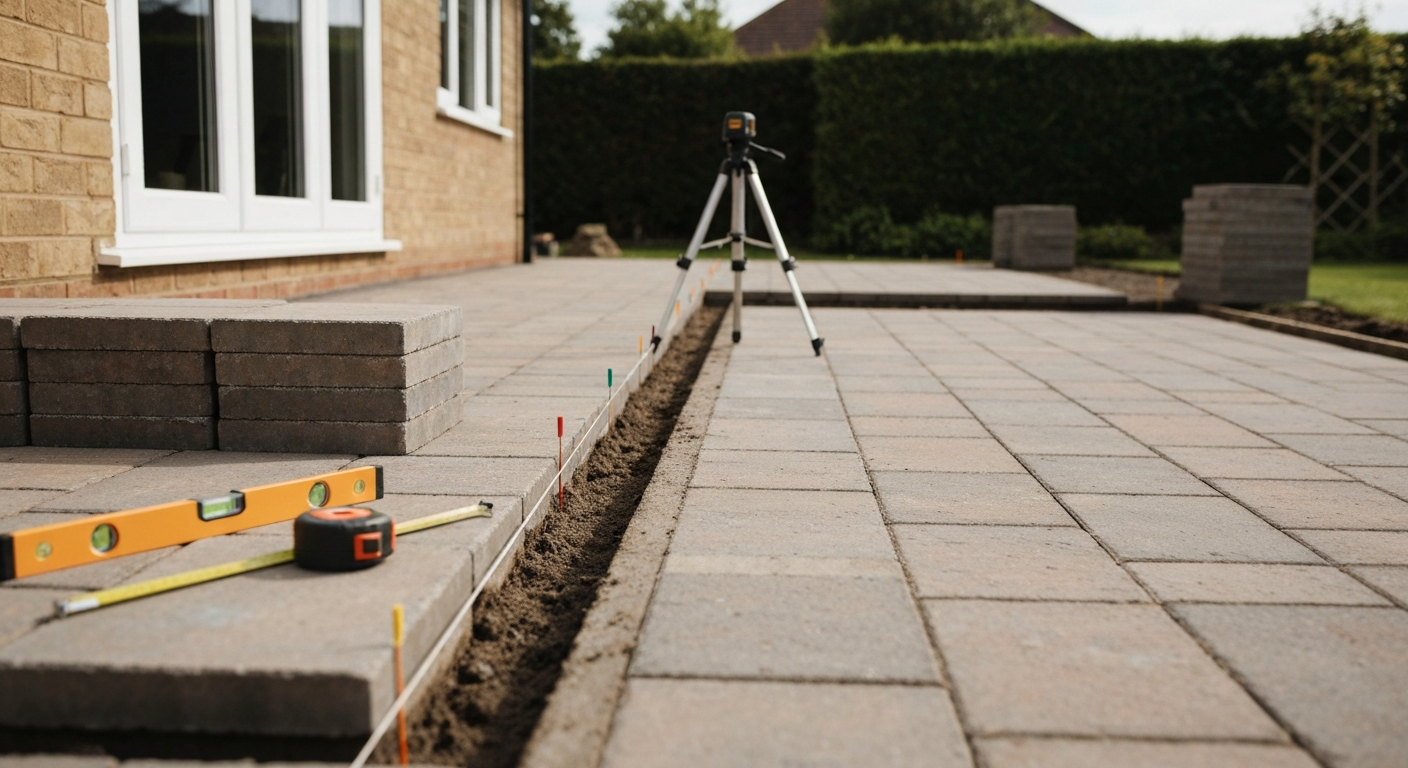
To set a fall on a patio, you need to build a consistent slope of between 1:80 and 1:40 (roughly 12.5 mm to 25 mm per metre) into the sub-base and finished surface, directing water away from the house and toward a drain, lawn, or soakaway. That slope range covers most patio materials. Smooth porcelain or polished concrete needs the steeper end; textured stone or gravel can get away with the gentler end. Get this right from the start and you will never stand in a puddle on your own patio.
How to Set a Fall on a Patio: DIY Slope, Drain & Build Guide

Nolan Lennox
20 Jul 2026
What patio fall actually is and why you cannot skip it
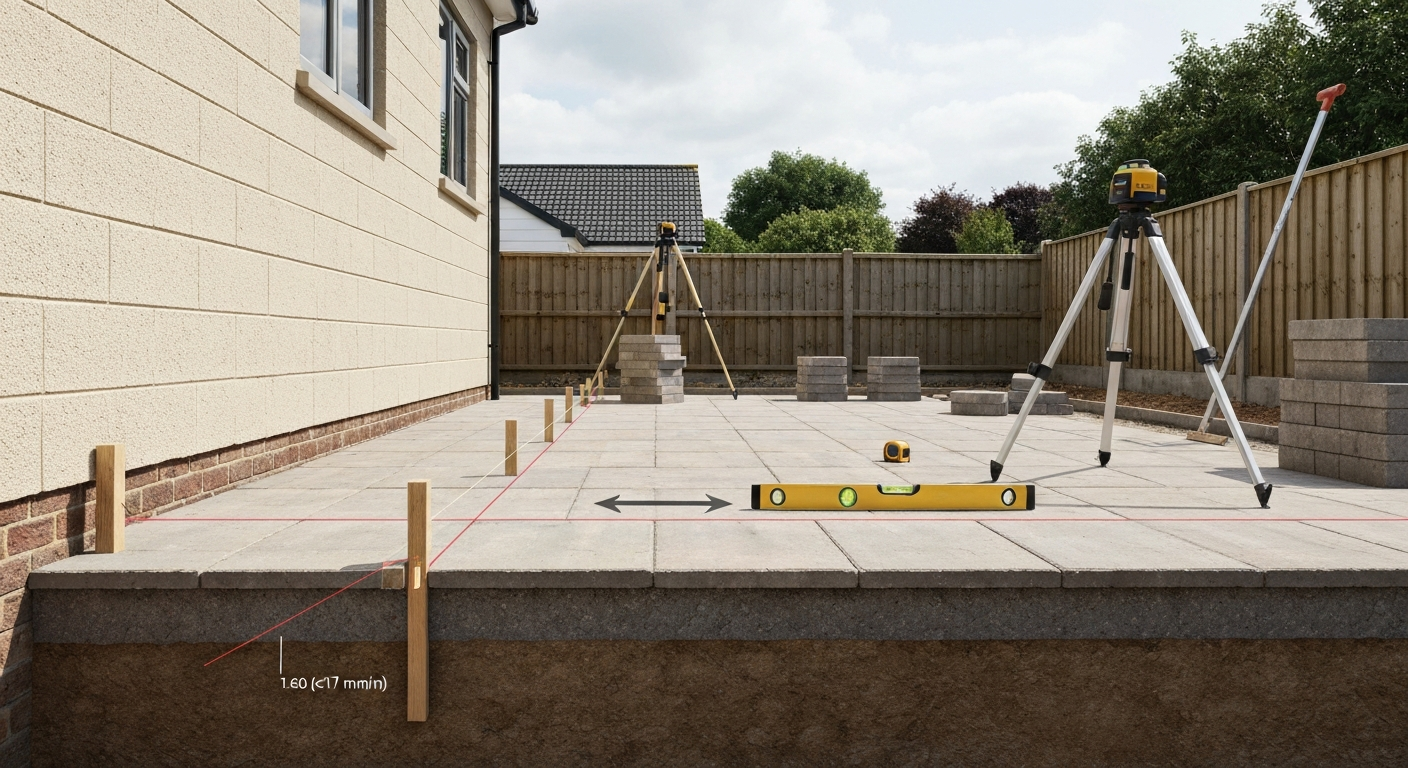
Patio fall is simply the deliberately built-in slope across the surface that lets gravity move rainwater off the paving and away from your home. It is not accidental unevenness. It is a planned, measured gradient that runs from the highest point (usually closest to the house wall) down to the lowest point (toward the garden, a channel drain, or a soakaway). Without it, water sits on the surface, works its way into joints and cracks, freezes and expands in winter, accelerates efflorescence on stone, and eventually causes subsidence in the sub-base.
The other critical function of patio fall is protecting your foundations. Every installation guide I have ever read, and every trade body I have referenced, is consistent on this point: the finished patio surface must sit at least 150 mm (two brick courses) below the damp proof course (DPC) in the house wall, and it must slope away from the wall, not toward it. Water pooling against a house wall is one of the fastest routes to damp ingress you will find. Getting the fall correct is not just about comfort; it protects a substantial financial asset.
Legal, regulatory and planning checks before you start
I will be honest: a lot of DIYers skip this step and most of the time nothing bad happens immediately. But the risks are real and worth ten minutes of your time before you order a single tonne of hardcore.
UK building regulations and drainage rules
In England and Wales, Approved Document H (Building Regulations Part H) provides statutory guidance on surface-water drainage. Any new or altered domestic paved surface that adds impervious area must have an adequate drainage system. For more on complying with these rules, see our guide to building regulations on patio drainage. If you are laying more than 5 square metres of impermeable paving in the front garden, you need planning permission unless you use permeable materials or direct runoff to a lawn or border. BMP L633, Permeable Pavements (Tacoma SWMM/BMP library) notes minimum wearing-course slopes of about 1% and commonly limits surface grades to 5–6% blank" rel="noopener noreferrer">BMP L633 — Permeable Pavements (Tacoma SWMM/BMP library) notes minimum wearing-course slopes of about 1% and commonly limits surface grades to 5–6%.. Rear garden patios are generally permitted development, but that does not mean drainage can be ignored. The CIRIA SuDS Manual (C753) is the technical reference behind much of this guidance, and it strongly steers designers toward permeable or semi-permeable surfaces to reduce runoff.
In the US, the 2021 International Residential Code (IRC Section R401.3) requires that grading directs surface water away from foundation walls, with a minimum drop of 6 inches within the first 10 feet from the structure (around 5%). Where that full graded distance is not available, swales or drains are required. If your patio forms part of an accessible route to a door, the ADA Standards for Accessible Design cap level changes at 1/2 inch at thresholds and require any ramp section to be no steeper than 1:12 (8.33%). Patios steeper than 1:20 (5%) along an accessible path may trigger additional ramp and landing requirements.
Drainage discharge and utilities
Before digging anything, call your utility provider or use a cable/pipe avoidance tool (CAT scanner) to locate buried services. Many rear gardens have drainage runs, gas pipes and electricity cables that are shallower than you expect. Check whether your surface water can legally discharge to a soakaway, a watercourse, or the mains surface-water drain. US federal and state stormwater guidance treats added impervious area as a key driver of increased runoff and pollutant load, so homeowners should check local stormwater/NPDES or municipal rules before changing discharge paths from new patios or driveways added impervious area increases runoff. In many UK areas, connecting additional surface water to the combined sewer is prohibited. Your local planning authority or water company can confirm this. Also check whether there are any rights of drainage over neighbouring land if you are diverting water flow.
Permits and neighbour notifications
Most rear garden patios in the UK do not require a permit, but if you are altering drainage, building close to a boundary, or changing the flow of surface water so it affects a neighbour's land, you should notify them and potentially seek consent. In the US, permit requirements vary enormously by municipality; concrete pours over a certain square footage often require a building permit and inspection. Call your local building department if you are in any doubt. A failed inspection means breaking up work you have already done.
Recommended fall targets by patio material
There is no single magic number that works for every surface. The required fall depends on how quickly the surface sheds water, how porous the material is, and how textured the finish is. Here is a practical breakdown based on BS 7533 guidance, manufacturer installation notes, and real-world performance.
| Material | Minimum fall | Recommended working fall | Notes |
|---|---|---|---|
| Natural stone (textured) | 1:80 (12.5 mm/m, ~1.25%) | 1:60 (16.7 mm/m, ~1.67%) | Texture aids water break-up; 1:80 acceptable on well-jointed surfaces |
| Porcelain / smooth paving | 1:60 (16.7 mm/m) | 1:40 (25 mm/m, ~2.5%) | Low friction surface needs faster run-off; avoid anything flatter |
| Concrete (cast in situ) | 1:80 (~1.25%, or 1/8" per foot) | 1:48 (1/4" per foot, ~2%) | Build fall into formwork; smooth finish needs steeper fall than broom-finished |
| Block/brick paving | 1:80 (12.5 mm/m) | 1:60 to 1:40 | Joints allow minor infiltration; match fall to sand-set or mortar-set method |
| Gravel / loose aggregate | 1:80 minimum | 1:40 preferred | Gravel shifts; use consistent compacted falls to avoid raking problems |
| Permeable paving (SuDS) | 1% minimum (~10 mm/m) | 1–5% (max 6%) | Exceeding 6% risks rill erosion and reduces infiltration performance |
| Timber / composite decking | 1:60 (16.7 mm/m) | 1:40 to 1:60 | Fall allows drainage between boards; also prevents standing water on surface |
For most standard patios laid close to the house, I use 1:60 as my default target. It is noticeable enough to drain effectively, not so steep that garden furniture tips, and achievable without heroics in the sub-base. If someone specifically asks for a flat-looking patio with smooth porcelain, I push them toward 1:40 and explain exactly why.
How to measure and calculate your required slope
This is where a lot of DIYers lose confidence, but the maths really is straightforward once you understand what the numbers mean. A fall of 1:60 simply means that for every 60 units of horizontal distance, the surface drops 1 unit in height. If you are working in millimetres, 1:60 across a 3-metre-wide patio means a total height difference of 50 mm from the high edge to the low edge.
Step-by-step fall calculation
- Measure the total width of your patio in millimetres (e.g., 3,600 mm wide).
- Decide on your target fall ratio. Use 1: 60 as a starting point for most materials.
- Divide the width by the ratio denominator: 3,600 ÷ 60 = 60 mm. That is the total drop from high edge to low edge.
- Convert to a per-metre rate for laying reference: 60 mm ÷ 3.6 m = 16.7 mm per metre (which is your 1:60 rate).
- Mark the datum (highest) point on your setting-out pegs at the house wall, then subtract your calculated total drop at the far edge peg.
- For a 1: 40 fall on a 4-metre-wide patio: 4,000 ÷ 40 = 100 mm total drop across the width.
- For a 1: 80 fall on a 2.4-metre-wide patio: 2,400 ÷ 80 = 30 mm total drop — about the thickness of a pound coin for each 80 mm. That is gentle but workable on textured stone.
Worked example: a 4 m x 3 m slab patio
Say you are laying a 4 m wide by 3 m deep patio adjacent to the house. The fall runs across the 4 m width (left to right), with the house wall behind you. You want 1:60. Total drop = 4,000 ÷ 60 = 66.7 mm, which you round to 67 mm. The peg nearest the house on the left sits at your datum level (zero). The peg at the far right corner sits 67 mm lower. The two back pegs (at the wall) are at datum. The two front pegs (away from the wall) also follow the same left-to-right fall. Once those four corner pegs are set, you can run string lines between them at the finished surface level and use those lines to check every slab as you lay.
If your patio falls away from the house in two directions (a pyramid or hipped fall), you calculate the depth fall and width fall independently using the same method, then combine them at corner pegs. This is useful when a channel drain runs along the far edge and you want all water directed there.
Using a laser level vs a spirit level
A self-levelling rotary laser level is the most accurate way to set and verify falls across a patio. You set the laser at a known datum and use the receiver rod to read heights at each peg location. For most DIY projects, a decent 1.2 m or 1.8 m spirit level combined with a slope or gradient attachment (or a shim of the right thickness taped to one end) is perfectly adequate. A 67 mm total drop over 4 m is easy to confirm with a long level and a piece of timber. The key is checking frequently during laying, not just at the end.
Tools, materials and consumables checklist
What you need depends on the project type. Here is a practical breakdown by category. Do not buy everything before you confirm your method; some items are only needed for concrete pours or specific drainage types.
Setting out and measuring
- Timber pegs (25 x 25 mm softwood, 300–400 mm long) and a club hammer
- Builder's line and line pins
- Long spirit level (1.2 m or 1.8 m) or rotary laser level with receiver rod
- Tape measure (at least 5 m)
- Slope gauge or digital level (useful but not essential)
- Pencil, marker and notepad for recording datum heights
Sub-base and excavation
- Spade and mattock for hand excavation, or mini-digger hire for larger areas
- Wheelbarrow and skip or grab bag for spoil removal
- MOT Type 1 (crushed stone/hardcore) — typically 100 mm compacted depth for domestic patios
- Weed-suppressing membrane (optional but recommended under gravel)
- Plate compactor (hire from most tool hire shops, typically £40–£80/day)
For paved patios (slabs and block pavers)
- Sharp sand and cement for bedding mortar (typically 4: 1 or 5:1 mix)
- Mixing board or forced-action mixer (hire for large projects)
- Rubber mallet and pointing trowel
- Angle grinder with diamond blade for cutting slabs
- Brick bolster and club hammer (alternative for block pavers)
- Jointing compound or kiln-dried sand for block paver joints
- Edge restraints (concrete kerb edging or flexible steel/plastic edging for block pavers)
For cast concrete patios
- Formwork timber (150 mm x 25 mm treated softwood, or formwork ply)
- Formwork stakes and screws
- Reinforcing mesh (A142 or A193 for domestic use) and mesh spacers/chairs
- Ready-mix concrete (C25/C30 grade) or site-mix materials (cement, sharp sand, 20 mm aggregate)
- Screed board (straight-edged timber or aluminium screed rail, long enough to span forms)
- Bull float or darby float
- Steel finishing trowel or broom for texture
- Curing compound or polythene sheeting
Drainage components
- Channel/linear drain with grate (galvanised, plastic or stainless steel)
- Point drain or gully pot with rodding access
- Flexible drainage pipe (110 mm or 160 mm diameter)
- Soakaway crate (typically 400 x 400 x 400 mm or larger, depending on catchment area)
- Permeable geotextile membrane to wrap soakaway
- Haunching concrete for drain surrounds
Preparing the sub-base and setting your datum levels
The fall you set in the sub-base is the foundation for everything above it. If your hardcore is lumpy, inconsistently compacted, or runs the wrong way, no amount of clever bedding will reliably fix it. I have tried. It does not work. The fall needs to be built in from the bottom up.
Excavation depth
For a standard mortar-bedded flag patio, your total excavation depth is typically: 100 mm compacted Type 1 sub-base, plus 40–50 mm compacted mortar bed, plus the paving thickness (typically 35–50 mm for natural stone or 50–65 mm for concrete slabs). That puts most patios at 200–215 mm deep. Add a little extra if you are on clay or soft ground. The surface must finish at least 150 mm below the DPC, measure this first, before you start digging, and work backwards from there.
Setting pegs and datum levels
Drive your corner pegs in first, then intermediate pegs at roughly 1.5–2 m centres across the patio area. Set the datum peg at the highest point (the back corner closest to the house and highest side of the fall). From that datum, use your level and calculated drop-per-metre to set the height of every other peg. For a 1:60 fall across a 4 m width, each metre of distance from the datum drops 16.7 mm. Mark a line around each peg at finished sub-base level (i.e., the top of your compacted Type 1). Double-check every peg with a string line before you order or move any material.
Laying and compacting the sub-base
Spread Type 1 in layers no deeper than 75 mm before compaction. Each pass of the plate compactor reduces the loose depth by roughly 20–25%. Work the plate compactor in overlapping passes across the whole area, then check your peg marks. Top up any low spots and re-compact. The finished surface of the sub-base should mirror your target fall. Run a string line across it and check with your level before proceeding. This is the point where fixing mistakes is cheap and easy. An hour here saves a day of misery later.
Creating the fall for paved patios: slabs and block pavers step by step
Once your sub-base is set to the right fall and fully compacted, laying paving to maintain that fall is a methodical process. The biggest mistakes I see are rushing the bed preparation and not checking each course against the string line. For step-by-step guidance, see our detailed how to create a fall on a patio guide.
Mortar-bedded flag and slab paving
- Set your string lines at finished paving level across the area, incorporating your target fall. For a 1:60 fall over 4 m, the far end of the string sits 67 mm lower than the near end.
- Mix a semi-dry mortar bed: 5 parts sharp sand to 1 part Portland cement, mixed dry, damp enough to hold a squeeze but not wet enough to slump.
- Spread the mortar bed to a consistent depth of 40–50 mm, roughly following the fall of the sub-base beneath.
- Lay the first slab and tap down with a rubber mallet until it sits at string-line level. Check with your spirit level across the slab surface — it should match your intended fall gradient. Check the fall direction too, not just the level side to side.
- Leave a consistent joint gap (typically 10–15 mm for natural stone, 3–5 mm for tight-jointed paving). Use plastic spacers to maintain consistent gaps.
- Lay subsequent slabs in rows, using the string line as your constant reference. Re-run the string line as you move further from the datum.
- Check every third or fourth slab against the string line with a straightedge. Tap down any high slabs; relay any that are more than 3 mm out of tolerance.
- Allow the bed to cure for at least 24 hours (48 hours in cold weather) before pointing.
- Point joints with a mortar or proprietary jointing compound. Brush off any excess and allow to cure before trafficking.
Sand-set block pavers
Block pavers laid on a compacted sand bed follow the same fall principle, but the bedding method is different. Spread a 40–50 mm layer of sharp sand over the sub-base and screed it to the correct fall using a straight screed board running between your setting-out pegs. The sand bed should be a little high at this stage (by about 5–10 mm) because the blocks will compact down when you plate-vibrate them at the end. Lay your edge restraints first to lock everything in, then lay blocks in your chosen pattern, keeping them slightly above final level. Once all blocks are in, run the plate compactor over the entire area (use a rubber pad on the plate to protect the pavers), check the fall one last time, then brush kiln-dried sand into the joints and compact again.
Edge restraints and haunching
Edge restraints are non-negotiable for block paving and highly advisable for all paved patios. Without them, the edges migrate outward over time, the fall gradually flattens, and you end up with ponding near the middle. Concrete kerbing is the most robust option. Haunch it into place with a 100 mm concrete fillet on the outside face before you start laying. For block pavers, flexible plastic or galvanised steel edging pinned into the sub-base is the practical alternative.
Checking and adjusting after laying
Once the patio is complete and jointing mortar is cured, run a hosepipe across the high end and watch where the water goes. It should sheet off consistently toward the low edge. Any flat or low spots that hold water will show up immediately. Isolated low slabs in a mortar bed need to be lifted, extra bed added underneath, and relaid. In a sand-set paving scheme it is easier, lift the block, add or remove sand, relay, and re-compact.
Creating the fall for cast concrete patios
Concrete is unforgiving once it sets, so all your slope work has to happen before the pour. The fall is built into the formwork and sub-base, and maintained during screeding. This is the section where planning pays off most.
Setting the formwork to fall
- Excavate and compact your sub-base to the target fall as described above. For a 100 mm concrete slab, compact Type 1 to the fall and then add the reinforcing mesh on 25 mm spacers above it.
- Cut and position your formwork boards around the perimeter. For a 4 m wide patio at 1:48 (1/4 inch per foot, approximately 2%), the low-side form sits 83 mm lower than the high-side form (4,000 mm ÷ 48 = 83 mm).
- Set forms precisely. Drive stakes into the ground outside the formwork area, screw the boards to the stakes, and use your string line and level to confirm the top of each form is at exactly the right height at every stake location.
- Double-check the fall in both directions if you are using a compound fall (sloping away from the house and across the width). Mark datum heights on each stake in pencil.
- Brace all forms securely before pouring. Concrete is heavy and will push against unsupported formwork.
Pouring and screeding to fall
Pour concrete and roughly spread it with a spade or rake to just above the form level. Then use a screed board (a straight piece of 50 x 100 mm timber or an aluminium screed rail long enough to span both forms) pulled across the surface in a sawing motion. The tops of the forms act as your guide rails. If your forms are set correctly to the fall, the screed board automatically creates the right gradient as you pull it toward you. Work in sections of about 1.5–2 m if the patio is large, and pour continuously to avoid cold joints.
After screeding, use a bull float to embed aggregate and close the surface. Work parallel to the fall direction so you do not inadvertently flatten the gradient. For a broom finish (which gives better grip and slightly better drainage performance than a steel-trowelled finish), drag a stiff broom across the surface perpendicular to the fall direction once the bleed water has evaporated and the concrete is firm enough not to slump under the broom. ACI 302.1R is the standard technical reference for concrete flatwork placement and finishing, and it is worth reading the relevant sections before a large pour.
Curing and form removal
Cover the slab with polythene sheeting or apply a spray curing compound immediately after finishing. Keep the slab moist and covered for a minimum of 7 days (longer in hot or windy conditions). Do not remove formwork until the concrete has reached adequate strength, typically 24–48 hours for the sides in mild weather, but leave the base undisturbed. Inspect the fall with a hosepipe test once the slab is fully cured (28 days for full strength, though most water tests are done at 7 days).
What to do if the fall is wrong
If your concrete patio has a flat or reverse-fall spot after curing, you have a few options depending on severity. A surface grinder can remove a few millimetres to correct a minor high spot. A self-levelling overlay or concrete resurfacer can be applied and screeded to a corrected fall on top of the existing slab, as long as it is clean and sound. For persistent ponding, a channel drain let into the surface with a diamond saw and haunched in place is often the most practical fix.
Drainage solutions that work with your fall
Setting the fall correctly directs water to where you want it. What happens at that low point depends on the drainage solution you install. For practical methods on redirecting runoff and protecting your home, see our guide on how to divert water away from patio. The most common options for domestic patios are channel drains, point drains/gullies, and soakaways. For practical options and step-by-step methods to cover a drain on a patio, see our guide on how to cover a drain on a patio.
A channel drain (also called a linear drain) runs along the lowest edge of the patio and collects water across its full length. It suits wide patios where the fall runs in one direction. The channel body is haunched in concrete and the top grate sits flush with or very slightly below the finished paving surface. Point drains are better where falls converge at a single low spot, or where a patio slopes in from multiple directions. Both types connect to a drainage run that discharges to a soakaway, a watercourse, or (where permitted) the mains surface-water drain. A soakaway should be located at least 5 m from the house and 2.5 m from the boundary, filled with clean angular stone or soakaway crates wrapped in geotextile membrane, sized for your catchment area and local rainfall intensity.
If you need to adjust an existing drain to meet your new patio level, that is a separate task that deserves careful attention. Raising a drain to match new paving is straightforward with extension risers on plastic gullies, but cast-iron or older ceramic pot gullies sometimes need a more involved adjustment. Similarly, if your patio fall directs water toward an existing drain that is now covered by new paving, you will need to either relocate the drain or install a new run. These tasks are closely related to getting the overall fall right and are worth planning together at the design stage.
Gravel and decking: fall principles for other materials
Gravel patios and loose aggregate surfaces still need a planned fall, even though water can percolate through the material. The sub-base beneath must slope to drain away any water that reaches it, particularly in clay soils where surface water will not infiltrate quickly. A weed membrane over a compacted Type 1 sub-base, with the sub-base graded to 1:60 or steeper, works well. Edging restraints (timber, steel, or brick soldier course) are essential to keep gravel in place and maintain the gradient.
Timber and composite decking relies on fall between the boards, not through the surface. The joists or deck frame beneath the boards should be set to a fall of 1:60 to 1:40 so that water drains away from the house and falls through the gaps between boards to the ground below. Keep the ground beneath decking clear of debris and ideally covered with gravel or membrane to prevent waterlogging. Composite decking with tightly spaced boards may need a slightly steeper fall (toward 1:40) to ensure water does not sit on the surface.
Common mistakes and how to avoid them
- Falling toward the house: always double-check fall direction before laying begins. A string line from the house wall to the far peg makes this obvious.
- Finishing the patio above the DPC: measure DPC height first, work out your finished surface level, and check it leaves 150 mm clearance. It is easy to lose this headroom when you add up sub-base, bed, and paving thickness.
- Not checking frequently enough during laying: set the string line and check every third slab, not just the first and last.
- Inconsistent mortar bed depth: a lumpy or variable bed causes random high and low spots. Spread and screed the bed before laying each row.
- No edge restraints on block paving: without them, the edges will creep and the fall will gradually flatten over time.
- Ignoring drainage at the low point: a perfect fall that dumps water onto a lawn 100 mm from the patio edge is not a solution. Plan where the water goes before you start.
- Pouring concrete without confirming formwork levels: check every stake and form top before the truck arrives. You cannot adjust after the pour starts.
Quick maintenance checks to keep your fall working
Once your patio is laid and draining correctly, a small amount of annual maintenance keeps it performing well. Clear debris from channel drain grates and point drain covers every autumn before leaf fall really sets in. Flush channel drains with a hosepipe to clear silt from the body. Re-brush kiln-dried sand into block paver joints every couple of years, as it washes out over time and allows minor settlement that can alter the fall slightly. Re-point any mortar joints that crack or wash out in flag paving before water gets under the slabs. And once a year, run the hosepipe test: water on at the high end and watch where it goes. If it sheets off cleanly, you are in good shape.
FAQ
What is 'fall' on a patio and why does it matter?
Fall (slope) is the intentional gradient of a patio surface so water runs away from buildings into drainage points. Proper fall prevents ponding, reduces frost/deterioration and damp risks to foundations, and directs stormwater to legal disposal (drains, soakaways or SuDS). Incorrect fall causes standing water, algae/slip risk and potential structural or damp damage to adjacent buildings.
What legal or regulatory checks should a DIY homeowner make before changing patio fall?
Check local building regulations and guidance: in the UK consult Approved Document H and CIRIA SuDS guidance; in the US consult the local adoption of the IRC (R401.3) and municipal stormwater/NPDES rules. Also check planning/permits if you alter runoff paths, copy manufacturer instructions for proprietary paving/permeable systems, and consider accessibility rules (ADA) if the patio is part of an accessible route.
What are common target slopes (falls) for different patio materials?
Typical finished slopes used by trades and manufacturers: - Textured stone/blocks: around 1:80 (≈1.25% or 12.5 mm/m) - General flag paving and concrete: 1:60 to 1:40 (≈1.66%–2.5%) - Smooth porcelain/large-format slabs: nearer 1:40 (≈2.5%) - Permeable paving/gravel: minimum ~1% (1:100), maximum commonly ~5–6% for infiltration performance - Decking: build fall into joists or use slight gap drainage; aim for 1–2% toward drainage run or drip edge. Also ensure surfaces fall away from building damp proof course (DPC) by local guidance.
How do I measure and calculate the required fall in simple terms?
Decide run length from highest point (usually building) to drain/edge. Multiply run (in metres) by required fall per metre. Example: for 1:40 (≈2.5%) over 3 m: fall = 3 m × 25 mm/m = 75 mm drop. For 1:80 (≈1.25%) over 2.5 m: fall = 2.5 × 12.5 mm = 31.25 mm. Verify with a string line/laser level and a tape measure or long spirit level.
How do I set out and check fall before laying a patio?
Establish fixed reference points: DPC height, drain invert level and finished surface level. Mark high and low edge levels on walls or pegs. Stretch a string line between these points and measure offsets with a rule or use a rotary laser level to set consistent falls across the area. Check levels frequently during base build and laying (every few courses or panels).
Step‑by‑step: how to build fall for flagstones/segmental paving?
1) Excavate to required depth for subbase and bedding. 2) Install compacted subbase (Type 1/MOT or subbase per local guidance) to a consistent thickness using a string/laser to control levels. 3) Put a screeded mortar or sand bedding and screed to the designed fall (use a screed rail and fall profiles). 4) Lay flags/blocks from the highest point toward drains, checking each unit with a long spirit level and straight edge. 5) Compact (if block paving) and point/joint to manufacturer spec. 6) Haunch and edge‑restrain to lock profiles and maintain fall.
Next Article
How to Create a Fall on a Patio: DIY Guide to Proper Drainage
How to create a fall on a patio: step-by-step slopes, measurement examples, drains, costs, tools & safety tips