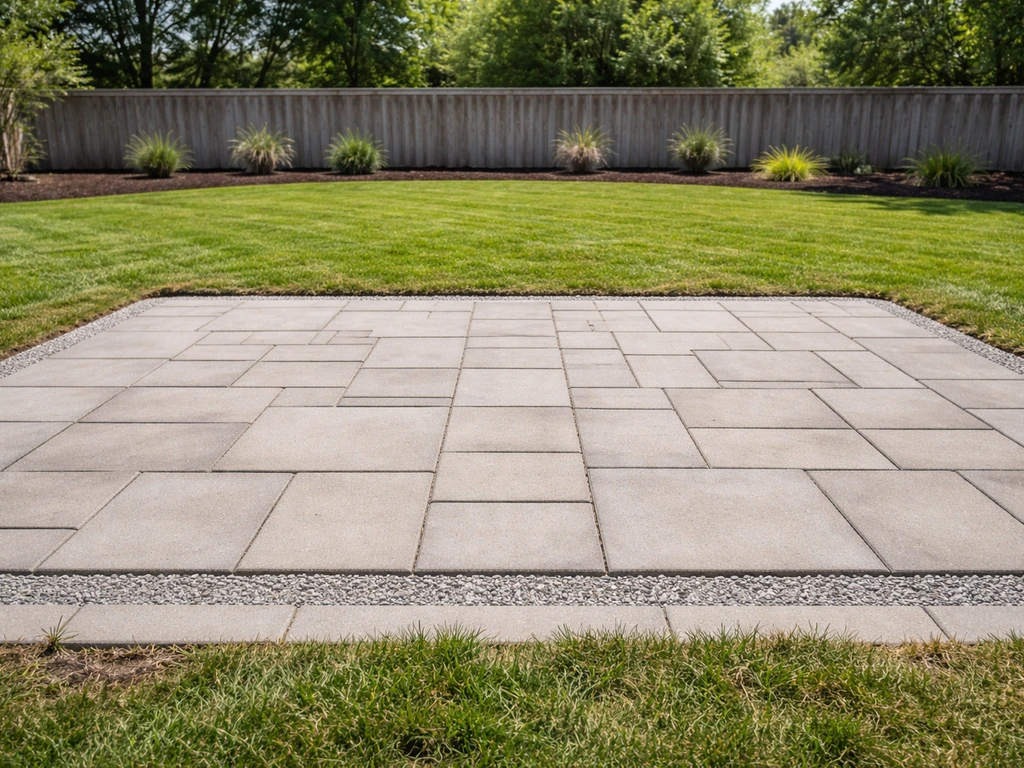
You can absolutely build a patio deck over grass yourself, and the method you choose depends mostly on three things: how permanent you want it, how much you want to spend, and whether your yard sits flat or slopes. If you're wondering "can you build a patio on top of grass", the short answer is yes, with proper site prep (stripping turf, stabilizing the subgrade, and installing a compacted aggregate base) you can install pavers, a floating deck, or modular tiles where grass once grew. For a clear, step-by-step primer on how to make a patio on grass, see our dedicated guide on that topic. The most common DIY approaches are pavers on a compacted gravel-and-sand base, a floating deck on precast deck blocks, a framed raised deck on concrete footings or ground screws, and modular deck tiles dropped straight onto the ground. Each one is buildable on a weekend to a few weekends, with the right prep work underneath making all the difference between a surface that lasts decades and one that shifts and sags after the first winter.
How to Build a Patio Deck Over Grass: DIY Guide & Options

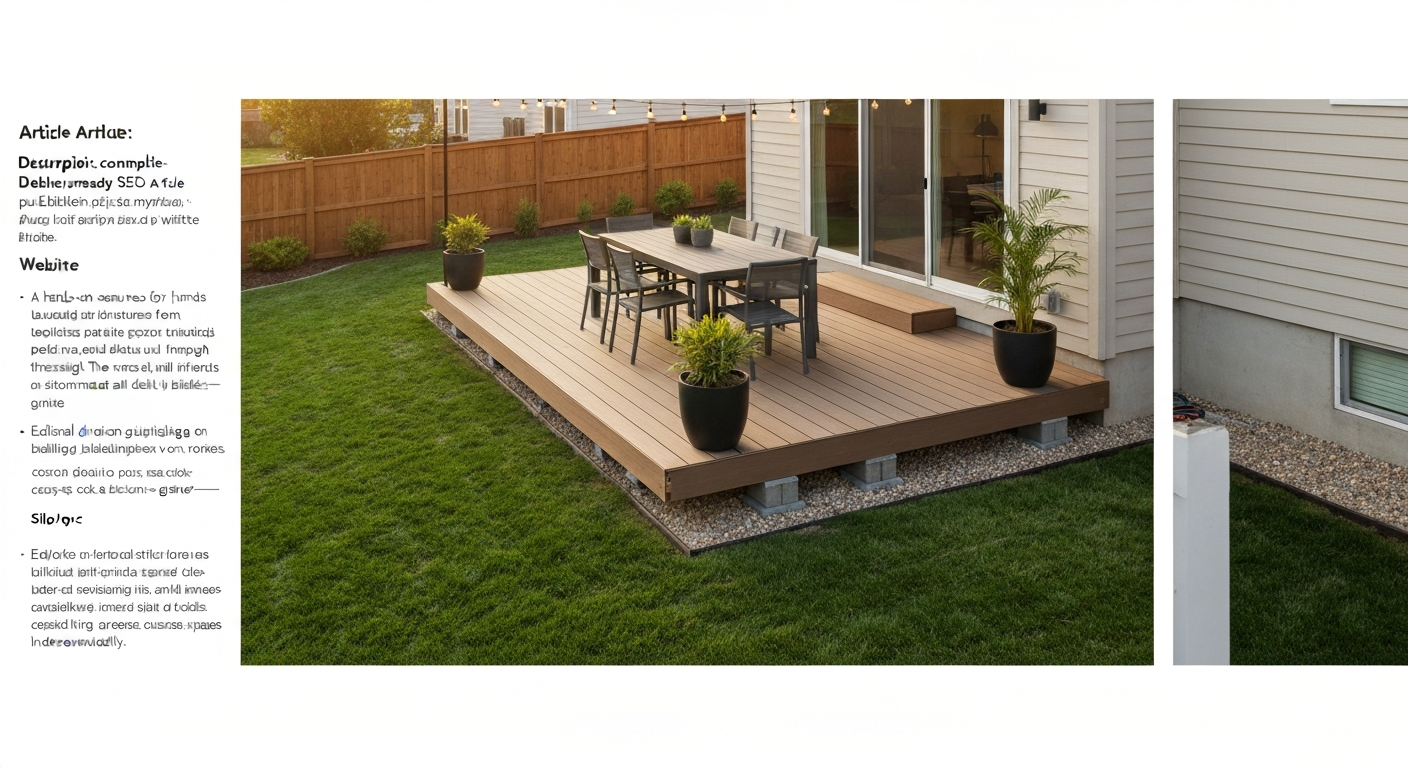
What this guide covers and who it's for
This walkthrough is written for homeowners who want to get their hands dirty and skip the contractor markup. Whether you're turning a flat backyard into a weekend hangout or building a raised entertaining deck off the back door, this guide covers the full picture: site checks, permits, foundation options, step-by-step build instructions for each method, materials and tools, cost ranges, and the warning signs that tell you when to bring in a pro. If you're weighing a quick seasonal setup versus something permanent, the decision guide below will point you in the right direction before you spend a dime.
Temporary, cheap, raised, or permanent, which one fits your situation
Before picking up a single tool, it's worth being honest about what you actually need. I've seen plenty of homeowners overbuild a $4,000 raised deck for a spot they use three weekends a year, and others throw down cheap tiles that turn into a soggy, uneven mess after one rainy season. Here's how to match the method to the situation.
| Method | Best For | Typical Cost (materials) | Permanence | Permit Usually Required? | Key Weakness |
|---|---|---|---|---|---|
| Modular deck tiles | Renters, seasonal use, flat ground | $3–$8/sq ft | Temporary / removable | Rarely | Moves on uneven ground, poor drainage under tiles |
| Pavers on sand/gravel | Budget permanent patio, flat to gently sloped yard | $8–$18/sq ft | Permanent (removable in theory) | Sometimes (size/location dependent) | Labor-intensive base prep, frost-heave in cold climates without deep base |
| Floating deck on deck blocks | Low-height freestanding deck, mild-frost zones | $12–$22/sq ft | Semi-permanent | Often exempt if under 30 in height and 200 sq ft | Frost heave, settlement on poor soils, not for slopes |
| Framed raised deck on footings or ground screws | Sloped yards, decks above 30 in, attached-to-house builds | $20–$45/sq ft | Permanent | Almost always required | Higher cost, permit/inspection process, more complex build |
If you want something cheap and fast that you can pull up and take with you if you move, modular tiles or a simple floating deck on deck blocks are the call. For step-by-step instructions on how to make a temporary patio, see the linked temporary patio guide. For step-by-step instructions on how to make a temporary patio on grass, including leveling, base options, and recommended temporary materials, see the linked guide. If you want a real outdoor room that adds value and holds up for 20 years, pavers on a proper base or a framed deck on footings is worth the extra work. Raised patio and deck builds on slopes are their own category, they require footings below frost depth and usually trigger a permit regardless of size. For a step-by-step walkthrough on how to build a raised patio on grass, see our guide on how to build a raised patio on grass.
Site checks before you dig or build anything
I learned the hard way on my second deck that skipping site checks costs you more time than doing them properly. Spend an afternoon on these before you stake out your project area.
Call 811 first, every single time
In the U.S., dial 811 (the national call-before-you-dig number) before any excavation, even shallow trenching for edging. State 811 centers notify member utilities, who send crews to mark buried lines with flags and paint. Most states legally require you to call a minimum number of business days before digging, so do it early. Striking a gas or electrical line is not a DIY repair situation, it is a life-safety emergency. This call is free and takes about five minutes.
Measure slope and check drainage
Use a long level (or a level on a straight 8-foot board) to check grade across your build area. Industry guidance calls for patio surfaces to slope away from the house at a minimum of 1/8 inch per foot (roughly 1%) up to 1/4 inch per foot (2%) for good sheet drainage. More than about a 6-inch drop across your planned area means you're either building a raised structure, doing significant grading, or using a retaining wall at one edge. Mark high and low points with stakes and string so you know exactly what you're working with.
Soil type and bearing capacity
Sandy, well-draining soil compacts nicely and supports a good gravel base. Heavy clay holds water and shifts with freeze-thaw cycles, which means you need a deeper base and more attention to drainage. You can get a free preliminary read on your soil type using the USDA NRCS Web Soil Survey, search your address, pull up the map, and look at the hydrologic group and drainage class for your parcel. For preliminary soil maps and site-specific soil properties and limitations, consult the USDA NRCS Web Soil Survey (used to derive site soil properties and limitations). Building officials typically use conservative presumptive bearing values of 1,500 to 2,000 pounds per square foot for untested native soils when sizing footings. If your yard is consistently soft, waterlogged, or you're seeing standing water days after rain, factor in extra base depth and drainage solutions.
Mark the footprint accurately
Use batterboards and mason's line to lay out a square or rectangular footprint. Check for square by measuring diagonals, both should be equal. A few minutes here prevents a crooked deck that dogs you through every stage of the build.
Permits, local rules, and the leach field warning
When you need a permit
Most U.S. jurisdictions follow the International Residential Code, administered locally by the authority having jurisdiction (AHJ). Under common IRC-based practice, a building permit is typically required if the deck is attached to the house via a ledger, if any part of the deck surface is more than 30 inches above grade, or if the footprint exceeds roughly 200 square feet. But here's the catch: local AHJs frequently reduce these thresholds or require permits for all decks regardless of size. Always call your local building department before you start. A permit means inspections, which means a set of eyes on your footings and framing before you cover them up, and that's actually not a bad thing for a structural build.
Fastener and code basics
IRC Section R507 covers deck construction specifics. For any attached deck, ledger fasteners must be hot-dipped galvanized or stainless steel, and the ledger connection requires proper flashing to prevent water intrusion behind the band joist. The American Wood Council's Prescriptive Residential Wood Deck Construction Guide includes span tables and hardware details that many building departments accept directly as prescriptive compliance. Using the wrong fasteners in a permit-pulled deck will fail inspection, don't substitute.
Building over or near a septic leach field
If your property uses a septic system, building over or too close to the absorption field (drainfield) can crush distribution pipes, compact soil, and destroy a system that costs $10,000 or more to replace. The U.S. EPA advises that required setback distances vary by state and county, there is no single national number. Many states have explicit tables listing minimum setbacks from septic tanks, drainfields, and distribution boxes to structures, wells, and surface water. For example, state rules like Minnesota's Chapter 7081 publish numeric minimums in table form. Contact your local health department to get the specific setback distances for your county before you plan anything near a septic component. If you're asking whether you can build a patio over a leach field, contact your local health department first to learn the specific rules and setbacks for building over or near a drainfield can you build a patio over a leach field. In general, no paving, no heavy structures, and minimal grading over any drainfield.
Safety reminders before you start
- Lift with your legs, not your back. Paver base materials ship in 50-pound bags and pavers themselves run 8–12 pounds each. Use a hand truck and ask for help on heavy deliveries.
- Wear steel-toed boots when handling pavers, lumber, and concrete blocks. A dropped paver on a foot is a serious injury.
- Eye and ear protection are non-negotiable when cutting pavers with an angle grinder or circular saw, or cutting lumber with a miter saw.
- If you're using a plate compactor, keep feet and hands clear of the plate and wear ear protection — sustained noise exposure from compactors exceeds safe limits quickly.
- When working on raised framing, use proper scaffolding or a stable ladder. Don't stand on joists or unsecured framing members.
- Treat any trip/fall hazard seriously during construction — loose boards, scrap piles, and uneven excavated ground all cause falls. Keep the work area clean.
- When using a circular saw or reciprocating saw, clamp workpieces whenever possible rather than hand-holding them.
- If you hit an unexpected buried line while digging, stop immediately and call 811 to report it.
Foundations and drainage, getting this part right
The surface you walk on is only as good as what's underneath it. This is the part most DIYers rush, and it's the reason patios crack, sink, and heave. Here's what each component actually does and when to use it.
Geotextile weed barrier
A commercial-grade woven geotextile (not the flimsy garden-center fabric) laid directly on stripped subgrade serves two purposes: it suppresses weed growth through the base, and it separates the aggregate base from the native soil so fine particles don't migrate up and contaminate your base over time. Skip the landscape fabric sold in 50-foot garden rolls, it degrades and clogs. Use contractor-grade woven polypropylene fabric rated for hardscape applications.
Compacted aggregate base
For pedestrian paver patios, ICPI (Interlocking Concrete Pavement Institute) industry practice calls for a minimum 4-inch compacted aggregate base on stable soils. On weak, clay-heavy, or frost-susceptible soils, increase this to 6 inches or more. The base material should be a clean, crushed angular aggregate (often called road base, crusher run, or crushed limestone), not rounded pea gravel, which doesn't compact properly. Place it in lifts no deeper than 3 to 4 inches and compact each lift with a plate compactor before adding more.
Bedding sand
On top of the compacted base goes a 1-inch layer of coarse concrete sand (ASTM C33). This is screeded flat with a screed board pulled across pipe guides set at grade, then left undisturbed until pavers go down. Do not use stone dust or polymeric sand as bedding, stone dust holds moisture and compresses unevenly; save polymeric sand for the joints after installation.
Edge restraints
Edge restraints are mandatory for interlocking paver systems. Without them, pavers gradually migrate outward under foot traffic, ruining the bond pattern and the joint integrity. Use plastic snap-together edge restraints pinned with 10-inch steel spikes, or metal edging for a cleaner look. Concrete edging works too, but is harder to adjust.
Drainage trenches and gravel runoff channels
If your yard naturally collects water or the patio sits in a low spot, a perimeter gravel trench (a shallow trench filled with clean crushed stone, sometimes containing a perforated pipe) at the low edge of the patio can intercept and redirect surface water before it undermines the base. This is especially useful on clay soils where water moves slowly. Tie the trench into an outlet point, a dry well, a slope to daylight, or a French drain that exits at a lower grade point on the property.
Foundation options compared
Each build method uses a different foundation logic. Here's the quick breakdown of what works for what scenario.
Pavers on compacted sand and gravel base
This is the classic approach for permanent ground-level patios. Strip the grass, compact the subgrade, install a crushed aggregate base in compacted lifts, screed a 1-inch sand layer, and set pavers with consistent joints. It distributes load across the entire base and drains well when built with a proper slope. Vulnerable to frost heave in northern climates if the base isn't deep enough to clear local frost depth, but a well-built base on well-draining soil handles freeze-thaw cycles better than most people expect.
Floating deck on precast deck blocks
Precast concrete deck blocks sit directly on the ground and support a freestanding wood or composite frame. No digging required beyond leveling the ground. This works well in mild-frost or frost-free climates where frost heave isn't a major issue, and it's the method most likely to be permit-exempt for small builds under 200 square feet that don't attach to the house and stay under 30 inches of height. On frost-susceptible soils, blocks will heave and settle over time. Not suitable for sloped sites without significant shimming.
Framed raised deck on concrete footings or ground screws
For decks above 30 inches, attached to the house, or on sloped ground, you need footings. Concrete footings must extend below the local frost line, this ranges from zero in southern coastal climates to 48 to 60 inches in northern states. Call your building department to confirm local frost depth. Ground screws (helical piles) are a legitimate alternative in many jurisdictions when the product carries an ICC-ES evaluation report (under AC358). See the Helical Pile Design and Code Compliance guide (ICC-ES AC358 / industry practice) - HelicalPileSource for details on ICC‑ES AC358 evaluation reports and typical torque‑correlation capacity verification. Installers verify load capacity through torque correlation during installation, and they avoid the wet concrete cure time. Both methods require proper post bases, corrosion-resistant hardware, and in most cases a building permit with inspections.
Modular deck tiles
Snap-together composite or wood deck tiles sit on a flat, firm surface and interlock without fasteners. They are the fastest install by far, a 200-square-foot area can go down in a few hours. They work best over an existing concrete slab or very firm, level ground, but can be placed over short grass if you first lay a weed membrane and a thin layer of compacted gravel for drainage. They shift and gap on uneven ground and trap moisture underneath if drainage is poor, so they work better as a temporary or seasonal solution than a long-term permanent install.
Method 1: Pavers on sand and gravel, step-by-step
This is the method I'd recommend to most backyard DIYers. It's physical work, but every step is learnable, the materials are widely available, and a well-built paver patio genuinely lasts decades. Budget 2 to 3 weekends for a 200-square-foot patio if you're renting a plate compactor and working solo or with one helper.
Materials checklist for pavers on sand
- Concrete pavers (measure your area and add 10% for cuts and waste)
- Crushed aggregate base (road base / crusher run) — plan for 4 in compacted depth minimum, 6 in on clay or frost-susceptible soil
- Coarse concrete sand, ASTM C33 — 1 in screeded bedding layer
- Contractor-grade woven geotextile fabric
- Plastic or metal paver edge restraints with 10-in steel spike pins
- Polymeric jointing sand (for filling joints after paver installation)
- Mason's line and stakes / batterboards for layout
- Screed pipes (two pieces of 1-in outer-diameter electrical conduit work well)
- Straight screed board (a straight 2x4 or aluminum straightedge, 8–10 ft long)
- Hand tamper for final seating of pavers
- Rubber mallet
Tools needed
- Plate compactor (rent from a local equipment rental store — budget $80–$150/day)
- Flat-blade spade and square-nose shovel for excavation
- Wheelbarrow
- Tape measure and carpenter's square
- Angle grinder with diamond blade, or a wet-cut paver saw (rent for cuts) for cutting pavers
- Level and long straightedge
- Broom for sweeping in jointing sand
- Garden hose and nozzle (for wetting polymeric sand)
Step-by-step build
- Call 811 and wait the required notice period before any digging. Mark any flagged utilities clearly and work around them.
- Lay out the patio footprint using batterboards and mason's line. Check for square by measuring both diagonals — they must match. Spray paint the outline on the ground.
- Excavate the area to a depth of 6 to 8 inches below finished grade (4 in base + 1 in sand + paver thickness, typically 2.375 in for standard 60mm pavers). Factor in your finished grade target and the minimum 1/8-in per foot slope away from any structures.
- Compact the subgrade soil with the plate compactor. If the soil is soft or disturbed, make multiple passes.
- Lay the geotextile fabric over the compacted subgrade, overlapping seams by at least 12 inches. Trim to fit inside the excavated area.
- Add crushed aggregate base in 3- to 4-inch lifts. Compact each lift thoroughly with the plate compactor, making multiple overlapping passes. Check for a firm, consistent surface — a foot should leave no significant impression.
- Install edge restraints along all sides of the excavated perimeter at finished-grade height. Stake them securely with 10-inch spikes every 12 inches.
- Set the two screed pipes parallel to each other on the compacted base, spaced so your screed board can reach across both. Set pipe height so that after screeding, the sand surface will put finished paver tops at your target grade with the correct slope.
- Pour coarse concrete sand between the pipes and screed it flat by dragging the screed board across the pipes in a sawing motion. Fill low spots and re-screed. Remove the pipes and fill the channels with sand, smoothed by hand.
- Start laying pavers from a corner or a straight edge, working away from yourself so you don't walk on screeded sand. Set each paver with a slight tap from the rubber mallet. Maintain consistent joint spacing (typically 1/16 to 3/16 inch) using the paver's built-in spacer nibs if present.
- Cut border pavers as needed using the angle grinder with a diamond blade or the rented paver saw. Wet cutting is cleaner and produces less dust — use eye protection and a respirator for dry cutting.
- Once all pavers are laid, run the plate compactor over the surface (put a rubber pad or piece of carpet under the plate to prevent chipping) to seat the pavers into the sand bed.
- Pour polymeric jointing sand over the paver surface and sweep it into the joints with a stiff broom. Compact again lightly. Sweep in a second application of sand, then activate the polymeric binders by lightly misting the surface with water according to the manufacturer's instructions. Let it cure as directed — usually 24 hours before foot traffic.
- Check the finished surface with a level for any low spots or high points. Individual pavers can be lifted and sand adjusted during the first few days before the polymeric sand fully cures.
Cost and timeline estimate for pavers on sand
| Item | Typical DIY Cost (200 sq ft patio) | Notes |
|---|---|---|
| Concrete pavers | $400–$900 | Varies widely by style and thickness; tumbled/standard vs. large-format |
| Crushed aggregate base (4–6 in) | $80–$160 | Buy by the ton from a landscape supplier; delivery saves time |
| Coarse bedding sand | $40–$80 | One ton covers roughly 200 sq ft at 1-in depth |
| Geotextile fabric | $25–$60 | Contractor-grade woven, sold by the roll |
| Edge restraints + spikes | $40–$80 | Plastic snap-lock style is cheapest; metal costs more |
| Polymeric jointing sand | $30–$60 | One 50-lb bag covers ~40–60 sq ft depending on joint width |
| Plate compactor rental (2 days) | $120–$260 | Rent for base compaction day and final paver seating day |
| Paver saw rental (half-day) | $60–$120 | Skip if you're comfortable with an angle grinder |
| Total estimate | $795–$1,720 | Tools you already own not included; delivery fees vary |
Allow two full weekends for a 200-square-foot patio working with one helper. The first weekend covers layout, excavation, base work, and screeding. The second covers paver laying, cuts, compaction, and jointing. Skimping on the base work is what turns a two-weekend job into a recurring annual repair project.
Load capacity and ventilation, what you need to know for decks
Residential decks are typically designed for a live load of 40 pounds per square foot under the IRC, which covers normal outdoor furniture, people, and incidental loads. If you're planning a hot tub (which can add 100 pounds per square foot or more when full), a heavy outdoor kitchen, or any concentrated load, flag this at the permit stage and get an engineer's sign-off on beam and post sizing. This is not optional, an undersized deck under a filled hot tub is a structural collapse waiting to happen.
Ventilation under a wood deck matters more than most people realize. The space between the decking boards and the ground underneath needs airflow to dry out after rain. A wood deck that sits too close to grade with no airflow will rot from the bottom up in just a few years, even if the decking surface looks fine. Deck blocks and framed systems naturally provide some airspace, but on low-profile builds, keep finished decking at least 6 to 8 inches above soil. Composite decking is less vulnerable to moisture than wood but still benefits from good airflow.
Troubleshooting and maintenance
Pavers heaving or sinking
Individual paver movement after installation almost always points to inadequate base compaction, a drainage problem saturating the base, or frost heave. Lift the affected pavers, pull out the bedding sand, diagnose the cause, and fix it at the base level before reinstalling. Simply tapping sunken pavers back up by adding sand under them without fixing the drainage or compaction issue will have you doing the same repair every spring.
Weeds coming through joints
This is almost always windblown organic matter settling into joints, not grass growing through from below (a proper geotextile prevents that). Sweep fresh polymeric sand into affected joints after cleaning them out. Re-activate with water. A one-time kiln-dried sand refresh every 2 to 3 years is normal maintenance.
Deck boards cupping, warping, or rotting
Wood decking cupping is usually a moisture issue, either poor drainage under the deck, lack of spacing between boards, or boards installed bark-side up instead of bark-side down. Check that gaps between boards are maintained (typically 1/8 to 3/16 inch for wood decking when installed, since wood expands when wet). Soft spots or discoloration at board ends or joists indicate rot, those members need replacement, not just a fresh coat of sealant.
Seasonal maintenance checklist
- Each spring: inspect paver or deck surface for heaved, sunken, or loose sections; check edge restraints and re-stake any that have shifted
- Wood decks: inspect all visible framing members for soft spots, discoloration, or rot; seal or stain exposed wood every 2–3 years depending on climate and product
- Composite decking: rinse with soapy water annually; check hidden fasteners for corrosion
- Paver patios: sweep in fresh jointing sand anywhere joints have eroded; re-seal pavers every 3–5 years if desired for color protection
- Check drainage slopes after heavy rain — pooling water near the house foundation is a priority fix regardless of surface material
- Inspect post bases and hardware on raised decks for corrosion annually; replace any fasteners showing significant rust
When to call a pro instead of pushing through solo
I'm all for doing it yourself, but there are specific situations where calling a structural engineer, licensed contractor, or your building department is the smarter move, not a cop-out. Here's the honest list:
- Any deck attached to the house via a ledger board: ledger connections are the most common point of catastrophic deck failure. If you've never done a ledger attachment with proper flashing and IRC-compliant fasteners, get a structural inspection or hire a framer for that portion.
- Deck height above 30 inches: fall hazard, permit required, and railing design must meet code. This is not optional.
- Hot tub, heavy outdoor kitchen, or any concentrated load: have an engineer size the beams and footings for the actual load. Don't guess.
- Any work near a septic drainfield or within an easement: stop, call your health department, and get written setback confirmation before breaking ground.
- Soil that is soft, saturated, or consistently fails the 'foot impression' test after compaction: you may need engineered footings or a soil bearing test before proceeding.
- Slopes greater than about 6 inches across the build area without experience in building retaining walls or elevated framing: the engineering complexity increases significantly.
- Any permit situation where the inspector flags a design issue: don't argue, don't work around it. Get clarification, adjust the design, and re-inspect.
The line between a satisfying DIY build and a frustrating (or dangerous) experience is usually drawn at the foundation and framing level. Surface work, laying pavers, setting tiles, even installing decking boards, is well within reach for a patient beginner. Foundation decisions on elevated structures, attached builds, and problem soils are where professional input pays for itself many times over.
FAQ
How do I decide between a temporary, raised, or permanent patio deck over grass?
Decide by intended use, budget, and local rules: choose temporary (pavers on sand, modular tiles, floating deck on blocks) for short-term or rental properties and lowest cost; choose raised (framed deck on deck blocks, ground screws, or shallow footings) when you need height, storage/clearance, or to level uneven ground; choose permanent (framed deck on code footings or ledger-attached deck) for long-term value, heavy loads, or if attaching to the house. Consider permits, frost depth, and soil — permanent decks require more design, permit checks, and long-term drainage planning.
What site and permit checks should I do before starting?
1) Call 811 (or your local one-call) to locate utilities before digging. 2) Check local building department for permit triggers — typical triggers: attached decks, deck height >30 in, or footprint over local area thresholds. 3) Verify property lines and HOA rules. 4) Check septic/leach-field locations and local health department setbacks (drainfields often have large setbacks; don’t build over them). 5) Review local frost-depth and soil-bearing info (NRCS Web Soil Survey) to size footings or choose ground screws. 6) Ask AHJ about ledger attachment rules, required hardware corrosion class, and whether floating systems are allowed without a permit.
Quick checklist of safety and permit reminders I must follow
Always call 811 before digging; confirm permits with the AHJ; use code-approved fasteners (hot-dipped galvanized or stainless per IRC R507); follow local frost-depth footing requirements; flash and waterproof ledger connections; maintain required setbacks from septic/wells; wear PPE and follow ladder/excavation safety; when in doubt, get a plan stamped or hire a pro.
How do I build a paver patio over grass (basic step-by-step)?
1) Mark and excavate sod and topsoil to required depth (typically 6–8 in for pedestrian patio: 4 in compacted base + 1 in bedding + paver thickness). 2) Compact subgrade; add geotextile if desired for separation. 3) Place and compact aggregate base in 2–3 lifts to required thickness; check slope for drainage (1–2%). 4) Screed 1 in of bedding sand (ASTM C33) over the base. 5) Lay pavers in chosen pattern with tight joints and straight lines. 6) Install edge restraint (plastic, metal, or concrete). 7) Sweep polymeric or joint sand into joints; compact and re-sweep. 8) Clean and water per manufacturer. Note: increase base thickness for weak soils or frost-prone areas.
How do I build a floating deck on deck blocks (ground-level)?
1) Confirm local code allows freestanding decks and that frost-heave is not a major risk. 2) Clear and level grass; optionally remove topsoil and add crushed stone for drainage. 3) Place precast deck blocks on compacted pads in a layout per joist spacing. 4) Set pressure-treated sleepers or beams into blocks, ensure they are level and square. 5) Install joists and blocking; attach decking. 6) Provide drainage gaps and ventilation under deck; add weed barrier under the footprint. Limitations: not for attached decks, heavy concentrated loads, or frost zones where blocks may heave.
How do I build a framed raised deck on footings or ground screws (step-by-step)?
1) Design: determine layout, spans, and footing spacing using span tables or engineer. 2) Obtain permits and mark utilities. 3) Set stringlines, establish grades, and locate footings. 4) Excavate and install code-depth concrete footings or install ground screws per manufacturer torque specs. 5) Set post anchors or sonotubes with piers; ensure posts are plumb. 6) Attach beams to posts; install joists using joist hangers and follow span/spacing. 7) Install blocking, ledger (if attached — flash and use specified fasteners), and decking. 8) Add stairs, railings, and under-deck ventilation/drainage provisions. Inspect per permit.
How to Patio Over Grass: DIY Steps, Base, and Weed Control
DIY steps to patio over grass: base prep, weed control, drainage, pavers, slabs, gravel, and tool cost tips for durabili