Yes, you can build a patio on top of grass, but whether you should depends heavily on the method you choose and how long you want it to last. For temporary setups like interlocking deck tiles, gravel mats, or paver pads, laying directly over turf is genuinely workable. For permanent patios made from concrete, sand-set pavers, or compacted gravel, building on living turf without proper prep leads to settlement, uneven surfaces, and eventual failure. The grass and organic soil beneath will compress and decompose, pulling your patio down with it.
Can You Build a Patio on Top of Grass? Practical DIY Guide

Nolan Lennox
24 Jul 2026
Can you realistically build a patio on top of grass?
I've built patios both ways, and here's what I've learned the hard way: the answer isn't a flat yes or no, it's a "yes, if." If you want a weekend project that looks good for a season or two without a major commitment, you absolutely can lay deck tiles or set down a compacted gravel area right over turf. But if you're pouring concrete or setting pavers you plan to use for 20 years, you need to strip the sod and build a proper base. Burying live grass under pavers causes the organic material to decompose, the soil to compress unevenly, and your surface to sink in patches within a couple of years. It also smells. I've seen it happen on my own first attempt, and it's not a fun fix.
The key distinction is permanence. Temporary and semi-permanent options are designed to sit on top of an imperfect surface. Permanent hardscape systems are engineered to work with a prepared, compacted subgrade. Understanding which category your project falls into before you buy a single paver will save you real money and frustration.
Decision checklist: should you build over turf or remove it?
Run through these questions before you commit to either approach. Your answers will tell you more than any general rule.
- How long do you want this patio to last? Under 3 years: over-turf methods work. 5+ years with minimal maintenance: remove and prepare the ground.
- What material are you using? Deck tiles and gravel mats can tolerate imperfect bases. Sand-set pavers, poured concrete, and compacted gravel patios cannot.
- What is your soil type? Clay or poorly drained soil compresses badly under load and holds moisture. Sandy, well-draining soil is more forgiving for lighter builds.
- Does the area slope away from your house? You need at least a 1% to 2% grade (roughly 1/8 inch per foot) for drainage. If water pools in the area now, it will pool under your patio too.
- Do you live in a frost-prone region? Freeze-thaw cycles heave shallow surfaces. In cold climates, a properly compacted aggregate base is not optional for anything permanent.
- What is the intended load? Furniture and foot traffic: standard. Hot tub, heavy planters, or vehicle access: you need engineered thickness and compaction.
- Are there tree roots in the area? Root systems under a patio will continue to grow, crack surfaces, and make leveling a recurring battle.
- Is there a septic leach field nearby? Never build permanent hardscape over a leach field without understanding access and legal restrictions.
- Do you need a permit? Patios under a certain size are typically exempt in most jurisdictions, but rules vary. Check locally before you start.
Pros and cons: building on grass versus removing the turf
Neither approach is universally right. Here is an honest breakdown of what you're trading off with each.
| Factor | Building on Existing Grass | Removing Turf and Reworking Ground |
|---|---|---|
| Setup effort | Low to moderate | High, requires excavation and hauling |
| Upfront cost | Lower | Higher (labor, base materials, disposal) |
| Lifespan | Short to medium (1–5 years typical for most methods) | Long (10–25+ years with proper base) |
| Surface stability | Poor for permanent materials; acceptable for lightweight tiles | Excellent when compacted correctly |
| Drainage control | Difficult to manage properly | Can be engineered into the base |
| Frost heave risk | High in cold climates | Low if aggregate base is correctly sized |
| Weed/grass encroachment | Ongoing issue without robust suppression layer | Manageable with edging and geotextile |
| Reversibility | Easy to remove or adjust | Difficult and expensive to undo |
| Best for | Temporary, rental, budget, or low-use spaces | Permanent outdoor living areas |
My recommendation: if you're renting, not sure about the layout, or working with a tight budget, go over-turf with a reversible system. If you own the property and you're building something you want to use every summer for the next decade, do the excavation. The extra two days of prep work pays off every single year.
Choosing permanent vs temporary: lifespan, budget, and how you'll use it
Temporary and permanent aren't just about how long a patio lasts physically. They're about how much you're willing to spend, whether you might move or change the space, and how much ongoing maintenance you're comfortable with. I think of it as a spectrum, not a binary choice.
- Temporary (1–3 years): Deck tiles, rubber paver pads, gravel in contained areas, ground-level platforms on plastic feet. Cost is usually under $5–$8 per square foot installed. Minimal prep, easy to relocate.
- Semi-permanent (3–10 years): Compacted gravel with edging, stepping-stone paths, sand-set concrete pavers with a basic base. Cost ranges roughly $8–$20 per square foot depending on material and how much base work you do.
- Permanent (10–25+ years): Properly bedded interlocking pavers with ICPI-spec base, poured concrete slab, natural stone on mortar. Cost typically starts at $15–$30+ per square foot for materials alone in a DIY build.
Budget is usually the deciding factor, but so is intended use. A seating area for two chairs and a side table doesn't need the same base as a full outdoor kitchen or a hot tub pad. Match the system to the actual load and the number of years you realistically plan to stay in the home. There is no award for over-engineering a rental property patio.
Inexpensive and temporary patio options for grass
These options work directly over turf with minimal prep, and most of them can be set up in a day. For step-by-step guidance and material lists, see how to make a temporary patio for quick setup and tips. They are honest solutions, not just stopgaps, as long as you know their limits. For step-by-step instructions and materials for short-term installations, see our guide on how to make a temporary patio on grass.
Interlocking deck tiles
Composite or wood-look deck tiles snap together in a grid and sit on plastic feet that let air and moisture circulate underneath. They look sharp, they're genuinely fast to install, and most systems can be picked up and reconfigured without tools. The caveat: they require a reasonably flat, firm surface. Soft, springy turf will flex under them, leading to uneven tiles. Mow the grass short, let the area dry out, and if the ground is very soft, put down a layer of compacted screenings or fine gravel first. Manufacturers like NewTechWood explicitly state that their tiles should go on a stable, level base, not spongy living turf.
Paver pads and stepping-stone grids
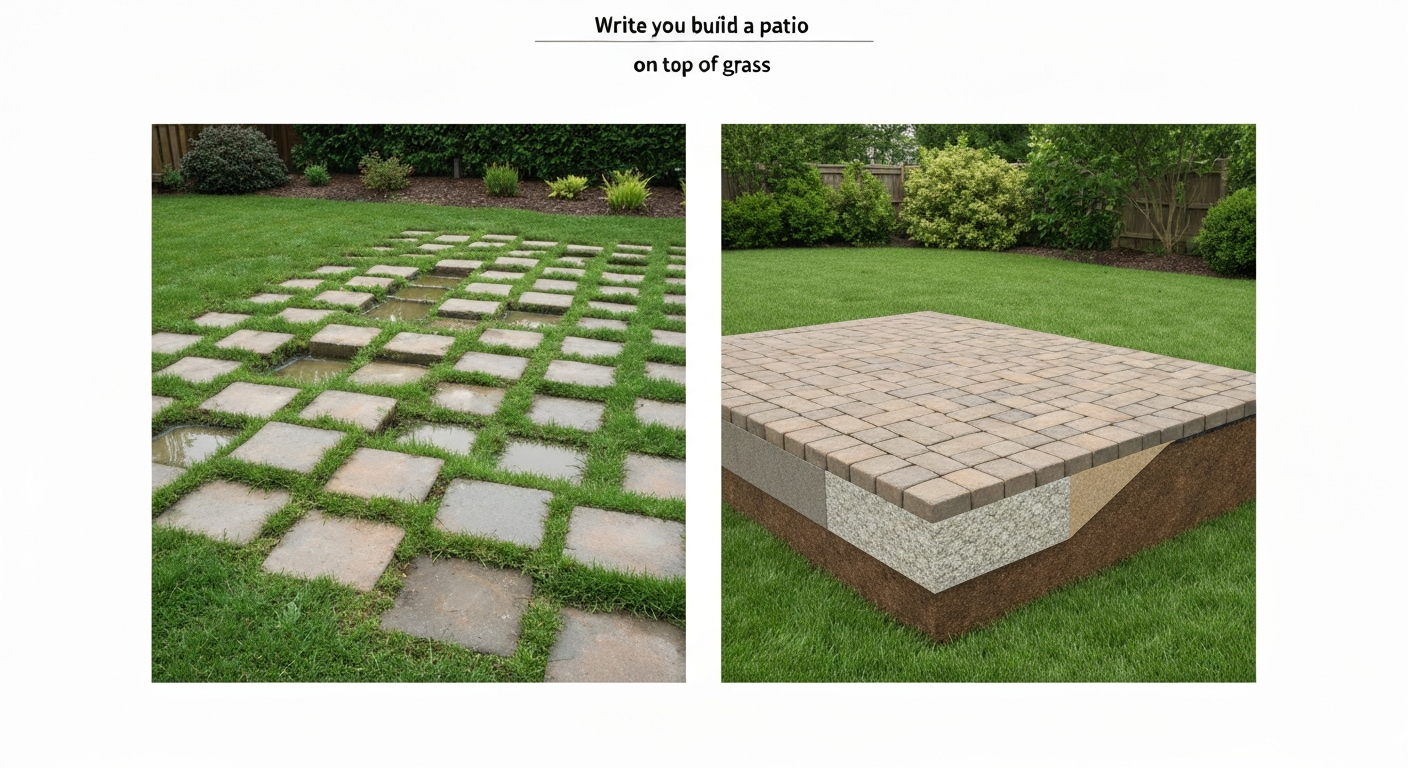
Individual concrete or rubber paver pads placed on tamped-down turf are a solid budget move for smaller areas. Tamp the soil, level each pad with a rubber mallet and a level, and you're done. They will shift over time as the ground freezes, thaws, and compresses, so plan to relevel annually. This is a fine approach for a side path or a small seating spot, less so for a full patio where a level surface matters more.
Gravel mats and contained gravel areas
A defined gravel area outlined with landscape edging or timber borders is one of the cheapest patio-style setups you can build on grass. Kill or remove the turf in the area, lay a weed-suppression fabric (knowing it suppresses weeds in the short to medium term but isn't permanent, per university extension research), add 3–4 inches of pea gravel or crushed stone, and edge it cleanly. Budget: as low as $1–$3 per square foot in materials. It won't be perfectly level, it won't feel as solid underfoot as pavers, and gravel migrates over time, but for a budget-conscious casual space it's hard to beat.
Mulch and wood chip areas
Deep wood chip or bark mulch areas work well as informal outdoor spaces, especially in shaded spots where hardscape feels out of place. They're the softest underfoot, the cheapest to install, and they decompose into the soil over time, which means you'll replenish them every year or two. Not ideal for furniture that sinks in, but perfectly fine for Adirondack chairs, fire ring areas, or play spaces.
Overview of permanent on-ground patio methods
Permanent patios require removing sod and organic topsoil, building a compacted aggregate base, and then installing your surface material on top. Here's how the most common methods compare.
| Method | Base Required | Typical Thickness | Relative DIY Difficulty | Approx. Material Cost (per sq ft) |
|---|---|---|---|---|
| Sand-set concrete pavers | 4 in compacted gravel + 1 in bedding sand | 6–7 in total below paver | Moderate | $4–$12 |
| Poured concrete slab | 4 in compacted granular subbase | 4 in slab minimum | Hard (forming, mixing/ordering, finishing) | $4–$8 |
| Compacted gravel patio | 4–6 in compacted crushed stone | 4–6 in | Easy to moderate | $1–$4 |
| Natural stone on sand/mortar | 4 in compacted gravel + sand or mortar bed | 6–8 in total | Moderate to hard | $8–$20+ |
| Sleeper/timber grid patio | Leveled, compacted base or pier footings | Varies by design | Moderate | $6–$15 |
Sand-set interlocking pavers
This is the most popular DIY permanent patio method for good reason: it's forgiving, repairable, and looks great. The ICPI and CMHA specify a minimum 4-inch compacted aggregate base over well-drained soils, plus a 1-inch nominal bedding sand layer using correctly graded concrete sand (ASTM C33 spec). Edge restraints anchored into the base, not just the soil, are required to prevent lateral spreading. See the Paver installation guide (ICPI‑aligned) for details showing that edge restraints must be anchored into the compacted base, not just into soil. After laying pavers, sweep in polymeric jointing sand and compact the surface with a plate compactor to lock everything in place. Do not skip the compactor step.
Poured concrete slab
A 4-inch poured slab is the most durable DIY patio surface, but it's also the hardest to get right. The Portland Cement Association recommends 4 inches over a compacted granular subbase for foot traffic and standard furniture. Hot tubs and heavy loads need more thickness and possibly rebar reinforcement. Once poured, concrete is permanent and difficult to remove, so make sure you're happy with the placement before you commit. Cracking from frost heave or settling is the main failure mode when the subbase work is skipped or rushed.
Compacted gravel patio
A compacted crushed-stone patio is underrated by a lot of DIYers. Remove the sod and topsoil, lay a geotextile separation fabric over the subgrade, fill with 4–6 inches of angular crushed stone or compacted gravel in lifts, edge it well, and you have a permeable, affordable, and surprisingly attractive outdoor space. Gravel patios do require periodic replenishment and releveling, especially after heavy rain or freeze-thaw cycles, but the upfront cost is the lowest of any permanent method.
Site prep and drainage essentials
This is the section most DIYers skim and then regret skimming. Good site prep is what separates a patio that looks great in year five from one that looks terrible in year two.
Grading and slope
Your finished patio surface needs to slope away from any structure at a rate of at least 1% to 2%. In practical terms, that's about 1/8 inch of drop per linear foot. This sounds trivial, but getting it wrong means water pools on the surface and migrates toward your foundation. Set up string lines and check slope with a level before you excavate, not after. Adjusting the slope of a finished patio is expensive and tedious.
Drainage through the base
Surface slope handles runoff, but the base also needs to drain. Clay-heavy soil that holds water is a real problem: water trapped under a compacted base has nowhere to go and causes frost heave in winter and soft spots in summer. If your yard has poor drainage, you may need to install a perforated drain pipe at the edge of the excavation, or reconsider your material choice in favor of a permeable system like open-graded pavers or compacted gravel.
Frost depth and freeze-thaw
If you're in a frost-prone region, the freeze-thaw cycle is the single biggest threat to a shallow patio. The International Residential Code (IRC) publishes frost depth maps by region, and while a patio slab isn't a structural footing, the principle applies: if your base doesn't extend below the frost line, moisture in the soil freezes, expands, and pushes your surface up. In colder climates, use a thicker open-graded aggregate base and ensure excellent drainage so moisture doesn't accumulate under your patio in the first place.
Soil assessment
Before you dig, understand what you're working with. The USDA NRCS publishes soil surveys you can look up by address, which give you drainage class, soil texture, and bearing capacity. Soft, high-organic, or clay-heavy soils may need to be over-excavated and replaced with structural fill. You can do a simple field test: grab a handful of subsoil after you've stripped the topsoil. If it ribbons between your fingers when wet and barely crumbles, it's clay-dominant and needs attention. Sandy or gravelly native soil is much more cooperative.
When to remove topsoil (and how deep to dig) versus when building over turf is safe
The topsoil and organic layer under your lawn is what makes your grass green and also what makes it a terrible base for hardscape. Organic material compresses, retains moisture, decomposes, and continues to do all of these things after you bury it under pavers or concrete. Standard practice from municipal specs and contractor guides alike is to remove sod and topsoil down to the planned subgrade elevation before building anything permanent.
How deep to excavate
The depth you need to excavate depends on your material and base requirements. For a typical sand-set paver patio, you're removing enough soil to accommodate the compacted aggregate base (4 inches minimum), a 1-inch bedding sand layer, and the paver thickness itself, usually 2–3 inches. That puts you at roughly 7–8 inches of excavation. For a 4-inch concrete slab with a 4-inch subbase, you're digging around 8 inches total. For a simple compacted gravel patio, 5–6 inches is usually enough. Always add an inch or two as a buffer if your topsoil is particularly deep or organic-rich.
Dealing with tree roots and organic layers
Tree roots are a wildcard. Small surface roots can be cut and removed during excavation. Major roots from nearby trees will continue to grow and will eventually lift or crack any rigid surface you install over them. If the area has significant root presence, either choose a flexible paving system or relocate the patio. Organic topsoil that's thick (more than a few inches) and spongy should always be removed and replaced with engineered aggregate, not buried in place.
When building directly over turf actually works
Building on top of existing turf without major excavation is genuinely fine in a few specific scenarios: you're using a reversible system (deck tiles, rubber pavers, gravel mat) that's designed for it; the area is very well-drained and won't be bearing heavy loads; and you understand that some settling and releveling will be needed over time. For step-by-step instructions, tool lists, and prep checklists, see our guide on how to patio over grass. If your planned area overlaps a septic leach field, review specific guidance on whether you can build a patio over a leach field before proceeding can you build a patio over a leach field. For anything where level matters and you want it to stay level, strip the turf. For step-by-step instructions, see our guide on how to build a patio deck over grass. For step-by-step guidance on installing a patio directly over turf, see how to make a patio on grass. For something casual and adjustable, you can work with what's there.
Compaction targets
Once you've excavated and are building your base, compaction is critical. Residential patio specs commonly target 95% of Standard Proctor density (ASTM D698) for both the subgrade and aggregate base layers. In practice, this means using a rented plate compactor and compacting aggregate in lifts of no more than 4 inches at a time, not dumping 8 inches of gravel and running the compactor once over the top. Cutting corners here is the single most common reason DIY patios develop uneven spots in years two and three.
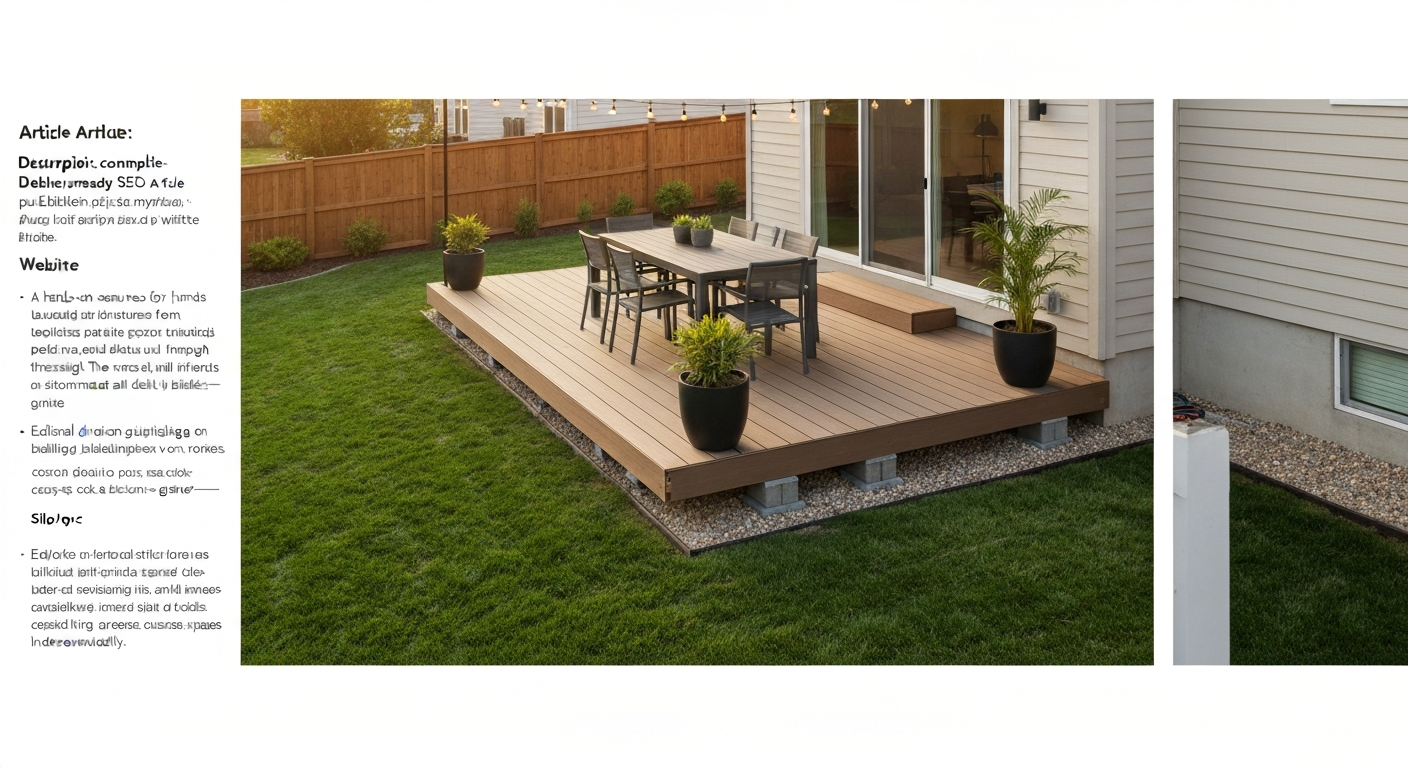
Building a raised patio or a floating deck over grass follows slightly different rules, since you're working with footings or elevated frames rather than a ground-level base, and the same applies if you're exploring a cheap-and-simple approach that skips major excavation altogether. Those builds have their own prep requirements and tradeoffs worth understanding before you start.
FAQ
Can you build a patio on top of grass?
Yes — but usually not by simply laying hard materials directly on live turf. Building a durable patio typically requires removing or reworking the turf/topsoil, installing a proper compacted base (or a correct floating/raised system), and addressing drainage and edging. Temporary, low‑load solutions exist that need less prep but have shorter lifespans and more maintenance.
When is it feasible to leave the grass and build on top of it?
Leaving grass in place is only practical for very temporary, light‑use solutions (e.g., temporary deck tiles, portable flooring, or short‑term event platforms) where you accept unevenness, settlement risk, and potential turf damage. For any permanent patio, pavers, gravel, or concrete, remove the turf and organic topsoil and build a compacted granular base for stability and drainage.
How do I choose permanent vs temporary patio solutions?
Consider intended lifespan, weight and use (furniture, barbecue, hot tub), budget, site drainage, slope, local freeze‑thaw conditions, and permits. Temporary: modular deck tiles, plastic grids over a leveled subsoil — low cost, fast install, higher maintenance. Permanent: compacted aggregate base with pavers/concrete/stone — higher upfront cost, long life. Raised deck: good when you want to avoid digging or need to clear grade/vegetation and can handle framing, footings, and clearance.
What are common material options for building a patio on or over grass?
Permanent: concrete slab (4 in min for residential foot traffic), interlocking concrete pavers with compacted aggregate base and bedding sand, natural stone on compacted base, permeable pavers with reservoir base. Inexpensive/temporary: crushed gravel on minimal prep, plastic/gridded turf reinforcement, floating deck tiles or composite interlocking tiles. Raised options: timber sleepers, framed wood or composite deck built on posts or adjustable pedestals.
What basic site‑preparation and drainage steps are required?
1) Mark and remove sod and organic topsoil to design subgrade elevation. 2) Check and correct slope for positive drainage away from structures (~1–2% or ~1/8–1/4" per foot). 3) Install geotextile over weak soils when needed. 4) Add and compact aggregate base in lifts to specified thickness. 5) Provide edge restraints for pavers or edging for gravel. 6) Ensure runoff is directed to a safe outlet or infiltration area.
What are simple step‑by‑step build plans for common methods?
Pavers (permanent, simplified): 1) Remove sod/topsoil to depth for base + bedding + paver thickness. 2) Compact subgrade, add geotextile if weak. 3) Install aggregate base (typically 4–6 in compacted) in lifts, compact each lift. 4) Screed ~1 in bedding sand, lay pavers, cut edge pieces. 5) Install edge restraint anchored into base. 6) Sweep joint sand (or polymeric sand) and compact surface. Gravel patio (budget): 1) Remove sod only if shallow; better to strip to reduce organic mixing. 2) Compact subgrade, install landscape fabric if desired. 3) Add 2–4 in crushed stone base, compact. 4) Add 1–2 in fine gravel or decomposed granite, compact, edge with timber or metal. Floating deck (over grass): 1) Level/grade and install ground contact posts or adjustable footpads. 2) Build frame with treated lumber, add joists. 3) Install decking boards or tiles. 4) Provide ventilation and avoid trapping moisture under decking.
Next Article
How to Build a Patio Deck Over Grass: DIY Guide & Options
How to build a patio deck over grass: step-by-step DIY guide with decisions, materials, costs, and permit tips.