Evening ground for a patio means two things working together: a surface that's flat enough to walk and sit on comfortably, plus a gentle slope away from your house so water drains off instead of pooling under your pavers or rotting your deck boards. You want 1/4 inch of drop for every foot of patio distance away from the foundation. That's the target. Get that right, build a solid compacted base under it, and you'll have a patio that stays flat for years instead of one that rocks, sinks, or turns into a puddle every time it rains.
How to Even Ground for Patio: DIY Leveling Steps

Nolan Lennox
11 Jun 2026
What 'even ground' actually means for a patio
People assume leveling a patio means making it perfectly flat, like a tabletop. That's actually wrong, and if you do it that way, you'll end up with standing water every time it rains. True 'even ground' for a patio has two components. First, it needs to be consistent and smooth so nothing rocks or creates tripping hazards. Second, it needs a deliberate drainage slope built in from the start.
The standard drainage slope for any patio surface blank" rel="noopener noreferrer">within 10 feet of your house is 1/4 inch per foot, directed away from the foundation. On a 12-foot-deep patio, that means the far edge sits 3 inches lower than the edge closest to your house. That's enough to move water away efficiently without making the surface feel like you're standing on a ramp. The acceptable range is 1/8 inch to 1/4 inch per foot (roughly 1% to 2% slope). Stay in that window and you're golden. Go flatter and water pools. how to make a level patio. Go steeper and it feels and looks wrong.
When people talk about leveling for a patio, they're really talking about controlling that slope precisely across the whole surface, not just at one spot. A patio can look flat but still have low spots that collect water or high spots that make a chair wobble. The goal is a consistently graded surface with no surprises.
Assess your site before you move a single shovelful
Don't skip this step. Spending 30 minutes reading your yard now saves you hours of rework later. You need to find three things: where the high and low spots are, what direction water naturally flows, and what your soil is like underneath.
Find the high and low spots

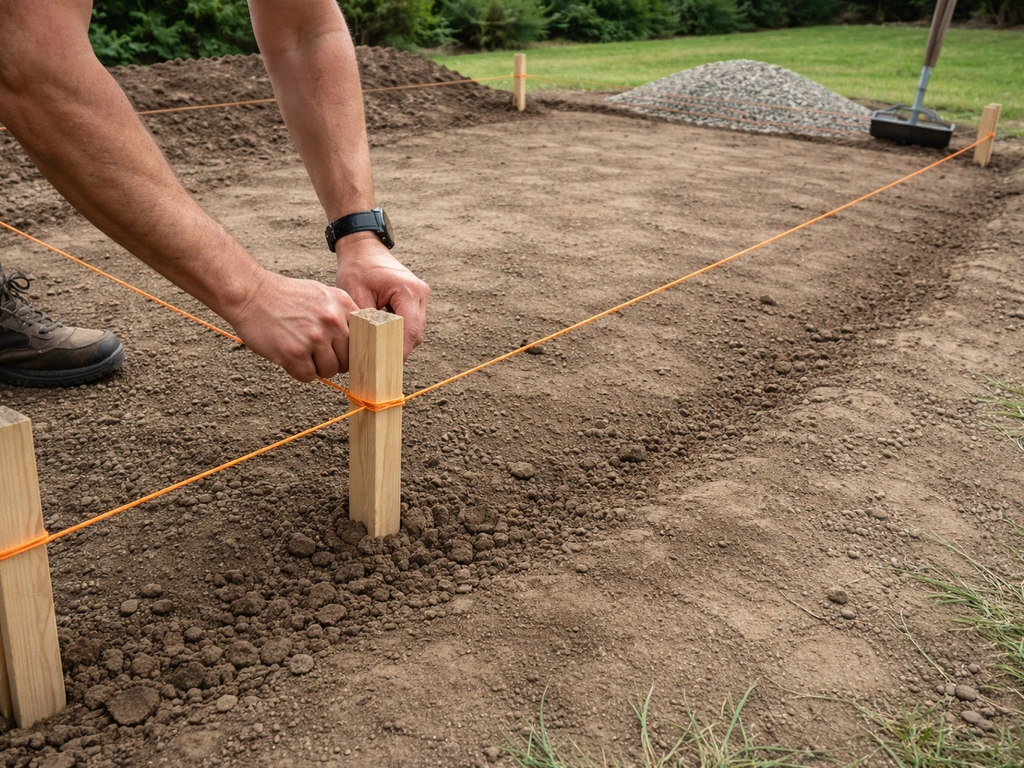
Drive a stake at each corner of your planned patio area. Run string lines between them and use a line level (a small bubble level that clips onto the string) to get the strings level. Once they're level, measure down from the string to the ground at multiple points across the area. A spot where you measure 4 inches down is higher than a spot where you measure 7 inches down. Map it out. Even a rough sketch with measurements at 2-foot intervals will show you exactly where you're cutting and where you're filling.
If you have access to a laser level, use it. Rent one for around $40 to $60 a day from any home improvement store. A laser gives you a reference plane across the whole area at once, which is faster and more accurate than string lines for larger patios. For anything over 200 square feet, the rental is worth every penny.
Check your soil conditions
Dig down 6 to 8 inches at a few spots and look at what you've got. Clay soil holds water and shifts with freeze-thaw cycles, which means you need to be especially careful about compaction and drainage. Sandy or loamy soil drains well but can settle under load if it's not compacted. If you find soft, spongy soil or organic material like old roots and debris, dig it all out. You cannot compact organic material into a stable base. It will rot and your patio will sink.
Also check if the ground currently slopes toward your house. If it does, this is a more involved fix. You'll either be cutting down the high side significantly, adding substantial fill on the low side, or regrading the surrounding yard to redirect water before it gets to your patio area.
If you need to add more than 4 to 6 inches of fill over a large area, take a look at guides on how to build up ground for a patio or how to raise a patio area, because those involve additional structural considerations. If you are adding more height, plan your excavation and base thickness carefully so the added soil and gravel remain stable over time build up ground for a patio.
Choose the right base for your patio type
The base system under your patio surface is where the real leveling work happens. Different patio materials need different base approaches, and getting this wrong is the number one reason patios fail.
| Patio Material | Base System | Total Excavation Depth | Notes |
|---|---|---|---|
| Concrete pavers / brick | 4–6 in. compacted gravel + 1 in. bedding sand | 6–8 in. below finished grade | Sand layer allows fine adjustment before setting pavers |
| Natural stone / flagstone | 4–6 in. compacted gravel + 1–2 in. bedding sand | 7–9 in. below finished grade | Thicker stones need less sand; use DG or stone dust for irregular shapes |
| Poured concrete slab | 4–6 in. compacted gravel base | 4–6 in. + slab thickness (4 in. min) | No sand layer; slope is built into the form, not the base |
| Concrete tile / porcelain | 4–6 in. compacted gravel + mortar or thin-set on slab | Slab + tile thickness | Needs slab-level base; tile cannot tolerate movement |
| Composite / wood decking | Graded and compacted subgrade only | Varies by framing height | Drainage slope built into frame; ground should slope away beneath it |
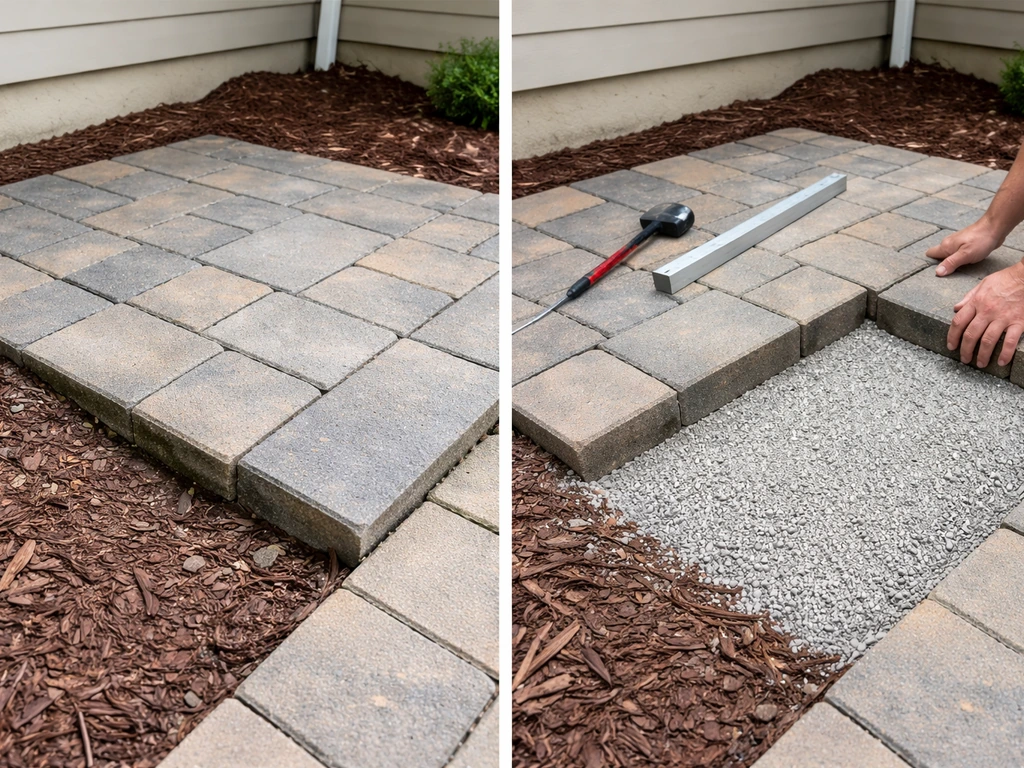
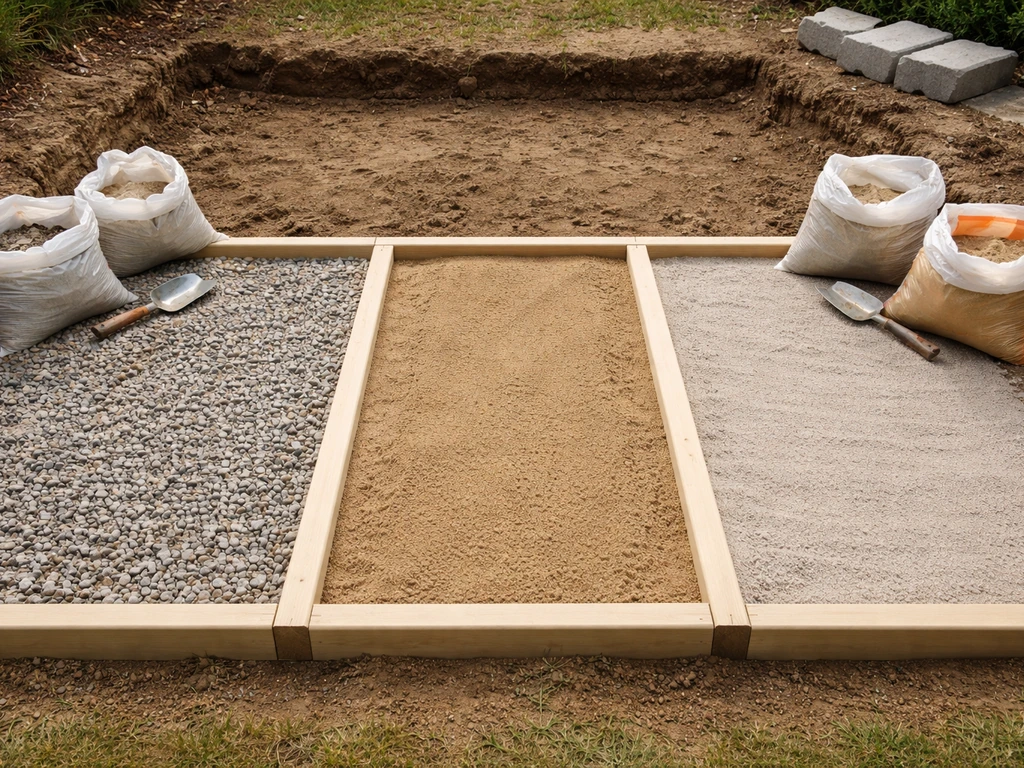
For pavers, brick, and stone, the system is always compacted gravel base first, then a layer of bedding sand (also called leveling sand or course sand) on top. If you are working with pavers, the next step is to follow the ground level for patio process so the drainage slope and base stay consistent. The gravel handles drainage and load distribution. The sand is your fine-tuning layer where you set the exact slope and smooth out any remaining irregularities. Never use fine play sand or polymeric sand as your bedding layer. Use coarse concrete sand or stone dust.
For poured concrete slabs and tile-on-slab setups, the slope is built into the concrete form itself, not into a sand layer. Your compacted gravel base needs to be level and consistent, but the drainage pitch is established when you pour and screed the concrete. For wood or composite patios, you're grading the ground beneath the structure for drainage, but the actual levelness of the walking surface comes from your framing, not the dirt.
Step-by-step leveling workflow
Here's the actual process from raw ground to a ready-to-pave base. Take it one phase at a time and don't rush the compaction steps.
Step 1: Set your reference lines with the drainage slope built in
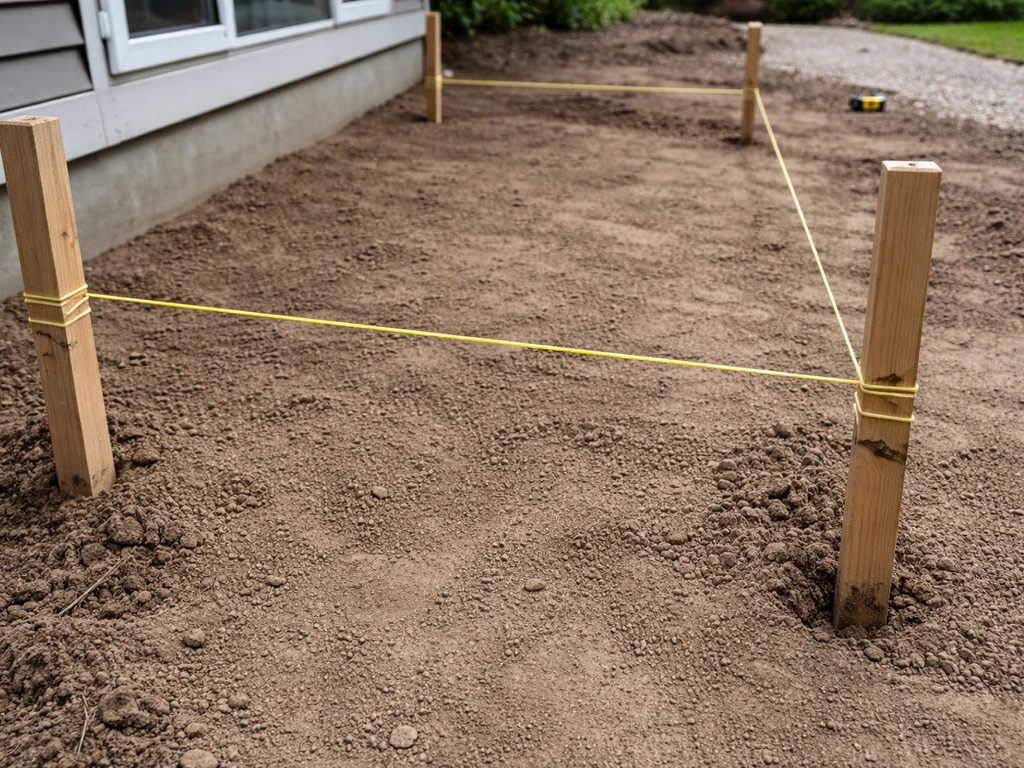
Drive stakes at each corner of your patio. On the stakes closest to your house, mark the finished surface height. On the stakes at the far edge, mark that same height minus your drainage drop. For a 10-foot patio with 1/4 inch per foot of slope, the far edge stakes get marked 2.5 inches lower than the house-side stakes. Run string lines between matching stakes. These strings represent your finished surface grade. Everything you do below happens a calculated distance under these lines.
Mark your string positions: finished surface height, minus paver or slab thickness, minus bedding sand thickness (1 inch for pavers), minus your gravel base depth (4 to 6 inches). That's how deep you need to excavate. Write the number down. It'll be different at every corner if your yard isn't already graded.
Step 2: Excavate and remove
Dig out the area to your calculated depth, cutting into the high spots and removing sod, roots, and any soft material. Save the string lines as your reference throughout. After excavation, rake the bottom of the hole as flat and consistent as you can, then walk the entire area to identify any remaining soft spots. Dig those out and fill with gravel, not soil.
Step 3: Compact the subgrade
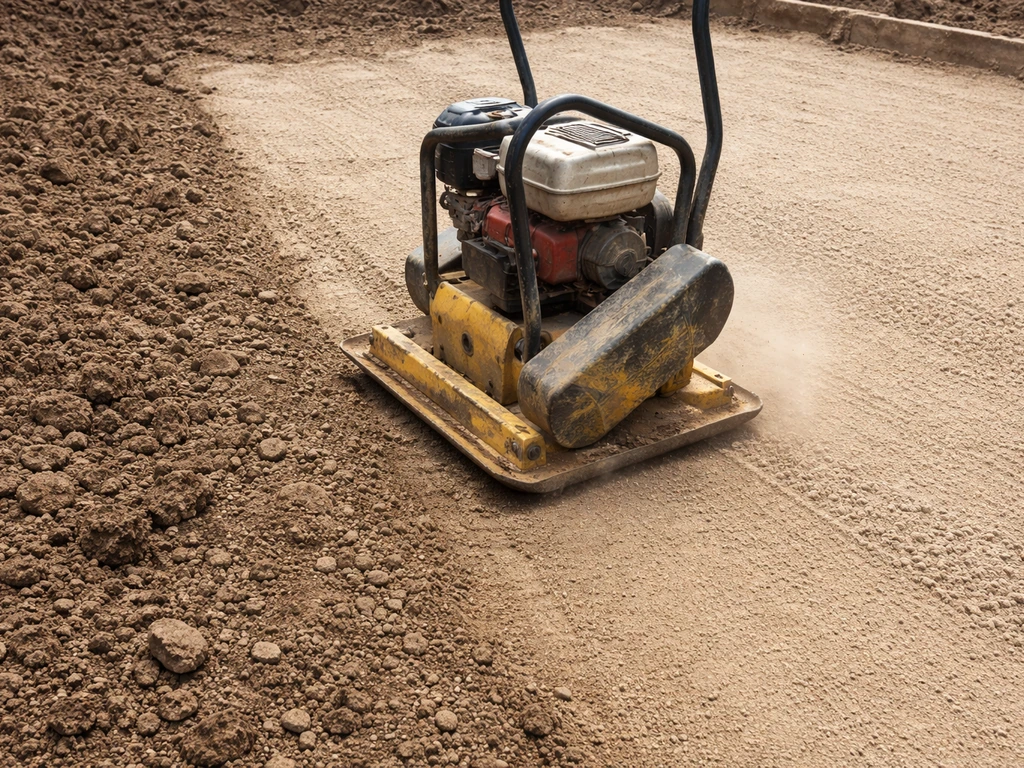
Rent a plate compactor. This is non-negotiable for any patio larger than about 50 square feet. A hand tamper just doesn't give you enough force to properly compact soil. Run the plate compactor over the entire excavated area in overlapping passes. If you have clay soil, lightly mist it before compacting to help it bind. After compacting, the surface should feel solid underfoot with no give.
Step 4: Lay and compact your gravel base
Add processed gravel (also called road base, crusher run, or compactable gravel) in 2 to 3 inch lifts, compacting each lift before adding the next. Don't dump in 6 inches and compact it all at once. Thin lifts compact properly; thick ones don't. Use your string lines to check depth as you go. After the final compaction, your gravel surface should reflect the same slope as your string lines, minus the bedding sand and material thickness.
Step 5: Screed the bedding sand (for pavers, brick, and stone)

Lay two 1-inch diameter pipes or conduit on the compacted gravel, running parallel to each other about 6 feet apart. These are your screed rails. Fill between them with coarse concrete sand, then drag a straight 2x4 across the pipes to pull the sand into a perfectly even 1-inch layer. Remove the pipes, fill those channels with sand, and lightly tamp the filled spots. Do not compact the sand after screeding. You want it firm but undisturbed so you can set pavers directly on it.
Step 6: Check, adjust, and start laying
Before you set a single paver, check your screeded sand surface against your string lines one more time. Measure down from the string at multiple points. The distance should equal exactly your paver or material thickness. Fix any spots that are off. Once you start setting pavers, avoid walking on the screeded sand. Work from the laid surface or use a kneeler board to distribute your weight.
Leveling for different patio materials
The workflow above covers the core process, but each material type has some quirks worth knowing about before you start.
Concrete pavers and brick
Pavers and brick are the most forgiving for DIYers because you can adjust individual pieces after laying them. They sit on that 1-inch sand bed and can be lifted, shimmed, or tapped down with a rubber mallet until they're right. The standard flatness tolerance for a paver surface is no more than 3/8 inch deviation over a 10-foot straightedge. After setting all pavers, run the plate compactor over the surface (with a rubber pad attached to protect the paver faces) to lock everything into the sand.
Natural stone and flagstone
Natural stone varies in thickness, sometimes by half an inch or more within the same batch. You need to account for this as you lay each piece, adding or removing sand beneath individual stones to keep the surface consistent. Stone dust or decomposed granite works better than coarse sand for flagstone because it packs around irregular shapes more effectively.
Poured concrete
With concrete, the leveling work is almost entirely done before the pour. Your compacted gravel base and your forms set the slope. Once concrete is poured, you screed across the form tops and the drainage pitch is locked in. If your forms aren't set correctly, there's no fixing it after the pour. Take extra time setting forms and double-check slope with a level and tape measure before you order concrete.
Porcelain tile and concrete tile on slab
Tile needs a rigid, stable surface underneath it. It's typically installed over a poured concrete slab using thin-set mortar. The slab does all the work of maintaining slope and flatness. Tile itself has zero tolerance for movement or flexing, so if your base settles even slightly, grout cracks and tiles pop. This is a good reason to be meticulous about compaction and base depth if you're going the tile route.
Wood and composite decking
For wood and composite patios sitting on a ground-level frame, your job with the soil is simpler but still important. You need the ground underneath graded so it slopes away from the house (same 1/4 inch per foot rule), and you want the surface bare enough that vegetation doesn't grow up into your framing. A layer of landscape fabric and gravel beneath the frame handles both. The actual level walking surface is achieved through your framing and joists, not the dirt. That said, if the ground shifts significantly after installation, it can affect your frame, so good soil compaction still matters.
Drainage and finishing details that keep things stable long-term
Getting the base right is most of the battle, but a few finishing details make the difference between a patio that stays perfect for 15 years and one that starts shifting after the first winter.
Edge restraints are not optional
Any paver or brick patio without edge restraints will spread over time. The sand bed allows lateral movement, and without something holding the perimeter in place, pavers slowly migrate outward, leaving gaps and uneven surfaces. Install plastic or aluminum paver edging along all exposed edges, staked into the ground every 12 inches. It's cheap and it works. For areas where you want a more finished look, a soldier course of pavers set in concrete on the perimeter does the same job.
Geotextile fabric between soil and gravel
Lay a layer of woven geotextile landscape fabric on your compacted subgrade before adding gravel. This fabric separates the soil from your base material, preventing fine particles from migrating up into the gravel over time (a process called pumping). Without it, your gravel base gradually contaminates with soil fines and loses its drainage and load-bearing properties.
Leveling tolerances to aim for
For the finished surface, aim for no more than 3/8 inch variation when you lay a 10-foot straightedge across it. Transitions between pavers should have no more than 1/8 inch of height difference to avoid tripping hazards. Your slope should consistently measure 1/8 to 1/4 inch per foot across the entire patio, not just at one end. Check it in multiple directions, not just away from the house.
Handle water at the perimeter
Think about where water goes after it drains off your patio. If it runs onto a lawn or garden bed, that's fine. If it runs toward a neighbor's property, a low point near the foundation, or back onto the patio itself, you need a plan. A simple channel drain or strip drain at the low edge of the patio can collect runoff and direct it through a buried perforated pipe to a more appropriate location. This is worth planning before you lay a single paver rather than retrofitting it later.
Common DIY mistakes and how to fix them
I've made most of these myself at some point, so consider this a list of hard-won lessons. If your existing patio has sunk or rocked, you can follow the same drainage principles while you learn how to lift a patio and reset the base.
- Skipping soil compaction and going straight to gravel: The gravel compacts fine, but the soil beneath it settles unevenly under load. Fix: If your patio is already down and you have low spots forming, you sometimes can lift sections, re-compact beneath, add gravel, and relay. It's a pain, but it's the only real fix.
- Wrong slope direction or no slope at all: Some people level their patio perfectly flat because it feels right. Then they get puddles. Fix for an existing patio: If it's pavers, you can lift sections, add or remove sand, and re-lay. For concrete, you're looking at a resurfacer or drainage grooves, which is far more work.
- Using the wrong sand: Fine play sand or polymeric sand as a bedding layer is too fine. It washes out easily and doesn't compact well. Always use coarse concrete sand or stone dust for the bedding layer.
- Not accounting for material thickness: If your pavers are 2.375 inches thick instead of 2 inches, your finished surface ends up higher than planned. Measure your actual pavers before you set your excavation depth.
- Rocking or wobbly pavers right after laying: This almost always means the sand bed isn't consistent underneath that paver. Lift it, check the sand, fill low spots, and re-set. Don't tap it down hoping it'll stabilize.
- Wavy or humped surfaces after compacting with the plate compactor: This happens when sand isn't screeded evenly before paving or when the compactor picks up and shifts pavers. Use a long straightedge to find high spots after compaction and tap them down individually with a mallet, or use the compactor with a rubber pad.
- Skipping edge restraints: Pavers migrate. It's slow, but it happens. If your existing patio is already spreading, install edge restraints now and fill gaps with polymeric sand to stabilize what's there.
Tools and materials to have ready
Here's what you actually need to execute this properly, whether you're buying or renting.
| Item | Buy or Rent | Approximate Cost | What It's For |
|---|---|---|---|
| Plate compactor | Rent | $60–$100/day | Compacting soil and gravel base layers |
| Laser level or line level | Rent laser ($40–$60/day) or buy line level ($8) | Varies | Setting reference grades and checking slope |
| String line and stakes | Buy | $10–$20 | Marking perimeter and reference lines |
| Tape measure (25 ft min) | Buy | $15–$30 | Measuring depth and slope drops |
| Screed pipes (1 in. conduit) | Buy | $10–$15 for 10 ft | Screeding sand to consistent 1 in. depth |
| Straightedge or long level (6–8 ft) | Buy | $20–$50 | Checking surface flatness after laying |
| Rubber mallet | Buy | $15–$25 | Setting individual pavers without cracking |
| Geotextile landscape fabric | Buy | $0.10–$0.30/sq ft | Separating soil from gravel base |
| Compactable gravel (road base) | Buy | $25–$45/ton | Primary base layer |
| Coarse concrete sand | Buy | $20–$35/ton | Bedding layer for pavers/brick/stone |
| Paver edge restraints | Buy | $1–$2/linear ft | Holding patio perimeter in place |
You don't need to buy everything. The plate compactor and laser level are the two rentals that make the biggest difference in quality. Everything else is either inexpensive to buy or something you probably already have in your garage.
If your site has more complex challenges, like significant grade changes, areas that need major fill, or ground that slopes toward the house rather than away from it, some of the techniques around how to build a patio on uneven ground or how to raise a patio area go deeper into those specific scenarios. But for most standard patio installs on reasonably flat ground, the process outlined here is everything you need to get a stable, properly draining surface that will last. If you’re trying to get a patio level with the right drainage pitch, revisit the slope-and-base steps to match your patio size and materials get a stable, properly draining surface that will last.
FAQ
Do I really need a slope if my patio surface looks flat right now?
Yes, you still need the drainage pitch even if it looks flat. Use the string or laser reference to check for low spots, water will collect wherever the pitch is interrupted, like near doorways, along edges, or around a centerline if the grade was never corrected.
What if my patio distance from the house is more than 10 feet, is 1/4 inch per foot still the right target?
For most patios, keep using the 1/4 inch per foot rule (with the 1/8 to 1/4 inch per foot acceptable range). If your far edge would end up too low for doors, steps, or adjacent landscaping, you may need to regrade the surrounding yard or redesign the water route instead of forcing the same pitch everywhere.
How do I measure the slope correctly without confusing “flat” with “level”?
Measure height against a consistent reference, not just by feeling or using a single bubble level. Take multiple measurements from the string or laser plane at regular intervals, then confirm the overall drop matches your patio length times the target slope rate.
Can I use play sand or polymeric sand as the bedding layer under pavers?
Avoid play sand and polymeric sand as bedding. They do not provide the right stability, and polymeric products are intended for joint filling, not for the leveling bed, where you need controlled, drain-friendly compaction and fine adjustment.
How thick should the sand leveling layer be, and what happens if it is thicker than recommended?
For pavers, the process typically assumes about a 1 inch leveling sand bed. If you go thicker, the sand can compress unevenly under traffic and cause rocking, you might also end up short on excavation depth so the gravel base and final grade end up off.
Is it okay to compact the bedding sand after screeding?
No. After you screed, you want the sand firm from your base preparation, but not disturbed by additional compaction. Compaction after screeding can create waves, which then transfer directly into paver surface flatness.
What flatness tolerance is “good enough” for a patio, and how do I check it?
Aim for no more than about 3/8 inch variation over a 10-foot straightedge for paver surfaces. Check in both directions across the patio, and also along likely walking paths and seating zones, since small deviations become noticeable at chair legs and heels.
How do I handle a site that already slopes toward the house?
Plan for more than just “leveling” the patio. You may need significant cut on the high side and/or fill on the low side, and you should consider redirecting runoff before it reaches the patio via yard regrading, drainage swales, or a revised outlet location.
Do I need paver edging if I’m installing pavers against a wall or existing structure?
Edges still matter, even when one side is constrained. If there is any exposed perimeter, use edging and stake it appropriately, without restraint the sand bed allows lateral movement, and the patio can spread at the free edges over time.
Should I use landscape fabric under the gravel base, or can I skip it?
Use it if you want to reduce soil fines migrating into your base, which undermines drainage and load-bearing performance. Skipping fabric often leads to “pumping,” where fine particles move upward during wet and freeze-thaw cycles, causing settling and loss of stability.
Why does my patio still rock even after I leveled the sand?
Rocking usually means the base beneath the sand was not uniformly compacted or there is soft spot contamination (like organics or untreated voids). Recheck the gravel and subgrade, remove and replace the problematic zone rather than shimming only at the paver layer.
How do I prevent water from flowing back onto the patio after draining off-site?
Make sure the runoff has a clear path away from the foundation and away from the patio surface. If water could collect at a low spot near the house or run into the patio again, add a controlled drainage outlet, such as a strip/channel drain tied into a buried perforated line.
For concrete slabs, can I adjust slope after the pour?
No. With poured concrete, the pitch is established when forms are set and the slab is screeded. If forms are not correct before ordering and placing, you cannot reliably correct slope afterward without major work, like grinding, patching with controlled thickness, or complete removal in extreme cases.
Next Article
How to Lift a Patio: Fix Sinking, Settling, or Heaving
DIY guide to lift a sinking, tilted, or heaving patio: diagnose causes, reset pavers or concrete, and prevent future set