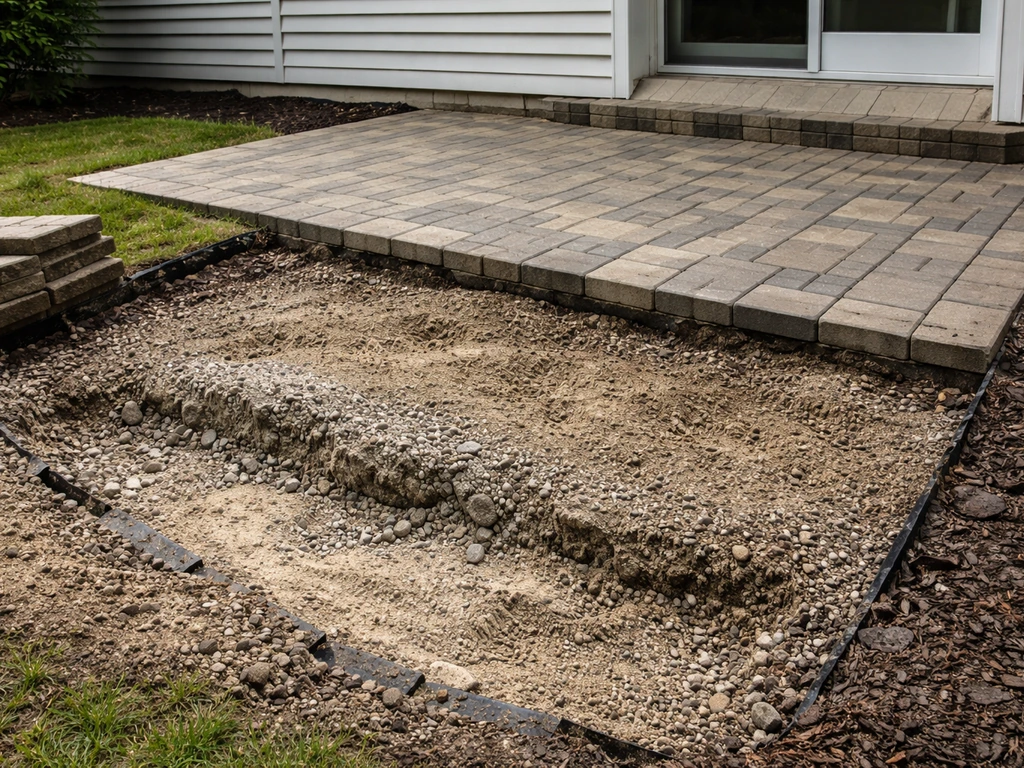
Raising a patio area means rebuilding or re-grading the surface to sit at a higher finished elevation, usually to fix drainage problems, level out settled ground, or bring the patio up flush with a door threshold. To figure out the exact finished height and how to raise patio level without causing drainage problems, measure from your door threshold and set the proper slope before you rebuild. You can do this by regrading and recompacting the existing base, adding more base material and rebuilding the surface on top, or constructing a raised platform with edging and retaining elements. Done right, with a proper compacted base, a 2% drainage slope (that's 1/4 inch drop per foot), and good edge restraints, you'll end up with a stable, long-lasting patio that sheds water and doesn't sink.
How to Raise a Patio Area: Step-by-Step DIY Guide


What 'raising a patio' actually means and when you need to do it
In practical DIY terms, raising a patio falls into two scenarios. The first is re-grading: your existing patio has settled or was installed at the wrong height, and you need to bring the surface up so water drains away from the house instead of pooling or running toward the foundation. The second is a full rebuild at a higher elevation, which usually happens when a door threshold is significantly above the old patio, when you're terracing a sloped yard, or when you're starting fresh on ground that needs to come up several inches before any surface material goes down.
The most common reason people go looking for this fix is standing water. If your patio sits flat or slopes toward the house, every rainstorm dumps water against your foundation. For uneven ground, you can often solve the pooling problem by rebuilding the base and learning how to build a patio on uneven ground without creating new low spots If your patio sits flat or slopes toward the house. Settlement is the second culprit: gravel base material that wasn't compacted properly shifts over time, and the patio sinks unevenly. Both problems are solvable, and both solutions start with the same foundation work.
It's worth knowing that raising the finished surface isn't the only way to fix an uneven or low patio. Sometimes the issue is just getting the ground level before you ever lay a surface, and other times it's about building up a low spot rather than raising the whole area. If your situation is more about correcting an isolated dip or working with a sloped yard, those specific challenges have their own approaches worth exploring.
Plan first: measure your elevation targets, slope, and site constraints
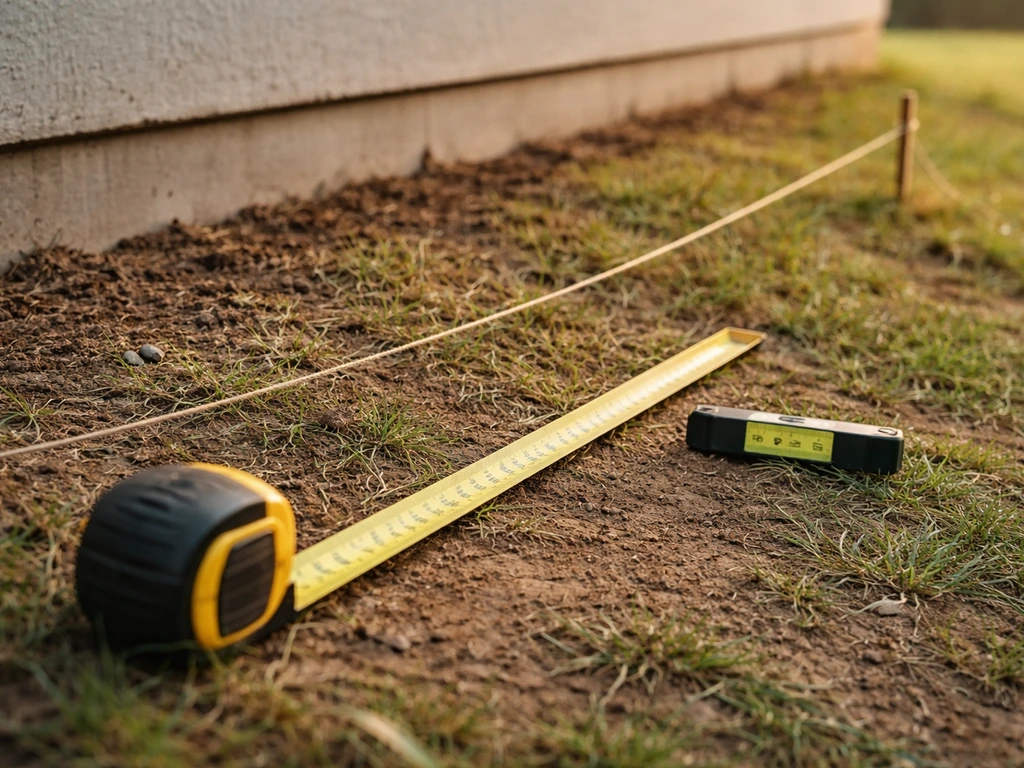
Before you move a single shovelful of dirt, you need two numbers: your target finished surface height and your drainage slope. Start at the house. Measure from the bottom of your door threshold (or sill) down to the ground. A finished patio surface should sit at least 1 to 2 inches below that threshold so rain can't splash back inside. That measurement gives you your high point.
From that high point at the house, the surface needs to slope away at a minimum of 1/4 inch per foot. So a 12-foot-deep patio needs to drop 3 inches from the house edge to the outer edge. That's the widely cited 2% grade standard for residential hardscape, and it's the minimum you want. If you build it flatter than that, the slope will likely disappear within a season or two as the base settles slightly, and you'll be back to standing water.
To establish your grade line, drive stakes into the ground at your four corners, tie nylon string between them, and use a line level (a small bubble level that clips onto the string) to get the strings perfectly level. Once you have a level reference line, you can measure down from the string to the ground at multiple points to understand how much your existing grade varies and how much material you need to add or remove. This string-line method is the same technique used by professional landscapers and it costs almost nothing to set up.
Before you start any digging, call 811. This is the national call-before-you-dig line in the US, and it's the law in every state. Most states require you to call at least two business days before excavation begins so utilities can come mark gas, electric, water, and cable lines. It's a free service and it takes about five minutes. Hitting a buried line is not a recoverable mistake, so don't skip it.
Also check your local frost line depth. In colder climates, freeze-thaw cycles are the enemy of shallow bases. If your region freezes deep (6 inches or more), your compacted base needs to be deep enough that it doesn't heave and shift every winter. The frost line map varies significantly by region, so look up your specific area before finalizing your base depth.
Choosing your build method: regrade, raise with base, or use retaining elements
There are three main approaches, and which one you pick depends on how much height you need to gain and what's already there.
Option 1: Regrade and recompact
If your patio surface has settled unevenly but the overall elevation is close to correct, you may be able to pull up the pavers or surface material, add a small amount of base material to the low areas, recompact, and relay. This is the least invasive and cheapest approach. It works well for paver patios where the pavers are in good shape and the settlement is limited to an inch or two in specific spots.
Option 2: Raise with a compacted base
If you need to bring the entire patio up several inches, you'll excavate or remove the old surface, add compacted gravel base in layers, and rebuild from scratch. This raised-base approach is often the best way to make a level patio when you need to gain several inches. This is the most common scenario for a full patio raise and is the approach covered in detail in the prep and build sections below. It works with any surface material: pavers, brick, gravel, concrete, or wood/composite decking.
Option 3: Retaining and edging systems
If you're raising a patio on a slope or raising it significantly above the surrounding grade, you'll need something to hold the raised area in place. That means retaining walls or substantial edging. Options include treated timber (easiest to DIY, lowest cost, but shorter lifespan of 10 to 15 years even with treatment), concrete block or CMU (durable, more labor intensive), and natural or manufactured stone (most attractive, widest cost range). The retaining element defines the perimeter of your raised area and holds back the compacted base material.
| Method | Best for | DIY difficulty | Relative cost | Lifespan |
|---|---|---|---|---|
| Regrade and recompact | Minor settlement, small elevation changes | Easy | Low | Depends on surface material |
| Raise with compacted base (full rebuild) | Gaining 2–8+ inches of elevation, fixing drainage | Moderate | Medium | 20+ years with pavers/concrete |
| Retaining/edging system + raised base | Sloped yards, large elevation changes, terracing | Moderate to hard | Medium to high | 15–30+ years depending on material |
For most homeowners raising a flat or gently sloped patio by a few inches to fix drainage, Option 2 (raise with a compacted base) is the right call. It's the most forgiving to DIY and produces the most durable result when the base is done correctly. If you're wondering how to lift a patio for better drainage, this approach is usually the most practical place to start.
Prep the ground: excavation, geotextile, subbase, and compaction
This is where most DIY patios succeed or fail. The surface material is almost secondary. A beautiful paver patio on a poorly prepared base will be cracked, sunk, and wavy within two or three winters. A simple gravel patio on a properly compacted base will look good for years. Don't rush this part.
Excavation
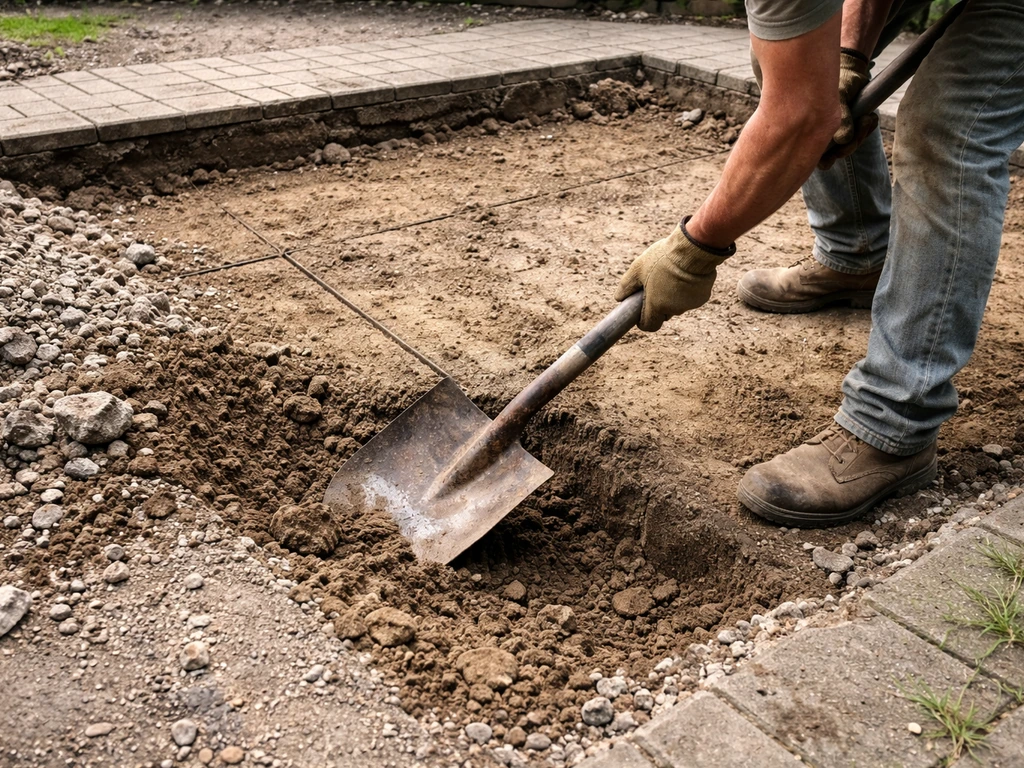
If you're rebuilding from scratch, remove all existing surface material and excavate the subgrade. For a standard pedestrian paver patio, you need roughly 4 inches of compacted gravel base plus 1 inch of bedding sand, so excavate to accommodate those layers plus the thickness of your surface material. If your pavers are 2.375 inches thick, you're digging down about 7.5 inches below your target finished grade. Mark that depth on your stakes before you dig.
If you're raising rather than excavating, you're adding material instead of removing it. In that case, you don't excavate deeper; you work up from existing grade. But you should still scarify (rough up) the top inch or two of the existing subgrade with a hand rake or tiller so the new base material bonds rather than sliding.
Geotextile fabric
Lay a non-woven geotextile fabric over the subgrade before adding your first layer of gravel. This fabric acts as a separator, preventing the fine soil particles below from migrating up into your gravel base over time. Without it, clay or silty soils slowly contaminate the base, reducing drainage and causing settlement. Overlap seams by at least 12 inches and let it run up the sides a bit so it's fully captured under the base.
Subbase and base material
Use crushed stone (also called processed gravel, dense-graded aggregate, or road base depending on your region) for your base. It compacts into a stable, interlocking mass that gravel or river rock simply can't match. A 4-inch compacted base is standard for pedestrian patios. If your soil is soft, wet, or clay-heavy, go 6 inches. Add the material in lifts no thicker than 4 inches at a time, compact each lift before adding the next.
Compaction
Rent a plate compactor. This is not optional. You can't compact base material by hand-tamping it well enough to prevent future settlement. Make multiple passes over each lift, going in perpendicular directions. The target for the subgrade itself is around 95% of maximum dry density (the Proctor standard), which in practice means the ground isn't spongy or giving underfoot. For the gravel lifts, compact until the plate compactor stops sinking and the surface feels solid and stable. Skipping passes or rushing compaction is the single most common reason DIY patios fail.
Set your elevation and lay the surface

Once your base is compacted to the correct height, it's time to set your finished elevation and lay your surface material. Your string lines are still your reference here. The top of your surface material should match your target finished grade at the high point (near the house) and drop 1/4 inch per foot as you move away. If you're trying to achieve even ground for a patio, start by measuring the current grade and adjusting the base material so the finished surface stays level and drains correctly how to even ground for patio.
Pavers and brick
Spread a 1-inch layer of coarse bedding sand over the compacted base. Do not exceed 1 inch. blank" rel="noopener noreferrer">Bedding sand that's too thick (2 to 3 inches) is one of the most common DIY mistakes, and it leads to uneven settlement because thick sand layers compress inconsistently. Use a screed board (a straight 2x4 or purpose-made screed rail) and your string lines to pull the sand smooth at exactly the right height. Then set pavers or brick on the sand without pressing them in, letting them settle naturally. Use a rubber mallet to tap them flush. Check your slope with a level frequently as you go. To get a patio level from the start, check your slope and elevation as you work, not just at the end.
Gravel surface
For a gravel patio, skip the bedding sand. After your compacted base is set, add your decorative gravel (pea gravel, crushed granite, or decomposed granite are popular choices) to a depth of about 2 to 3 inches. Gravel is the most budget-friendly surface by far and the easiest to install, but it shifts underfoot and requires occasional raking and top-dressing. Edge restraints are critical with gravel to keep it from migrating off the base.
Concrete
If you're pouring concrete, the 1/4-inch-per-foot slope requirement is the same, and your forms define both the perimeter and the finished height. For a raised pour, your compacted base should be at the right height to support a 4-inch slab (minimum thickness for a pedestrian patio). Plan a 1/2-inch expansion joint where the slab meets the house foundation; this isolates the slab and allows independent movement so the slab doesn't crack as it expands and contracts. Concrete is the most permanent choice and the hardest to adjust later if something goes wrong, so double-check your slope and form heights before the truck arrives.
Wood and composite decking
If you're raising a patio area significantly (6 inches or more), a low-profile wood or composite deck on sleepers or a simple frame is worth considering. Sleepers (pressure-treated 4x4s or 6x6s) sit on the compacted base and carry the decking. This approach handles uneven grades easily, drains naturally, and can be the most cost-effective way to raise a surface a foot or more. Composite decking costs more upfront but eliminates annual sealing and resists rot and splintering.
Finishing details: edging, joints, steps, and weatherproofing
Edge restraints
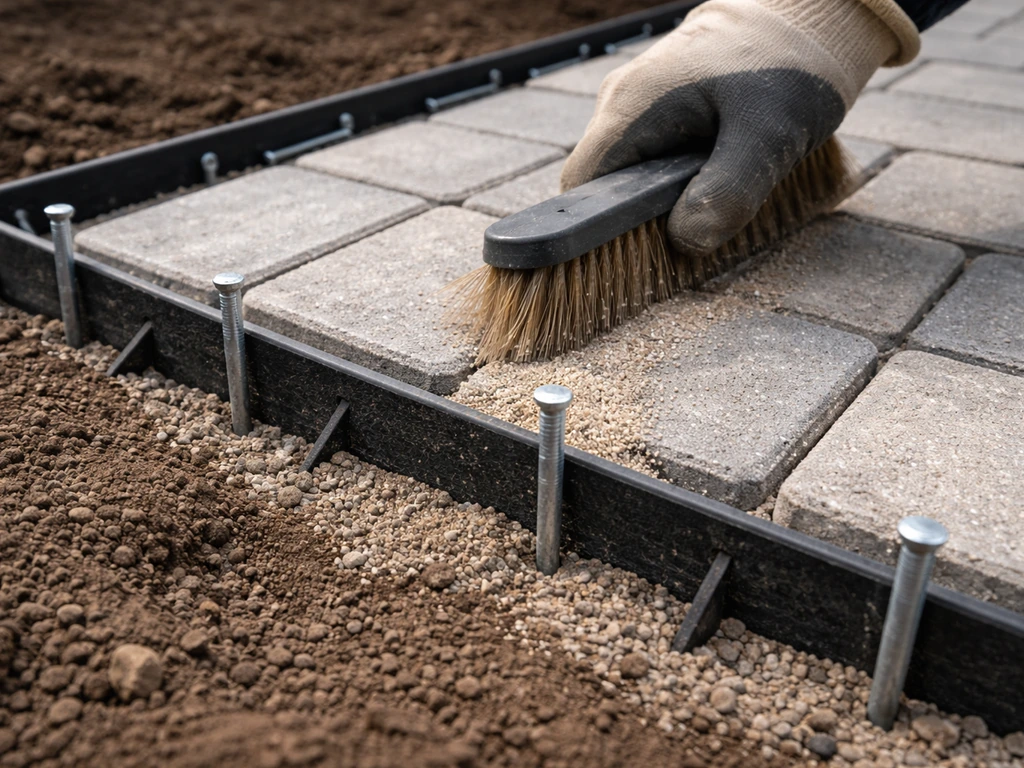
Edge restraints are what keep your pavers, gravel, or base from migrating outward over time. For pavers, plastic paver edging pinned with landscape spikes is the standard DIY choice. Spike it every 12 inches on straight runs and tighter on curves. The edging should be tall enough to capture the full depth of your base and bedding layers. For a gravel surface, the same plastic edging works, or you can use timber, steel, or stone edging for a more finished look. Dig a small trench along the perimeter, compact 1 inch of sand in the bottom for a firm seat, drop in the edging, and spike it down.
Joints and polymeric sand
For paver patios, fill joints with polymeric sand rather than regular jointing sand. Polymeric sand activates with water and hardens, resisting ants, weeds, and erosion. After laying all your pavers, sweep dry polymeric sand across the surface and work it into the joints with multiple passes of a push broom. Then run your plate compactor over the entire surface (with a rubber pad attached to protect the pavers) to seat the pavers and vibrate the sand into the joints fully. After compacting, sweep in a second round of sand to fill any voids, and then activate with a fine mist of water. Don't soak it. Follow the manufacturer's instructions for your specific brand.
Step transitions
If your raised patio sits significantly higher than the surrounding yard, you need steps. A single step is safe up to about 7 to 8 inches of rise. For more height, add multiple steps. Steps can be built from the same paver material as the patio, from natural stone, or from pressure-treated lumber. Each step needs its own stable base, compacted the same way as the patio base. Don't just stack pavers on loose soil.
Weatherproofing and sealing
Concrete and natural stone benefit from a penetrating sealer applied after the surface is fully cured and dry (allow at least 28 days for new concrete). Sealer reduces water absorption, slows staining, and in freeze-thaw climates, reduces spalling damage. Pavers don't require sealing, but sealing them enhances color and helps lock the polymeric sand in place. Composite decking and pressure-treated wood should be left to dry after installation before any coating is applied.
Troubleshooting common problems and DIY best practices
Standing water after the job is done
If water is still pooling after the build, the slope is the culprit. Either the finished surface isn't sloped enough, or it was sloped correctly but the base settled and flattened the grade. For pavers, you can pull up the affected area, add or redistribute bedding sand, and relay. For concrete, you're looking at grinding the surface or adding a thin overlay, both of which are more involved repairs. This is why getting the slope right before you lay any surface is so important.
Pavers sinking or rocking
This almost always comes back to inadequate compaction or bedding sand that's too thick. Pull the affected pavers, check the base, add compacted material where needed, re-screed the bedding sand to exactly 1 inch, and relay. If a large area is affected, it's worth renting the plate compactor again and making passes over the entire surface before calling it fixed.
Edges spreading or pulling away
Edge restraints that weren't spiked frequently enough, or were installed in soft soil without enough anchorage, will migrate outward as the surface is used. Pull the edging back into position, deepen the trench, add compacted sand to the base, and re-spike with longer or additional spikes. On sandy or loose soils, consider a concrete haunch (a small strip of concrete poured along the outside of the edging) to lock it permanently.
Cost and material considerations
Budget matters, and the surface material you choose makes the biggest cost difference. Gravel is the cheapest option, running about $1 to $3 per square foot for materials. Concrete pavers typically run $3 to $8 per square foot for materials. Poured concrete is roughly $4 to $8 per square foot for a DIY pour (materials only). Natural stone can run $10 to $30 per square foot. Composite decking materials are typically $5 to $15 per square foot. Remember that the base work costs roughly the same regardless of surface material, so the base isn't where you save money. Tool rentals (plate compactor, laser level) usually run $50 to $100 per day and are well worth it.
Your materials and tools checklist, and what to do next
Materials checklist
- Crushed stone/processed gravel (calculate cubic yards: length x width x depth in feet, divide by 27)
- Coarse bedding sand (for paver installs only, 1-inch layer)
- Geotextile landscape fabric (non-woven)
- Surface material: pavers, brick, gravel, concrete, or composite/wood decking
- Plastic paver edging or alternative (steel, timber, stone) and landscape spikes
- Polymeric sand (for paver joints)
- Expansion joint filler (1/2 inch, for concrete against structures)
- Concrete or mortar (if building retaining element or steps)
- Penetrating sealer (optional, for concrete or stone surfaces)
Tools checklist
- Tape measure and marking paint or chalk line
- Wooden stakes and nylon string
- Line level (clips onto string)
- Laser level (optional but highly recommended for larger areas)
- Plate compactor (rent this, don't skip it)
- Hand tamper (for edges and tight spots the plate compactor can't reach)
- Shovel, rake, and wheelbarrow
- Screed board (a straight 2x4 works fine)
- Rubber mallet
- Utility knife (for cutting geotextile fabric)
- Safety glasses, gloves, and steel-toed boots
Project sequence: what to do and when
- Call 811 at least two business days before any digging begins. This is your first step, before anything else.
- Set your string lines and measure your existing grade. Calculate how much height you need to gain and how much material you need.
- Order or pick up materials: crushed stone, geotextile fabric, and surface material. Have the stone delivered if possible; it's heavy.
- Excavate or remove existing surface material. Scarify the subgrade surface.
- Lay geotextile fabric over the subgrade.
- Add crushed stone base in lifts no deeper than 4 inches each. Compact each lift fully with the plate compactor before adding the next.
- Check your grade with string lines after each compacted lift. Adjust before adding more material.
- For pavers: screed 1 inch of bedding sand and lay pavers. For gravel: add decorative layer. For concrete: set forms and pour. For wood/composite: install sleeper frame and decking.
- Install edge restraints along all perimeter edges.
- Fill joints (polymeric sand for pavers), compact the surface, activate the sand with water mist.
- Build steps if needed, using the same compacted base approach.
- Apply sealer once the surface has fully cured (allow 28 days for new concrete).
- Review drainage by running a hose over the surface. Water should move away from the house within seconds.
The whole sequence for a mid-size patio (200 to 400 square feet) typically takes a weekend plus a day for a capable DIYer working alone, or a single weekend with a helper. The base work will take longer than you expect. Budget a full day just for gravel delivery, fabric installation, layering, and compaction. That's normal, and it's time well spent because the base is the whole game.
FAQ
How much should I raise my patio if the issue is drainage near the house or a door threshold?
Use your door as the reference point. Measure the height difference from the bottom of the threshold to the existing patio surface, then aim for the finished patio surface to end up about 1 to 2 inches below the threshold. That margin helps prevent rain splash or water intrusion, while still allowing a 1/4 inch per foot slope to shed water away.
Can I raise only part of my patio instead of the whole area?
Yes, but only if you can maintain the drainage path. If you create a local “high” spot without re-establishing a continuous slope away from the house, water can divert into a new low area. Plan the grade line with string across the whole patio footprint, then limit excavation and rebuild to the zones that truly need it.
What if my patio is already raised but water still pools?
Pooling usually means the finished surface is not shedding water, even if it feels higher in places. Check two points: the slope direction and the actual grade consistency, use the string-line method and measure at multiple locations. If the base has settled flat, the fix is typically rework of bedding sand and surface material for pavers, or a more involved repair for concrete.
Is 2% drainage slope a strict rule, or can I go flatter?
For typical residential hardscape, 1/4 inch per foot (about 2%) is the minimum. Going flatter is risky because minor settlement over a couple seasons can erase the slope and restart pooling. If you have frequent heavy rainfall or clay soils, it is smarter to build the minimum grade accurately rather than hope the base will stay perfect.
How do I know how deep to dig if I am raising a paver patio?
Base depth comes from your finished goal and the thickness of each layer. A common starting build is roughly 4 inches compacted base plus about 1 inch bedding sand, then add the paver thickness. For example, if your pavers are about 2.375 inches thick, you are often digging down close to 7.5 inches below target finished grade, then confirming with string measurements.
Can I reuse the existing gravel base or pavers to save money?
Sometimes, but only if the base is still uniformly compacted and the material is not contaminated. If the base was the cause of settlement, reusing it often leads to repeating the problem. For pavers, you can salvage them if they stay structurally sound, but you will still need to remove or rework any unstable base and reset bedding to the correct 1 inch.
What is the safest way to compact the base, and what is a common mistake?
Rent a plate compactor and compact in lifts, no thicker than about 4 inches each. Make multiple passes over each lift in perpendicular directions. The most common failure is rushing compaction or skipping it, which leaves voids and causes the new patio to sink unevenly.
Do I need geotextile fabric under my new patio base?
If your subgrade is clay, silty, or tends to retain water, geotextile is strongly recommended because it limits upward migration of fines into the gravel. For well-draining sandy soils, it may be less critical, but it is still useful as a separator when you want long-term stability.
How can I tell if I laid too much bedding sand under pavers?
If your bedding sand layer exceeds about 1 inch, it can compress unevenly, creating a wavy surface over time. After laying, look for rocking or slight movement under load. The reliable fix is to lift affected pavers, remove excess sand, re-screed to exactly about 1 inch, then reset and verify the slope.
Should I vibrate pavers immediately after setting them?
Vibration is part of polymeric sand systems, but use care. After you sweep polymeric sand into joints, compact with a plate compactor fitted with a rubber pad to avoid damaging pavers. Do not over-compact early on, and never skip the required second sand fill step before activating with mist water.
How do I prevent edging from bowing or moving over time?
Edging movement usually comes from inadequate anchoring or soil that is too soft. Spike spacing matters, and the edging needs to sit on a properly prepared, compacted seat. If you keep seeing migration, deepen the trench, add compacted sand under the edging, use longer spikes or add more spikes, and consider a concrete haunch for extra locking.
What water-control step should I take if water is pooling after the patio raise?
Treat it as a slope verification problem before it becomes a structural problem. Re-check grade with string measurements against the 1/4 inch per foot requirement, then correct bedding distribution for pavers. If concrete is involved, surface correction may mean grinding or an overlay, which is harder to adjust than pavers.
Do I need expansion joints if I raise or rebuild next to my house?
Yes, especially for concrete. Plan a small expansion joint where the slab meets the foundation so the slab can move independently with temperature changes. Without that separation, cracking risk increases as the slab expands and contracts.
When should I install steps on a raised patio, and how do I build them safely?
As a rule of thumb, plan steps when the rise is around 7 to 8 inches or more, otherwise use a ramp-friendly transition if possible. Each step needs its own stable, compacted base, do not just stack pavers on loose soil. Match step materials to the patio surface, but keep the foundation work consistent.
How long should I wait before sealing concrete or other coated surfaces?
Give new concrete time to fully cure and dry before applying penetrating sealer, typically at least 28 days. Sealing too early can trap moisture and reduce performance, and in freeze-thaw areas it can increase the risk of surface damage if the concrete is not ready.
What should I do if a utility line is close to where I need to dig?
Call 811 before excavation, and assume marks need to be respected on-site. If marks are unclear or the trench is extremely close, stop and confirm location before proceeding. Hitting a buried line is not something you can “fix later,” so take the permit and locating step seriously.
How to Raise Patio Level: DIY Guide for Better Drainage
DIY steps to raise patio level for drainage: measure, plan slope, add base, and rebuild pavers or concrete to prevent po