You raise a patio level by either building up the base underneath it or tearing it out and rebuilding it at the correct height. For pavers or brick, you can usually lift and relay them on a new, thicker compacted gravel and sand base. For poured concrete, you're generally looking at a partial or full demo and repour, though bonded overlays work for small height adjustments. Either way, the target slope is 1/4 inch per foot (a 2% grade) away from your house, and everything you do to raise the level has to protect that drainage direction. If you are planning an even-ground patio, it helps to treat the base as a drainage system, not just a height adjustment how to even ground for patio.
How to Raise Patio Level: DIY Guide for Better Drainage

Nolan Lennox
16 Jun 2026
Why you actually need to raise the patio level
Before you dig in, it helps to be honest about what's causing the problem. I've seen homeowners spend a weekend raising a patio only to watch the same issue come back in a year because they treated the symptom instead of the cause.
- The patio is sitting too low relative to the door threshold, creating a step down that's a tripping hazard or just looks awkward.
- Water pools on or near the surface because the patio has no slope or has settled into a slight inward bowl.
- The surrounding yard has been regraded or raised over time, so the patio now sits in a depression.
- The original base was never properly compacted, and the whole surface has slowly sunk by an inch or two.
- You're adding a new patio section that needs to match or smoothly transition from an existing one at a different elevation.
- Frost heave has pushed sections unevenly and the whole field needs to come up and be reset.
The difference between a base that settled (compaction failure) and one that sank due to poor soil conditions matters. If you just add fill on top of a soft, unstable subgrade, it'll sink again. Dig down and probe the soil. If it's consistently firm at 6 to 8 inches below grade, you're probably dealing with a compaction problem, which is fixable. If it's soft and spongy well below the surface, you may need to excavate deeper, improve the subgrade, or in serious cases, talk to a pro about geotextile fabric and engineered fill.
Measuring and planning the new height
This is the part most DIYers rush, and it's where most mistakes happen. Take the time to get this right before you move a single shovelful of gravel. If you want the quickest overview of how to raise a patio area, start by setting the target elevation and drainage slope, then build up the base in properly compacted layers.
Set your target elevation first
Start at your door threshold. The finished patio surface should sit at or slightly below the door threshold, typically no more than 1/2 inch below it. The IRC requires impervious patio surfaces within 10 feet of the foundation to slope a minimum of 2% away from the building, which works out to 1/4 inch of drop for every foot of patio length. So if your patio is 12 feet deep, you need a 3-inch total drop from the house side to the outer edge. If it's 20 feet deep, you're looking at a 5-inch drop. Write this number down and keep it in front of you throughout the project.
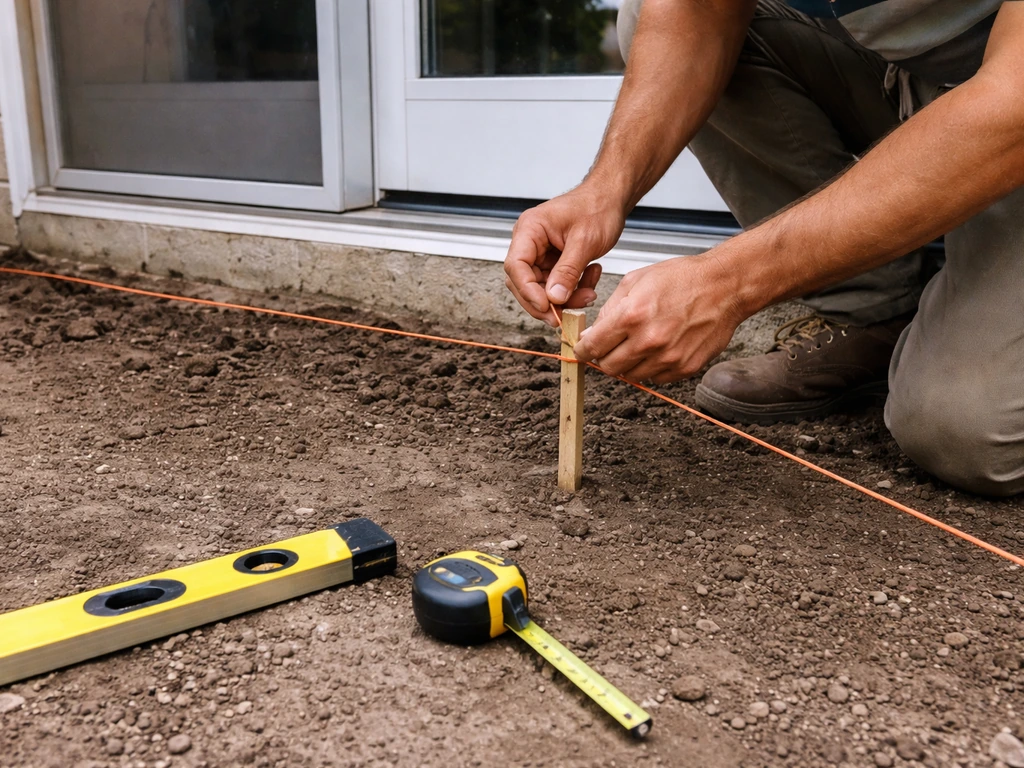
How to set up your reference lines
- Drive a stake at the house wall (or tie a line to a screw near the threshold) and run a mason's string line out to the outer edge of the patio.
- Use a line level or a digital level app on a long straightedge to make the string perfectly level first.
- Once level, lower the outer end of the string by 1/4 inch for every foot of run. For a 12-foot patio, lower the outer stake end by 3 inches. This string now represents your finished surface slope.
- Run additional parallel strings across the width to account for any cross-slope or transition to a lawn edge.
- Measure from your string down to the existing surface at multiple points to understand how much height you need to add across the entire area.
Handling transitions and adjacent surfaces
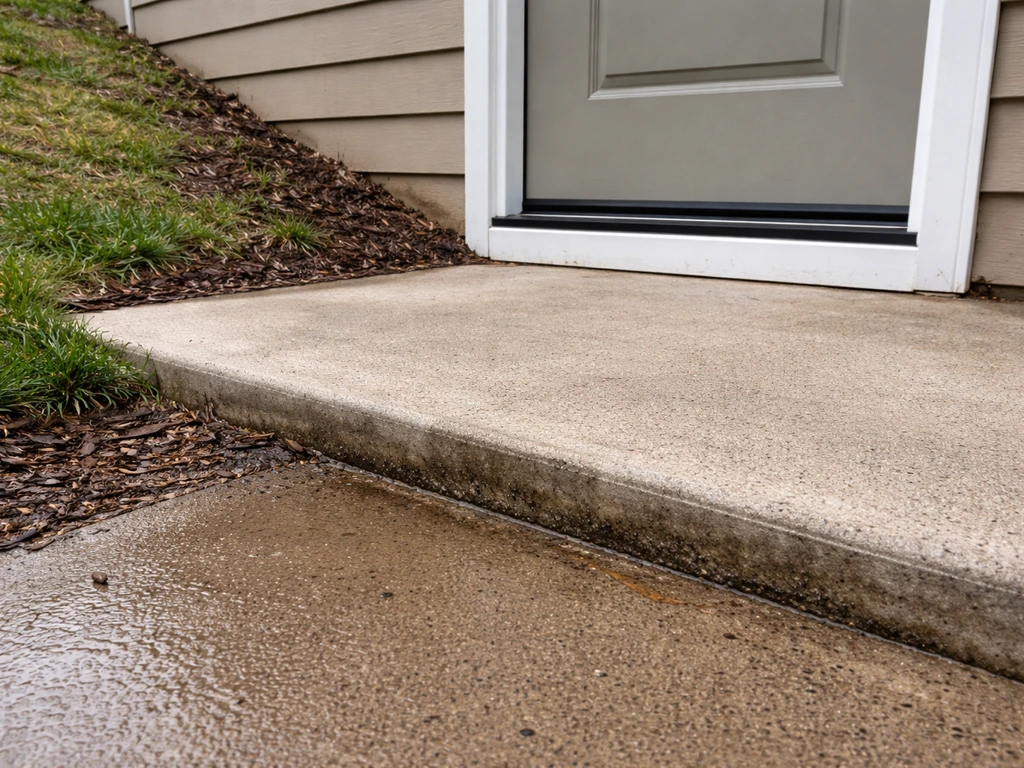
Where the patio meets a sidewalk, driveway, or lawn, a change in level greater than 1/4 inch needs to be beveled or ramped. ADA standards are useful here even for residential work: changes in level up to 1/2 inch should be beveled at no steeper than a 1:2 slope. For threshold transitions at entrances and doors, the Access Board ADA guide discusses maximum threshold height concepts (including a maximum of 3/4 inch for certain existing or altered thresholds) when using required beveled-edge profile rules changes in level up to 1/2 inch should be beveled at no steeper than a 1:2 slope.. Anything abrupt above that becomes a tripping hazard and, if you're ever selling the house, an inspection flag. Plan your transition pieces and edge treatments before you start raising anything.
DIY methods for raising the patio base
There are three realistic approaches for a DIYer, and the right one depends on how much height you need to add and what the patio is made of. If you need a detailed, step-by-step walkthrough for how to lift a patio, start by matching your method to the amount of height change and the patio material.
Adding compactable fill and gravel base
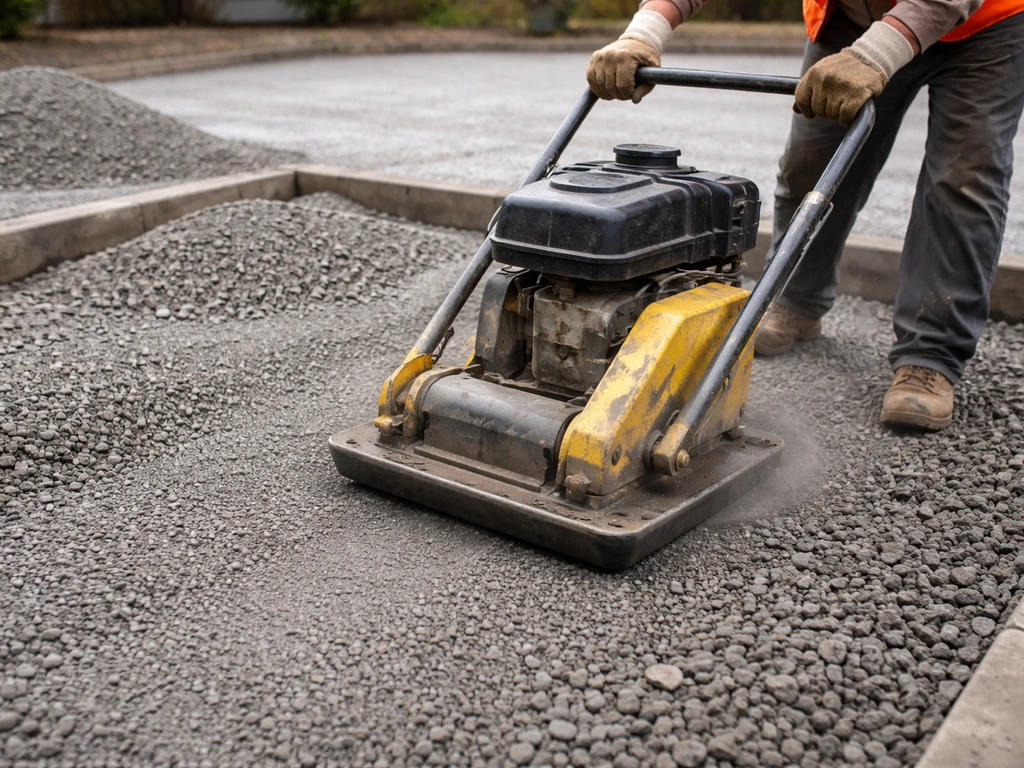
This is the go-to method when you're raising the level by more than 1 inch and working with a paver or brick patio you plan to lift and relay. You can also use these same ground-building steps when you’re building up the patio base how to build up ground for patio. The key rule is compact in lifts, meaning you never dump in 6 inches of gravel and compact it all at once. Add it in 2 to 3 inch layers, compact each one fully with a plate compactor before adding the next. A plate compactor delivering around 5,000 lbf of compaction force is the standard tool for patio base work. For small areas or tight spots, a hand tamper works but takes more passes. Use compactable crushed stone aggregate (often called Class II base, road base, or crusher run) rather than rounded pea gravel, which won't lock together and compact properly.
If you're adding more than 4 inches of fill over existing soil, lay a strip of geotextile filter fabric on the prepared subgrade first. It prevents soil fines from migrating up into your gravel base over time, which is exactly what causes future settling. It costs almost nothing and takes five minutes to lay down.
Re-laying pavers on a leveling sand bed
Once your compacted gravel base is at the right height, you need a 1-inch layer of coarse bedding sand on top before laying the pavers. Screed it flat using two parallel pipes or screed rails set at your target height, then drag a straight board across them. Check the slope frequently against your string lines as you work. The sand layer is not where you make up for a poorly compacted base, it's just the final setting bed. The base is where the height and stability come from.
Concrete overlay for small height adjustments
If you have an existing concrete patio that's only 1/2 inch to 1 inch too low, a bonded concrete overlay is a viable option. If you need a bigger lift than an overlay can handle, you'll want to follow the full process for how to make a level patio with proper base height and drainage bonded concrete overlay. Clean the existing slab thoroughly, apply a concrete bonding adhesive (products like QUIKRETE Concrete Bonding Adhesive are made for this), and pour a thin topping mix or resurfacer. Be realistic: this only works on sound concrete that isn't cracked or heaved. If the slab has structural problems, an overlay just inherits them.
Step-by-step rebuilding by patio type
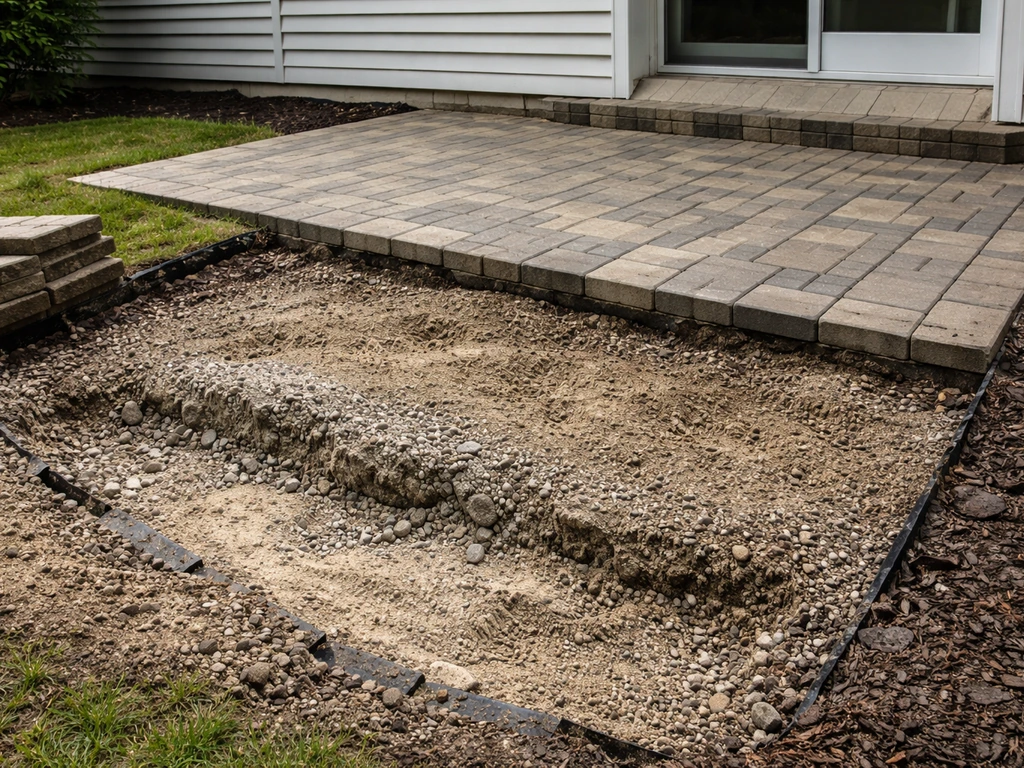
Raising a paver or brick patio
- Pull up all pavers or bricks and stack them nearby on a flat surface. Label or photograph any pattern areas so you can reassemble them.
- Remove the old bedding sand completely. Don't try to reuse it as fill.
- Probe and assess the subgrade. If it's soft, excavate until you hit firm soil, then add compactable fill back in controlled lifts.
- Lay geotextile filter fabric over the prepared subgrade if you're adding 4 or more inches of new base.
- Add crushed gravel base in 2 to 3 inch lifts, compacting thoroughly after each lift. The minimum finished compacted base thickness for pedestrian patio areas is 4 inches.
- Check your string lines after each compacted lift to make sure you're building toward the correct finished slope.
- Once the base is at the right height, install your edge restraints before the sand layer. Plastic or aluminum edging pinned with spikes keeps everything from migrating later.
- Screed a 1-inch layer of coarse bedding sand over the base, using your slope guide strings to maintain the correct pitch.
- Lay the pavers working away from the house, maintaining your pattern and consistent joint spacing.
- Compact the finished paver surface with a plate compactor (use a rubber pad attachment to avoid cracking pavers), then sweep dry polymeric sand into the joints.
- Make a final pass with the compactor to set the sand, then lightly mist with water to activate polymeric sand if used.
Raising a poured concrete patio
Poured concrete is less forgiving. If the existing slab is low by more than about 1 inch, is cracked, or has heaved sections, you're usually better off with a full demo and repour rather than trying to work around it. Rent a concrete saw and a breaker (or jackhammer) to break it up, then haul the rubble out. Crushed concrete can actually be reused as base fill if it's broken into small pieces and properly compacted, which saves on disposal costs.
- Saw-cut the perimeter of the slab, then break it into manageable pieces with a jackhammer or demo hammer.
- Excavate to the correct depth so that your base layers plus the 4-inch slab thickness will land at the target finished elevation.
- Compact the subgrade, then build up your gravel base in compacted lifts to the correct height.
- Set your forms using 2x4 lumber for a 4-inch slab. Stake them firmly and check the slope with a level and your string lines. The form tops represent your finished surface elevation.
- If the patio adjoins the house foundation, install a 1/2-inch isolation joint (foam backer rod or expansion joint material) between the new slab and the house to prevent cracking.
- Pour and screed the concrete using a straight screed board running across the tops of your forms. Work from the far end back toward the house.
- Float and finish the surface, then cut control joints every 8 to 10 feet with a groover or circular saw to manage cracking.
- Cure with a curing compound or plastic sheeting for at least 7 days before heavy use.
Problems that will ruin the job if you ignore them
Settling after you finish
The single biggest cause of a raised patio settling back down is skipping or rushing compaction. Every lift needs to be compacted before the next one goes on. If you're not renting a plate compactor, you're probably not compacting well enough. Hand tamping works only in very small areas or for the final inch or two of sand. Don't let anyone talk you out of proper equipment for this step.
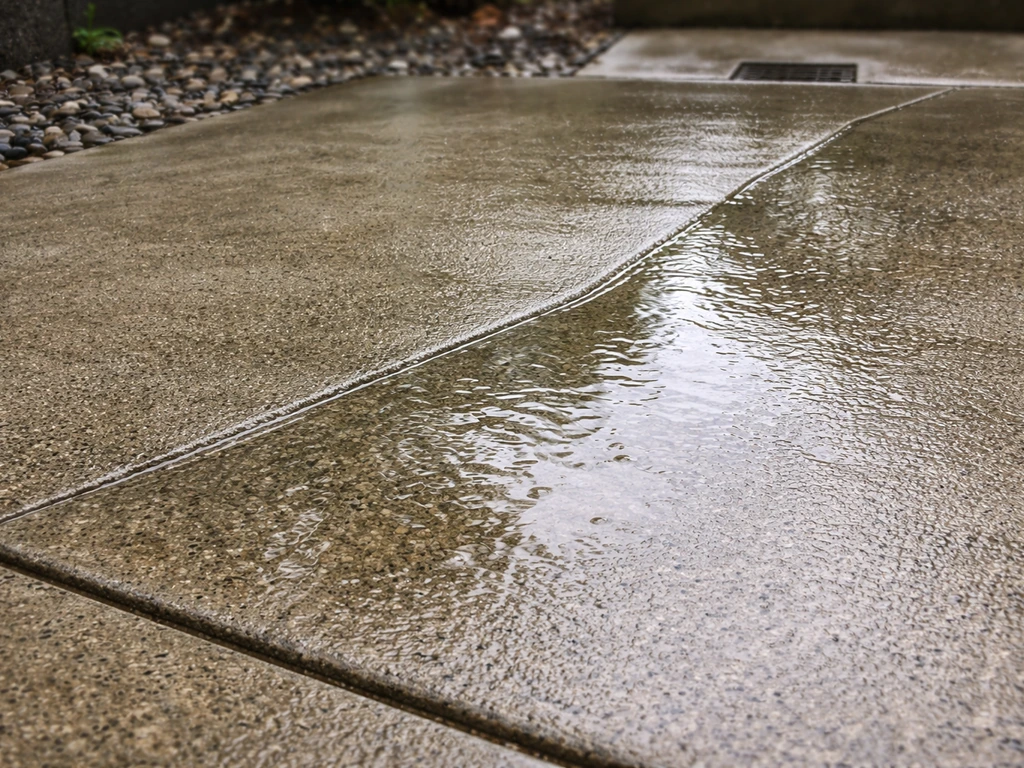
Water pooling on the surface
If any low spot forms, water will find it. Check your slope constantly as you build, not just at the end. A 1/4-inch per foot drop needs to be consistent across the whole surface, not just on average. Use your string lines as a real-time reference while you set the base and sand, not just at the start.
Tripping edges and uneven steps
When the new patio surface meets an existing surface at a different height, an abrupt lip of more than 1/4 inch is a tripping hazard. Bevel it or create a proper step with a tread depth of at least 11 inches and a riser of no more than 7 inches. Don't leave a 1-inch lip at the door threshold and call it done.
Edging failure and paver spread
Without solid edge restraints, pavers migrate outward over time, opening joints and creating waviness across the surface. Install the edging before the sand layer, not after you've laid the pavers. Spike it into the base at least every 12 inches, and closer on curves.
Directing water toward the foundation
Raising your patio level can inadvertently change how water flows if you don't account for the whole drainage picture. After you're done, watch where water goes in a heavy rain. The 2% slope away from the house is a minimum, not a goal. Make sure the water has somewhere to go at the outer edge, whether that's a lawn, a drain, or a gravel strip.
Tools, materials, and what this will cost you
| Item | What it's for | Typical cost |
|---|---|---|
| Plate compactor (rental) | Compacting gravel base in lifts | $60–$100/day rental |
| Crushed gravel / road base | Compactable base fill | $25–$45 per ton delivered |
| Coarse bedding sand | 1-inch paver setting layer | $30–$50 per cubic yard |
| Geotextile filter fabric | Subgrade stabilization | $0.15–$0.30 per sq ft |
| Plastic or aluminum paver edging | Perimeter restraint | $1–$2 per linear foot |
| Polymeric joint sand | Locking paver joints | $25–$40 per 50 lb bag |
| Mason's string line + stakes | Setting slope reference | $10–$20 |
| Line level or digital level | Checking slope accuracy | $10–$30 |
| Concrete bonding adhesive (overlay only) | Bonding new to existing concrete | $15–$25 per quart |
| Form lumber (concrete rebuild) | Setting pour height and slope | $0.50–$1 per linear foot |
For a DIY paver patio rebuild, expect to spend roughly $4 to $8 per square foot in materials if you already have the pavers and are just rebuilding the base. If you're buying new pavers and doing a full install, materials alone typically run $6 to $15 per square foot depending on the paver style. Professionally installed paver patios in 2026 run $12 to $30 per square foot all-in. A basic poured concrete patio professionally done runs roughly $8 to $14 per square foot, with custom finishes pushing higher. Doing it yourself on a concrete pour saves roughly 40 to 60% of labor cost, but requires renting or borrowing more specialized equipment.
Permits, safety, and when to hand it off to a pro
Do you need a permit?
It genuinely depends on where you live. Some municipalities require permits for any new patio slab or significant reconstruction, including work that modifies grade near a foundation. Others don't require permits for simple paver or concrete patio work on private property. I'd recommend spending five minutes on your local building department's website or making a quick call before you start. Some jurisdictions specifically include patio/steps work in their driveway and sidewalk permit categories. Getting caught without a required permit on work that affects drainage near your foundation is not a risk worth taking.
Safety basics to take seriously
- Call 811 (in the US) before any digging to have underground utilities marked. This is free and required by law.
- Wear safety glasses and hearing protection when running a plate compactor or breaking concrete.
- Heavy concrete slabs can weigh 12 pounds per square foot for a 4-inch slab. Have help when moving large pieces.
- Don't work near an open excavation that's more than a few feet deep without shoring or proper sloping of the cut.
When to call a pro instead
Most paver patio raises are genuinely DIY-able with a weekend and a rented compactor. If you're wondering how to make ground level for patio, start by determining the right height at the door threshold and then rebuild the base to match that grade and drainage slope. But there are situations where I'd strongly recommend bringing in a professional. If you're raising the patio level by more than 6 inches near the foundation, you need someone to assess whether that affects drainage toward the house or puts lateral pressure on a foundation wall. If you're planning a bigger change, knowing how to get a patio level (and keep it drained correctly) will help you decide whether a pro is worth it. If the soil is consistently soft or wet well below grade, that's a sign of a drainage or soil stability problem that base gravel alone won't fix. And if you need to repour a large concrete slab, especially one with rebar, working with a concrete contractor is often worth the cost unless you're already experienced with concrete work. A bad pour is expensive to fix.
FAQ
Can I raise my patio level by adding gravel on top without digging out the old base?
Usually you should not, especially if the old base is already compacted poorly or has settled before. Adding fill on top tends to amplify the existing settlement, and you still need to restore the 2% slope away from the house. A practical check is to probe for softness and measure the current slope before deciding whether you can lift and relay (pavers) or must excavate and rebuild the base.
How do I know my patio slope is correct after it is raised?
Recheck with string lines or a line level as you approach the finished height, then confirm at multiple points using a straight 2x board and a level measurement (or a slope app with consistent phone position). Look for low spots where water might pond, not just the average drop. If the surface has any dip that collects water during a hose test, you have a drainage failure even if the overall grade looks right.
What if my patio touches the house siding or a door swing, after I raise the level?
Avoid raising the patio so close to doors, steps, or weep areas that water cannot escape properly. A common mistake is trapping moisture against siding or blocking door clearance. Before finalizing height, dry-fit transition details (bevels, steps, or a ramped edge) so doors still open freely and exterior drainage stays directed away from the foundation.
Is geotextile fabric always required when raising a patio?
No, it is mainly helpful when you are adding more than about 4 inches of fill over existing soil. In that case, geotextile reduces the risk of soil fines migrating into the gravel base and causing future settlement. If you are rebuilding the base down to firm material and using properly compacted lifts, fabric may be less critical.
Can I use sand alone to raise a paver patio?
Sand alone is a common DIY failure. Sand can shift and compress, and it does not provide the structural support you need for stability. The correct approach is compacted crushed stone (road base or crusher run) for strength, then a thin bedding sand layer only for leveling pavers on top.
What compactor should I rent, and is it mandatory?
For typical paver patios, a plate compactor is the standard because it achieves consistent compaction across the lift. It is not optional if you want long-term stability, particularly when raising more than a small amount. Hand tamping can work only for very small sections or for the final sand/bedding, but it rarely compacts deeper base layers properly.
How many inches can I compact in one lift?
Stick to 2 to 3 inch compacted lifts for gravel base. If you dump thicker than that, the lower layer often stays loose, leading to rapid settlement. Measure loosely, then compact, then verify by probing and rechecking grade before adding the next layer.
If I need to raise a concrete patio a little, is a bonded overlay always safe?
No. Overlays are best only for sound slabs that have no significant cracking, heaving, or structural movement. If the slab is cracked through, rocking, or shows heave, the overlay can fail because it follows the existing problem. When in doubt, treat it as a full repour or consult a concrete contractor.
Can I break up an old concrete slab and reuse it as fill under a new patio?
Often yes, crushed concrete can be reused as base fill if it is broken into appropriately small pieces and compacted in layers. However, avoid using large chunks that do not interlock and do not compact uniformly. Also confirm your local disposal and reuse rules, since practices vary by area.
Do I need edging restraints when raising a patio?
Yes, edging matters even more when you disturb and rebuild the base. Without restraints, pavers can spread outward, joints open, and the surface becomes wavy over time. Install edging before the bedding sand, and ensure it is spiked into the base with close spacing on curves.
How should I handle transitions to existing surfaces like a sidewalk or lawn after raising?
Plan transitions so you do not create a lip or tripping edge. If the level change is more than about 1/4 inch, you should bevel or build a proper step or ramp so movement is safe and drainage is not blocked. Also consider how the new edge interacts with lawn irrigation and downspouts to avoid redirecting water toward the foundation.
What’s a safe way to run a hose test after finishing?
After the patio is fully built, hose water across the surface and observe where it flows under a variety of patterns, including toward the house side and toward the edges. You want water to move away consistently at every point, not just in the center. If you see pooling at any edge or near a doorway, adjust drainage details before the base fully cures and settles.
When should I hire a pro instead of doing it myself?
Hire help if you need a major height change near the foundation (for example, more than about 6 inches), if the soil is consistently soft or wet far below the surface, or if the existing concrete has cracking or heaving. These situations can indicate drainage or lateral pressure issues that a simple base rebuild cannot fix. Also consider professional help if you will be modifying grade close to foundation walls where impact and permitting rules may apply.
Next Article
How to Build Up Ground for a Patio Base and Drainage
Step-by-step DIY on raising patio ground, setting correct slope, compacting base layers, and planning drainage for stabl
