Lifting a patio means excavating the settled sections, rebuilding the compacted base that failed, and re-setting your surface material back to the correct elevation and slope. For pavers and brick, you do that by pulling up the units, re-compacting the aggregate base, re-screeding bedding sand, and re-laying everything with proper jointing.
How to Lift a Patio: Fix Sinking, Settling, or Heaving

Nolan Lennox
6 Jun 2026
To build up ground properly for a patio lift, you’ll also want to focus on a well-compacted base layer and correct bedding height before you re-lay the surface build up ground for patio. For a concrete slab, "lifting" usually means injecting material (either a cement slurry or expanding polyurethane foam) beneath the slab to fill the void and push it back up.
The method matters a lot, so the first step is figuring out which situation you're actually dealing with.
Figure out what "lift a patio" means in your situation
People use "lift a patio" to mean a few different things, and getting this wrong will cost you time and money. There are really three scenarios here, and you need to identify yours before you pick up a single tool.
- Individual pavers or bricks have sunk, rocked, or tilted: This is the most DIY-friendly scenario. The pavers themselves are fine. The problem is the base underneath them has failed, shifted, or washed out. You lift the units, fix what's below, and reset them.
- A concrete slab has settled or tilted: This is a different animal. The slab is one solid piece, and you can't just pick it up. You either inject material beneath it to raise it back up (mudjacking or foam jacking), or you break it out and rebuild from scratch if the base damage is severe.
- A patio area needs to be raised to a higher elevation overall: Sometimes the patio isn't sunken, it just needs to be higher relative to a door threshold, a raised garden bed, or a drainage channel. This is really a "build up" project, not a repair, and it involves adding material to the sub-base before re-laying your surface.
This guide focuses primarily on the first two scenarios since those are what most homeowners mean when they're searching for help. If you're looking at raising a patio area that was never the right height to begin with, you'll want to look at how to build up the ground before your surface layer goes down.
If you already know you want a higher patio, the key is to start by diagnosing why it sits low so the rebuild holds its slope raising a patio area. To keep your patio from settling again, focus on rebuilding the compacted base and adding the right drainage before you set your pavers or slab build up the ground.
Once you know what needs raising, you can follow a step-by-step approach to how to even ground for patio by building up the soil and base to the correct slope. If you need help dialing in the right slope and base buildup, see the full guide on even grounding for a patio even ground for patio. Either way, the diagnostic step below applies to everyone.
Diagnose the cause: settling, poor base, drainage, or frost heave
Before you start lifting anything, spend 20 minutes figuring out why it moved in the first place. If your goal is a raised patio with the right slope, the process starts by diagnosing why it moved, then rebuilding the base before you re-lay the surface how to make a level patio.
If your patio is on uneven ground, the key is to diagnose the cause of the dip and then rebuild the base and drainage so the new surface stays level long term how to build a patio on uneven ground. If you skip this, you'll rebuild the same failure. I've seen homeowners re-lay pavers twice without fixing the drainage problem underneath, and the whole thing settled again within a single winter.
Symptoms and their likely causes
| What you see | Most likely cause |
|---|---|
| Pavers rocking or clicking when walked on, joint sand missing in spots | Bedding sand has shifted or been washed out; compacted base may also have degraded |
| Localized dip that lines up with a downspout or low spot where water collects | Washout or erosion beneath the base from concentrated water flow |
| Broad slab area has tilted relative to the surrounding surface, possibly with cracks | Void formed under concrete slab, often from erosion or organic material decomposing |
| Raised sections or buckled pavers, especially after a hard winter | Frost heave: water in the soil beneath froze, expanded, and pushed material up |
| Edges of the patio have spread outward and units are migrating | Missing or failed edge restraints; perimeter units have no containment |
| Entire patio has gradually dropped 1 to 3 inches over several years | Initial compaction was inadequate and the base has finally settled under load and weather |
If your pattern is localized dips near a downspout or where runoff concentrates, water is your primary culprit. If the problem is spread across the whole patio evenly, it's almost certainly a base compaction failure. Frost heave is obvious in cold climates and usually shows up as raised sections rather than sunken ones, often reversing partially in spring. Tree roots nearby are another cause worth checking: they can push material up from below or, as they decompose, create voids that let the surface collapse down.
Tools, materials, and safety for a DIY patio lift
What you'll need to gather
- Flat pry bar or chisel and rubber mallet (for paver removal without chipping)
- Long-handled screwdriver or putty knife (to get under tight pavers)
- Plate compactor (rent from any equipment rental store; don't skip this)
- Hand tamper (useful for tight corners the plate compactor can't reach)
- Screed board or long straightedge (for leveling bedding sand)
- String line and line level or a long spirit level
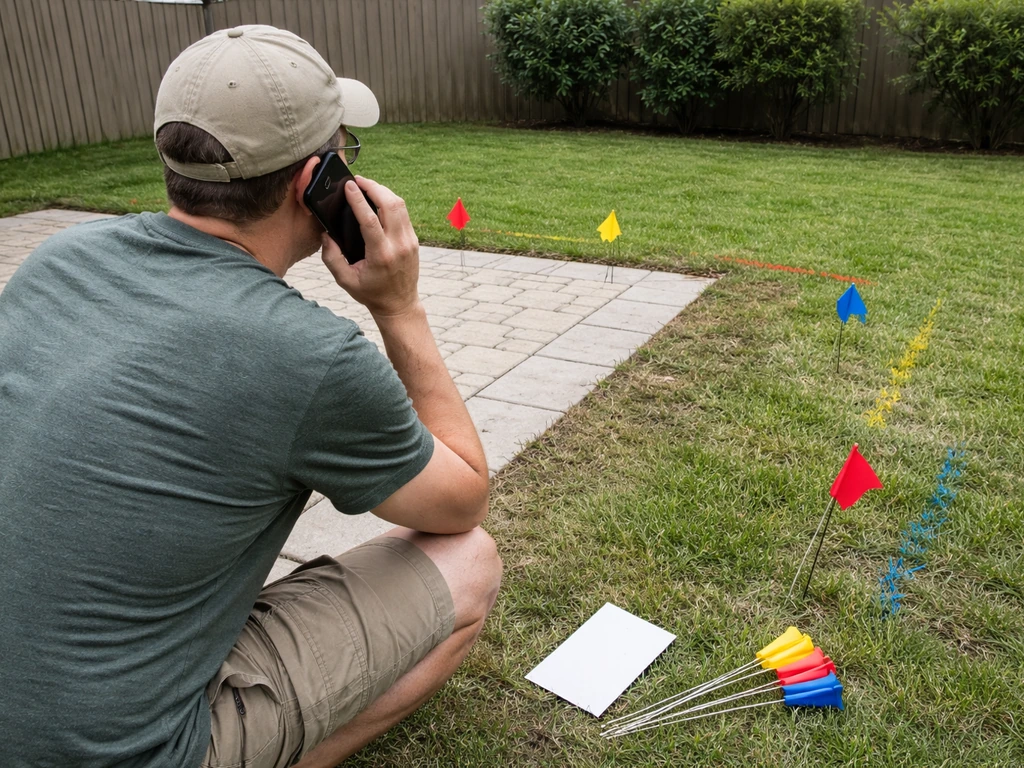
- Measuring tape, stakes, and bright spray paint or chalk line
- Wheelbarrow and shovels
- Compactable gravel or crushed stone aggregate (3/4" crushed is common for base repair)
- Coarse bedding sand (concrete sand, not play sand)
- Polymeric jointing sand (activates with water to lock paver joints)
- Edge restraint spikes if your restraints are damaged or missing
Safety basics you can't skip
Cutting pavers, bricks, or concrete generates crystalline silica dust, which is a serious long-term lung hazard. OSHA has had enforceable silica standards in construction since 2016, and NIOSH guidance specifically calls out cut-off saws as a major exposure source. OSHA notes that its crystalline silica standard includes [key exposure control requirements for construction tasks that generate silica dust](https://www. osha.
gov/silica-crystalline/construction-info), with the final rule issued on March 25, 2016. If you need to cut any units during this project, wear a properly fitted N95 respirator at minimum, work outdoors, and use a wet-cut saw with water suppression where possible. Safety glasses, work gloves, and steel-toed boots are non-negotiable for this kind of work. Pavers are heavy, corners are sharp, and a plate compactor can do real damage to feet and fingers if you're not paying attention.
Prep work: marking levels, removing sections, and protecting utilities
Call 811 before you dig anything
This is not optional. Call 811 (the national "call before you dig" number) before you excavate, even for a shallow patio repair. Underground utilities including gas lines, electrical conduits, and irrigation lines can be surprisingly shallow, and the cost of hitting one is catastrophically higher than the two-minute phone call. Most states require you to call at least two full business days before you plan to dig, so factor that into your schedule. Utility companies will come out and mark your yard for free.
Mark your target level and slope
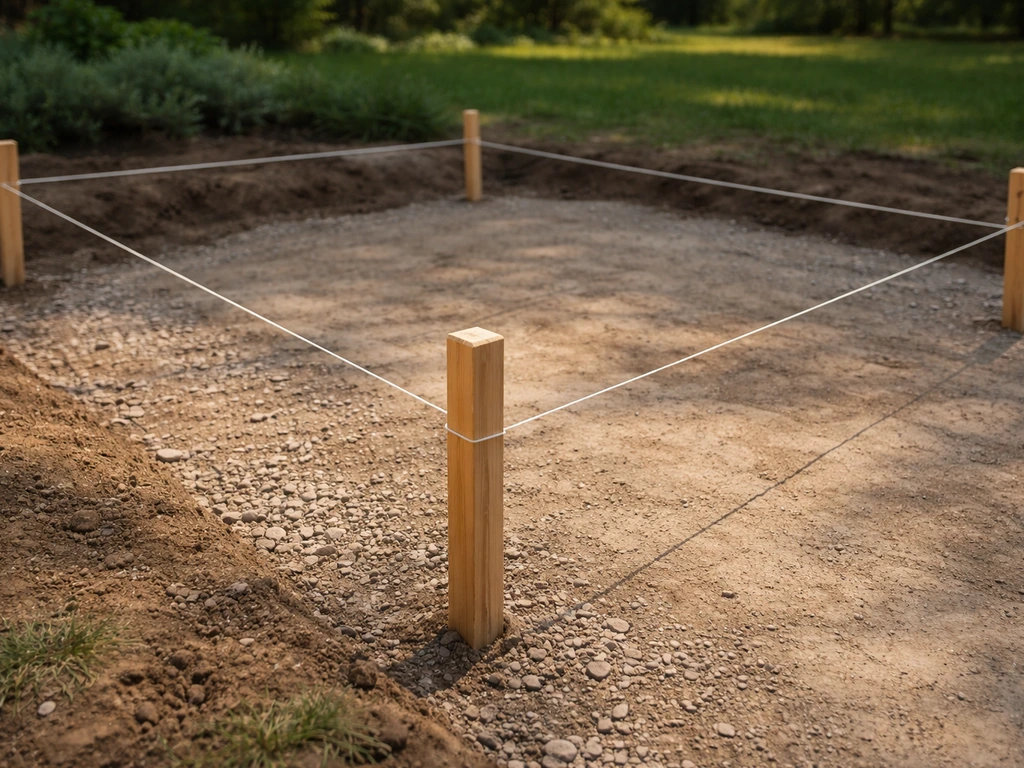
Before anything comes up, establish where your finished surface needs to be. Drive stakes at the corners and run string lines at your target height. Your patio needs to slope away from the house at a minimum of 1/8 inch per foot, and going up to 1/4 inch per foot is even better for problem drainage areas. Follow the right elevation and slope so you know exactly how to raise patio level without creating new drainage issues.
So for a 10-foot deep patio, you want 1. 25 to 2. 5 inches of drop from the house to the outer edge. Mark the correct height on every stake and double-check with your level.
Getting this right before you touch a single paver will save you hours of re-work later.
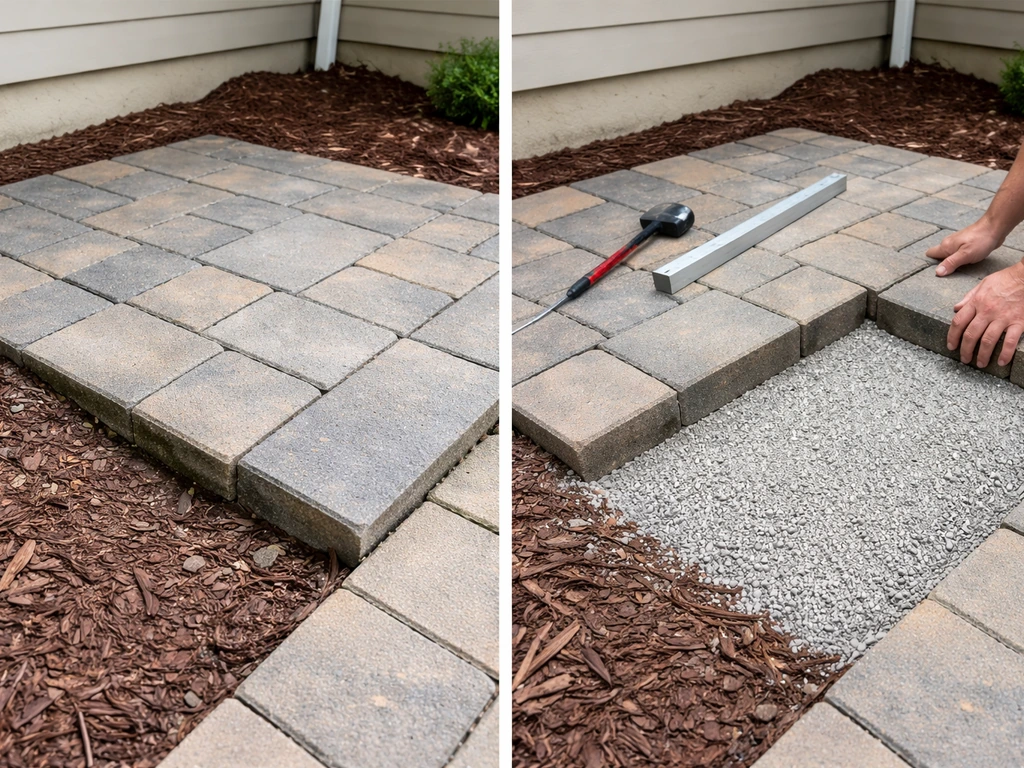
Remove sections systematically
Start paver removal at an edge or corner, not the middle of a section. Slide your pry bar into the joint at a low angle and pop the paver up gently. Stack the pulled pavers in groups on a tarp nearby, keeping them organized by color and pattern batch if you have mixed units. Number them with chalk if you have a complex pattern. For large repairs, a rubber mallet and a wide pry bar make this faster than you'd expect. Inspect each paver as you remove it: any that are cracked through, spalled badly, or structurally compromised should be set aside for replacement. Trying to re-use badly damaged units will leave weak spots in your finished surface.
Step-by-step: re-leveling with excavation and base rebuild
For paver and brick patios
- Excavate down to expose the full failed area: Once pavers are off, dig out the existing bedding sand and any degraded base material. You want to reach stable, undisturbed soil or identify exactly where the failure happened (washed-out zone, rotten organic material, root decomposition). Be thorough here. Leaving any soft spots or voids will cause a repeat failure.
- Address the root cause before adding any new material: If water is the problem, this is the time to re-route a downspout, add a perforated drain pipe at the low end, or re-grade the subgrade. If tree roots caused voids, remove them and treat the stump. If frost heave is a recurring problem, consider increasing your base depth so it extends below your local frost line.
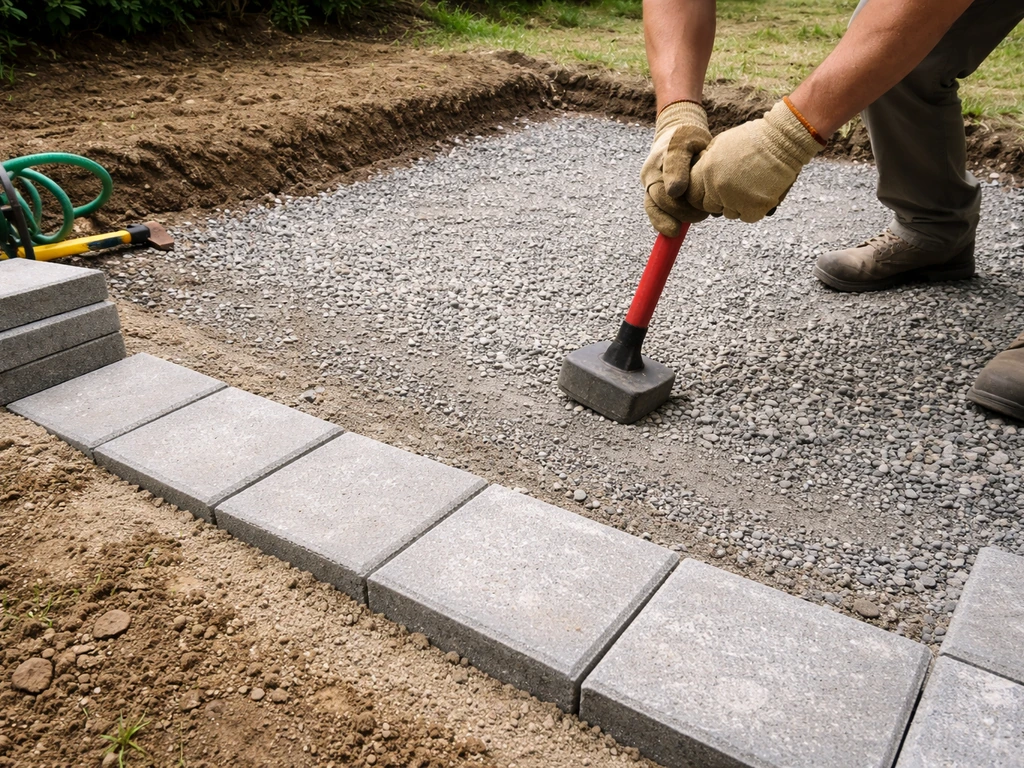
- Re-compact the subgrade: Use your plate compactor on the exposed soil. Go over it multiple times until there's no visible movement. Any soft or wet zones need to be dug out and filled with compactable aggregate.
- Rebuild the aggregate base: Add 4 to 6 inches of compactable gravel (3/4-inch crushed stone is standard) in layers no more than 2 to 3 inches thick, compacting each layer before adding the next. Don't dump it all in and compact once. The layered compaction is what gives you a stable foundation.
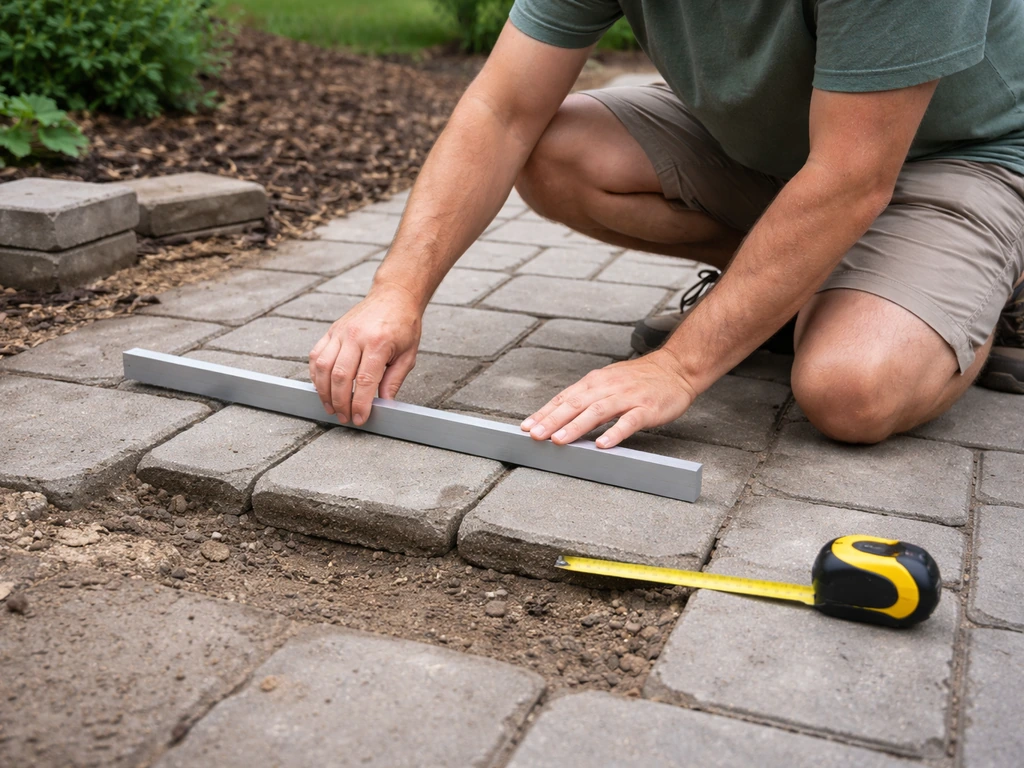
- Screed your bedding sand: Add about 1 inch of coarse bedding sand (concrete sand) over the compacted base. Use two parallel screed guides set to your target slope and drag your screed board across them to create a smooth, consistent surface. Don't walk on this layer after screeding.
- Check your slope with a level: Before laying anything, set your level across the screeded sand and verify the slope is reading between 1/8 and 1/4 inch drop per foot away from the house. Adjust now while it's easy.
- Re-lay the pavers: Start at a fixed reference edge (usually the house side) and work outward. Set each paver with a firm press straight down, not a sliding motion. Use spacers or keep joints consistent by eye. Tap each unit level with your rubber mallet as you go.
For concrete slabs: DIY options and their limits
Concrete lifting is less of a DIY project and more of a decision tree. If the slab has a clean void beneath it (no major cracking, just settled), you have two realistic options: mudjacking (slabjacking) and polyurethane foam lifting (polyjacking or foam jacking).
| Method | How it works | Best for | DIY-friendly? | Typical consideration |
|---|---|---|---|---|
| Mudjacking (slabjacking) | Cement slurry pumped under slab through drilled holes to fill void and push slab up | Larger slabs, cost-conscious repair, stable soil conditions | No, needs specialized pump equipment | Lower material cost but heavier fill; can re-settle if drainage not fixed |
| Polyurethane foam lifting (polyjacking) | Expanding foam injected through small holes; cures quickly and fills void | Smaller slabs, areas near utilities, faster curing needed | No, needs professional injection equipment | Higher cost but lighter fill, smaller holes, faster return to use |
| Full demo and rebuild | Break out slab, excavate, rebuild base, pour new concrete | Major cracking, severe base failure, drainage redesign needed | Partial DIY possible (demo + forming, hire pour) | Most expensive upfront but addresses root cause fully |
Honest take: if your concrete slab has settled significantly and you don't want to demo it, call a professional concrete leveling company for mudjacking or foam jacking. The equipment and technique required aren't practical to DIY on a one-time basis. Where you can DIY is the prep work (cleaning the area, managing drainage, clearing access) and the decision-making (knowing whether the slab is worth saving or should be replaced). If the slab is cracked badly through in multiple directions, or if it keeps re-settling because drainage under it is actively eroding the soil, lifting it without fixing the base is just buying time. Full demo and rebuild is the honest long-term answer in those cases.
Re-lay and finish: pavers, brick, and jointing
Check your edge restraints first
Before you start placing pavers back down, inspect your edge restraints. These are the rigid plastic or metal channels that run along the perimeter and keep the outer rows from migrating outward over time. If they're broken, missing, or were never properly staked down, your patio will spread at the edges again regardless of how well you rebuilt the base. Replace any damaged sections and drive new spikes through the restraint and into the compacted base every 12 inches or so.
Initial compaction before jointing
Once all the pavers are back in place, run your plate compactor over the entire repaired area. This is a critical step that a lot of DIYers skip because the surface looks done. The compaction seats each paver firmly into the bedding sand and ensures everything is at a consistent height. Use a rubber pad or piece of carpet between the compactor plate and your pavers to avoid surface damage. Do this pass before you apply any jointing sand.
Apply polymeric jointing sand
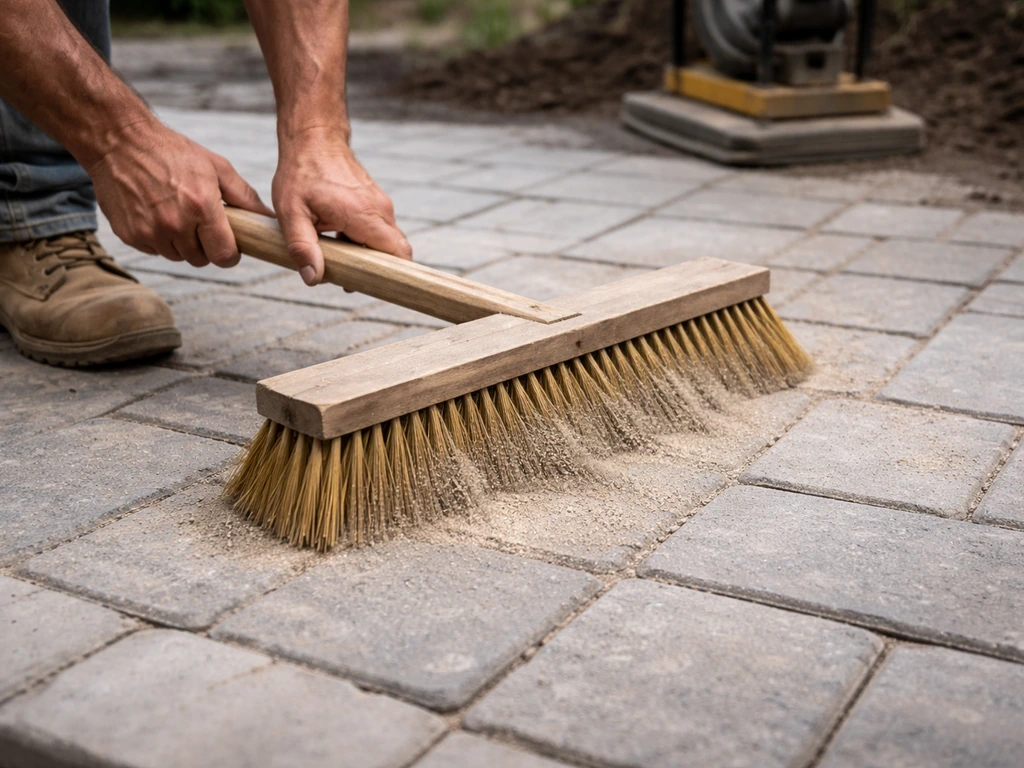
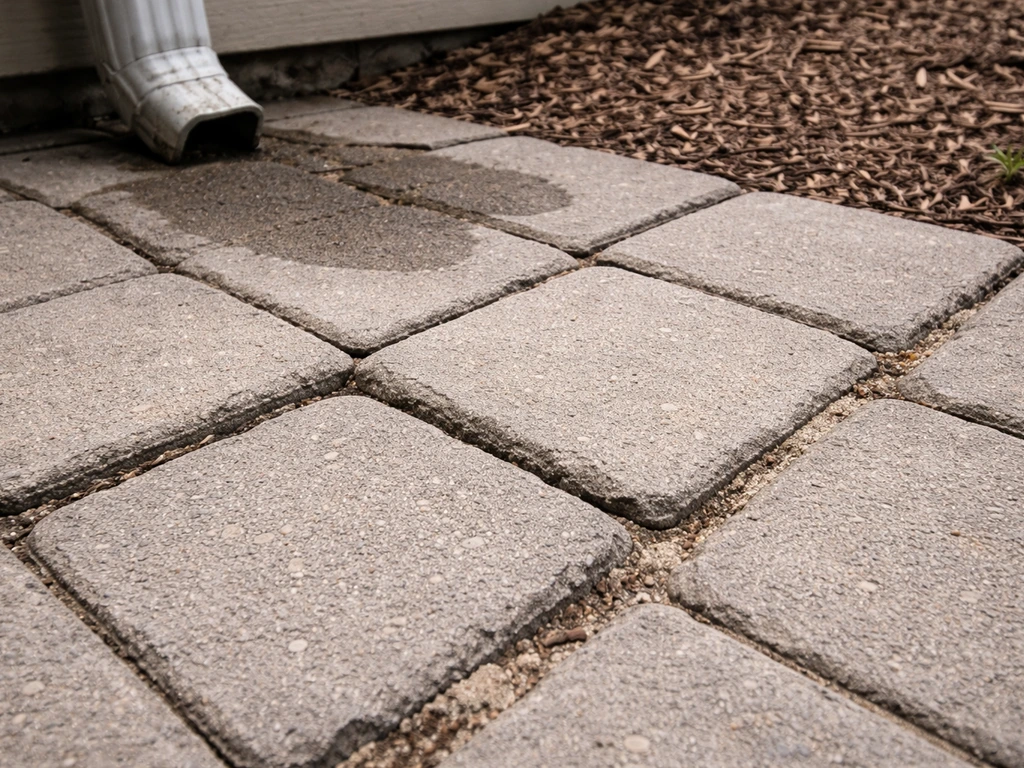
Sweep polymeric sand across the entire repaired area and work it into the joints with a push broom. Blow or sweep off any excess from the paver faces. Then do a second light compaction pass to help the sand settle fully into the joints. Follow the manufacturer's instructions on your specific polymeric sand product for the final activation step, which involves a light misting of water that activates the polymer binders and locks the sand in place. Don't soak it, just mist it evenly. Polymeric sand is worth the extra cost over regular sand because it resists washout, which is often what caused your problem in the first place.
Final level check and cleanup
Walk the entire repaired section and check for any high spots or rocking units. Use a straightedge or long level to confirm the surface transitions smoothly between the repaired area and the untouched sections. A slight lippage between pavers (1/8 inch or less) is acceptable; anything more than that is a tripping hazard and means a paver needs to come up and be re-set. Clean the surface thoroughly before the polymeric sand fully cures.
Prevention and long-term fixes: drainage, compaction, and maintenance
You've done the hard work. Now make sure you don't have to do it again in three years. Most repeat patio failures trace back to two things: water getting where it shouldn't, and inadequate base compaction from the original build. You've fixed the compaction. Here's how to handle water permanently.
Manage drainage at the source
- Extend downspouts at least 6 feet away from the patio edge, ideally using buried drain pipe with a pop-up emitter at the end
- Make sure your patio consistently slopes away from the house at 1/8 to 1/4 inch per foot across the entire surface, not just in one direction
- Add a channel drain or perforated pipe trench at the low end of the patio if water naturally concentrates there
- Re-grade any adjacent lawn areas that direct surface runoff toward the patio rather than away from it
- Check where your driveway, sidewalk, and roof runoff goes during a heavy rain and intercept it before it reaches your patio base
Maintenance habits that prevent future settling
- Re-apply polymeric sand to the joints every 3 to 5 years, or whenever you notice joint sand has thinned out or washed away
- Inspect edge restraints each spring and re-spike any sections that have lifted or shifted
- After severe winters, do a quick walk-over to find any frost-heaved units and reset them before they become a tripping hazard or a larger repair
- Keep tree roots in mind: if you have large trees near the patio, check the area closest to them every couple of years for subtle lifting or cracking
- Don't use steel-blade snow shovels or ice picks on pavers; they can displace joint sand and chip edges, accelerating the same problems you just fixed
When to call a professional instead
Most paver and brick repairs are well within DIY range if you're comfortable with physical labor and renting equipment. Concrete slab lifting is generally a job for a professional leveling contractor unless you're doing a full demo/rebuild where you can hire out just the pour. Beyond that, call a pro when: the settled area is large (more than 100 square feet of severe settling), when you suspect utility conflicts, when the soil beneath is actively eroding (meaning water is still flowing under the slab), or when there's structural settling of the house foundation itself. That last one is not a patio problem, it's a foundation problem, and confusing the two is a serious mistake.
If you've followed the steps above for a paver or brick patio, you can realistically start and finish a moderate-sized repair (up to about 50 square feet) in a weekend. The first day goes to removal, excavation, and base rebuild. The second day is for re-laying, compaction, and jointing. Give the polymeric sand 24 hours to fully cure before heavy traffic. That's it: you've got a solid, properly sloped, correctly drained patio again, and this time you know exactly why it's going to stay that way.
FAQ
How do I know whether my concrete patio needs re-leveling versus a full replacement?
If you see cracks in the concrete running in multiple directions, widening at the joints, or doors/windows near the patio showing changes, treat it as a structural settlement signal rather than a simple void. In those cases, foam or mudjacking may not stop movement, because the slab is likely being forced by an ongoing base or drainage failure (or even foundation movement).
What’s the best way to verify patio slope after lifting and before resetting pavers?
A good way to confirm slope is to check the patio surface at multiple points with string lines from the house edge to the drain side, then verify with a long level or straightedge. Don’t rely on a single measurement, especially around downspouts where water can create localized dips even when the rest of the patio looks flat.
Can I lift and re-lay a patio without changing drainage if it “seems fine”?
Yes, but only if the water pathway is corrected first. If you lift pavers and keep the same drainage route, water can still undermine the rebuilt base and you’ll see new settlement along the same channels. Recheck grading, add or fix point drains where runoff concentrates, and confirm there is a clear outlet away from the patio.
Why do paver patios spread at the edges again even after I install edging restraints?
Before installing restraints, remove any loose bedding sand and make sure the base beneath the edge is properly compacted. If you just screw or spike restraints into soft aggregate or thin base, the restraint can fail early and the edge rows can spread or sink again even after careful re-laying.
How long should I wait after polymeric sand before using the patio, and what about rain?
Polymeric sand cures differently based on weather and product, so 24 hours is a general baseline. Avoid heavy traffic and avoid washing the patio, and if your area gets heavy rain soon after application, protect the surface to prevent premature washout before activation.
What should I do if the repaired paver area is still low after compaction?
If your repaired section feels lower than it should after compaction, don’t try to “top off” with extra sand later. The consistent approach is to lift the affected pavers, fix the base thickness and re-compact, then reset to the target height and re-check transitions with a straightedge.
How should I handle lifting a patio when tree roots might be involved?
When you suspect tree root involvement, lift a small test section and inspect for voids, lifted bedding, or roots pushing material upward. If roots are causing voids, you usually need to remove or manage the root source and rebuild the base with a stable, properly compacted layer, not just raise the surface.
Can mudjacking or foam lifting work if water is still eroding soil under the slab?
You should not keep foam or slurry lifting going if the slab has ongoing erosion beneath it. Signs include soil still draining away, recurring voids, or the slab continuing to move after a lift. In those situations, repair efforts should focus on stopping the water pathway and rebuilding the base, otherwise you are repeatedly treating the symptom.
Is it okay to re-use pavers or brick you removed during a lift?
For pavers, re-use is fine only for units that are structurally intact and not cracked through or spalled through the face. If units are damaged, re-installing them creates weak spots that will rock or settle prematurely, often showing up as unevenness within a season.
What’s the most common cause of localized patio dips near downspouts, and how do I fix it permanently?
Around downspouts, prioritize correcting the runoff path and outlet first. A common mistake is changing only the patio elevation and forgetting that concentrated flow can keep scouring under the base. Ensure the downspout discharges to a functioning extension, splash pad, or drain line that moves water away from the patio footprint.
When does “moderate DIY” become too big to handle efficiently?
For DIY paver lifts, a weekend is realistic for moderate areas, but it depends on how much excavation and base rebuilding is needed. If you find extensive failure across most of the patio or multiple drainage problems, time and cost rise quickly, and a phased approach or professional assessment can prevent rework.
Next Article
How to Build a Patio on Uneven Ground: DIY Guide
Step-by-step DIY guide to build a patio on uneven ground: grading, drainage slope, and laying pavers, slabs, or concrete